Spring Security 是 Spring 家族中的一个安全管理框架,Spring Boot 对于 Spring Security 提供了 自动化配置方案,可以零配置使用 Spring Security。
SpringBoot 2.x版本
1.整合Security。
2.简单示例
3.详细配置。
一、整合Security
1.加入Security依赖,为了方便演示,加入thymeleaf依赖。
 	<dependency>
            <groupId>org.springframework.boot</groupId>
            <artifactId>spring-boot-starter-security</artifactId>
        </dependency>
	<dependency>
            <groupId>org.springframework.boot</groupId>
            <artifactId>spring-boot-starter-thymeleaf</artifactId>
        </dependency>
        <dependency>
            <groupId>org.springframework.boot</groupId>
            <artifactId>spring-boot-starter-web</artifactId>
        </dependency>
2.创建Controller类,在里面写个方法。
@Controller
public class SecurityController {
    @RequestMapping("/hello")
    public String Hello(Model model){
        model.addAttribute("msg","Spring Security!!!");
        return "Hello";
    }
}
3.创建thymeleaf页面,Hello.html.
<!DOCTYPE html>
<html lang="en" xmlns:th="http://www.thymeleaf.org">
<head>
    <meta charset="UTF-8">
    <title>Security安全管理哦</title>
</head>
<body>
<h1>Security管理中</h1>
<div>
    <h3 th:utext="${msg}"></h3>
</div>
</body>
</html>
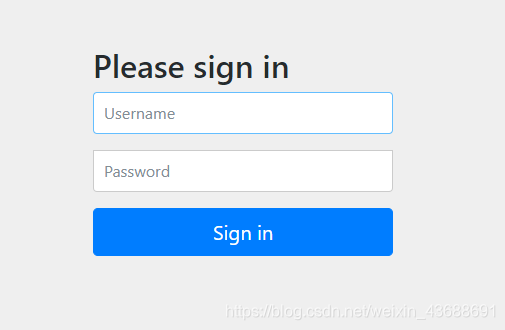
4.在properties中设置好访问端口后,此时Security模块已经开启了。启动项目,控制台会自动给出一个密码,默认用户名为user,此时访问Controller中的方法,浏览器出现以下界面,输入用户名和密码,才能进入Hello.html页面。
二、简单示例
接下来我们自己写一个Security的配置类,简单了解一下Security的使用。
1.在template下创建一些用来演示的html页面。
2.把Hello.html略作修改。
<body>
<h1>Security管理中</h1>
<div>
    <h3 th:utext="${msg}"></h3>
</div>
<div>
   <div>
        <h1>初级技能</h1>
        <a th:href="@{level_1/1}">加减乘除</a>
    </div>

    <div>
        <h1>中级技能</h1>
        <a th:href="@{level_2/1}">函数方程</a>
    </div>
</div>
</body>
3.创建Security的配置类,该配置类需要继承 WebSecurityConfigurerAdapter ,并重写配置方法。这里重写了认定和授权方法。
@EnableWebSecurity
public class SecurityConfiguration extends WebSecurityConfigurerAdapter {
    @Override
    protected void configure(HttpSecurity http) throws Exception {
        http.authorizeRequests().antMatchers("/hello").permitAll()
                .antMatchers("/level_1/1").hasRole("Lv_1")
            .antMatchers("/level_2/1").hasRole("Lv_2");

        http.formLogin();
    }

    @Override
    protected void configure(AuthenticationManagerBuilder auth) throws Exception {
        //super.configure(auth);
        auth.inMemoryAuthentication().passwordEncoder(new 	                                       BCryptPasswordEncoder()).withUser("Jack")
                .password(new BCryptPasswordEncoder().encode("123456")).roles("Lv_1");
    }


}
1)、这里的代码有些复杂,加密了密码算法,如果不写登录会报错,后面我们可以单独设置方法来解决。
auth.inMemoryAuthentication().passwordEncoder(new 				                                          BCryptPasswordEncoder()).withUser("Jack")
                .password(new BCryptPasswordEncoder().encode("123456")).roles("Lv_1");
SpringBoot2.0抛弃了原来的NoOpPasswordEncoder,要求用户保存的密码必须要使用加密算法后存储,在登录验证的时候Security会将获得的密码在进行编码后再和数据库中加密后的密码进行对比
这里也可以在配置类中使用原来的这个方法,当然不推荐,因为已经被废弃了,老版本适用,新版本会报错。
@Bean
    public static NoOpPasswordEncoder passwordEncoder() {
        return (NoOpPasswordEncoder) NoOpPasswordEncoder.getInstance();
    }
2)、或者用 BCryptPasswordEncoder加密,设置一个bean,但是此时的密码还是明文,所以密码部分还是需要设置编码。
 @Bean
    public static BCryptPasswordEncoder passwordEncoder() {
        return new BCryptPasswordEncoder();
    }
此时1)部分的代码可以如下
auth.inMemoryAuthentication().withUser("Jack")
                .password(new BCryptPasswordEncoder().encode("123456")).roles("Lv_1")
4.在Controller中继续加入两个路由。
 @RequestMapping("/level_1/1")
    public String level_1(){

        return "level_1/1";
    }
    @RequestMapping("/level_2/1")
    public String level_2(){

        return "level_2/1";
    }
5.此时我们访问hello,进入以下界面。
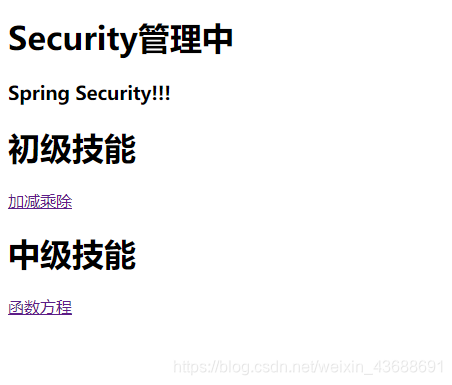
点击加减乘除,此时需要表单验证,输入Jack和密码123456,进入level_1/1.html,返回,点击函数方程,出现以下界面。

因为Lv_1角色无法访问这个界面,Lv_2角色才可以进入。
三、详细配置
3.1、自定义配置类
自定义配置类需要继承WebSecurityConfigurerAdapter,开启@EnableWebSecurity注解。
重写configure(HttpSecurity http)和configure(AuthenticationManagerBuilder auth)方法可以自定义规则。
1)、http.authorizeRequests()方法开启授权路径,antMatchers("/hello").permitAll()代表/hello路径所有人都可以访问,.antMatchers("/level_1/*").hasRole("Lv_1")代表/level_1/下路径只有Lv_1角色才可以访问。
2)、auth.inMemoryAuthentication().withUser("Jack") .password(new BCryptPasswordEncoder().encode("123456")).roles("Lv_1")代表在内存中设置用户,密码及其角色。
@EnableWebSecurity
public class SecurityConfiguration extends WebSecurityConfigurerAdapter {
    @Override
    protected void configure(HttpSecurity http) throws Exception {
        http.authorizeRequests().antMatchers("/hello").permitAll()
                .antMatchers("/level_1/*").hasRole("Lv_1")
                .antMatchers("/level_2/*").hasRole("Lv_2")
                .antMatchers("/level_3/*").hasRole("Lv_3")
        ;


        http.formLogin().passwordParameter("pwd").usernameParameter("username")
                .loginPage("/userLogin")
                .successForwardUrl("/hello");
        http.logout().logoutSuccessUrl("/hello");

    }

    @Override
    protected void configure(AuthenticationManagerBuilder auth) throws Exception {
        //super.configure(auth);
        auth.inMemoryAuthentication().withUser("Jack")
                .password(new BCryptPasswordEncoder().encode("123456")).roles("Lv_1")
                .and().withUser("Sally").password(new BCryptPasswordEncoder().encode("999"))
                .roles("Lv_3","Lv_2","Lv_1");
    }

    @Bean
    public static BCryptPasswordEncoder passwordEncoder() {
        return new BCryptPasswordEncoder();
    }
}
3.2、自定义登录页
  http.formLogin().passwordParameter("pwd").usernameParameter("username")
                .loginPage("/userLogin").loginProcessingUrl("/userLogin")
                .successForwardUrl("/hello");
        http.logout().logoutSuccessUrl("/hello");
这里设置了/userLogin路径为登录路径,SpringBoot Security中登录是需要提交一个Post表单的,这里设置了表单参数为pwd和username,表单提交路径为loginProcessingUrl("/userLogin"),登录成功后返回/hello,
3.3、开启Thymleaf对Security的支持
Thymleaf对Security提供了一些支持标签,方便操作。
如下 sec:authorize="!isAuthenticated()",如果没有登陆,标签里面的内容不会显示。除此之外,还有许多其他的标签。
<div sec:authorize="!isAuthenticated()">
    <h3>你好,请登录</h3>
    <a th:href="@{/userLogin}">登录</a>
</div>
使用支持需要引入依赖,同时在html页面引入命名空间。
<dependency>
            <groupId>org.thymeleaf.extras</groupId>
            <artifactId>thymeleaf-extras-springsecurity5</artifactId>
            <version>3.0.4.RELEASE</version>
        </dependency>
xmlns:sec="http://www.thymeleaf.org/thymeleaf-extras-springsecurity4"
这里的版本冲突需要注意。