转载请注明出处,Oh,Guy http://www.cnblogs.com/cg-Yun/p/4110762.html
如题,据我们的大神伟哥所说,我们在后面的开发中有可能会用到一个工具,需求是能够根据游戏原画所出的单个文字的图在游戏中能够方便的使用, 即跟调用 BMFont类型的字体一样。但是为什么要用原画出的图片,直接使用 BMFont不就好了,。。。当然是因为原画出的图肯定要比 BMFont 中的字体要好看啊。。。
废话不多说,看下面实现。。。
仔细的看 BMFont 的文件格式:
info face="HiraKakuStdN-W8" size=64 bold=0 italic=0 charset="" unicode=0 stretchH=100 smooth=1 aa=1 padding=0,0,0,0 spacing=2,2
common lineHeight=96 base=56 scaleW=256 scaleH=128 pages=1 packed=0
page id=0 file="example-2.fnt.png"
chars count=3
char id=24230 x=2 y=2 width=66 height=66 xoffset=1 yoffset=-1 xadvance=64 page=0 chnl=0 letter="度"
char id=29702 x=70 y=2 width=66 height=62 xoffset=1 yoffset=2 xadvance=64 page=0 chnl=0 letter="理"
char id=32 x=138 y=2 width=0 height=0 xoffset=21 yoffset=76 xadvance=21 page=0 chnl=0 letter="space"
个人觉得对应关系是:
face--字体名称,
size-- 字体大小,
scaleW-- 生成的图片宽度,
scaleH-- 生成的图片高度,
pages-- 生成的图片页数,
file -- 生成的图片名称,
count -- 文字的个数,
char id -- 单个文字对应的 Unicode码,
x , y -- 文字的坐标,x y轴为图片的左上角,
width , height -- 文字在图片上所占的宽高,
xadvance -- 文字未被处理的宽度,
letter -- 文字字符,
除 xoffset, yoffset 不能理解,但是用猜测的方法填写的之外,其余的都是使用的 原fnt文件未被修改的值。。。
想到打包图片到一起,根据配置文件 fnt来寻找文字的位置,实际就是使用一种自定义的图集,而正好 TexturePacker支持自定义 format 格式的功能。。。
下面以使用最新版的 TP v3.5.3 为例,因为我之前用的 破解版的 TP中缺少一个库文件(grantlee_defaulttags)的引用,导致所有使用 js扩展的 format都不能使用,而恰好咱们要写的这个需要用到 js扩展来计算一些东西,故 此处被坑,找了很长时间的原因,而新版的 v3.5.3则没有这个坑。。。
首先,在桌面新建目录群 my-TP-Exporters,格式如下

(其中的.svn不需要),然后打开 TP,使用自定义模式,然后在 TP的 preferences设置自定义目录为刚才咱们创建的 my-TP-Exporters,
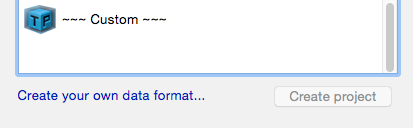
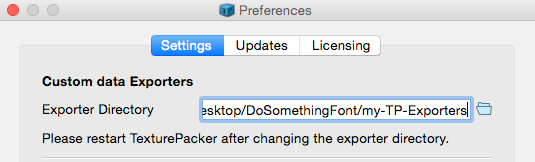
别忘了设置玩路径点下面的 ok!!!
在上面的目录群中分别创建了三个文件:BMFont_custom.fnt(模板)、exporter.xml(TP配置文件)、makecssselector.qs(js扩展)
首先贴出 exporter.xml 的内容:
 1 <exporter version="1.0">
 2     <!-- identifier of the exporter -->
 3     <name>BMFont_custom</name>
 4
 5     <!-- display name of the exporter for the combo box -->
 6     <!-- 此处更改的是在 TexturePacker 中显示的 format 类型 -->
 7     <displayName>BMFont (custom)</displayName>
 8
 9     <!-- description of the exporter -->
10     <!-- 此处的是这个 format 的简要说明 -->
11     <description>Exporter for BMFont, created by Yun</description>
12
13     <!-- exporter version -->
14     <!-- 此次更改的版本 -->
15     <version>1.0</version>
16
17     <!-- currently only one file allowed - more to come with update -->
18     <!-- 下面改的是生成的文件的后缀名信息,和生成的 format 参照模板 -->
19     <files>
20         <file>
21             <!-- name of this file variable -->
22             <name>fnt</name>
23
24             <!-- human readable name (for GUI) -->
25             <displayName>fnt</displayName>
26
27             <!-- file extension for the file -->
28             <fileExtension>fnt</fileExtension>
29
30             <!-- name of the template file -->
31             <!-- 参照模板, 必须要和本文件处在同一目录下 -->
32             <template>BMFont_custom.fnt</template>
33         </file>
34     </files>
35
36     <!-- target framework supports trimming -->
37     <supportsTrimming>true</supportsTrimming>
38
39     <!-- target framework supports rotated sprites -->
40     <supportsRotation>false</supportsRotation>
41
42     <!-- rotated sprites direction (cw/ccw) -->
43     <rotationDirection>cw</rotationDirection>
44
45     <!-- supports npot sizes -->
46     <supportsNPOT>true</supportsNPOT>
47
48     <!-- supports file name stripping (remove .png etc) -->
49     <supportsTrimSpriteNames>yes</supportsTrimSpriteNames>
50
51     <!-- supports texure subpath -->
52     <supportsTextureSubPath>yes</supportsTextureSubPath>
53
54 </exporter>
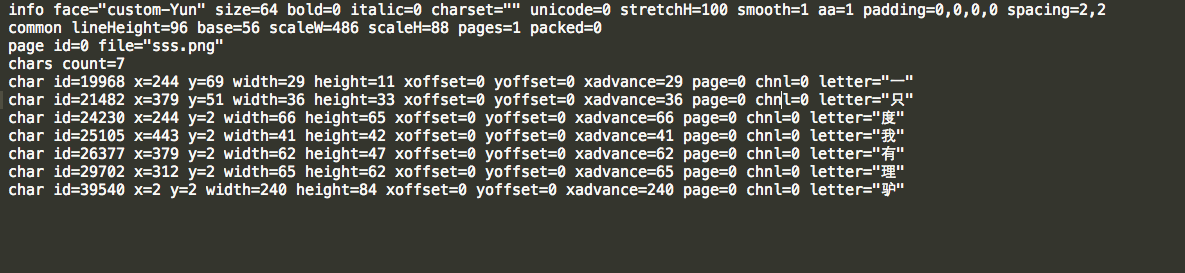
再贴出根据上面的 .fnt文件 修改的模板 BMFont_custom.fnt
info face="custom-Yun" size=64 bold=0 italic=0 charset="" unicode=0 stretchH=100 smooth=1 aa=1 padding=0,0,0,0 spacing=2,2
common lineHeight=96 base=56 scaleW={{texture.size.width}} scaleH={{texture.size.height}} pages=1 packed=0 {% load makecssselector %}
page id=0 file="{{texture.fullName}}"
chars count={{allSprites|getArrayLength}} {% for sprite in allSprites %}
char id={{sprite.trimmedName|getUnicode}} x={{sprite.frameRect.x}} y={{sprite.frameRect.y}} width={{sprite.frameRect.width}} height={{sprite.frameRect.height}} xoffset={{sprite.sourceRect.x}} yoffset={{sprite.sourceRect.y}} xadvance={{sprite.untrimmedSize.width}} page=0 chnl=0 letter="{{sprite.trimmedName|makecssselector}}"{% endfor %}
最后是 在上面的BMFont_custom.fnt 中用到的 一些 javascript 函数的扩展文件 makecssselector.qs,(注意,所有的js扩展函数返回值必须为 String类型)
 1 // create a css selector by replacing -hover with :hover
 2 var MakeSelectorFilter = function(input)
 3 {
 4   var input = input.rawString();
 5   return input.replace("-hover",":hover");
 6 };
 7 // create name in BMFont_custom.fnt to invoke
 8 MakeSelectorFilter.filterName = "makecssselector";
 9 // add the function to TexturePacker Library
10 Library.addFilter("MakeSelectorFilter");
11
12 // return the length of array
13 var GetArrayLength = function(input) {
14     return input.length.toString()
15 };
16 GetArrayLength.filterName = "getArrayLength";
17 Library.addFilter("GetArrayLength");
18
19 // return the Unicode for input char
20 var GetUnicode = function(input) {
21     input=MakeSelectorFilter(input)
22     return input.charCodeAt(0).toString()
23 };
24 GetUnicode.filterName = "getUnicode";
25 Library.addFilter("GetUnicode");
上面 所有用到的TP的 API 参照其官网 https://www.codeandweb.com/texturepacker/documentation#customization
额,还有 一些本来我是不会的 javascript脚本 现查现用的 http://www.w3school.com.cn/js/index.asp
下面测试一下成果,
文字图片:
 ,
,
使用 TP自定义 format 打包:

生成图集:
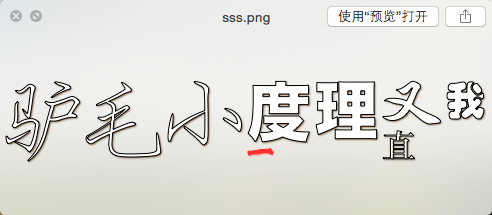
下面在 cocos2dx 工程中的使用效果:
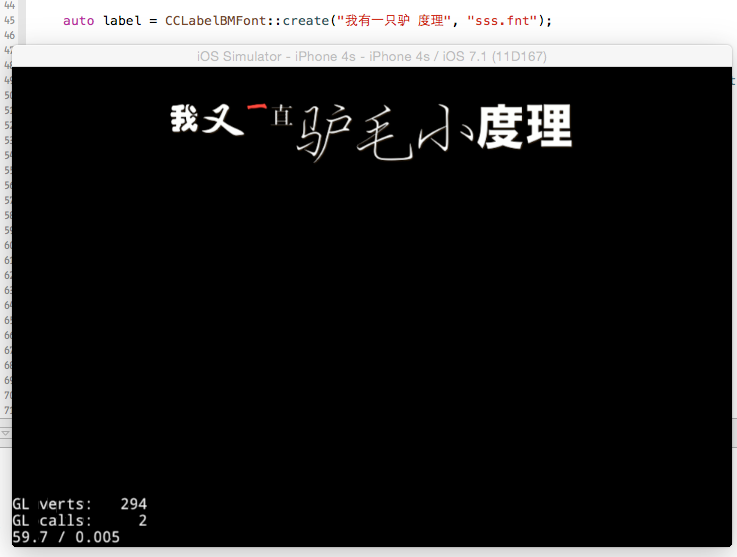
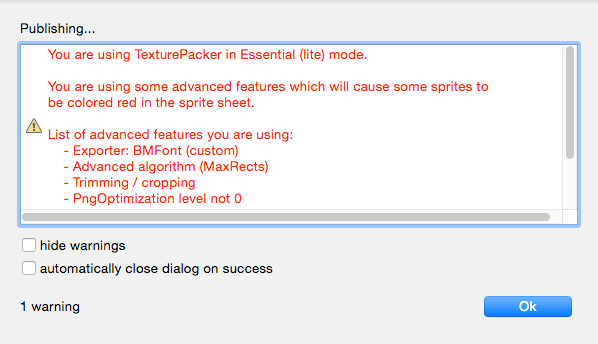
注意:
不知道大家注意到了没有,上面生成的图集文字中有个别的红色的文字,这是由于使用的未破解的 TP,用未破解的 TP来自定义format时, 生成的图集会有个别红色的图片,
怎么办呢,版本低的没有可以成功使用的库,版本高的没有破解的,头疼。。。
在这个网址我试着 跟 TP的开发作者申请了一个免费的 license key, 目前正在等待中。。。
申请网址 http://www.codeandweb.com/request-free-license
关于如何动态的使用命令行调用打包成 BMFont 文件,请参照我上一篇帖子
http://www.cnblogs.com/cg-Yun/p/4081255.html
转载请注明出处,Oh,Guy http://www.cnblogs.com/cg-Yun/p/4110762.html
后期追加补充:
前面生成的.fnt文件在使用的过程中又遇到了些以前没有注意到的问题,
1)、字体在 cocostudio中作为自定义字体使用时,获得的 label标签高度明显的超过了字体本身所原有的高度
2)、字体中的个别高度较短的文字(例如数字或字母),在使用时跟高度较大的汉字一同出现时,不能居中显示
遇到了上面的两个问题,不好用就再接着折腾。。。
重新查看 cocostudio自带的字体.fnt文件,发现了上面提到过得不明白什么意思的几个参数的含义(yoffset, xoffset, lineHeight)
lineHeight -- 在引擎解析出来的文字使用时,所占的label标签的高度
xoffset, yoffset -- 对生成好的文字图片在引擎中显示时,分别对其x, y轴相对于文字的原点(左上角)做出的增益调整
知道了上面两个参数的含义,也就能够解决上面的两个问题了
对于makecssselector.qs ,新增加两个函数,
根据文字集合获得所有文字的生成图集后的最大高度,
和由上面的最大高度来对单个文字在y轴的增益调整。。。。
 1 // getMaxLineHeight from all png array
 2 maxLineH=1;
 3 var GetMaxLineH = function(input) {
 4     for (index in input){
 5         if (input[index].frameRect.height > maxLineH){
 6             maxLineH = input[index].frameRect.height;
 7         };
 8     }
 9     return input[index].frameRect.height.toString();
10 };
11 GetMaxLineH.filterName = "getMaxLineH";
12 Library.addFilter("GetMaxLineH");
13
14 // Base on MaxLineHeight get Yoffset
15 var GetYoffset = function(input) {
16     return ((maxLineH - input) / 2).toString();
17 };
18 GetYoffset.filterName = "getYoffset";
19 Library.addFilter("GetYoffset");
相应的需要对模板中的参数根据上面的俩个js扩展作调整:
1 info face="custom-Yun" size=64 bold=0 italic=0 charset="" unicode=0 stretchH=100 smooth=1 aa=1 padding=0,0,0,0 spacing=2,2 {% load makecssselector %}
2 common lineHeight={{allSprites|getMaxLineH}} base=56 scaleW={{texture.size.width}} scaleH={{texture.size.height}} pages=1 packed=0
3 page id=0 file="{{texture.fullName}}"
4 chars count={{allSprites|getArrayLength}} {% for sprite in allSprites %}
5 char id={{sprite.trimmedName|getUnicode}} x={{sprite.frameRect.x}} y={{sprite.frameRect.y}} width={{sprite.untrimmedSize.width}} height={{sprite.untrimmedSize.height}} xoffset={{sprite.sourceRect.x}} yoffset={{sprite.frameRect.height|getYoffset}} xadvance={{sprite.frameRect.width}} page=0 chnl=0 letter="{{sprite.trimmedName|makecssselector}}"{% endfor %}
这样便解决了上面所提到的两个问题。。。。
贴出效果图:

转载请注明出处,Oh,Guy http://www.cnblogs.com/cg-Yun/p/4110762.html
继续追加:
今天收到了 TexturePacker开发原作者发来的邮件,里面包含了 TP的免费的key,如此我便可以能更加完美的使用TP了,而且解决了上面的不足——生成的文字中带有恶心的红色纹理,使用 key注册TP之后,贴出生成的纹理字体效果图:
