CSV文件处理
在Python中处理CSV文件可以使用模块csv。有关csv模块的官方资料看这里。
1 读取csv文件
csv.reader(csvfile, dialect='excel', **fmtparams)
使用reader()函数来读取csv文件,返回一个reader对象。reader对象可以使用迭代获取其中的每一行。
>>> import csv
>>> with open('userlist.csv','rt') as csv_file:
    csv_conent = [ row for row in csv.reader(csv_file)]


>>> csv_conent
[['Doctor', 'No'], ['Rosa', 'Klebb'], ['Mister', 'Big'], ['Auric', 'Goldfinger'], ['Ernst', 'Blofeld']]
>>>
class csv.DictReader(csvfile, fieldnames=None, restkey=None, restval=None, dialect='excel', *args, **kwds)
可以使用DicReader()按照字典的方式读取csv内容,如下:
>>> import csv
>>> with open('userlist3.csv','rt',newline='') as csvfile:
    reader = csv.DictReader(csvfile, fieldnames =[1,2],delimiter=':')
    for row in reader:
        print(row[1],row[2])


Doctor No
Rosa Klebb
Mister Big
Auric Gold
Ernst Blofeld
>>>
2 写入csv文件
csv.writer(csvfile, dialect='excel', **fmtparams)
使用writer()函数来写csv文件,返回一个writer对象。writer对象可以使用writerow()写一行数据,或者使用。writerows()写多行数据
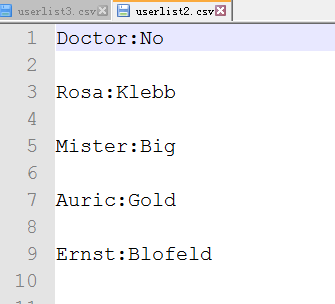
>>> import csv
>>> namelist = []
>>> namelist = [
    ['Doctor','No'],
    ['Rosa','Klebb'],
    ['Mister','Big'],
    ['Auric','Gold'],
    ['Ernst','Blofeld'],
    ]
>>> with open('userlist2.csv','wt') as c_file:
    csvout = csv.writer(c_file, delimiter=':')
    csvout.writerows(namelist)


>>> with open('userlist3.csv','wt',newline='') as c_file:
    csvout = csv.writer(c_file, delimiter=':')
    csvout.writerows(namelist)
生成的csv文件如下:

class csv.DictWriter(csvfile, fieldnames, restval='', extrasaction='raise', dialect='excel', *args, **kwds)
使用DictWriter把字典类型的数据写入到csv文件中,如下:
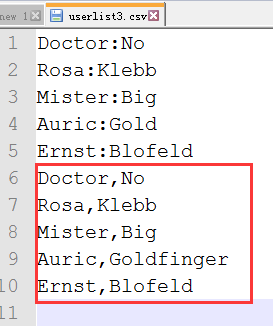
>>> import csv
>>> villains = [
{'first': 'Doctor', 'last': 'No'},
{'first': 'Rosa', 'last': 'Klebb'},
{'first': 'Mister', 'last': 'Big'},
{'first': 'Auric', 'last': 'Goldfinger'},
{'first': 'Ernst', 'last': 'Blofeld'},
]
>>> with open('userlist3.csv','at',newline='') as csvfile:
    writer = csv.DictWriter(csvfile,['first','last'])
    writer.writerows(villains)
XML文件处理
XML是可扩展标记语言,它使用tag来分隔数据。
处理XML文件,可以使用python中的xml模块,它包含下面的几个子模块:
xml.etree.ElementTree: the ElementTree API, a simple and lightweight XML processor
xml.dom: the DOM API definition
xml.dom.minidom: a minimal DOM implementation
xml.dom.pulldom: support for building partial DOM trees
xml.sax: SAX2 base classes and convenience functions
xml.parsers.expat: the Expat parser binding
xml模块更多的相关内容参考官方文档。
使用xml.etree.ElementTree来解析处理XML文件内容,如下:


<?xml version="1.0"?>
<data>
    <country name="Liechtenstein">
        <rank>1</rank>
        <year>2008</year>
        <gdppc>141100</gdppc>
        <neighbor name="Austria" direction="E"/>
        <neighbor name="Switzerland" direction="W"/>
    </country>
    <country name="Singapore">
        <rank>4</rank>
        <year>2011</year>
        <gdppc>59900</gdppc>
        <neighbor name="Malaysia" direction="N"/>
    </country>
    <country name="Panama">
        <rank>68</rank>
        <year>2011</year>
        <gdppc>13600</gdppc>
        <neighbor name="Costa Rica" direction="W"/>
        <neighbor name="Colombia" direction="E"/>
    </country>
</data>
>>> import xml.etree.ElementTree as et
>>> tree = et.ElementTree(file='sample.xml')
>>> root = tree.getroot()
>>> root.tag
'data'
>>> for child in root:
    print('tag:',child.tag, 'attributes:',child.attrib)
    for grandchild in child:
        print('	tag:',grandchild.tag,'attributes:',grandchild.attrib)


tag: country attributes: {'name': 'Liechtenstein'}
    tag: rank attributes: {}
    tag: year attributes: {}
    tag: gdppc attributes: {}
    tag: neighbor attributes: {'name': 'Austria', 'direction': 'E'}
    tag: neighbor attributes: {'name': 'Switzerland', 'direction': 'W'}
tag: country attributes: {'name': 'Singapore'}
    tag: rank attributes: {}
    tag: year attributes: {}
    tag: gdppc attributes: {}
    tag: neighbor attributes: {'name': 'Malaysia', 'direction': 'N'}
tag: country attributes: {'name': 'Panama'}
    tag: rank attributes: {}
    tag: year attributes: {}
    tag: gdppc attributes: {}
    tag: neighbor attributes: {'name': 'Costa Rica', 'direction': 'W'}
    tag: neighbor attributes: {'name': 'Colombia', 'direction': 'E'}

>>> len(root)
3
>>> len(root[0])
5
>>> len(root[1])
4
>>>
JSON/pickle数据处理
python中使用json模块把复杂结构的数据转换成JSON字符串,或者把JSON字符串转换成数据。
一个典型的复杂结构的数据如下:
>>> menu =
    {
    "breakfast": {
                "hours": "7-11",
                "items": {
                        "breakfast burritos": "$6.00",
                        "pancakes": "$4.00"
                        }
                },
    "lunch" : {
            "hours": "11-3",
            "items": {
                    "hamburger": "$5.00"
                    }
            },
    "dinner": {
            "hours": "3-10",
            "items": {
                    "spaghetti": "$8.00"
                    }
            }
    }
1 转换成JSON字符串
使用dumps()将menu转换成JSON格式的字符串如下:
>>> import json
>>> menu_json = json.dumps(menu)
>>> menu_json
'{"dinner": {"items": {"spaghetti": "$8.00"}, "hours": "3-10"}, "breakfast": {"items": {"pancakes": "$4.00", "breakfast burritos": "$6.00"}, "hours": "7-11"}, "lunch": {"items": {"hamburger": "$5.00"}, "hours": "11-3"}}'
>>>
更多json模块的用法参考官方文档。
2 转换成复杂结构的数据
使用loads()函数把JSON字符串转换成python的结构数据,如下:
>>> menu2 = json.loads(menu_json)
>>> menu2
{'dinner': {'items': {'spaghetti': '$8.00'}, 'hours': '3-10'}, 'breakfast': {'items': {'pancakes': '$4.00', 'breakfast burritos': '$6.00'}, 'hours': '7-11'}, 'lunch': {'items': {'hamburger': '$5.00'}, 'hours': '11-3'}}
>>> type(menu2)
<class 'dict'>
>>> type(menu_json)
<class 'str'>
>>>
pickle的功能类似于json,也可以将python中的结构化的数据序列化(转换为字符串)。其优点是可以序列化更多的python中的数据对象,比如datetime对象。其缺点是只能在python中使用,json的话其他语言也支持。
例子如下:
>>> import json
>>> import pickle
>>> import datetime
>>> now1 = datetime.datetime.utcnow()
>>> jsoned = json.dumps(now1)
Traceback (most recent call last):
  File "<pyshell#89>", line 1, in <module>
    jsoned = json.dumps(now1)
  File "C:Python35-32libjson\__init__.py", line 230, in dumps
    return _default_encoder.encode(obj)
  File "C:Python35-32libjsonencoder.py", line 199, in encode
    chunks = self.iterencode(o, _one_shot=True)
  File "C:Python35-32libjsonencoder.py", line 257, in iterencode
    return _iterencode(o, 0)
  File "C:Python35-32libjsonencoder.py", line 180, in default
    raise TypeError(repr(o) + " is not JSON serializable")
TypeError: datetime.datetime(2016, 11, 5, 7, 22, 20, 551139) is not JSON serializable
>>> pickled = pickle.dumps(now1)
>>> now1
datetime.datetime(2016, 11, 5, 7, 22, 20, 551139)
>>> now2 = pickle.loads(pickled)
>>> now2
datetime.datetime(2016, 11, 5, 7, 22, 20, 551139)
>>>
YAML文件处理
python使用第三方模块pyyaml来操作数据。官方文档点这里。
一个典型的YAML文件如下:
name:
    first: James
    last: McIntyre
dates:
    birth: 1828-05-25
    death: 1906-03-31
details:
    bearded: true
    themes: [cheese, Canada]
books:
    url: http://www.gutenberg.org/files/36068/36068-h/36068-h.htm
poems:
    - title: 'Motto'
      text: |
        Politeness, perseverance and pluck,
        To their possessor will bring good luck.
    - title: 'Canadian Charms'
      text: |
        Here industry is not in vain,
        For we have bounteous crops of grain,
        And you behold on every field
        Of grass and roots abundant yield,
        But after all the greatest charm
        Is the snug home upon the farm,
        And stone walls now keep cattle warm.
>>> with open('sample.yml','rt') as y_file:
    text = y_file.read()


>>> data = yaml.load(text)
>>> data['poems']
[{'text': 'Politeness, perseverance and pluck,
To their possessor will bring good luck.
', 'title': 'Motto'}, {'text': 'Here industry is not in vain,
For we have bounteous crops of grain,
And you behold on every field
Of grass and roots abundant yield,
But after all the greatest charm
Is the snug home upon the farm,
And stone walls now keep cattle warm.', 'title': 'Canadian Charms'}]
>>> data['details']
{'bearded': True, 'themes': ['cheese', 'Canada']}
>>> data['poems'][0]
{'text': 'Politeness, perseverance and pluck,
To their possessor will bring good luck.
', 'title': 'Motto'}
>>>
配置文件处理
Python中可以使用configparser模块来处理如下格式的配置文件。
[DEFAULT]
ServerAliveInterval = 45
Compression = yes
CompressionLevel = 9
ForwardX11 = yes

[bitbucket.org]
User = hg

[topsecret.server.com]
Port = 50022
ForwardX11 = no
>>> import configparser
>>> config = configparser.ConfigParser()
>>> config['DEFAULT'] = {'ServerAliveInterval': '45',
...                      'Compression': 'yes',
...                      'CompressionLevel': '9'}
>>> config['bitbucket.org'] = {}
>>> config['bitbucket.org']['User'] = 'hg'
>>> config['topsecret.server.com'] = {}
>>> topsecret = config['topsecret.server.com']
>>> topsecret['Port'] = '50022'     # mutates the parser
>>> topsecret['ForwardX11'] = 'no'  # same here
>>> config['DEFAULT']['ForwardX11'] = 'yes'
>>> with open('example.ini', 'w') as configfile:
...   config.write(configfile)
...
更多configeparser的内容参考官方文档。
Excel表格处理
处理Excel文件的模块有很多,例如openpyxl, xlsxwriter, xlrd等。详细请参考官方文档。