Java基础增强
2、debug的调试模式(断点调试模式)
使用这种模式,调试程序(看到程序里面数据的变化)
使用debug第一步需要设置一个断点(让程序运行停止在这一行)
- 显示出来行号
- 双击左边,出现一个圆点,表示设置了一个断点
使用debug as方式,运行程序
- 提示是否进入到调试界面,yes
- 在断点那一个,有一个绿色条,表示程序停止在这一行,没有向下运行
可以让程序向下执行,
- 使用 step over 快捷键是 F6(单步执行)
- resume F8:表示调试结束,直接向下运行
比如当前的断点之后还有断点,跳到下一个断点,如果当前断点后面没有断点,程序直接运行结束。
debug另外一个用途
** 查看程序的源代码
** F5 step into:进入到方法
** F7 step return :返回
3、junit的使用
单元测试 测试对象是 是一个类中的方法,juint不是javase的一部分,想要使用导入jar包,但是,在myeclipse中自带了junit的jar包
* 首先juint版本 3.x 4.x
* 单元测试方法时候,方法命名规则 public void 方法名() {}
* 使用注解方式运行测试方法, 在方法的上面
** @Test:表示方法进行单元测试
@Test
public void testAdd1() {
TestJunit test01 = new TestJunit();
test01.testAdd(2, 3);
}
- 选中方法名称,右键运行 点击run as --- junit test
- 当出现绿色条,表示方法测试通过
- 当出现了红棕色条,表示方法测试不通过
--- 要运行类中的多个测试方法,点击类中的其他位置,run as --- junit test
** @Ignore :表示这个方法不进行单元测试
** @Before: 在每个方法执行运行
** @After:在每个方法之后运行
** 断言(了解)
- Assert.assertEquals("测试期望的值", "方法运行的实际的值")
JDK5.0新特性
jdk版本: 1.1 1.2 1.4 5.0
** 泛型、枚举、静态导入、自动拆装箱、增强for、可变参数
** 反射
4、泛型的简介
为什么要使用泛型?一般使用在集合上。
比如现在把一个字符串类型的值放入到集合里面,这个时候,这个值放入到集合之后,失去本身的类型,只能是object类型,这个时候,比如想要对这个值进行类型转换,很容易出现类型转换错误,怎么解决这个问题,可以使用泛型来解决。
在集合上如何使用泛型
- 常用集合 list set map
- 泛型语法 集合<String> 比如 List<String>
在泛型里面写是一个对象,String 不能写基本的数据类型 比如int (****)
* 基本的数据类型对应包装类
在集合上使用泛型【list、set、map】
在list上使用泛型【list的三种实现 ArrayList linkedList Vector】
在set上使用泛型【特点:无序的遍历、不能有重复元素】
在map上面使用泛型
- map结构:key-valu形式
e-code【TestDemo2.java集合上的泛型】


  1 package boom.test03;
  2
  3 import java.util.ArrayList;
  4 import java.util.HashMap;
  5 import java.util.HashSet;
  6 import java.util.Iterator;
  7 import java.util.List;
  8 import java.util.Map;
  9 import java.util.Map.Entry;
 10 import java.util.Set;
 11
 12 import org.junit.Ignore;
 13 import org.junit.Test;
 14
 15 /**
 16  * 泛型在集合上使用
 17  * @author Administrator
 18  *
 19  */
 20 public class TestDemo2 {
 21     /**
 22      * 3、泛型在map上使用
 23      */
 24     @Test
 25     public void testMap(){
 26         Map<String, String> map = new HashMap<String, String>();
 27         map.put("Java", "001");
 28         map.put("JavaScript", "002");
 29         map.put("Python", "003");
 30         // 遍历map
 31          /*遍历方式*/
 32         //  1、获取所有的key,通过key得到value 使用get方法
 33         // 获取所有的key
 34         Set<String> sets = map.keySet();
 35         // 遍历所有的key返回set
 36         for (String key : sets) {
 37             // 通过key得到value
 38             String value = map.get(key);
 39             System.out.println(key + ":" + value);
 40         }
 41         System.out.println("-----------");
 42
 43         // 2、获取key和value的关系*/
 44         Set<Entry<String, String>> set1 = map.entrySet();
 45         // 遍历set1
 46         for (Entry<String, String> entry : set1) {
 47             // entry是key和value的关系
 48             String key = entry.getKey();
 49             String value = entry.getValue();
 50             System.out.println(key+":"+value);
 51         }
 52
 53     }
 54
 55     /**
 56      * 2、泛型在set上的使用[特点:无序的遍历、不能有重复元素]
 57      */
 58     @Ignore
 59     public void testSet(){
 60         Set<String> set = new HashSet<String>();
 61         set.add("Java");
 62         set.add("Python");
 63         set.add("JavaScript");
 64         // 遍历set集合 [迭代器、增强for]
 65         // 1、增强for
 66         for (String s2 : set) {
 67             System.out.println(s2);
 68         }
 69         System.out.println("---------------");
 70
 71         // 2、迭代器
 72         Iterator<String> it = set.iterator();
 73         while (it.hasNext()) {
 74             System.out.println(it.next());
 75         }
 76
 77     }
 78
 79     /**
 80      * 1、泛型在list上的使用
 81      */
 82     @Ignore
 83     public void testList(){
 84         List<String> list = new ArrayList<String>();
 85         list.add("小喜庆01");
 86         list.add("小喜庆02");
 87         list.add("小喜庆03");
 88         // 遍历list集合[普通遍历、迭代器遍历、增强for]
 89         // 1、 普通for
 90         for (int i = 0; i < list.size(); i++) {
 91             String s = list.get(i);
 92             System.out.println(s);
 93         }
 94         System.out.println("-------------");
 95
 96         // 2、 增强for
 97         for (String s1 : list) {
 98             System.out.println(s1);
 99         }
100         System.out.println("-------------");
101
102         // 3、迭代器
103         Iterator<String> it = list.iterator();
104         while (it.hasNext()) {
105             System.out.println(it.next());
106         }
107
108     }
109
110 }
5、泛型使用在方法上
方法逻辑相同,只是数据类型不同,这个时候使用泛型方法
* 使用泛型方法 需要定义一个类型 使用大写字母表示 T :这个T表示任意的类型
* 写在返回值之前 void之前 <T>,表示定义了一个类型 这个类型是 T,在下面就可以使用这个类型了 T
e-code【TestDemo3.java】
 1 package boom.test03;
 2
 3 import java.util.Arrays;
 4
 5 /**
 6  * 泛型使用在方法上
 7  * 定义一个数组,实现指定位置上数组元素的交换[11和13]
 8  * @author Administrator
 9  *
10  */
11 public class TestDemo3 {
12     public static void main(String[] args) {
13         Integer[] arr1 = { 10, 11, 12, 13, 14, 15 };
14         System.out.println("原始数据:"+Arrays.toString(arr1));
15         swap1(arr1,1,3);
16         System.out.println("转换后数据:"+Arrays.toString(arr1));
17
18         String[] arr2 = { "aa", "bb", "cc", "dd" };
19         System.out.println("原始数据:"+Arrays.toString(arr2));
20         swap1(arr2,1,3);
21         System.out.println("转换后数据:"+Arrays.toString(arr2));
22
23     }
24     /**
25      * 使用泛型方法 需要定义一个类型 使用大写字母表示 T :这个T表示任意的类型
26      */
27     public static <T> void swap1(T[] arr,int i,int j){
28         T temp = arr[i];
29         arr[i] = arr[j];
30         arr[j] = temp;
31     }
32
33 /*    private static void swap1(String[] arr2, int i, int j) {
34         String temp1 = arr2[i];
35         arr2[i] = arr2[j];
36         arr2[j] = temp1;
37     }
38     private static void swap1(int[] arr1, int i, int j) {
39         // 定义中间变量进行值得转换
40         int temp = arr1[i];
41         arr1[i] = arr1[j];
42         arr1[j] = temp;
43
44     }*/
45
46 }
6、泛型在类上的使用(了解)
e-code【TestDemo4.java】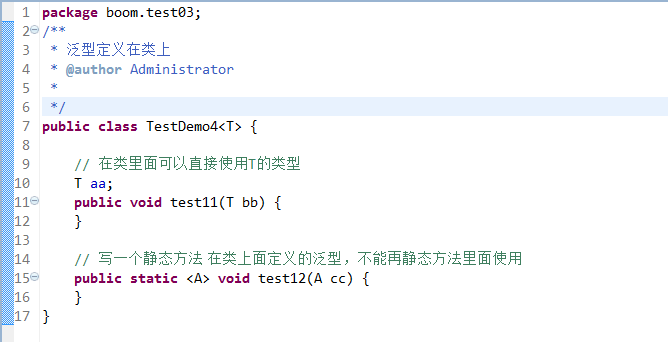
7、枚举的简介
什么是枚举?
需要在一定的范围内取值,这个值只能是这个范围内中的任意一个。
现实场景:交通信号灯,有三种颜色,但是每次只能亮三种颜色里面的任意一个
* 使用一个关键字 enum
** enum Color3 {
RED,GREEN,YELLOW;
}
e-code【TestEnum1.java】
 1 package boom.test04;
 2
 3 public class TestEnum1 {
 4     // 传统的方式
 5     private int color;
 6
 7     // 第二种方式
 8     private Color2 color1;
 9
10     // 第三种方式JDK5.0新特性  枚举
11     private Color3 color3;
12
13     public void test() {
14         this.color = Color1.RED;
15         this.color1 = Color2.RED;
16         this.color3 = Color3.RED;
17     }
18 }
19 // 使用枚举
20 enum Color3{
21     RED,GREEN,YELLOW;
22 }
23 class Color2 {
24     // 实用化构造方法
25     private Color2(){}
26     public static final Color2 RED = new Color2();
27     public static final Color2 GREEN = new Color2();
28     public static final Color2 YELLOW = new Color2();
29 }
30 class Color1 {
31     public static final int RED = 1;
32     public static final int GREEN = 2;
33     public static final int YELLOW = 3;
34 }
* 枚举的构造方法也是私有的
* 特殊枚举的操作(了解)
** 在枚举类里面有构造方法
* 构造方法里面有参数,需要在每个实例上面都写参数
** 在枚举类里面有抽象方法
* 在枚举的每个实例里面都重写这个抽象方法
8、枚举的api的操作
** name() :返回枚举的名称
** ordinal() :枚举的下标,下标从0开始
** valueOf(Class<T> enumType, String name) :得到枚举的对象
** 还有两个方法,都是这两个方法不在api里面,编译的时候生成两个方法
*** valueof(String name) 转换枚举对象
*** values() 获得所有枚举对象数组
* 枚举对象、枚举对象下标、枚举对象名称表示之间的转换
e-code【TestEnum2.java】
 1 package boom.test04;
 2
 3 import org.junit.Test;
 4
 5 public class TestEnum2 {
 6     // 3、通过枚举的下标,得到枚举的对象和名称
 7     @Test
 8     public void test3(){
 9         int idx = 2;
10         // 得到枚举的对象
11         Color[] cs = Color.values();
12         // 根据下标得到对象
13         Color c = cs[idx];
14         // 得到枚举的名称
15         String name = c.name();
16         System.out.println(name);
17
18     }
19     // 2、通过枚举的名称,得到枚举的对象和下标
20     @Test
21     public void test2(){
22         String name = "RED";
23         // 得到枚举对象
24         Color c = Color.valueOf(name);
25         // 枚举的下标
26         int idx = c.ordinal();
27         System.out.println(idx);
28     }
29     // 1、通过枚举对象,得到枚举名称和下标
30     @Test
31     public void test1() {
32         // 得到枚举的对象
33         Color c = Color.GREEN;
34         // 得到枚举名称
35         String name = c.name();
36         // 得到枚举的下标
37         int idx = c.ordinal();
38         System.out.println(name+":"+idx);
39     }
40
41 }
42 // 创建枚举类
43 enum Color{
44     RED,GREEN,YELLOW;
45 }
9、静态导入(了解)
* 可以在代码里面,直接使用静态导入方式,导入静态方法或者常量
* import static XX.XX.xxx
* import static java.lang.System.out;
import static java.util.Arrays.sort;
** 比如现在实现一个计算器 在Math类里面
e-image
10、自动拆装箱
装箱: 把基本的数据类型转换成包装类
拆箱:把包装类转换成基本的数据类型
自动装箱:Integer i = 10; 自动拆箱:int m = i;
- //在jdk1.4里面实现拆装箱
public void test1() {
//装箱
Integer m = new Integer(10);
//拆箱
int a = m.intValue();
}
** jdk是会向下兼容
- 比如 jdk1.4里面写的代码,这个时候到5.0里面也可以运行
e-code【TestDemo2.java】
 1 package boom.test05;
 2
 3 public class TestDemo2 {
 4
 5     /**自动拆装箱
 6      * @param args
 7      */
 8     public static void main(String[] args) {
 9         Integer i =8; // 自动装箱
10         int m= i; // 自动拆箱
11         doSomething(10);// 调用double m
12
13     }
14     public static void doSomething(double m){
15         System.out.println("double......");
16     }
17     public static void doSomething(Integer a){
18         System.out.println("Integer......");
19     }
20 }
a. 执行的结果是会调用 doSomething(double m)
b. 首先在jdk1.4里面肯定调用这个方法,如果调用下面的方法,需要类型转换,但是jdk1.4不能实现自动拆装箱
c. 由于jdk是向下兼容,所以,在jdk1.4调用这个方法,在jdk5.0里面还是会调用这个方法
11、增强for循环(*****)
语法 for(遍历出来的值 : 要遍历的集合) {}
- for(String s : list) {
System.out.println(s);
}
使用场景: 数组;实现Iterable接口的集合 可以使用增强for循环
在集合上使用增强for循环遍历
list set 实现了Iterator接口,所以可以使用增强for循环
map不能使用增强for循环,没有实现Iterator接口,所以不能使用增强for循环
增强for循环出现目的:为了替代迭代器(底层就是迭代器实现的)
12、内容补充
(1)泛型擦除
* 首先泛型只是出现在源代码阶段,当编译之后泛型不存在了
(2)练习:实现一个泛型方法,接受任意类型的数组,颠倒数组中所有元素
e-code【TestDemo5.java】
 1 package boom.test05;
 2
 3 import java.util.Arrays;
 4
 5 public class TestDemo5 {
 6
 7     /**
 8      * 实现一个泛型方法,接受任意类型的数组,逆序数组中所有元素
 9      * @param args
10      */
11     public static void main(String[] args) {
12         Integer[] arr1 = {12,34,65,67,341,23};
13         System.out.println("原始数据:"+Arrays.toString(arr1));
14         reverses(arr1);
15         System.out.println("交换数据:"+Arrays.toString(arr1));
16
17         System.out.println("--- 分割线 ---");
18
19         String[] arr2 = {"a","b","c","d","e","f","g"};
20         System.out.println("原始数据:"+Arrays.toString(arr2));
21         reverses(arr2);
22         System.out.println("交换数据:"+Arrays.toString(arr2));
23
24
25     }
26
27     public static <T> void reverses(T[] arr1) {
28         /**
29          * 基本思想:把第一个元素和最后一个元素交换位置,把第二个元素和倒数第二个元素交换位置
30          * 交换 长度/2
31          */
32         // 遍历数组
33         for(int i = 0;i<arr1.length/2;i++) {
34             /*int temp = arr[0];
35             arr[0] = arr[arr.length-1];*/
36             T temp = arr1[i];
37             arr1[i] = arr1[arr1.length - i - 1];
38             arr1[arr1.length - i - 1] = temp;
39
40         }
41     }
42
43 }
13、可变参数
* 可变参数可以应用在什么场景:实现两个数的相加,实现三个数的相加 四个数的相加.........
-- 如果实现的多个方法,这些方法里面逻辑基本相同,唯一不同的是传递的参数的个数,可以使用可变参数
* 可变参数的定义方法 数据类型...数组的名称
* 理解为一个数组,这个数组存储传递过来的参数
e-code【TestDemo3.java】
 1 package boom.test05;
 2
 3 public class TestDemo3 {
 4
 5     /**
 6      * 可变参数
 7      * 实现两个数,三个数,四个数......相加
 8      * @param args
 9      */
10     public static void main(String[] args) {
11         add(10,33);
12         add(10,33,45);
13         add(10,33,45,43);
14         add(10,33,45,43,34);
15     }
16     // 可变参数写法
17     public static void add(int ...nums){
18         // nums理解为一个数组,这个数组存储传递过来的参数
19         // 测试nums长度
20 //        System.out.println(nums.length);
21         int sum = 0;
22         // 遍历数组
23         for (int i = 0; i < nums.length; i++) {
24             sum += nums[i];
25         }
26         System.out.println("sum=" + sum);
27
28     }
29
30     /*public void add(int a,int b){
31         int sum = a+b;
32         System.out.println(sum);
33     }
34     public void add(int a,int b,int c){
35         int sum = a+b+c;
36         System.out.println(sum);
37     }
38     public void add(int a,int b,int c,int d){
39         int sum = a+b+c+d;
40         System.out.println(sum);
41     }*/
42
43 }
* 注意的地方
(1)可变参数需要写在方法的参数列表中,不能单独定义
(2)在方法的参数列表中只能有一个可变参数
(3)方法的参数列表中的可变参数,必须放在参数最后
- add1(int a,int...nums)
14、反射的原理(********理解********)
应用在一些通用性比较高的代码中,后面学到的框架,大多数都是使用反射来实现的,在框架开发中,都是基于配置文件开发。
在配置文件中配置了类,可以通过反射得到类中的 所有内容,可以让类中的某个方法来执行,类中的所有内容:属性、没有参数的构造方法、有参数的构造方法、普通方法。
画图分析反射的原理
* 首先需要把java文件保存到本地硬盘 .java
* 编译java文件,成.class文件
* 使用jvm,把class文件通过类加载器加载到内存中
* 万事万物都是对象,class文件在内存中使用Class类表示
* 当使用反射时候,首先需要获取到Class类,得到了这个类之后,就可以得到class文件里面的所有内容
- 包含属性 构造方法 普通方法
* 属性通过一个类 Filed
* 构造方法通过一个类 Constructor
* 普通方法通过一个类 Method
15、使用反射操作:属性、没有参数的构造方法、有参数的构造方法、普通方法的操作
* 首先获取到Class类
- // 获取Class类
Class clazz1 = Person.class;
Class clazz2 = new Person().getClass();
Class clazz3 = Class.forName("所在类的包名+类名路");// 复制 选择类名 ==> Copy Qualified Name
比如: 要对一个类进行实例化,可以new。不使用new,怎么获取(反射)?
//得到Class
Class class1 = Class.forName("boom.test06.Person");
// 得到Person实例(需要强转)
Person p = (Person) class1.newInstance();
// 设置值
e-code【Person.java】
 1 package boom.test06;
 2
 3 public class Person {
 4     private String name;
 5     private String id;
 6
 7     // 无参构造方法
 8     public Person(){
 9
10     }
11     // 有参的构造方法
12     public Person(String name, String id) {
13         super();
14         this.name = name;
15         this.id = id;
16     }
17     // 普通方法
18     public String getName() {
19         return name;
20     }
21     public void setName(String name) {
22         this.name = name;
23     }
24     public String getId() {
25         return id;
26     }
27     public void setId(String id) {
28         this.id = id;
29     }
30
31 }
e-code【TestDemo1.java】
 1 package boom.test06;
 2
 3 import java.lang.reflect.Constructor;
 4 import java.lang.reflect.Field;
 5 import java.lang.reflect.Method;
 6
 7 import org.junit.Test;
 8
 9 public class TestDemo1 {
10     public static void main(String[] args) throws Exception {
11         // 获取Class(三种方式)
12         /*Class class1 = Person.class;
13         Class class2 = new Person().getClass();
14         Class class3 = Class.forName("boom.test06.Person");*/
15
16     }
17
18
19     // 4、操作普通方法 操作setName
20     @Test
21     public void test4() throws Exception{
22         // 得到Class类
23         Class class4 = Class.forName("boom.test06.Person");
24         // 得到Person实例
25         Person p4 = (Person) class4.newInstance();
26         // 得到普通方法
27         Method m1 = class4.getDeclaredMethod("setName", String.class);
28         // 执行setName,设置值
29         m1.invoke(p4, "小明");
30         System.out.println(p4.getName());
31     }
32
33     // 3、反射操作属性
34     @Test
35     public void test3(){
36         try {
37             // 得到Class类
38             Class class3 = Class.forName("boom.test06.Person");
39             // 得到name属性
40             // class3.getDeclaredFields();//表示得到所有的属性
41
42             // 得到Person类的实例
43             Person p1 = (Person) class3.newInstance();
44             // 通过这个方法得到属性,参数是属性的名称
45             Field f1 = class3.getDeclaredField("name");
46             // 操作的是私有的属性,不让操作,需要设置可以操作私有属性setAccessible(true),可以操作私有属性
47             f1.setAccessible(true);
48             // 设置name值 set方法,两个参数:第一个参数类的实例,第二个参数是设置的值
49             f1.set(p1, "wangwu"); // 相当于 在 p.name = "wangwu";
50             System.out.println(f1.get(p1)); // 相当于 p.name
51         }catch(Exception e) {
52             e.printStackTrace();
53         }
54     }
55
56     // 2、操作有参数构造方法
57     @Test
58     public void test2() throws Exception{
59         // 得到Class
60         Class class2 = Class.forName("boom.test06.Person");
61         // 传递有参的构造方法里面的参数类型,类型使用class形式想传递
62         Constructor cs = class2.getConstructor(String.class,String.class);
63         // 通过有参的构造方法设置值
64         // 通过有参数的构造方法创建Person实例
65         Person p1 = (Person) cs.newInstance("lisi","101");
66         System.out.println(p1.getId()+" "+p1.getName());
67
68     }
69
70     // 1、操作无参数构造方法
71     @Test
72     public void test1() throws Exception {
73         // 得到Class
74         Class class1 = Class.forName("boom.test06.Person");
75         // 得到Person实例(需要强转)
76         Person p = (Person) class1.newInstance();
77         // 设置值
78         p.setName("小喜庆");
79         p.setId("1001");
80         System.out.println(p.getName()+" "+p.getId());
81
82     }
83 }