1、安装插件(可以选择在初始化项目的时候安装)
cnpm install vue-router --save-dev
2、将插件全局引入到项目中(main.js)
import VueRouter from 'vue-router'
3、将插件注入到vue中(main.js)
Vue.use(VueRouter) //全局使用该组件
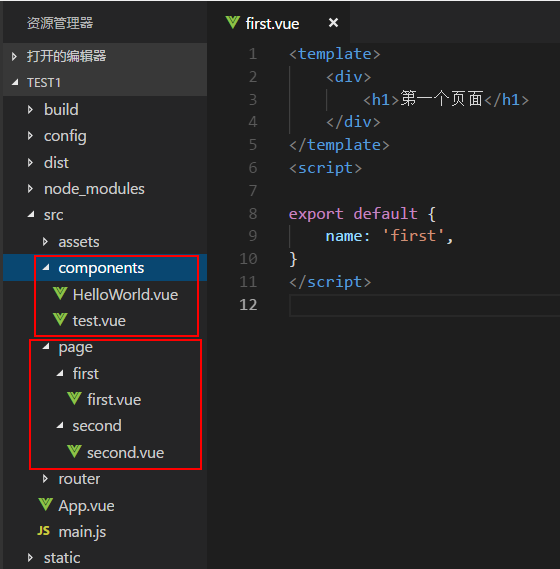
4、创建组件(需要跳转的页面),举例如下:
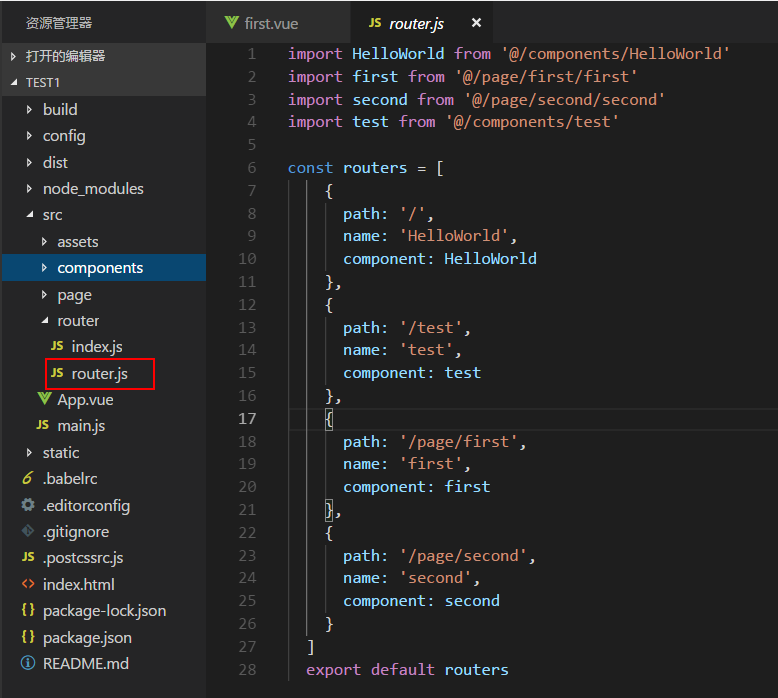
5、配置路由(router.js),先引入组件,再写配置,最后导出(export...)
6、生成router实例(main.js)并传routes(路由)配置
先将 router.js 引入进来
import routers from './router/router'
const router = new VueRouter({
  mode:'history', //模式
  routes:routers  //routes是一组路由
})
7、生成 vue 实例 (main.js),并将路由注入到整个项目
new Vue({
  el: '#app', //挂载根实例
  router,//注入到根目录中
  components: { App },
  template: '<App/>'
})
8、在项目主组件(APP.vue)中写路由跳转,例:
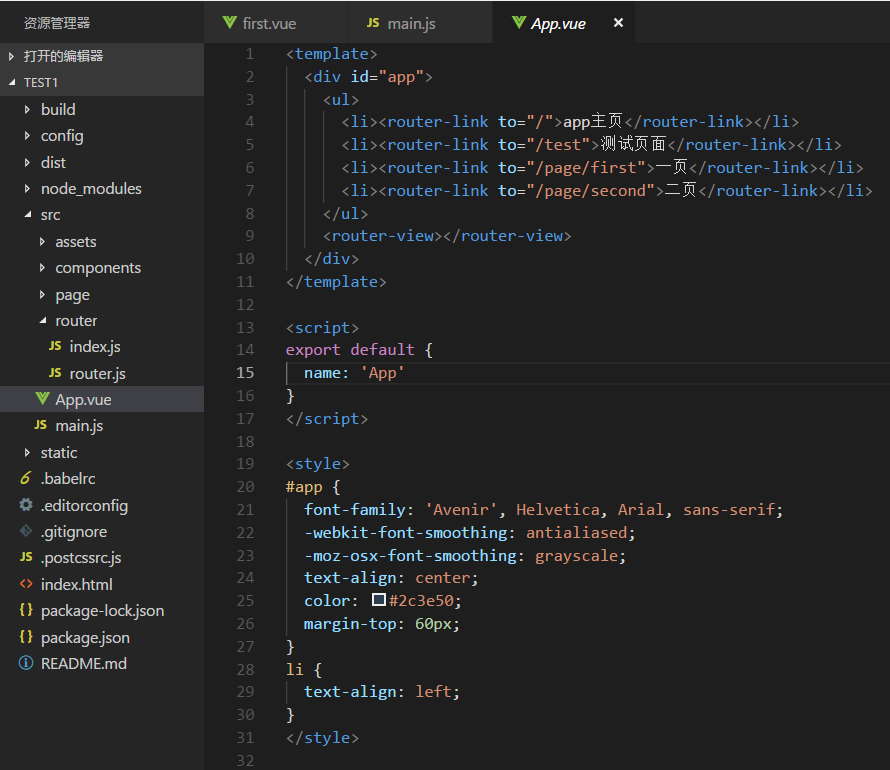
或者:
this.$router.push({
    path: '/orderCommit',
    query: {
        date: this.dateValue
    }
})
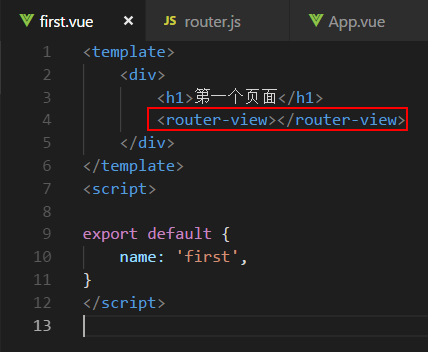
二、二级路由
1、在一级路由的基础上,路由配置中加上children
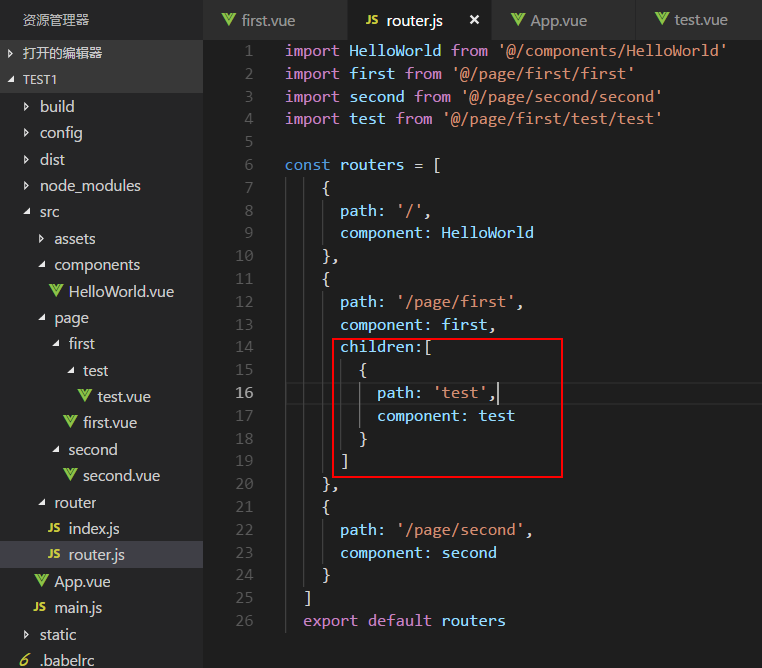
2、在一级组件中加上显示
OK~
this.$router.push({
path: '/orderCommit',
query: {
date: this.dateValue,
timeSlot: this.timeState,
timeSlotLast: this.timeSlotLast,
tableInfo: myTableInfo,
tableId: this.tableIdStr,
isCourt: this.isCourt,
peopleNum: peopleNum
}
})