环境
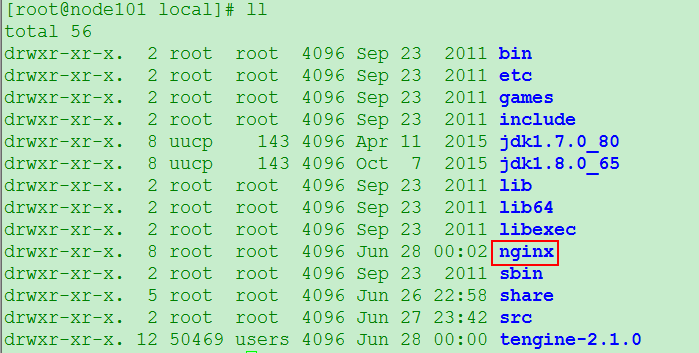
tengine-2.1.0
Tengine是由淘宝网发起的Web服务器项目。它在Nginx的基础上,针对大访问量网站的需求,添加了很多高级功能和特性。Tengine的性能和稳定性已经在大型的网站如淘宝网,天猫商城等得到了很好的检验。它的最终目标是打造一个高效、稳定、安全、易用的Web平台。
一、安装tengine
1、nginx依赖 gcc openssl-devel pcre-devel zlib-devel
[root@node101 tengine-2.1.0]# yum install gcc openssl-devel pcre-devel zlib-devel -y
2、安装Nginx
[root@node101 tengine-2.1.0]# ./configure && make && make install
注意:tengine默认安装目录:/usr/local/nginx
3、将Nginx配置为系统服务,以方便管理。
(3.1)在/etc/rc.d/init.d/目录中建立文本文件nginx,在文件中粘贴下面的内容:
#!/bin/sh
#
# nginx - this script starts and stops the nginx daemon
#
# chkconfig:   - 85 15
# description:  Nginx is an HTTP(S) server, HTTP(S) reverse
#               proxy and IMAP/POP3 proxy server
# processname: nginx
# config:      /etc/nginx/nginx.conf
# config:      /etc/sysconfig/nginx
# pidfile:     /var/run/nginx.pid

# Source function library.
. /etc/rc.d/init.d/functions

# Source networking configuration.
. /etc/sysconfig/network

# Check that networking is up.
[ "$NETWORKING" = "no" ] && exit 0

nginx="/usr/local/nginx/sbin/nginx"
prog=$(basename $nginx)

NGINX_CONF_FILE="/usr/local/nginx/conf/nginx.conf"

[ -f /etc/sysconfig/nginx ] && . /etc/sysconfig/nginx

lockfile=/var/lock/subsys/nginx

make_dirs() {
   # make required directories
   user=`nginx -V 2>&1 | grep "configure arguments:" | sed 's/[^*]*--user=([^ ]*).*/1/g' -`
   options=`$nginx -V 2>&1 | grep 'configure arguments:'`
   for opt in $options; do
       if [ `echo $opt | grep '.*-temp-path'` ]; then
           value=`echo $opt | cut -d "=" -f 2`
           if [ ! -d "$value" ]; then
               # echo "creating" $value
               mkdir -p $value && chown -R $user $value
           fi
       fi
   done
}

start() {
    [ -x $nginx ] || exit 5
    [ -f $NGINX_CONF_FILE ] || exit 6
    make_dirs
    echo -n $"Starting $prog: "
    daemon $nginx -c $NGINX_CONF_FILE
    retval=$?
    echo
    [ $retval -eq 0 ] && touch $lockfile
    return $retval
}

stop() {
    echo -n $"Stopping $prog: "
    killproc $prog -QUIT
    retval=$?
    echo
    [ $retval -eq 0 ] && rm -f $lockfile
    return $retval
}

restart() {
    configtest || return $?
    stop
    sleep 1
    start
}

reload() {
    configtest || return $?
    echo -n $"Reloading $prog: "
    killproc $nginx -HUP
    RETVAL=$?
    echo
}

force_reload() {
    restart
}

configtest() {
  $nginx -t -c $NGINX_CONF_FILE
}

rh_status() {
    status $prog
}

rh_status_q() {
    rh_status >/dev/null 2>&1
}

case "$1" in
    start)
        rh_status_q && exit 0
        $1
        ;;
    stop)
        rh_status_q || exit 0
        $1
        ;;
    restart|configtest)
        $1
        ;;
    reload)
        rh_status_q || exit 7
        $1
        ;;
    force-reload)
        force_reload
        ;;
    status)
        rh_status
        ;;
    condrestart|try-restart)
        rh_status_q || exit 0
            ;;
    *)
        echo $"Usage: $0 {start|stop|status|restart|condrestart|try-restart|reload|force-reload|configtest}"
        exit 2
esac
(3.2)修改nginx文件的执行权限
[root@node101 init.d]# chmod +x /etc/rc.d/init.d/nginx
(3.3)添加该文件到系统服务中去
[root@node101 init.d]# chkconfig --add /etc/rc.d/init.d/nginx
查看是否添加成功,on和off分别指服务被启动和停止
[root@node101 init.d]# chkconfig --list nginx
nginx 0:off    1:off    2:off    3:off    4:off    5:off    6:off
4、通过服务启动,停止,重启nginx
service nginx start|stop|restart
[root@node101 init.d]# service nginx start
Starting nginx:                           [ OK ]

二、配置Nginx
使用nginx收集请求日志,针对业务设计的请求链接格式来配置nginx日志记录格式,这里我们请求都是以http://wjy.com/log.gif?requestdata,修改配置文件:/usr/local/nginx/conf/nginx.conf
1、设置日志格式:
log_format my_format '$remote_addr^A$msec^A$http_host^A$request_uri';#定义日志格式my_format
解释日志参数:
remote_addr:客户端的IP;
msec:当前的Unix时间戳;
http_host指的就是请求头里的host属性;
request_uri就是完整url中刨去最前面主机剩下的部分:/log.gif?requestdata;
^A是自定义的分隔符
2、URL匹配规则
location = /log.gif {
  default_type image/gif;#请求内容类型
  access_log /opt/data/access.log my_format; #请求日志存放路径以及所使用的日志格式
}
最后配置nginx.conf:
#user  nobody;
worker_processes  1;

#error_log  logs/error.log;
#error_log  logs/error.log  notice;
#error_log  logs/error.log  info;

#pid        logs/nginx.pid;


events {
    worker_connections  1024;
}

# load modules compiled as Dynamic Shared Object (DSO)
#
#dso {
#    load ngx_http_fastcgi_module.so;
#    load ngx_http_rewrite_module.so;
#}

http {
    include       mime.types;
    default_type  application/octet-stream;

    #log_format  main  '$remote_addr - $remote_user [$time_local] "$request" '
    #                  '$status $body_bytes_sent "$http_referer" '
    #                  '"$http_user_agent" "$http_x_forwarded_for"';

    log_format my_format '$remote_addr^A$msec^A$http_host^A$request_uri';

    #access_log  logs/access.log  main;

    sendfile        on;
    #tcp_nopush     on;

    #keepalive_timeout  0;
    keepalive_timeout  65;

    #gzip  on;

    server {
        listen       80;
        server_name  localhost;

        #charset koi8-r;

        #access_log  logs/host.access.log  main;

        location / {
            root   html;
            index  index.html index.htm;
        }

        location = /log.gif {
            default_type image/gif;
            access_log /opt/data/access.log my_format;
        }


        #error_page  404              /404.html;

        # redirect server error pages to the static page /50x.html
        #
        error_page   500 502 503 504  /50x.html;
        location = /50x.html {
            root   html;
        }

        # proxy the PHP scripts to Apache listening on 127.0.0.1:80
        #
        #location ~ .php$ {
        #    proxy_pass   http://127.0.0.1;
        #}

        # pass the PHP scripts to FastCGI server listening on 127.0.0.1:9000
        #
        #location ~ .php$ {
        #    root           html;
        #    fastcgi_pass   127.0.0.1:9000;
        #    fastcgi_index  index.php;
        #    fastcgi_param  SCRIPT_FILENAME  /scripts$fastcgi_script_name;
        #    include        fastcgi_params;
        #}

        # deny access to .htaccess files, if Apache's document root
        # concurs with nginx's one
        #
        #location ~ /.ht {
        #    deny  all;
        #}
    }


    # another virtual host using mix of IP-, name-, and port-based configuration
    #
    #server {
    #    listen       8000;
    #    listen       somename:8080;
    #    server_name  somename  alias  another.alias;

    #    location / {
    #        root   html;
    #        index  index.html index.htm;
    #    }
    #}


    # HTTPS server
    #
    #server {
    #    listen       443 ssl;
    #    server_name  localhost;

    #    ssl_certificate      cert.pem;
    #    ssl_certificate_key  cert.key;

    #    ssl_session_cache    shared:SSL:1m;
    #    ssl_session_timeout  5m;

    #    ssl_ciphers  HIGH:!aNULL:!MD5;
    #    ssl_prefer_server_ciphers  on;

    #    location / {
    #        root   html;
    #        index  index.html index.htm;
    #    }
    #}

}
测试:
本地启动tomcat web应用,访问界面:

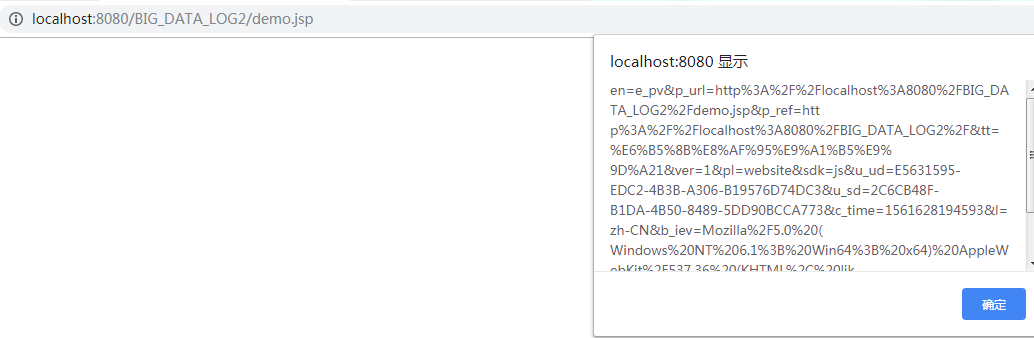
在/opt/data/access.log查看日志:
[root@node101 data]# tail -f access.log
192.168.118.1^A1561656575.201^Anode101^A/log.gif?en=e_l&ver=1&pl=website&sdk=js&u_ud=E5631595-EDC2-4B3B-A306-B19576D74DC3&u_sd=C7C0D4E3-7E60-479B-AC1C-2F5305EC20D4&c_time=1561627763553&l=zh-CN&b_iev=Mozilla%2F5.0%20(Windows%20NT%206.1%3B%20Win64%3B%20x64)%20AppleWebKit%2F537.36%20(KHTML%2C%20like%20Gecko)%20Chrome%2F75.0.3770.100%20Safari%2F537.36&b_rst=1920*1080
192.168.118.1^A1561656575.209^Anode101^A/log.gif?en=e_pv&p_url=http%3A%2F%2Flocalhost%3A8080%2FBIG_DATA_LOG2%2Fdemo.jsp&p_ref=http%3A%2F%2Flocalhost%3A8080%2FBIG_DATA_LOG2%2F&tt=%E6%B5%8B%E8%AF%95%E9%A1%B5%E9%9D%A21&ver=1&pl=website&sdk=js&u_ud=E5631595-EDC2-4B3B-A306-B19576D74DC3&u_sd=C7C0D4E3-7E60-479B-AC1C-2F5305EC20D4&c_time=1561627771147&l=zh-CN&b_iev=Mozilla%2F5.0%20(Windows%20NT%206.1%3B%20Win64%3B%20x64)%20AppleWebKit%2F537.36%20(KHTML%2C%20like%20Gecko)%20Chrome%2F75.0.3770.100%20Safari%2F537.36&b_rst=1920*1080
192.168.118.1^A1561656582.756^Anode101^A/log.gif?en=e_pv&p_url=http%3A%2F%2Flocalhost%3A8080%2FBIG_DATA_LOG2%2Fdemo2.jsp&p_ref=http%3A%2F%2Flocalhost%3A8080%2FBIG_DATA_LOG2%2Fdemo.jsp&tt=%E6%B5%8B%E8%AF%95%E9%A1%B5%E9%9D%A22&ver=1&pl=website&sdk=js&u_ud=E5631595-EDC2-4B3B-A306-B19576D74DC3&u_sd=C7C0D4E3-7E60-479B-AC1C-2F5305EC20D4&c_time=1561627781910&l=zh-CN&b_iev=Mozilla%2F5.0%20(Windows%20NT%206.1%3B%20Win64%3B%20x64)%20AppleWebKit%2F537.36%20(KHTML%2C%20like%20Gecko)%20Chrome%2F75.0.3770.100%20Safari%2F537.36&b_rst=1920*1080
192.168.118.1^A1561657012.776^Anode101^A/log.gif?en=e_pv&p_url=http%3A%2F%2Flocalhost%3A8080%2FBIG_DATA_LOG2%2Fdemo.jsp&p_ref=http%3A%2F%2Flocalhost%3A8080%2FBIG_DATA_LOG2%2F&tt=%E6%B5%8B%E8%AF%95%E9%A1%B5%E9%9D%A21&ver=1&pl=website&sdk=js&u_ud=E5631595-EDC2-4B3B-A306-B19576D74DC3&u_sd=2C6CB48F-B1DA-4B50-8489-5DD90BCCA773&c_time=1561628194593&l=zh-CN&b_iev=Mozilla%2F5.0%20(Windows%20NT%206.1%3B%20Win64%3B%20x64)%20AppleWebKit%2F537.36%20(KHTML%2C%20like%20Gecko)%20Chrome%2F75.0.3770.100%20Safari%2F537.36&b_rst=1920*1080
三、flume agent配置
a1.sources = r1
a1.sinks = k1
a1.channels = c1

a1.sources.r1.type = exec
a1.sources.r1.command = tail -F /opt/data/access.log

a1.sinks.k1.type=hdfs
a1.sinks.k1.hdfs.path=hdfs://node101:8020/log/%Y%m%d
a1.sinks.k1.hdfs.rollCount=0
a1.sinks.k1.hdfs.rollInterval=0
a1.sinks.k1.hdfs.rollSize=10240
a1.sinks.k1.hdfs.idleTimeout=5
a1.sinks.k1.hdfs.fileType=DataStream
a1.sinks.k1.hdfs.useLocalTimeStamp=true
a1.sinks.k1.hdfs.callTimeout=40000

a1.channels.c1.type = memory
a1.channels.c1.capacity = 1000
a1.channels.c1.transactionCapacity = 100

a1.sources.r1.channels = c1
a1.sinks.k1.channel = c1