手机APP对话框是很多APP都有的下面来看下怎么实现的吧,
打开Android studio 然他自动创建好布局和类;
下面我们修改activity_main.xml中的代码
<?xml version="1.0" encoding="utf-8"?>
<LinearLayout
    xmlns:android="http://schemas.android.com/apk/res/android"
    xmlns:tools="http://schemas.android.com/tools"
    xmlns:app="http://schemas.android.com/apk/res-auto"
    android:layout_width="match_parent"
    android:layout_height="match_parent"
    android:orientation="vertical">

    <Button
        android:id="@+id/btn1"
        android:layout_width="wrap_content"
        android:layout_height="wrap_content"
        android:text="Hello World!"
        android:layout_gravity="center"
        android:layout_marginTop="60pt"
        android:textAllCaps="false"
        />

    <Button
        android:id="@+id/btn2"
        android:layout_width="wrap_content"
        android:layout_height="wrap_content"
        android:layout_gravity="center"
        android:text="Button"
        android:layout_marginTop="3pt"
        android:textAllCaps="false"
        />

</LinearLayout>
再activity_main.xml添加了两个按钮 分别是用于 AlertDialog 和 ProgressDialog的
下面我们再看ActivityMain中的代码
package com.example.administrator.myappalertdialog;
import android.app.ProgressDialog;
import android.content.DialogInterface;
import android.preference.DialogPreference;
import android.support.v7.app.ActionBar;
import android.support.v7.app.AlertDialog;
import android.support.v7.app.AppCompatActivity;
import android.os.Bundle;
import android.view.View;
import android.widget.Button;
import android.widget.Toast;
public class MainActivity extends AppCompatActivity implements View.OnClickListener {
private Button mBtn1;
private Button mBtn2; //声明控件
@Override
protected void onCreate(Bundle savedInstanceState) {
super.onCreate(savedInstanceState);
setContentView(R.layout.activity_main);
ActionBar actionbar = getSupportActionBar(); // 去除标题栏
if(actionbar!= null)
{
actionbar.hide();
}
mBtn1 = (Button) findViewById(R.id.btn1); //查找控件
mBtn1.setOnClickListener(this); //创建点击事件
mBtn2 = (Button) findViewById(R.id.btn2);
mBtn2.setOnClickListener(this);
}
public void onClick(View view) //点击事件
{
switch(view.getId())
{
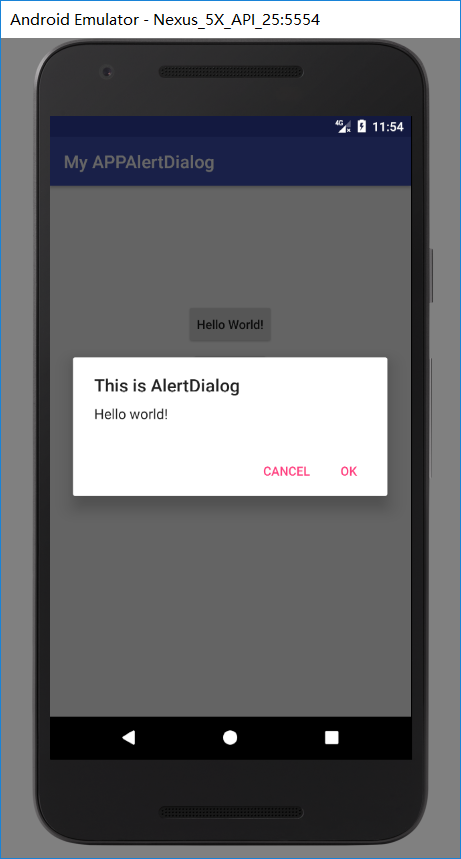
case R.id.btn1:AlertDialog.Builder dialog = new AlertDialog.Builder(MainActivity.this);
dialog.setTitle("This is AlertDialog"); //对话框标题
dialog.setMessage("Hello world!"); //内容
dialog.setCancelable(true); //可撤销性
dialog.setPositiveButton("OK", new DialogInterface.OnClickListener() {
@Override
public void onClick(DialogInterface dialog, int which) {
Toast.makeText(MainActivity.this,"OK",Toast.LENGTH_SHORT).show(); //提示内容
} //确定按钮的点击事件
});
dialog.setNegativeButton("Cancel", new DialogInterface.OnClickListener() {
@Override
public void onClick(DialogInterface dialog, int which) {
Toast.makeText(MainActivity.this,"Cancel",Toast.LENGTH_SHORT).show(); //提示内容
}//取消按钮的点击事件
});
dialog.show(); //全部显示出来
break;
//下面的原理一样。
case R.id.btn2:
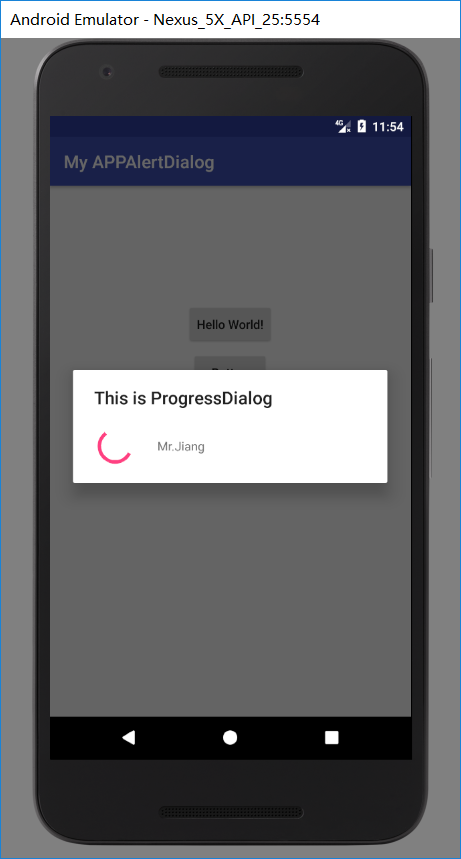
ProgressDialog progressdialog = new ProgressDialog(MainActivity.this);
progressdialog.setTitle("This is ProgressDialog");
progressdialog .setMessage("Mr.Jiang");
progressdialog.setCancelable(false);
progressdialog.show();
break;
default: Toast.makeText(MainActivity.this,"ERROR",Toast.LENGTH_SHORT).show();break;
}
}
}
上面ProgressDialog 没有确定和取消按钮,我们可以把progressdialog.setCancelable里面的值改成true,按下BACK键即可退出,还有可以用progressdialog.dismiss();来去取消关闭对话框;
下面附上第一个和第二个效果图.