1.准备工作
http://how2j.cn?p=36286
nginx:http://nginx.org/download/nginx-1.18.0.zip
tomcat_8111:https://how2j.cn/frontdownload?bean.id=1594
tomcat_8222:https://how2j.cn/frontdownload?bean.id=1595
redis-2.4.5-win32-win64.zip:https://how2j.cn/frontdownload?bean.id=1596
tomcat-redis.rar:https://how2j.cn/frontdownload?bean.id=1597
2.启动命令
- 第一种
直接双击nginx.exe会有个屏幕一闪而过,这个时候,其实已经启动成功了。
- 第二种
命令行方式:
启动:start nginx
关闭:nginx -s stop
重启:nginx -s reload
启动成功后,访问:http://127.0.0.1
3.端口被占用(解决办法)
查看80端口被哪些程序占用了
netstat -ano|findstr "80"

根据pid(进程id) 查询对应的应用程序
tasklist|findstr "1828"

根据名称 结束该程序
taskkill /f /t /im java.exe
或者通过pid中止
taskkill /f /pid 1828
4.为什么要提供多个tomcat
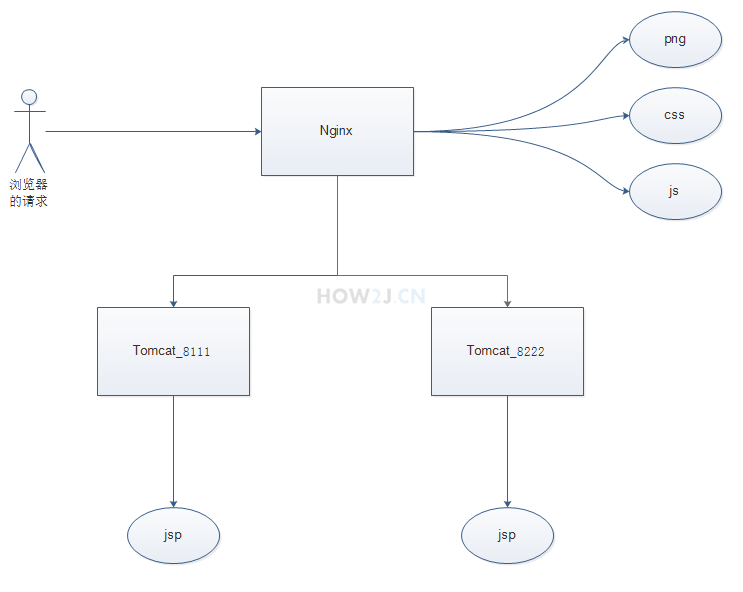
Nginx是一个web服务器,很快速,但是不能作为Servlet 容器独立运行,所以通常的工作方式是Nginx配合Tomcat来协同工作。 这就是为什么要单独提供Tomcat,以方便配合Nginx进行工作。
5.运行tomcat8111
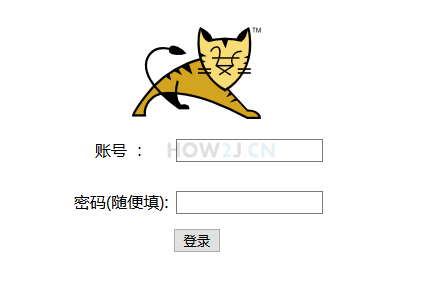
解压并运行其中bin目录下的startup.bat,访问http://127.0.0.1:8111/,会自动跳转到http://127.0.0.1:8111/login.jsp
-
如未能跳转到该页面,请按如下操作尝试
①停止:
nginx -s stop②任务管理器中结束nginx任务。
③启动:
start nginx

6.反向代理
先说正向代理,比如要访问youtube,但是不能直接访问,只能先找个FQ软件,通过FQ软件才能访问youtube. FQ软件就叫做正向代理。
所谓的反向代理,指的是用户要访问youtube,但是youtube悄悄地把这个请求交给bilibili来做,那么bilibili就是反向代理了。
在当前教程指的就是访问nginx,但是nginx把请求交给tomcat来做。
-
启动tomcat8111
-
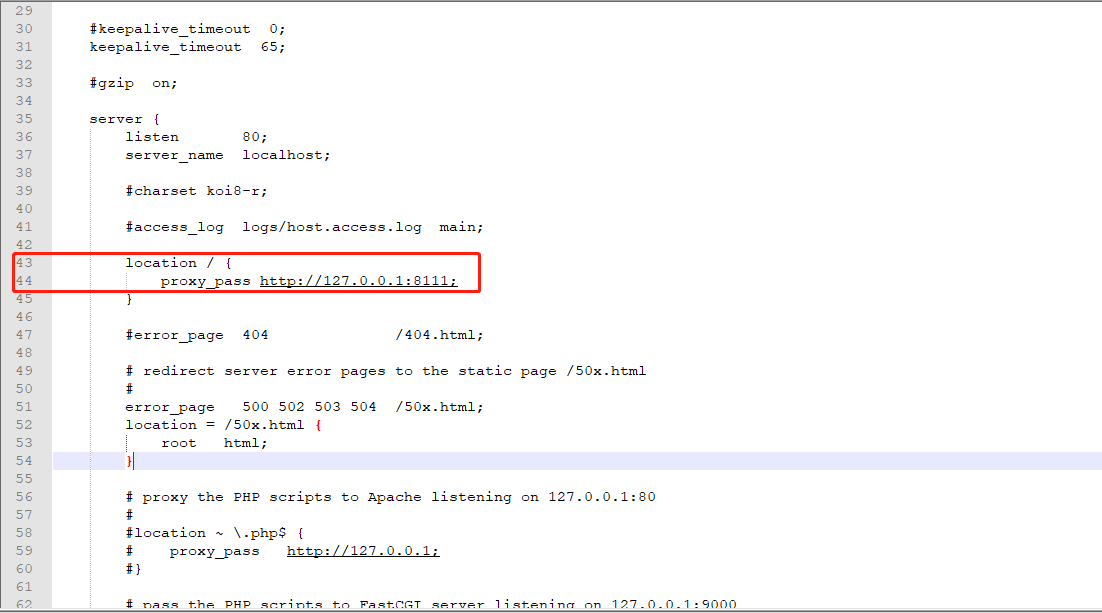
修改nginx.conf
location / 表示处理所有请求
proxy_pass http://127.0.0.1:8111; 表示把请求都交给http://127.0.0.1:8111来处理
location / {
	proxy_pass http://127.0.0.1:8111;
}
完整nginx.conf代码如下:
#user  nobody;
worker_processes  1;

#error_log  logs/error.log;
#error_log  logs/error.log  notice;
#error_log  logs/error.log  info;

#pid        logs/nginx.pid;


events {
    worker_connections  1024;
}


http {
    include       mime.types;
    default_type  application/octet-stream;

    #log_format  main  '$remote_addr - $remote_user [$time_local] "$request" '
    #                  '$status $body_bytes_sent "$http_referer" '
    #                  '"$http_user_agent" "$http_x_forwarded_for"';

    #access_log  logs/access.log  main;

    sendfile        on;
    #tcp_nopush     on;

    #keepalive_timeout  0;
    keepalive_timeout  65;

    #gzip  on;

    server {
        listen       80;
        server_name  localhost;

        #charset koi8-r;

        #access_log  logs/host.access.log  main;

        location / {
            proxy_pass http://127.0.0.1:8111;
        }

        #error_page  404              /404.html;

        # redirect server error pages to the static page /50x.html
        #
        error_page   500 502 503 504  /50x.html;
        location = /50x.html {
            root   html;
        }

        # proxy the PHP scripts to Apache listening on 127.0.0.1:80
        #
        #location ~ .php$ {
        #    proxy_pass   http://127.0.0.1;
        #}

        # pass the PHP scripts to FastCGI server listening on 127.0.0.1:9000
        #
        #location ~ .php$ {
        #    root           html;
        #    fastcgi_pass   127.0.0.1:9000;
        #    fastcgi_index  index.php;
        #    fastcgi_param  SCRIPT_FILENAME  /scripts$fastcgi_script_name;
        #    include        fastcgi_params;
        #}

        # deny access to .htaccess files, if Apache's document root
        # concurs with nginx's one
        #
        #location ~ /.ht {
        #    deny  all;
        #}
    }


    # another virtual host using mix of IP-, name-, and port-based configuration
    #
    #server {
    #    listen       8000;
    #    listen       somename:8080;
    #    server_name  somename  alias  another.alias;

    #    location / {
    #        root   html;
    #        index  index.html index.htm;
    #    }
    #}


    # HTTPS server
    #
    #server {
    #    listen       443 ssl;
    #    server_name  localhost;

    #    ssl_certificate      cert.pem;
    #    ssl_certificate_key  cert.key;

    #    ssl_session_cache    shared:SSL:1m;
    #    ssl_session_timeout  5m;

    #    ssl_ciphers  HIGH:!aNULL:!MD5;
    #    ssl_prefer_server_ciphers  on;

    #    location / {
    #        root   html;
    #        index  index.html index.htm;
    #    }
    #}

}
- 重启nginx访问
重启命令:nginx -s reload
访问链接:http://127.0.0.1/
就会观察到已经反向代理到tomcat了
- 意义何在
既然直接通过 127.0.0.1:8111/login.jsp 可以访问,那么干嘛要通过 127.0.0.1/login.jsp 去反向代理到tomcat呢? 为什么不直接使用tomcat呢?

因为nginx在处理静态文件的吞吐量上面比tomcat好很多,通常他们俩配合,不会把所有的请求都如本例所示的交给tomcat, 而是把静态请求交给nginx,动态请求,如jsp, servlet,ssm, struts等请求交给tomcat. 从而达到动静分离的效果。 接下来就会讲解如何进行动静分离。
- 动静分离
所谓的动静分离就是指图片,css, js之类的都交给nginx来处理,nginx处理不了的,比如jsp 就交给tomcat来处理~

好处是nginx处理静态内容的吞吐量很高,比tomcat高多了,这样无形中提升了性能。

- 修改nginx.conf
location ~.(css|js|png)$ {
	root D:/1-software/046-nginx-1.18.0/tomcat_8111/webapps/ROOT;
}
这表示所有的css js png访问都由nginx来做,访问的地址是
D:/1-software/046-nginx-1.18.0/tomcat_8111/webapps/ROOT
这里要注意,填写本地地址的时候,要用正斜杠 / 不要用反斜杠
完整nginx.conf代码如下:
#user  nobody;
worker_processes  1;

#error_log  logs/error.log;
#error_log  logs/error.log  notice;
#error_log  logs/error.log  info;

#pid        logs/nginx.pid;


events {
    worker_connections  1024;
}


http {
    include       mime.types;
    default_type  application/octet-stream;

    #log_format  main  '$remote_addr - $remote_user [$time_local] "$request" '
    #                  '$status $body_bytes_sent "$http_referer" '
    #                  '"$http_user_agent" "$http_x_forwarded_for"';

    #access_log  logs/access.log  main;

    sendfile        on;
    #tcp_nopush     on;

    #keepalive_timeout  0;
    keepalive_timeout  65;

    #gzip  on;

    server {
        listen       80;
        server_name  localhost;

        #charset koi8-r;

        #access_log  logs/host.access.log  main;

        location / {
            proxy_pass http://127.0.0.1:8111;
        }

		location ~.(css|js|png)$ {
			root D:/1-software/046-nginx-1.18.0/tomcat_8111/webapps/ROOT;
		}

        #error_page  404              /404.html;

        # redirect server error pages to the static page /50x.html
        #
        error_page   500 502 503 504  /50x.html;
        location = /50x.html {
            root   html;
        }

        # proxy the PHP scripts to Apache listening on 127.0.0.1:80
        #
        #location ~ .php$ {
        #    proxy_pass   http://127.0.0.1;
        #}

        # pass the PHP scripts to FastCGI server listening on 127.0.0.1:9000
        #
        #location ~ .php$ {
        #    root           html;
        #    fastcgi_pass   127.0.0.1:9000;
        #    fastcgi_index  index.php;
        #    fastcgi_param  SCRIPT_FILENAME  /scripts$fastcgi_script_name;
        #    include        fastcgi_params;
        #}

        # deny access to .htaccess files, if Apache's document root
        # concurs with nginx's one
        #
        #location ~ /.ht {
        #    deny  all;
        #}
    }


    # another virtual host using mix of IP-, name-, and port-based configuration
    #
    #server {
    #    listen       8000;
    #    listen       somename:8080;
    #    server_name  somename  alias  another.alias;

    #    location / {
    #        root   html;
    #        index  index.html index.htm;
    #    }
    #}


    # HTTPS server
    #
    #server {
    #    listen       443 ssl;
    #    server_name  localhost;

    #    ssl_certificate      cert.pem;
    #    ssl_certificate_key  cert.key;

    #    ssl_session_cache    shared:SSL:1m;
    #    ssl_session_timeout  5m;

    #    ssl_ciphers  HIGH:!aNULL:!MD5;
    #    ssl_prefer_server_ciphers  on;

    #    location / {
    #        root   html;
    #        index  index.html index.htm;
    #    }
    #}

}
- 观察效果
访问http://127.0.0.1/login.jsp,观察到静动都有的效果
- 观察tomcat日志
再到tomcat的输出日志里观察,就会发现,只访问了jsp, 所有的css,js,png都不会经过 tomcat,而是由nginx自己负责处理了。
7.负载均衡
负载均衡的概念就是当访问量很大的时候,一个 Tomcat 吃不消了,这时候就准备多个 Tomcat,由Nginx按照权重来对请求进行分配,从而缓解单独一个Tomcat受到的压力

- 启动两个tomcat
分别启动tomcat8111和tomcat8222
- 修改nginx.conf
首先增加一个upstream ,用来指向这两个tomcat
upstream tomcat_8111_8222{
	server	127.0.0.1:8111 weight=1;
	server	127.0.0.1:8222 weight=2;
}
然后修改location,反向代理到上述配置。
location / {
	proxy_pass http://tomcat_8111_8222;
}
完整的nginx.conf如下:
#user  nobody;
worker_processes  1;

#error_log  logs/error.log;
#error_log  logs/error.log  notice;
#error_log  logs/error.log  info;

#pid        logs/nginx.pid;


events {
    worker_connections  1024;
}


http {
    include       mime.types;
    default_type  application/octet-stream;

    #log_format  main  '$remote_addr - $remote_user [$time_local] "$request" '
    #                  '$status $body_bytes_sent "$http_referer" '
    #                  '"$http_user_agent" "$http_x_forwarded_for"';

    #access_log  logs/access.log  main;

    sendfile        on;
    #tcp_nopush     on;

    #keepalive_timeout  0;
    keepalive_timeout  65;

    #gzip  on;
	upstream tomcat_8111_8222 {
		server	127.0.0.1:8111	weight=1;
		server	127.0.0.1:8222  weight=2;
	}

    server {
        listen       80;
        server_name  localhost;

        #charset koi8-r;

        #access_log  logs/host.access.log  main;

        location / {
            proxy_pass http://tomcat_8111_8222;
        }

		location ~.(css|js|png)$ {
			root D:/1-software/046-nginx-1.18.0/tomcat_8111/webapps/ROOT;
		}

        #error_page  404              /404.html;

        # redirect server error pages to the static page /50x.html
        #
        error_page   500 502 503 504  /50x.html;
        location = /50x.html {
            root   html;
        }

        # proxy the PHP scripts to Apache listening on 127.0.0.1:80
        #
        #location ~ .php$ {
        #    proxy_pass   http://127.0.0.1;
        #}

        # pass the PHP scripts to FastCGI server listening on 127.0.0.1:9000
        #
        #location ~ .php$ {
        #    root           html;
        #    fastcgi_pass   127.0.0.1:9000;
        #    fastcgi_index  index.php;
        #    fastcgi_param  SCRIPT_FILENAME  /scripts$fastcgi_script_name;
        #    include        fastcgi_params;
        #}

        # deny access to .htaccess files, if Apache's document root
        # concurs with nginx's one
        #
        #location ~ /.ht {
        #    deny  all;
        #}
    }


    # another virtual host using mix of IP-, name-, and port-based configuration
    #
    #server {
    #    listen       8000;
    #    listen       somename:8080;
    #    server_name  somename  alias  another.alias;

    #    location / {
    #        root   html;
    #        index  index.html index.htm;
    #    }
    #}


    # HTTPS server
    #
    #server {
    #    listen       443 ssl;
    #    server_name  localhost;

    #    ssl_certificate      cert.pem;
    #    ssl_certificate_key  cert.key;

    #    ssl_session_cache    shared:SSL:1m;
    #    ssl_session_timeout  5m;

    #    ssl_ciphers  HIGH:!aNULL:!MD5;
    #    ssl_prefer_server_ciphers  on;

    #    location / {
    #        root   html;
    #        index  index.html index.htm;
    #    }
    #}
}
- 重启nginx并访问
使用命令 nginx -s reload 重启,然后使劲访问http://127.0.0.1/login.jsp
此时就可以观察到对jsp的访问,被分配到了不同的 Tomcat上

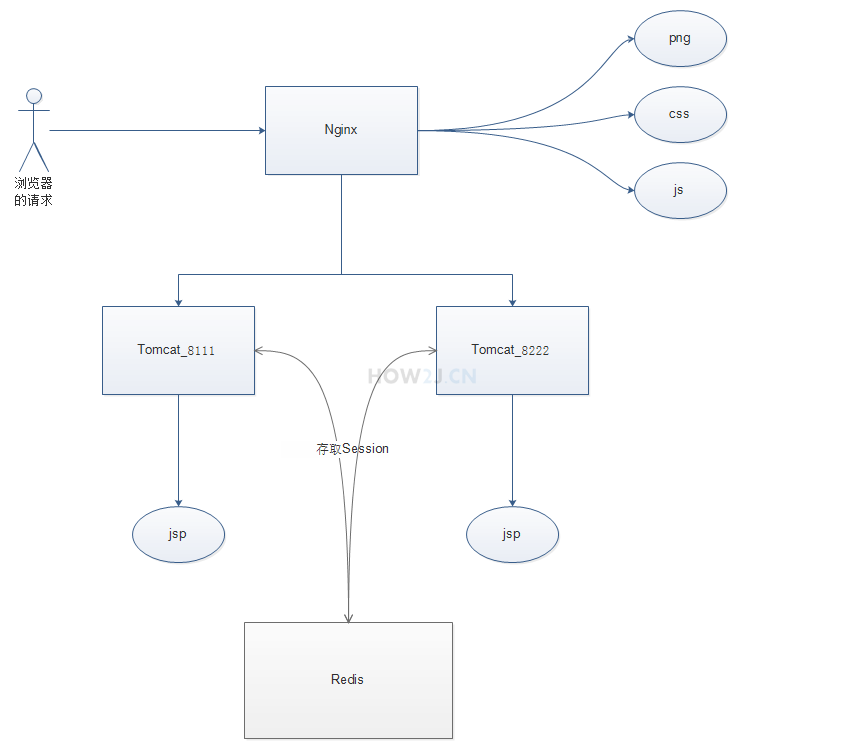
8.session共享
通过负载均衡课程,我们可以把请求分发到不同的 Tomcat 来缓解服务器的压力,但是这里存在一个问题: 当同一个用户第一次访问tomcat_8111 并且登录成功, 而第二次访问却被分配到了tomcat_8222, 这里并没有记录他的登陆状态,那么就会呈现未登录状态了,严重伤害了用户体验。
- redis+tomcat-sessoin-manager
Redis是什么呢?说简单点就是个独立的Hashmap,用来存放键值对的。
这样当tomcat1需要保存session值的时候,就可以把它放在Redis上,需要取的时候,也从Redis上取。
那么考虑这个情景:
1. 用户提交账号密码的行为被分配在了tomcat8111上,登陆信息被存放在redis里。
2. 当用户第二次访问的时候,被分配到了tomcat8222上
3. 那么此时tomcat8222就会从redis去获取相关信息,一看有对应信息,那么就会呈现登陆状态。
- 具体操作步骤
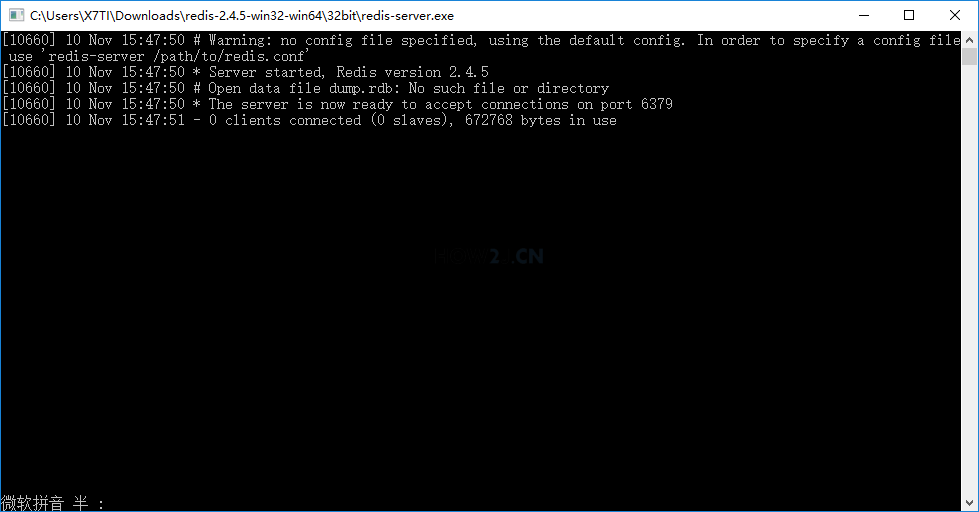
1. 启动redis
2. 给两个tomcat使用jar包
3. 配置两个tomcat
4. 重启两个tomcat
5. 测试
1.启动redis
1)对应启动redis-server.exe程序
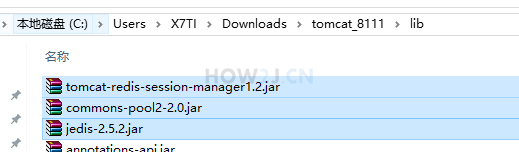
2.jar包
解压tomcat-redis.rar,下载解压后,放在tomat8111的lib目录下。注:不要放在webapp里面去了哦
下载解压后,放在tomat8222的lib目录下。注:不要放在webapp里面去了哦
两个tomcat都要放
3.修改context.xml(两个Tomcat都要放)
<Valve className="com.orangefunction.tomcat.redissessions.RedisSessionHandlerValve" />
<Manager className="com.orangefunction.tomcat.redissessions.RedisSessionManager"
host="127.0.0.1"
port="6379"
database="0"
maxInactiveInterval="60" />
完整context.xml代码如下:
<?xml version='1.0' encoding='utf-8'?>
<!--
  Licensed to the Apache Software Foundation (ASF) under one or more
  contributor license agreements.  See the NOTICE file distributed with
  this work for additional information regarding copyright ownership.
  The ASF licenses this file to You under the Apache License, Version 2.0
  (the "License"); you may not use this file except in compliance with
  the License.  You may obtain a copy of the License at

      http://www.apache.org/licenses/LICENSE-2.0

  Unless required by applicable law or agreed to in writing, software
  distributed under the License is distributed on an "AS IS" BASIS,
  WITHOUT WARRANTIES OR CONDITIONS OF ANY KIND, either express or implied.
  See the License for the specific language governing permissions and
  limitations under the License.
-->
<!-- The contents of this file will be loaded for each web application -->
<Context>

    <!-- Default set of monitored resources -->
    <WatchedResource>WEB-INF/web.xml</WatchedResource>

    <!-- Uncomment this to disable session persistence across Tomcat restarts -->
    <!--
    <Manager pathname="" />
    -->

    <!-- Uncomment this to enable Comet connection tacking (provides events
         on session expiration as well as webapp lifecycle) -->
    <!--
    <Valve className="org.apache.catalina.valves.CometConnectionManagerValve" />
    -->

  <Valve className="com.orangefunction.tomcat.redissessions.RedisSessionHandlerValve" />
  <Manager className="com.orangefunction.tomcat.redissessions.RedisSessionManager"
   host="127.0.0.1"
   port="6379"
   database="0"
   maxInactiveInterval="60" />

</Context>
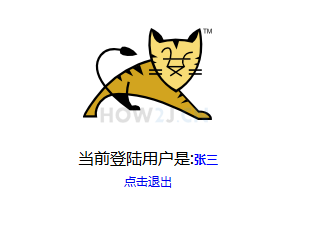
4.测试访问tomcat8111
Redis session共享机制和nginx其实无关,是发生在nginx之后的事情,所以直接访问login.jsp,然后登陆,并观察到已登陆状态
http://127.0.0.1:8111/login.jsp

5.测试访问tomcat8222
http://127.0.0.1:8222/login.jsp