swagger
Swagger 是一个规范和完整的框架,用于生成、描述、调用和可视化 RESTful 风格的 Web 服务。
-
号称世界上最流行的Api框架
-
RestFul Api文档在线自动生成工具=》Api文档与Api定义同步更新
-
直接运行,可以在线测试API接口
-
支持多种语言
作用:
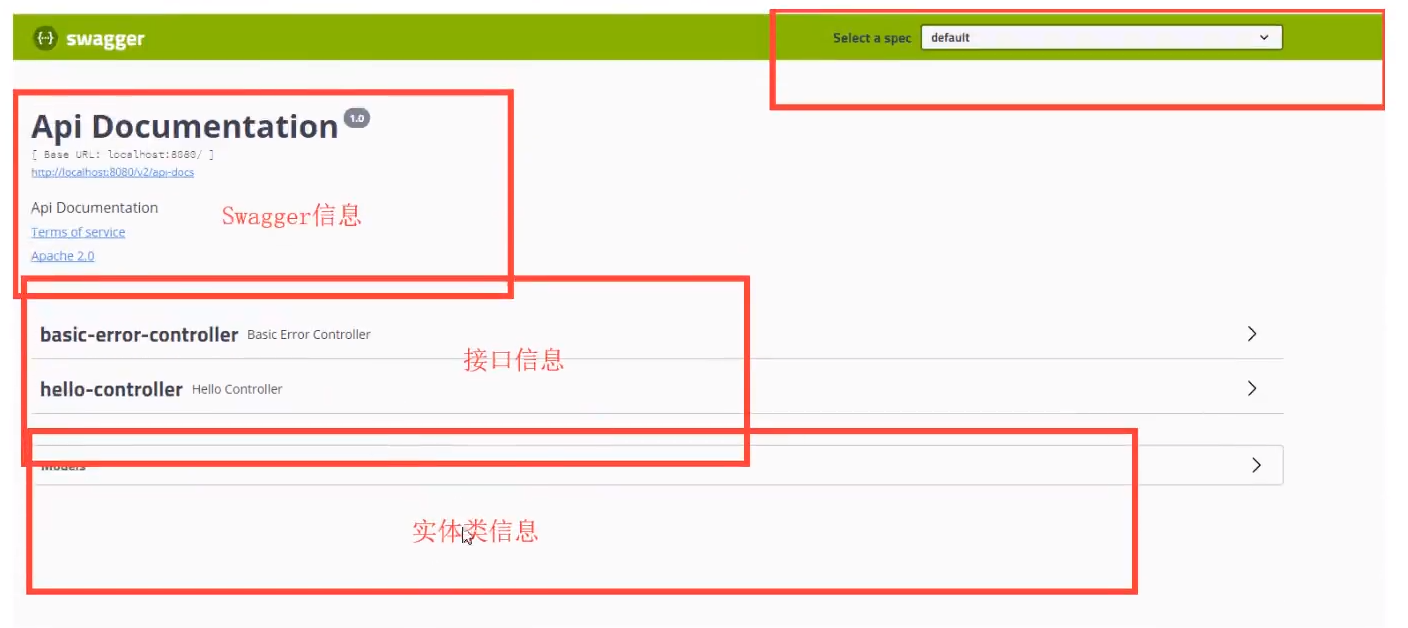
1.接口的文档在线自动生成。
2.功能测试。
在项目中使用Swagger需要springbox;
-
swagger2
-
ui
Springboot集成Swagger
-
新建Springboot项目
-
导入相关依赖
<!-- https://mvnrepository.com/artifact/io.springfox/springfox-swagger2 -->
<dependency>
<groupId>io.springfox</groupId>
<artifactId>springfox-swagger2</artifactId>
<version>2.9.2</version>
</dependency>
<!-- https://mvnrepository.com/artifact/io.springfox/springfox-swagger-ui -->
<dependency>
<groupId>io.springfox</groupId>
<artifactId>springfox-swagger-ui</artifactId>
<version>2.9.2</version>
</dependency>
-
编写一个hello项目
-
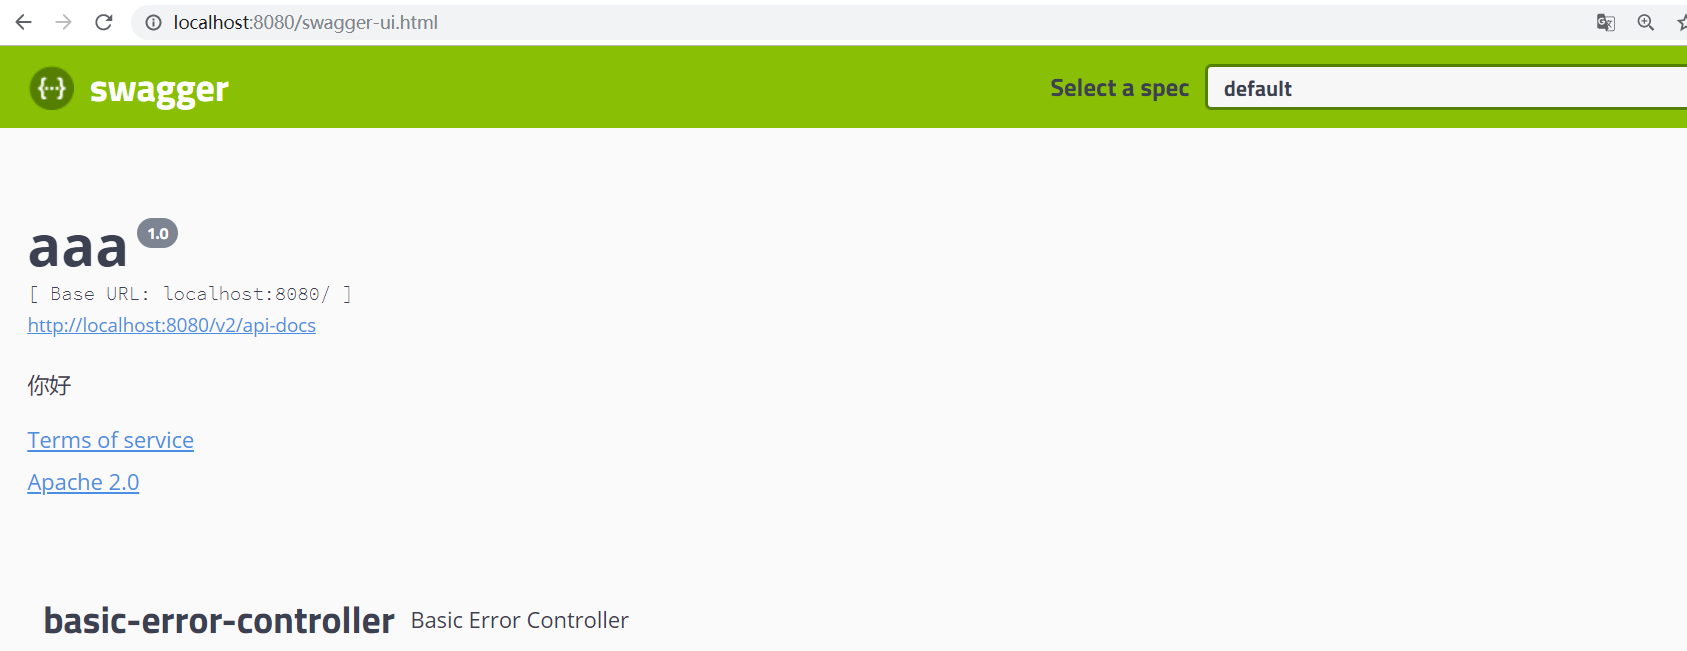
配置Swagger==》Config
配置Swagger
Swagger的bean实例Docket;
SwaggerConfig.java
import org.springframework.context.annotation.Bean;
import org.springframework.context.annotation.Configuration;
import springfox.documentation.service.ApiInfo;
import springfox.documentation.service.Contact;
import springfox.documentation.spi.DocumentationType;
import springfox.documentation.spring.web.plugins.Docket;
import springfox.documentation.swagger2.annotations.EnableSwagger2;
import java.util.ArrayList;
运行访问
Swagger配置扫描接口
Docket.select()
SwaggerConfig.java
import org.springframework.context.annotation.Bean;
import org.springframework.context.annotation.Configuration;
import springfox.documentation.builders.PathSelectors;
import springfox.documentation.builders.RequestHandlerSelectors;
import springfox.documentation.service.ApiInfo;
import springfox.documentation.service.Contact;
import springfox.documentation.spi.DocumentationType;
import springfox.documentation.spring.web.plugins.Docket;
import springfox.documentation.swagger2.annotations.EnableSwagger2;
import java.util.ArrayList;
配置是否启动Swagger
public class SwaggerConfig {
//配置了Swagger的Docket的bean实例
如果我只希望我的Swagger在生产环境中使用,在发布的时候不用;
-
判断是不是生产环境 flag
-
enable注入(flag)
application.properties
spring.profiles.active=dev
application-dev.properties
server.port=8081
application-pro.properties
server.port=8082
因为 Profiles profiles = Profiles.of("dev", "test");指定了“dev”和“test”环境;
这样使用8081端口访问就可以访问,8082端口不能访问;
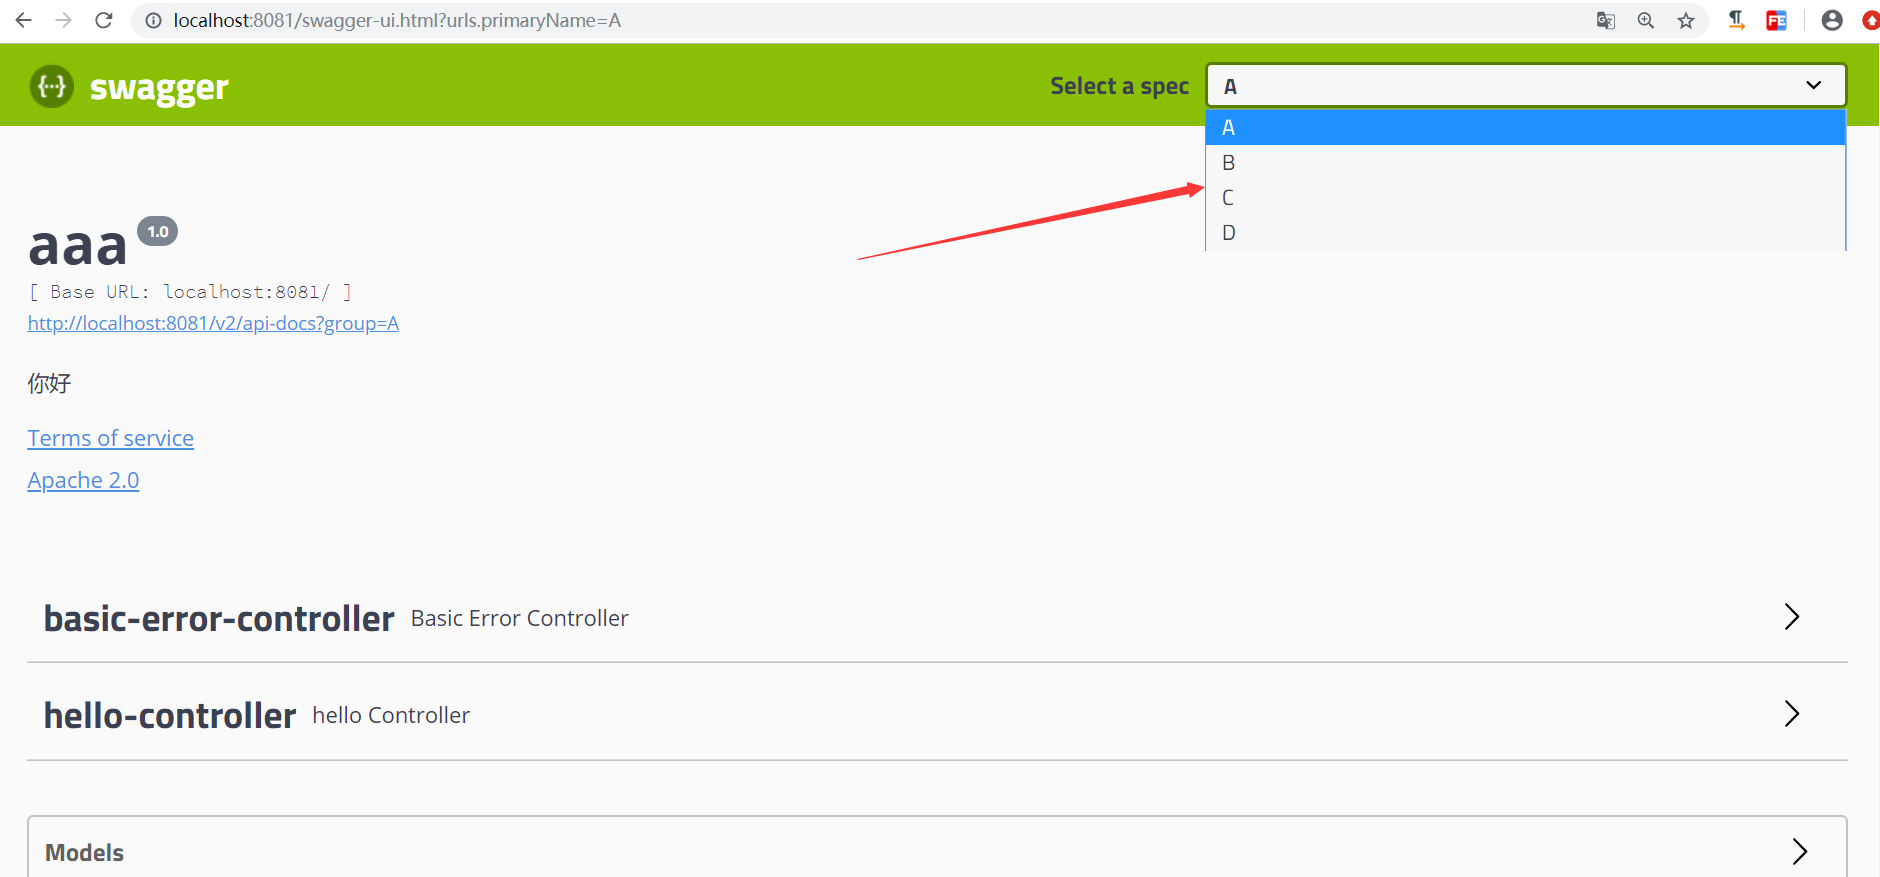
配置API文档的分组
如何配置多个分组,多个Docker实例即可,可以实现多人协同开发
分组显示
实体类注释
//@Api(注释)
//@ApiModel("用户实体类")
public class User{
controller
//@ApiOpertion("hello控制类")//Opertion接口,放在方法上,给方法添加注解
总结:
-
-
接口文档实时更新
-
可以在线测试
注意:在项目正式发布的时候关闭Swagger,安全,减少内存消耗;