android的视图分为两类,一类是布局,另一个类是控件
一、LinearLayout(线性布局)
最常用布局之一,线性布局的特性是每添加一个控件默认会在上个控件的下面占一行。
<LinearLayout xmlns:android="http://schemas.android.com/apk/res/android"
    xmlns:tools="http://schemas.android.com/tools"
    android:id="@+id/LinearLayout1"
<!-- 布局的宽度属性有:”fill_parent”,”wrap_content”,”match_parent” -->
<!-- fill_parent和match_parent 将强制性地使视图扩展至父元素大小   -->
<!-- wrap_content 将完整显示其内部的文本和图像   -->
    android:layout_width="match_parent"
    android:layout_height="match_parent"
<!-- vertical 垂直 ,horizontal 水平  -->
    android:orientation="vertical"
<!-- 子元素在父元素的对齐方式-->
   android:gravity="bottom|right"
>
android:layout_gravity和android:gravity区别
layout_gravity表示它在上一级界面的位置
gravity表示它里面的子视图的位置
二、RelativeLayout(相对布局)
最常用布局之一,相对布局的特性是添加的空间默认都在左上角一个覆盖一个。新添加的控件一定要在属性里指定其他控件相对的位置。
三、TableLayout(表格布局)
特点:一个 <TableRow>一行 里面加一个控件多一列
四、FrameLayout(帧布局)
特点:控件间的覆盖。应用场景比如视频播放器暂停时屏幕中间出现的按钮。
五、GridLayout(网格布局)
android4.0以后引入。比表格布局使用更加方便
1)可以自己设置布局中组件的排列方式
2)可以自定义网格布局有多少行,多少列
3)可以直接设置组件位于某行某列
4)可以设置组件横跨几行或者几列
典型案例,如计算器
六、AbsoluteLayout(绝对布局)
特点:能够像winform一样拖拉到屏幕上,所见即所得。但是分辨率一变,控件的大小和间距就会发生变化。
TextView
把控件拖入手机,右键go to XML 会看到如下代码
    <TextView
        android:text="TextView"
        android:layout_width="wrap_content"
        android:layout_height="wrap_content"
        android:layout_marginTop="14dp"
        android:id="@+id/textView2"
        android:layout_below="@+id/textView"
        android:layout_alignParentStart="true" />
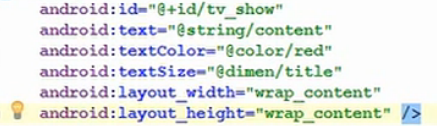
android:id 控件唯一标识
android:text 显示的文本信息
android:layout_width 控件宽度
android:layout_height 控件高度
宽和高有三种赋值方式:
1.可以设置固定值 如 100dp
2.也可以动态变化   "wrap_content"
3.可以适配父布局的宽和高   match_parent  fill_parent(老版本)


dpi =像素密度 ----每英寸上所能打印的点数--  英寸就是一条线
如 dpi 160  1英寸长的线上有160个点   dpi160是标准屏幕


px=像素
dp(dip)=是设备独立像素

在标准dpi的前提下 1dp=1px  在dpi 320的前提下 1dp=2px
总结
相同px  像素密度越高的屏幕,看起来越短
相同dp  不同的像素密度,看起来一样长
引用 @
android:lines="5" 显示5行
强制单行属性