接上一篇内容,对之前的配置文件做一些修改。
在web.xml中加入编码格式过滤器,从而就可以正常接收中文字符。
 1     <filter>
 2         <filter-name>characterEncodingFilter</filter-name>
 3         <filter-class>org.springframework.web.filter.CharacterEncodingFilter</filter-class>
 4         <init-param>
 5             <param-name>encoding</param-name>
 6             <param-value>UTF-8</param-value>
 7         </init-param>
 8     </filter>
 9
10     <filter-mapping>
11         <filter-name>characterEncodingFilter</filter-name>
12         <url-pattern>/*</url-pattern>
13     </filter-mapping>
在applicationContext.xml的权限配置部分,加入一条:
/config/**=anon
先将配置用户角色权限的路径设置为可匿名访问。
然后还需要对DatabaseRealm中的代码稍加修改。
DatabaseRealm.java
 1 public class DatabaseRealm extends AuthorizingRealm {
 2     @Autowired
 3     private RoleService roleService;
 4     @Autowired
 5     private PermissionService permissionService;
 6     @Autowired
 7     private UserService userService;
 8
 9     protected AuthorizationInfo doGetAuthorizationInfo(PrincipalCollection principals) {
10         //能进入到这里,表示账号已经通过认证了
11         String username = (String) principals.getPrimaryPrincipal();
12         //通过Dao获取角色和权限
13 //       Set<String> permissions = new Dao().listPermissions(username);
14 //       Set<String> roles = new Dao().listRoles(username);
15         Set<String> roleNames = roleService.listRoleNames(username);
16         Set<String> permisionNames = permissionService.listPermissions(username);
17         //授权对象
18         SimpleAuthorizationInfo sai =  new SimpleAuthorizationInfo();
19         System.out.println("roles->:"+roleNames);
20         System.out.println("perms->"+permisionNames);
21         //把通过Dao获取到的角色和权限都放进去
22         sai.setStringPermissions(permisionNames);
23         sai.setRoles(roleNames);
24         return sai;
25
26     }
27
28     protected AuthenticationInfo doGetAuthenticationInfo(AuthenticationToken token) throws AuthenticationException {
29         //获取账号密码
30         UsernamePasswordToken upt = (UsernamePasswordToken) token;
31         String username = token.getPrincipal().toString();
32         String password = new String(upt.getPassword());
33         String encryptPassword = "";
34         //获取数据库中的密码
35 //        User user = new Dao().getUser(username);
36 //        System.out.println("进到这里了:databaserealm");
37         User user = userService.getByName(username);
38         if(user != null) {
39             String passwordInDB = user.getPassword();
40             String salt = user.getSalt();
41             //将传入的密码进行加盐
42             encryptPassword = new SimpleHash("md5",password,user.getSalt(),2).toString();
43             System.out.println("输入的密码:"+encryptPassword);
44             System.out.println("passwordInDB"+user.getPassword());
45         }
46
47         //如果为空就是账号不存在,如果不相同就是密码错误,但是都抛出AuthenticationException,而不抛出具体错误原因,以防给破解者提供帮助信息
48         if (null == user || !encryptPassword.equals(user.getPassword())) {
49             throw new AuthenticationException();
50         }
51         //认证信息里存放账号和密码,getName()是当前Realm的继承方法,通常返回当前类名:DatabaseRealm
52         SimpleAuthenticationInfo sai = new SimpleAuthenticationInfo(username,password,getName());
53         return sai;
54     }
55 }
将之前写的index.jsp稍加修改:
 1 <%@ page language="java" contentType="text/html; UTF-8" pageEncoding="UTF-8" isELIgnored="false" %>
 2 <%@ taglib prefix="c" uri="http://java.sun.com/jsp/jstl/core" %>
 3 <head>
 4     <link rel="stylesheet" href="static/css/style.css"/>
 5 </head>
 6
 7 <body>
 8 <div class="workingroom">
 9     <div class="loginDiv">
10         ${request.contextPath}
11         <c:if test="${!empty subject.principal}">
12             <span>你好!${subject.principal}</span>
13             <a href="doLogout">退出</a>
14         </c:if>
15         <c:if test="${empty subject.principal}">
16             <a href="login">登录</a>
17         </c:if>
18     </div>
19     <ul>
20         <li><a href="listProduct">查看产品</a></li>
21         <li><a href="deleteProduct">删除产品</a></li>
22         <li><a href="deleteOrder">删除订单</a></li>
23         <li><a href="config/listUser">用户管理</a></li>
24     </ul>
25
26 </div>
27 </body>
重启服务器,访问:http://localhost:8080/shiro/index

到这里为止,我们的权限控制依然是由@RequiresRole,@RequiresPermission控制的,接下来对这个部分进行改造,通过动态配置url的方式完成权限控制。
1.首先去掉之前在pageController中添加的权限角色注解
2.在PermissionService中增加两个方法
needInterceptor,listPermissionURLs
在PermissionServiceImpl中的实现:
 @Override
    public boolean needInterceptor(String requestURI) {
        List<Permission> permissions = list();
        for (Permission permission : permissions) {
            if(permission.getUrl().equals(requestURI))
                return true;
        }
        return false;
    }

    @Override
    public Set<String> listPermissionURLs(String username) {
        List<Role> roles = roleService.listRoles(username);
        Set<String> urls = new HashSet<>();
        List<RolePermission> rolePermissions = new ArrayList<>();
        for (Role role : roles) {
            RolePermissionExample example = new RolePermissionExample();
            example.createCriteria().andRidEqualTo(role.getId());
            List<RolePermission> temp = rolePermissionMapper.selectByExample(example);
            rolePermissions.addAll(temp);
        }
        for (RolePermission rolePermission : rolePermissions) {
            Permission permission = permissionMapper.selectByPrimaryKey(rolePermission.getPid());
            urls.add(permission.getUrl());
        }
        return urls;
    }
3.URLPathMatchingFilter.java
PathMatchingFilter是Shiro的内置过滤器,我们自定义一个URLPathMathingFilter继承这个过滤器。
基本思路如下:
1.如果没有登录,跳转到登录页面
2.如果访问的路径不在权限系统中所维护,允许访问
3.如果用户所属的角色没有当前路径的权限,不允许访问,跳转到/unauthorized,否则允许访问。
 1 public class URLPathMatchingFilter extends PathMatchingFilter {
 2     @Autowired
 3     PermissionService permissionService;
 4     @Override
 5     protected boolean onPreHandle(ServletRequest request, ServletResponse response, Object mappedValue) throws Exception {
 6         String requestURI = getPathWithinApplication(request);
 7         //判断是否登录
 8         Subject subject = SecurityUtils.getSubject();
 9         if (!subject.isAuthenticated()) {
10             //如果没有登录,跳转到登录页面
11             WebUtils.issueRedirect(request, response, "/login");
12             return false;
13         }
14         //如果已经登录,判断是否是在Permission表中维护的路径
15        if(!permissionService.needInterceptor(requestURI)) {
16            //如果不是的话,允许访问
17            return true;
18        } else {
19            //判断登录用户的角色是否拥有该路径的权限
20            boolean hasPermission = false;
21            String username = subject.getPrincipal().toString();
22            Set<String> urls = permissionService.listPermissionURLs(username);
23            for (String url : urls) {
24              if(url.equals(requestURI)){
25                  hasPermission = true;
26                  break;
27              }
28            }
29            if(hasPermission) {
30                return true;
31            } else {
32                //权限不足
33                UnauthorizedException ex = new UnauthorizedException("当前用户没有权限访问路径:" + requestURI);
34                WebUtils.issueRedirect(request,response,"/authorized");
35                return false;
36            }
37        }
38     }
39 }
在Spring配置文件中声明URLPathMatchingFilter过滤器:
1 <!--路径匹配过滤器--> 2 <bean id="urlfilter" class="com.vi.filter.URLPathMatchingFilter"/>
在shiro过滤器工厂类中配置这个过滤器,设置过滤规则为所有url
1  <property name="filters">
2             <util:map>
3                 <entry key="logout" value-ref="logoutFilter"/>
4                 <entry key="url" value-ref="urlfilter"/>
5             </util:map>
6         </property>
1 public class URLPathMatchingFilter extends PathMatchingFilter { 2 @Autowired 3 PermissionService permissionService; 4 @Override 5 protected boolean onPreHandle(ServletRequest request, ServletResponse response, Object mappedValue) throws Exception { 6 String requestURI = getPathWithinApplication(request); 7 System.out.println("debug:"+requestURI); 8 //判断是否登录 9 Subject subject = SecurityUtils.getSubject(); 10 if (!subject.isAuthenticated()) { 11 //如果没有登录,跳转到登录页面 12 WebUtils.issueRedirect(request, response, "/login"); 13 return false; 14 } 15 //如果已经登录,判断是否是在Permission表中维护的路径 16 if(!permissionService.needInterceptor(requestURI)) { 17 //如果不是的话,允许访问 18 return true; 19 } else { 20 //判断登录用户的角色是否拥有该路径的权限 21 boolean hasPermission = false; 22 String username = subject.getPrincipal().toString(); 23 Set<String> urls = permissionService.listPermissionURLs(username); 24 for (String url : urls) { 25 if(url.equals(requestURI)){ 26 hasPermission = true; 27 break; 28 } 29 } 30 if(hasPermission) { 31 return true; 32 } else { 33 //权限不足 34 UnauthorizedException ex = new UnauthorizedException("当前用户没有权限访问路径:" + requestURI);
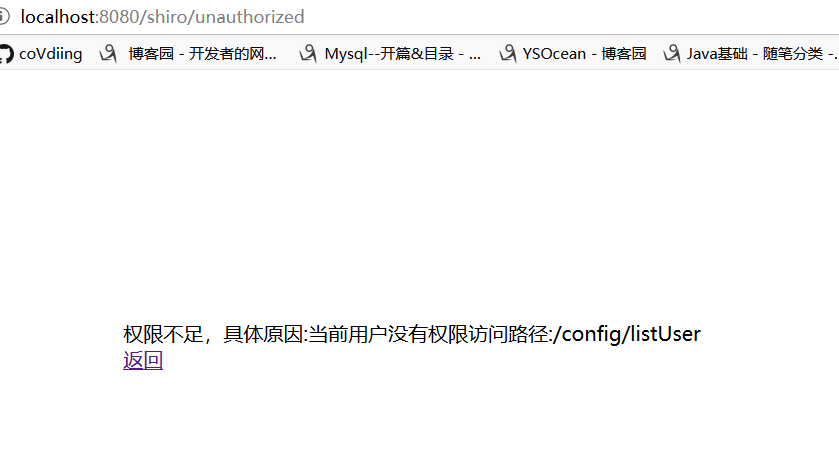
subject.getSession().setAttribte("ex",ex); 35 WebUtils.issueRedirect(request,response,"/unauthorized"); 36 return false; 37 } 38 } 39 } 40 }
完成以后,重启tomcat,接下来就可以动态的对访问权限进行控制了。
我们可以把用户管理,角色管理,权限管理所对应的路径全部赋给admin。这样角色不是admin的就不能够访问了。