Ansible简介
Ansible是一个开源部署工具
开发语言:python
特点:SSH协议通讯,全平台,无需编译,模块化部署管理
作用:推送Playbook进行远程节点快速部署
Ansible与Chef,Saltstack的区别
Chef
Ruby语言编写,C/S架构,配置需要Git依赖,Recipe脚本编写规范,需要编程经验
Saltstack
Python语言编写,C/S架构,模块化配置管理,YAML脚本编写规范,适合大规模集群部署
Ansible
Python语言编写,无Client,模块化配置管理,Playbook脚本编写规范,易于上手,适合中小规模快速部署
Ansible优势
ansible优势
轻量级无客户端(Agentless)
开源免费,学习成本低,快速上手
使用Playbook作为核心配置架构,同一的脚本格式批量化部署
完善的模块化扩展,支持目前主流的开发场景
强大的稳定性和兼容性(开发语言为系统默认自带的python,通讯工具为系统默认自带的ssh)
活跃的官方社区问题讨论,方便Trubleshooting与DEBUG问题
Ansible配合virtualenv安装配置
Ansible的两种安装模式(Centos7)
1.yum包管理安装
# yum -y install ansible
2.Git源代码安装【推荐】
# git clone https://github.com/ansible/ansible.git
Ansible2.5 + Python3.6安装步骤(Centos7)
准备工作


安装步骤
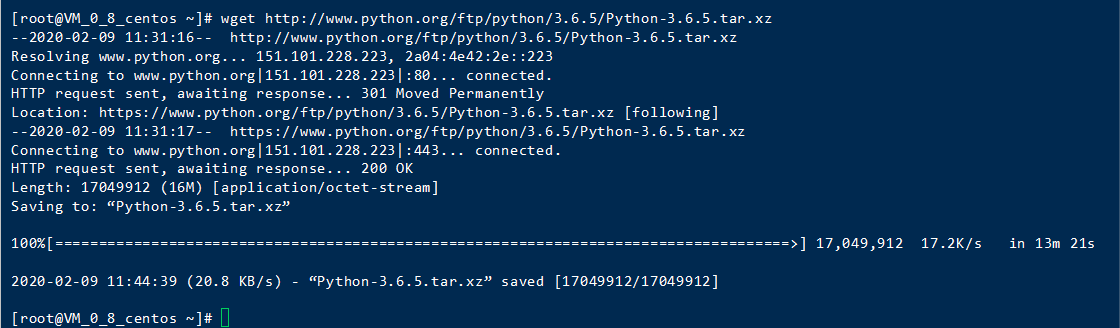
1.预先安装Python3.6版本
# wget http://www.python.org/ftp/python/3.6.5/Python-3.6.5.tar.xz
#tar xf Python-3.6.5.tar.xz

# yum -y install zlib-devel bzip2-devel openssl-devel ncurses-devel sqlite-devel readline-devel tk-devel gdbm-devel db4-devel libpcap-devel xz-devel
# ./configure --prefix=/usr/local/python3

# make && make install

# which pip3.6

这里没有找到pip3.6的路径,需要做对应的软链接

2.安装virtualenv
# pip install virtualenv

3.创建Ansible账户并安装python3.6版本virtualenv实例
# useradd deploy && su - deploy

# virtualenv -p python3.6 .py3-a2.5-env

# yum -y install git nss curl # 检查是否安装了git,没有则切换到root安装
4.Git源代码安装ansible2.5
# cd /home/deploy/.py3-a2.5-env
# git clone https://github.com/ansible/ansible.git

5.加载python3.6 virtualenv环境
# source /home/deploy/.py3-a2.5-env/bin/activate

# cd ansible && git checkout stable-2.5

6.安装ansible依赖包
# pip install paramiko PyYAML jinja2

7.在python3.6虚拟环境下加载ansible2.5
# source /home/deploy/.py3-a2.5-env/ansible/hacking/env-setup -q

8.验证ansible2.5
# ansible --version

Ansible playbooks入门和编写规范
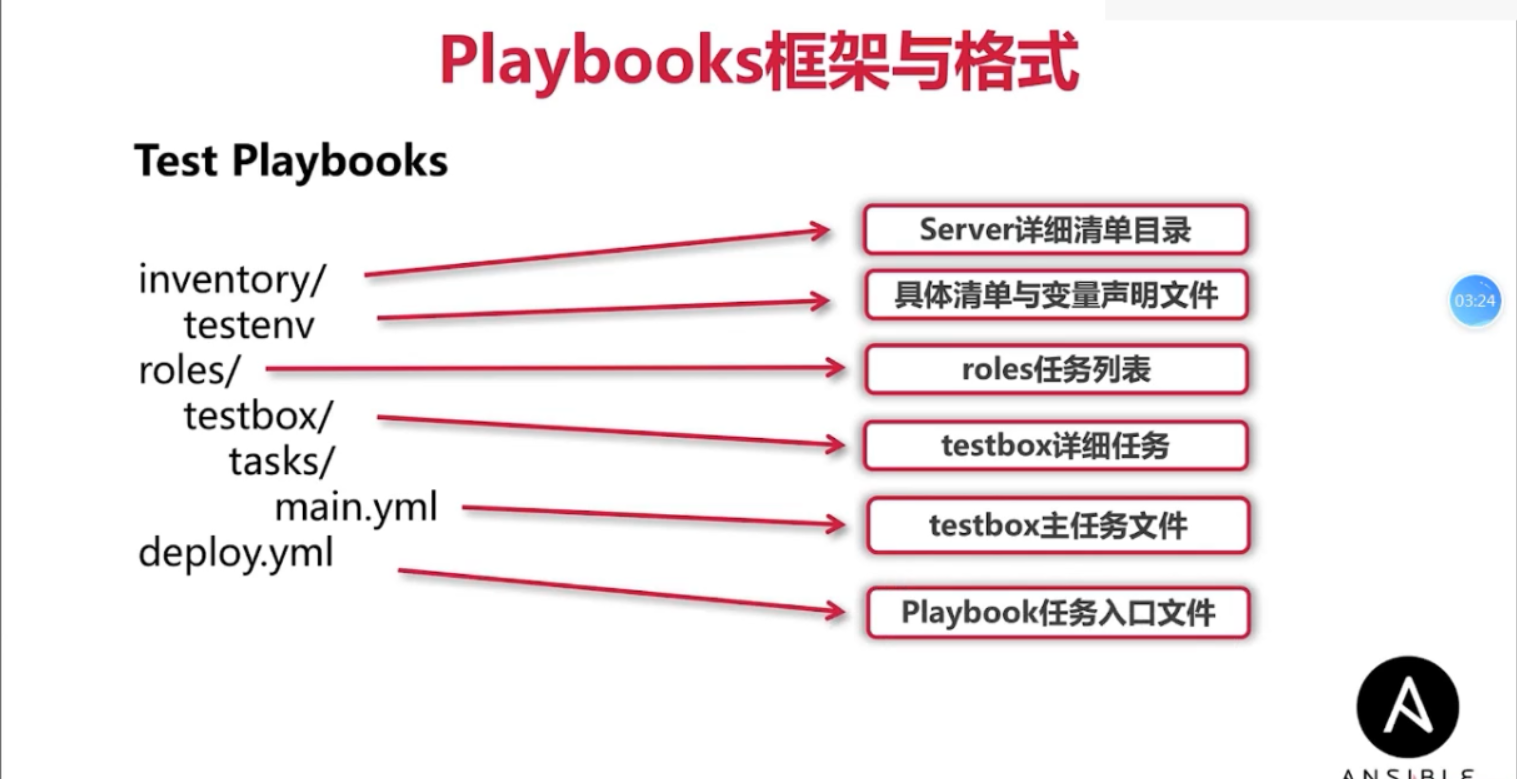
playbooks框架及格式
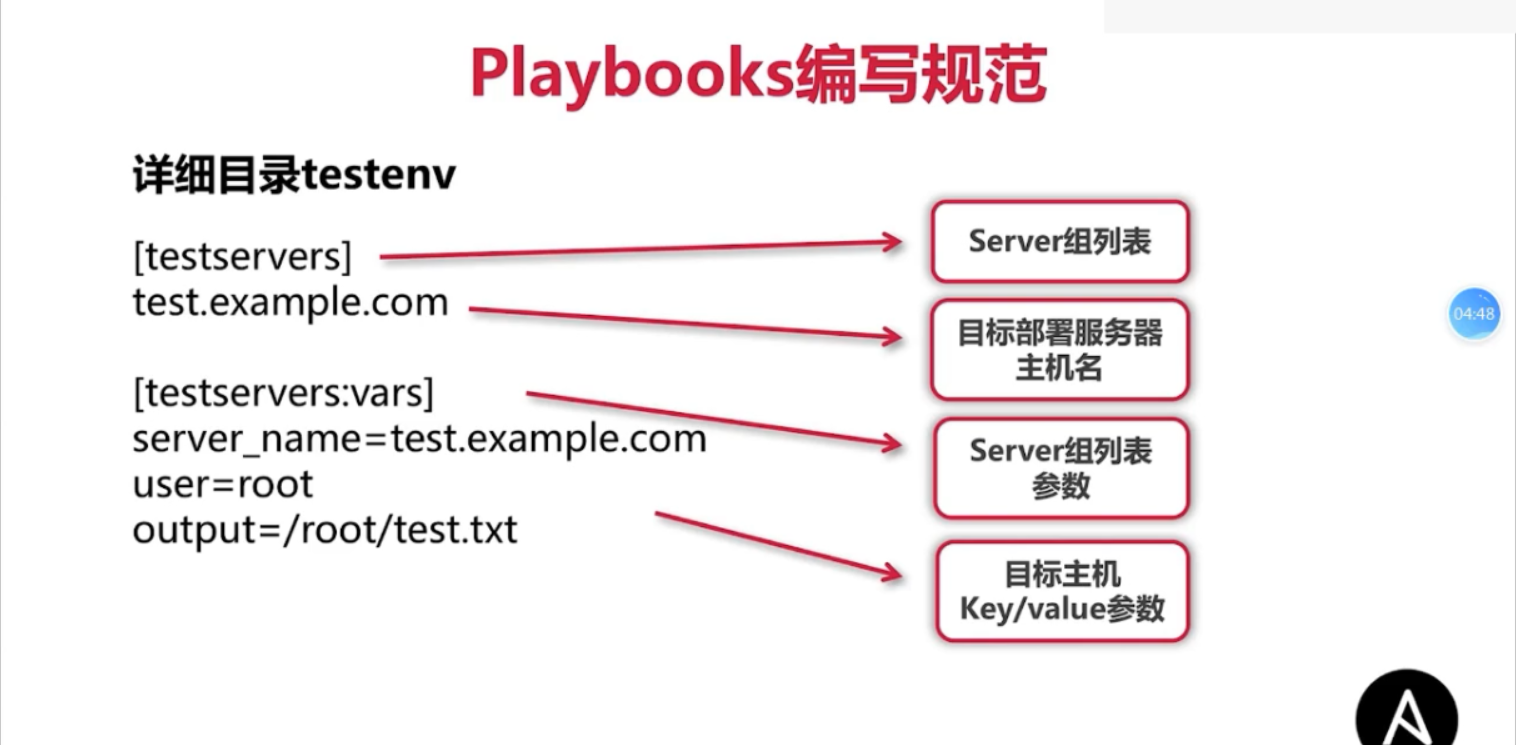
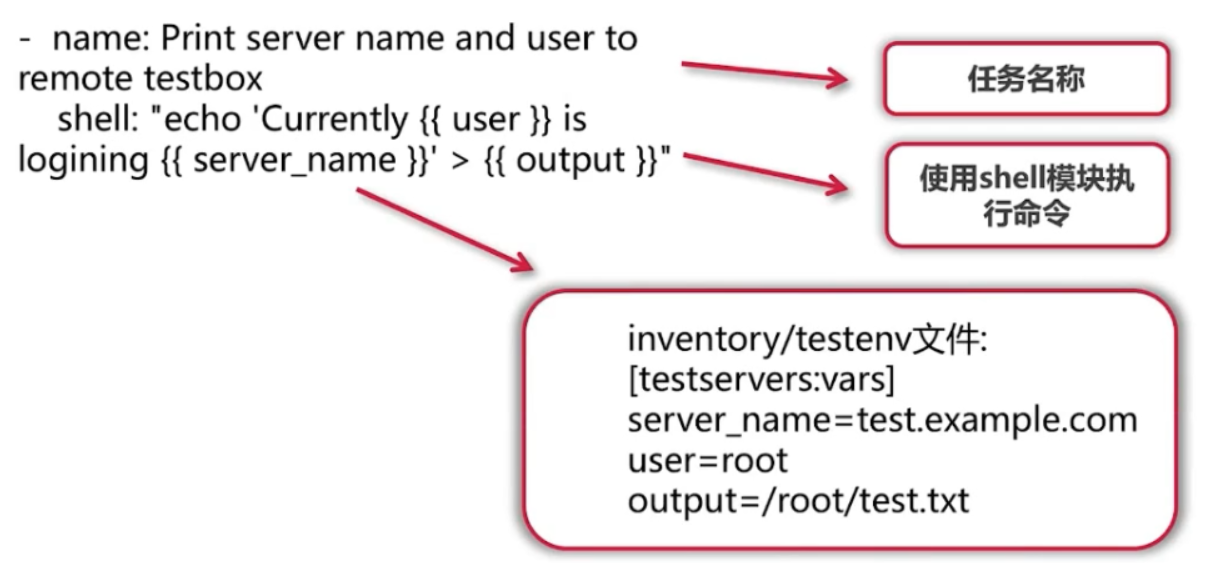
playbooks编写规范
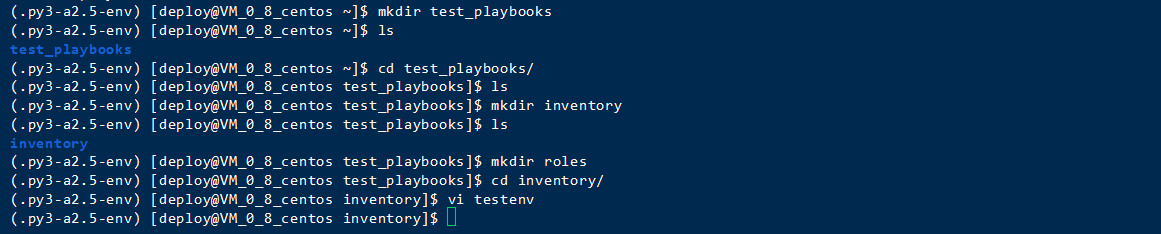

主任务文件main.yml

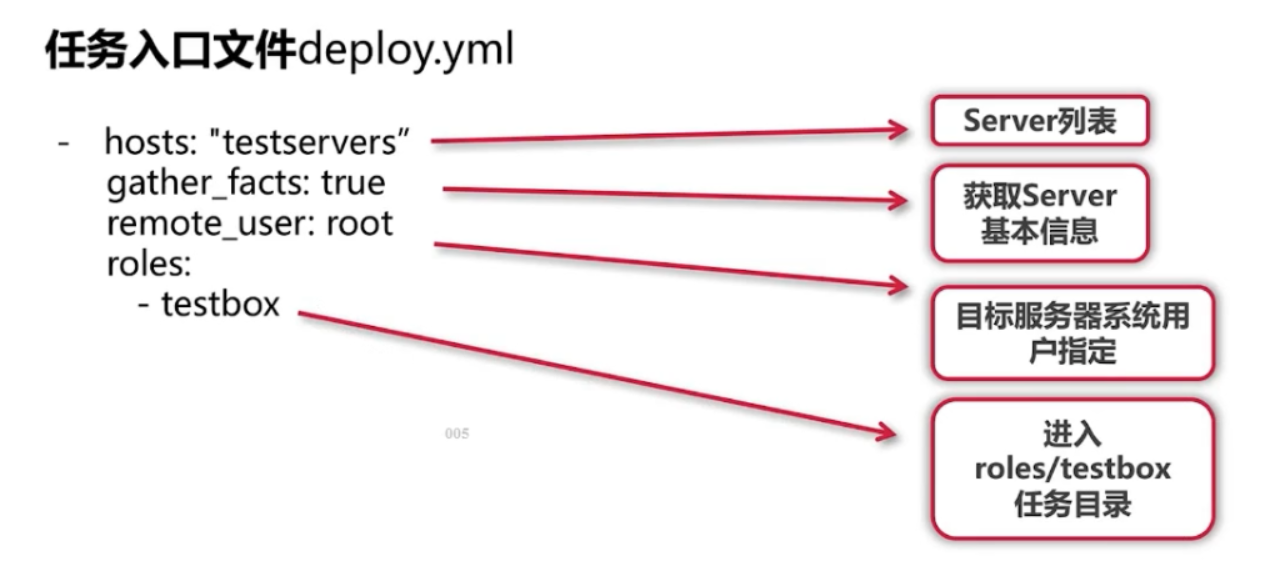
任务入口文件deploy.yml

SSH免秘钥认证
Ansible服务器端创建SSH本地秘钥
# ssh-keygen -t rsa
Ansible服务器端建立与目标部署机器的秘钥认证
# ssh-copy-id -i /home/deploy/.ssh/id_rsa.pub root@test.example.com

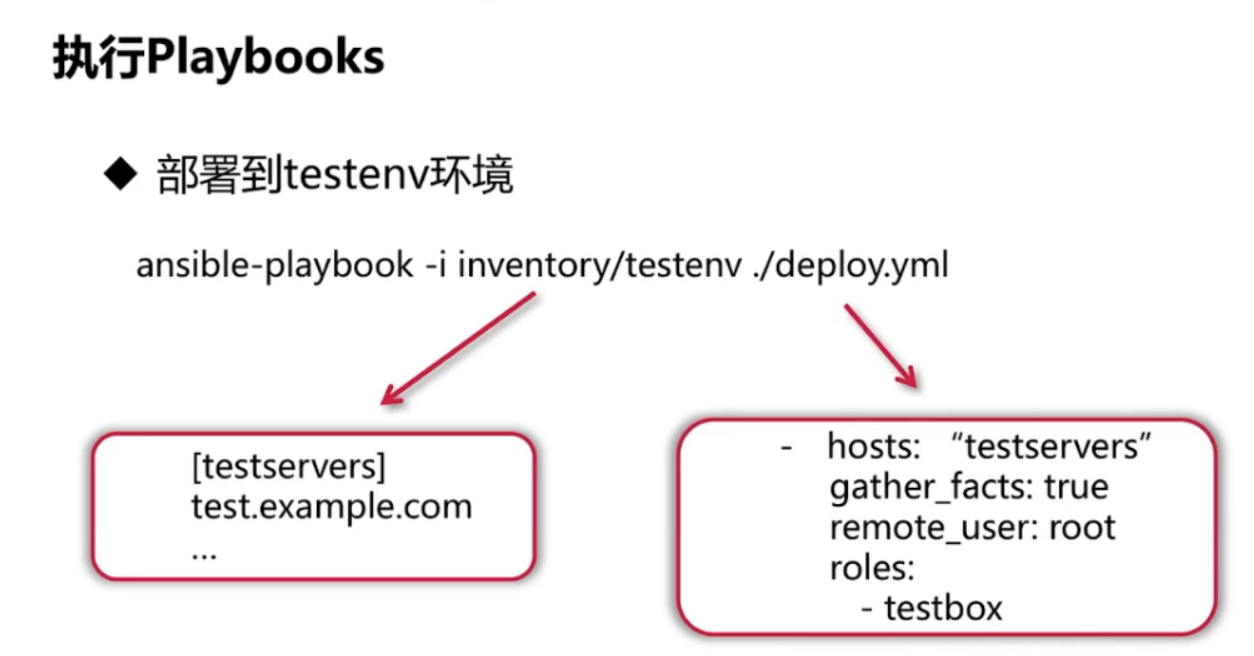
执行playbooks
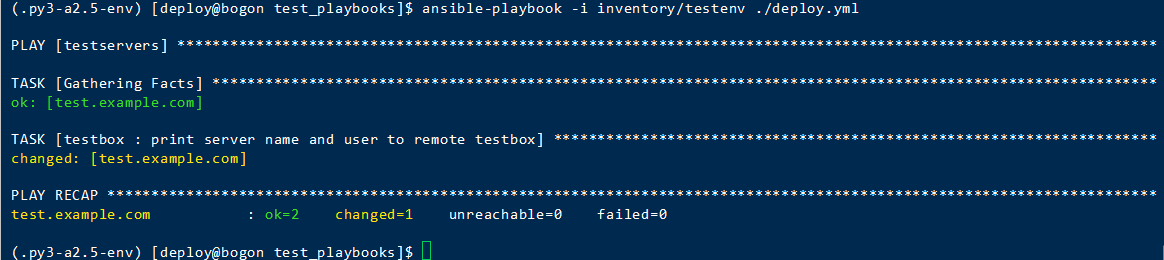
登录test.example.com查看对应的文件

Ansible playbooks常用模块介绍
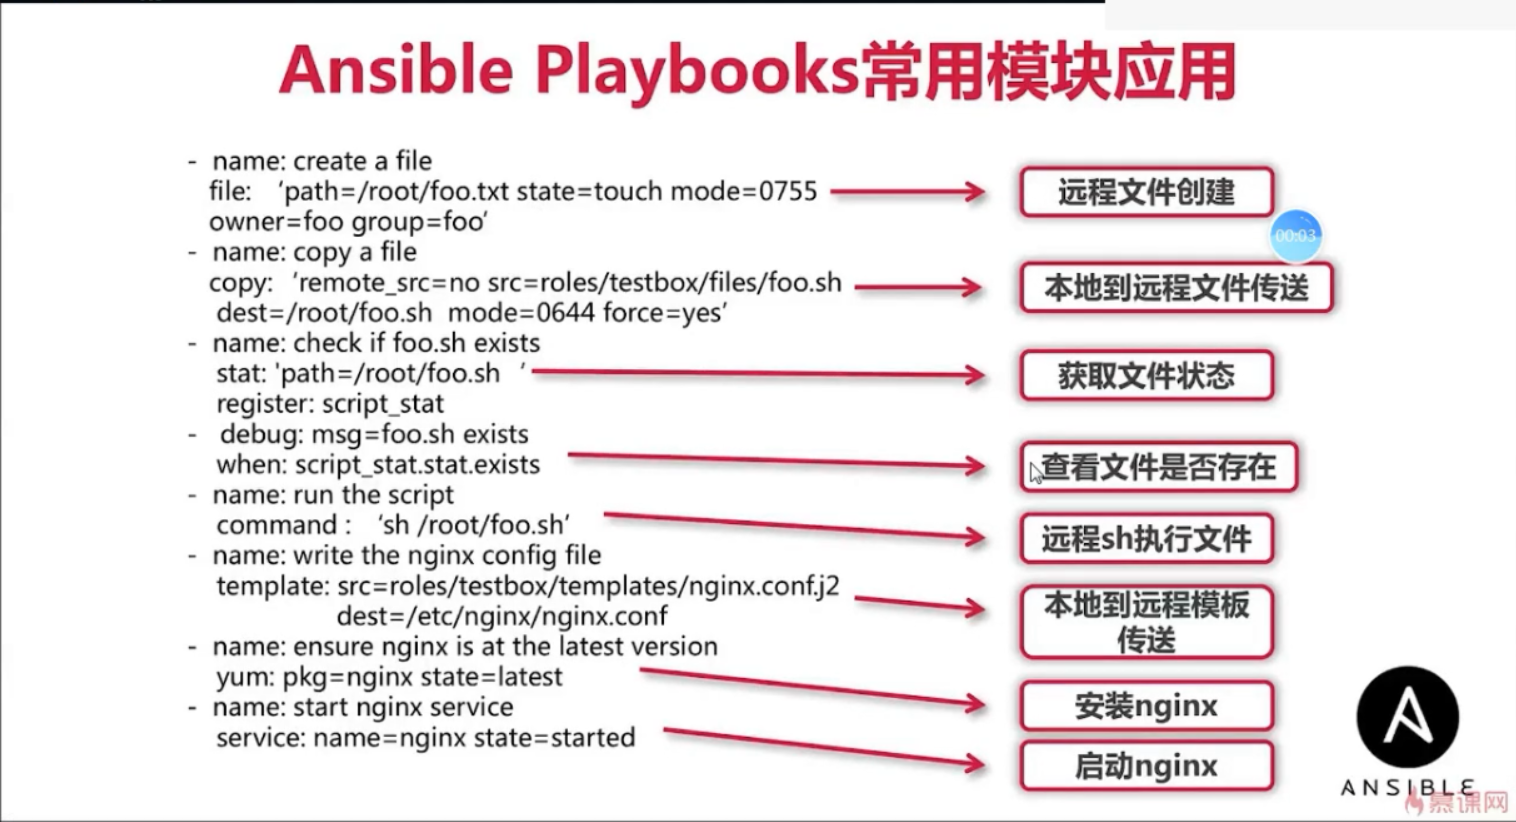
File模块
在目标主机创建文件或目录,并赋予其系统权限
- name: create a file
file: 'path=/root/foo.txt state=touch mode=0755 owner=foo group=foo'
Copy模块
实现Ansible服务端到目标主机的文件传送
- name: copy a file
copy: 'remote_src=no src=roles/testbox/files/foo.sh dest=/root/foo.sh mode=0644 force=yes'
Stat模块
获取远程文件状态信息
- name: check if foo.sh exists
stat: 'path=/root/foo.sh' register: script_stat
Debug模块
打印语句到Ansible执行输出
- debug: msg=foo.sh exists
when: script_stat.stat.exists
Command/Shell模块
用来执行Linux目标主机命令行
- name: run the script
command: "sh /root/foo.sh" # command不能使用重定向符号
- name: run the script
shell: "echo 'test' > /root/test.txt" # 推荐使用shell
Template模块
实现Ansible服务端到目标主机的jinja2模板传送
- name: write the nginx config file
template: src=roles/testbox/templates/nginx.conf.j2 dest=/etc/nginx/nginx.conf
Packaging模块
调用目标主机系统包管理工具(yum,apt)进行安装
- name: ensure nginx is at the latest version
yum: pkg=nginx state=latest
Service模块
管理目标主机系统服务
- name: start nginx service
service: name=nginx state=started