spring-boot项目创建
1、项目创建
使用Idea,File→Project→Spring initalizr,点击next,进行基本配置。此时 一个spring boot项目创建完成。
之后编写代码正常启动即刻
2、启动多实例
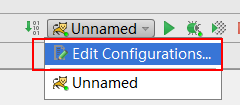
在idea右上角,点击Edit Configuration打开配置界面,取消Single instance only 配置,通过修改application文件的server.port的端口,启动。多个实例,需要多个端口,分别启动。
一、新建
1、File→new→Project
2、创建一个新的maven


3、finish即可
项目目录结构即建立完成。

二、项目部署
1、File→Project Structure
Project: 无需设置 (当然可点击Project complier output自定义编译目录)
2、Modules:可看到此项目无任何适配服务组件(因为是手工创建Maven,没有选择任何Maven模板)--因此需要我们进行添加。
如图

选择Web(为此项目添加Web服务组件,这便是一个Web项目了)
现在为Web设置资源目录。双击Web Resource Directory
选择scr/main目录。

在后面加上webapp。好了,点OK,Web的资源目录便设置好了。

现在设置Web的描述文件的目录

设置在webapp目录下

3、Facts: 表示当前项目的适配服务组件。可看到此项目已是一个Web项目了。
4、Aftifacts: 这个Aftifacts描述了当前项目发布的信息。现在进行添加,从Modeles中选择。


说明:A: 现在Artifacts已有了发布的项目了(idea中准确的说应是Modele) B:output root目录描述了当前项目的编译目录及适配服务。

三、部署服务器
1、编辑配置
2、添加

3、添加网站


注:很多人在这里找不到Arifact,请参考部署项目中的Modules的配置。如果没有为项目配置Web服务组件,那么就没有Artifact。(当前项目连Web项目都不是,哪儿来的Artifact,又部署什么呢?)

四、编写代码测试
1、创建一个java类。可看到继承HttpServlet出问题了--这是因为没有把Tomcat的依赖加入Module。
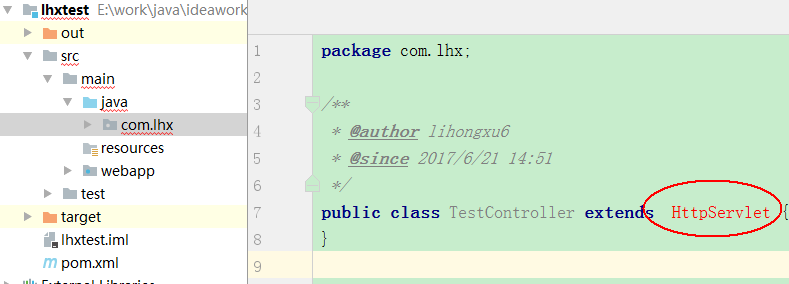
在Modules加入Tomcat依赖


添加后选中使用即可
java代码


package com.lhx;

import javax.servlet.ServletException;
import javax.servlet.annotation.WebServlet;
import javax.servlet.http.HttpServlet;
import javax.servlet.http.HttpServletRequest;
import javax.servlet.http.HttpServletResponse;
import java.io.IOException;

/**
 * @author lihongxu6
 * @since 2017/6/21 14:51
 */
@WebServlet("/testController")
public class TestController extends HttpServlet {
    @Override
    protected void doGet(HttpServletRequest req, HttpServletResponse resp) throws ServletException, IOException {
        doPost(req, resp);
    }

    @Override
    protected void doPost(HttpServletRequest req, HttpServletResponse resp) throws ServletException, IOException {
//        System.err.println("---");
        //解决乱码
        req.setCharacterEncoding("UTF-8");
        String name = req.getParameter("name");
        req.setAttribute("name", name);
        System.out.println(name);
        req.getRequestDispatcher("index.jsp").forward(req, resp);
    }
}
在webapp下建立index.jsp
<%--
  Created by IntelliJ IDEA.
  User: 木子旭
  Date: 2017/6/21
  Time: 15:02
  To change this template use File | Settings | File Templates.
--%>
<%@ page contentType="text/html;charset=UTF-8" language="java" %>
<html>
<head>
    <title>Title</title>
</head>
<body>
<form action="testController" method="post">
    <input name="name">
    return:${name}
    <input value="提交" type="submit">
</form>
</body>
</html>
xml配置
<?xml version="1.0" encoding="UTF-8"?>
<web-app xmlns="http://xmlns.jcp.org/xml/ns/javaee"
         xmlns:xsi="http://www.w3.org/2001/XMLSchema-instance"
         xsi:schemaLocation="http://xmlns.jcp.org/xml/ns/javaee http://xmlns.jcp.org/xml/ns/javaee/web-app_3_1.xsd"
         version="3.1">
    <welcome-file-list>
        <welcome-file>index.jsp</welcome-file>
    </welcome-file-list>
</web-app>
站点其他默认配置
