添加一个install_nginx.sh脚本
版本一:(以下脚本为在线自动化安装)
#!/bin/bash
mkdir /soft
cd /soft
wget -c http://nginx.org/download/nginx-1.14.0.tar.gz  #这里需要根据自己的情况修改这个URL
tar -zxvf nginx-1.14.0.tar.gz  #解压
cd nginx-1.14.0/
yum -y install gcc-c++  pcre-devel zlib-devel openssl-devel   #安装依赖,主要是安装这些,而接下来的三步则是编译安装必须执行的,其中prefix选项是指安装位置
./configure --prefix=/usr/local/nginx  --sbin-path=/usr/local/nginx/nginx --conf-path=/usr/local/nginx/nginx.conf
--pid-path=/usr/local/nginx/nginx.pid
--with-http_ssl_module
 #因为是直接使用yum安装好了pcre-devel 和zlib-devel以及openssl-devel,所以这里可以省掉--with-pcre=/opt/app/openet/oetal1/chenhe/pcre-8.37
--with-zlib=/opt/app/openet/oetal1/chenhe/zlib-1.2.8
--with-openssl=/opt/app/openet/oetal1/chenhe/openssl-1.0.1t
make
make install
cd /usr/local/nginx/
./nginx    #启动服务,现在访问localhost就能看到nginx的欢迎界面了
systemctl stop firewalld #保险起见,关闭防火墙
systemctl disable firewalld
将该脚本chmod +x install_nginx.sh
然后./install_nginx.sh执行即可
版本二:(以下内容为本地安装)
#!/bin/bash
#将nginx压缩包放到root家目录下,然后执行一下命令,注意,压缩包的名字一定要对应,或者根据实际压缩包名字修改一下对应的文件名
tar -zxvf nginx-1.14.0.tar.gz  #解压
cd nginx-1.14.0/
yum -y install gcc-c++  pcre-devel zlib-devel openssl-devel   #安装依赖,主要是安装这些,而接下来的三步则是编译安装必须执行的,其中prefix选项是指安装位置
./configure --prefix=/usr/local/nginx  --sbin-path=/usr/local/nginx/nginx --conf-path=/usr/local/nginx/nginx.conf
--pid-path=/usr/local/nginx/nginx.pid
--with-http_ssl_module --with-pcre=/opt/app/openet/oetal1/chenhe/pcre-8.37
--with-zlib=/opt/app/openet/oetal1/chenhe/zlib-1.2.8
--with-openssl=/opt/app/openet/oetal1/chenhe/openssl-1.0.1t
make
make install
cd /usr/local/nginx/
./nginx    #启动服务,现在访问localhost就能看到nginx的欢迎界面了
systemct stop firewalld #保险起见,关闭防火墙
systemct disable firewalld
将该脚本chmod +x install_nginx.sh
然后./install_nginx.sh执行即可
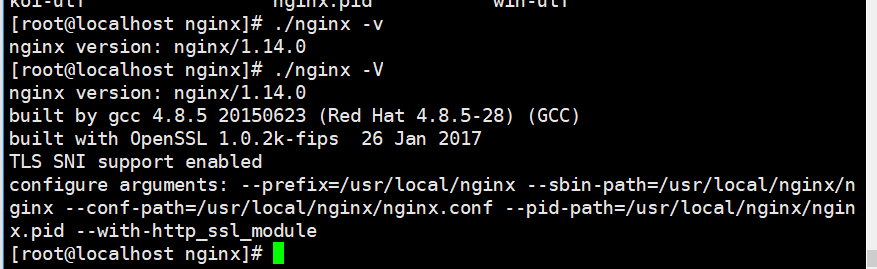
有时候,我们会忘记我们在编译安装时是怎么配置的,我们可以通过./nginx -V查看,小写的v只显示版本,大写的V会显示编译时的参数(这个也是有很大帮助的)