参考博主:努力哥完成
一、Open-Falcon介绍
1、监控系统,可以从运营级别(基本配置即可),以及应用级别(二次开发,通过端口进行日志上报),对服务器、操作系统、中间件、应用进行全面的监控,及报警,对我们的系统正常运行的作用非常重要。
2、基础监控
CPU、Load、内存、磁盘、IO、网络相关、内核参数、ss 统计输出、端口采集、核心服务的进程存活信息采集、关键业务进程资源消耗、NTP offset采集、DNS解析采集,这些指标,都是open-falcon的agent组件直接支持的。
Linux运维基础采集项:http://book.open-falcon.org/zh/faq/linux-metrics.html
对于这些基础监控选项全部理解透彻的时刻,也就是对Linux运行原理及命令进阶的时刻。
3、第三方监控
术业有专攻,运行在OS上的应用甚多,Open-Falcon的开发团队不可能把所有的第三方应用的监控全部做完,这个就需要开源社区提供更多的插件,当前对于很多常用的第三方应用都有相关插件了。
4、JVM监控
对于Java作为主要开发语言的大多数公司,对于JVM的监控不可或缺。
每个JVM应用的参数,比如GC、类加载、JVM内存、进程、线程,都可以上报给Falcon,而这些参数的获得,都可以通过MxBeans实现。
使用 Java 平台管理 bean:http://www.ibm.com/developerworks/cn/java/j-mxbeans/
5、业务应用监控
对于业务需要监控的接口,比如响应时间等。可以根据业务的需要,上报相关数据到Falcon,并通过Falcon查看结果。
二、Zabbix、Nagios、Open-Falcon这3大开源运维监控工具的比较
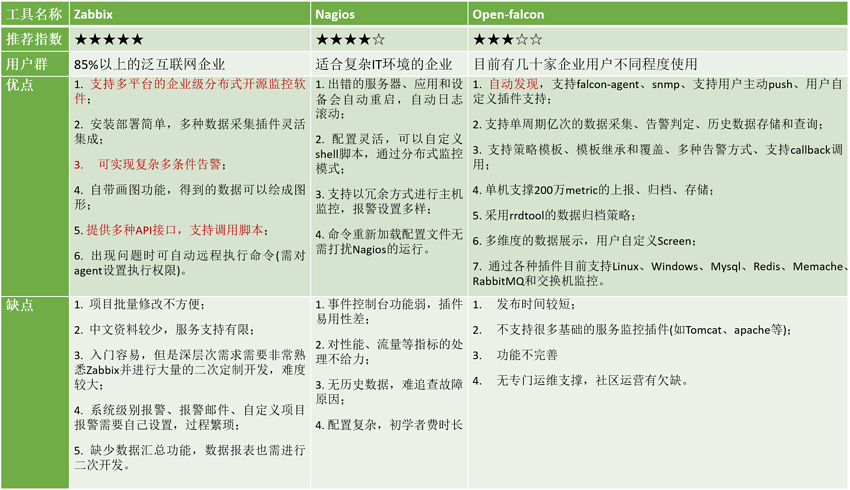
说明:Open-Falcon部署分为前端(客户端)和后端(服务端)
三、后端部署(服务端)
参考官方文档:https://book.open-falcon.org/zh_0_2/quick_install/prepare.html
1、系统环境
[root@open-falcon-server ~]# cat /etc/redhat-release
CentOS Linux release 7.2.1511 (Core)
2、系统优化
#安装下载软件
yum install wget -y
#更换aliyun源
mv /etc/yum.repos.d/CentOS-Base.repo /etc/yum.repos.d/CentOS-Base.repo.backup
wget -O /etc/yum.repos.d/CentOS-Base.repo http://mirrors.aliyun.com/repo/Centos-7.repo
#下载epel源
yum install epel-release.noarch -y
rpm -Uvh http://mirrors.aliyun.com/epel/epel-release-latest-7.noarch.rpm
yum clean all
yum makecache
#下载常用软件
yum install git telnet net-tools tree nmap sysstat lrzsz dos2unix tcpdump ntpdate -y
#配置时间同步
ntpdate cn.pool.ntp.org
#更改主机名
hostnamectl set-hostname open-falcon-server
hostname open-falcon-server
#开启缓存
sed -i 's#keepcache=0#keepcache=1#g' /etc/yum.conf
grep keepcache /etc/yum.conf
#关闭selinux
sed -i 's/SELINUX=enforcing/SELINUX=disabled/g' /etc/selinux/config
setenforce 0
#关闭防火墙
systemctl stop firewalld.service
systemctl disable firewalld.service
3、软件环境准备
#安装 redis
yum install redis -y
#redis常用命令
redis-server     redis 服务端

redis-cli    redis 命令行客户端

redis-benchmark  redis 性能测试工具

redis-check-aof   AOF文件修复工具

redis-check-dump  RDB文件修复工具

redis-sentinel     Sentinel 服务端
#启动redis
[root@localhost ~]# redis-server &
[1] 3222
[root@localhost ~]# 3222:C 26 Feb 15:19:31.280 # Warning: no config file specified, using the default config. In order to specify a config file use redis-server /path/to/redis.conf
3222:M 26 Feb 15:19:31.280 * Increased maximum number of open files to 10032 (it was originally set to 1024).
                _._
           _.-``__ ''-._
      _.-``    `.  `_.  ''-._           Redis 3.2.10 (00000000/0) 64 bit
  .-`` .-```.  ```/    _.,_ ''-._
 (    '      ,       .-`  | `,    )     Running in standalone mode
 |`-._`-...-` __...-.``-._|'` _.-'|     Port: 6379
 |    `-._   `._    /     _.-'    |     PID: 3222
  `-._    `-._  `-./  _.-'    _.-'
 |`-._`-._    `-.__.-'    _.-'_.-'|
 |    `-._`-._        _.-'_.-'    |           http://redis.io
  `-._    `-._`-.__.-'_.-'    _.-'
 |`-._`-._    `-.__.-'    _.-'_.-'|
 |    `-._`-._        _.-'_.-'    |
  `-._    `-._`-.__.-'_.-'    _.-'
      `-._    `-.__.-'    _.-'
          `-._        _.-'
              `-.__.-'
[root@localhost ~]# netstat -lntup|grep red
tcp        0      0 0.0.0.0:6379            0.0.0.0:*               LISTEN      3222/redis-server *
tcp6       0      0 :::6379                 :::*                    LISTEN      3222/redis-server *
#安装mysql
[root@open-falcon-server ~]#wget http://repo.mysql.com/mysql-community-release-el7-5.noarch.rpm
[root@open-falcon-server ~]# rpm -ivh mysql-community-release-el7-5.noarch.rpm
[root@open-falcon-server ~]#yum install -y mysql-server
#启动mysql并设置开机自启动
[root@open-falcon-server ~]# systemctl start mysqld.service
[root@open-falcon-server ~]# systemctl enable mysqld.service
#检查3306端口
[root@open-falcon-server ~]# netstat -lntup|grep 3306
4、初始化MySQL表结构(备注:导入表结构后,注意检查)
cd /tmp/ && git clone https://github.com/open-falcon/falcon-plus.git
cd /tmp/falcon-plus/scripts/mysql/db_schema/
mysql -h 127.0.0.1 -u root -p < 1_uic-db-schema.sql
mysql -h 127.0.0.1 -u root -p < 2_portal-db-schema.sql
mysql -h 127.0.0.1 -u root -p < 3_dashboard-db-schema.sql
mysql -h 127.0.0.1 -u root -p < 4_graph-db-schema.sql
mysql -h 127.0.0.1 -u root -p < 5_alarms-db-schema.sql
rm -rf /tmp/falcon-plus/
#设置数据库密码 (备注:用户名:root ,密码: password )
[root@open-falcon-server open-falcon]# mysqladmin -uroot password "password"
Warning: Using a password on the command line interface can be insecure.
#检查导入的数据表
mysql> show databases;
+--------------------+
| Database           |
+--------------------+
| information_schema |
| alarms             |
| dashboard          |
| falcon_portal      |
| graph              |
| mysql              |
| performance_schema |
| uic                |
+--------------------+
8 rows in set (0.00 sec)
5、配置Go语言开发环境
#安装go语言开发包(备注:安装需要epel源)
yum install golang -y
#检查版本
[root@open-falcon-server ~]# go version
 go version go1.8.3 linux/amd64
#查看go的安装路径
[root@open-falcon-server ~]# find / -name go
/etc/alternatives/go
/var/lib/alternatives/go
/usr/bin/go
/usr/lib/golang/src/cmd/go  #需要的是这个路径
/usr/lib/golang/src/go
/usr/lib/golang/bin/go
/usr/lib/golang/pkg/linux_amd64/go
#设置环境变量GOROOT和GOPATH
export GOROOT=/usr/lib/golang
export GOPATH=/home
6、下载编译好的二进制版本
直接下载官方编译好的二进制版本(x86 64位平台)。
#开始安装open-falcon
[root@open-falcon-server ~]# export FALCON_HOME=/home/work
[root@open-falcon-server ~]# export WORKSPACE=$FALCON_HOME/open-falcon
[root@open-falcon-server ~]# mkdir -p $WORKSPACE
#上传软件
[root@open-falcon-server ~]# ll
-rw-r--r--. 1 root root 40031472 Oct 29 2017 open-falcon-v0.2.1.tar.gz

#解压
[root@open-falcon-server ~]# tar -xf open-falcon-v0.2.1.tar.gz -C $WORKSPACE
[root@open-falcon-server ~]# cd $WORKSPACE
<br>#查看解压结果
[root@open-falcon-server open-falcon]# ll
total 3896
drwxrwxr-x. 7 501 501      67 Aug 15 19:16 agent
drwxrwxr-x. 5 501 501      40 Aug 15 19:16 aggregator
drwxrwxr-x. 5 501 501      40 Aug 15 19:16 alarm
drwxrwxr-x. 6 501 501      51 Aug 15 19:16 api
drwxrwxr-x. 5 501 501      40 Aug 15 19:16 gateway
drwxrwxr-x. 6 501 501      51 Aug 15 19:16 graph
drwxrwxr-x. 5 501 501      40 Aug 15 19:16 hbs
drwxrwxr-x. 5 501 501      40 Aug 15 19:16 judge
drwxrwxr-x. 5 501 501      40 Aug 15 19:16 nodata
-rwxrwxr-x. 1 501 501 3987469 Aug 15 19:16 open-falcon
lrwxrwxrwx. 1 501 501      16 Aug 15 19:16 plugins -> ./agent/plugins/
lrwxrwxrwx. 1 501 501      15 Aug 15 19:16 public -> ./agent/public/
drwxrwxr-x. 5 501 501      40 Aug 15 19:16 transfer
7、修改配置文件cfg.json
坑:
部分模块依赖连接数据库,因为如果不修改配置文件,aggregator模块会出现无法启动,graph、hbs、nodata、api、alarm模块会出现开启不报错但是状态为开启失败的情况。
如果需要每个模块都能正常启动,需要将上面模块的cfg.json的数据库信息进行修改。根据本教程的配置,需要修改配置文件所在的目录:
| 模块 | 配置文件所在路径 |
| aggregator | /home/work/open-falcon/aggregator/config/cfg.json |
| graph | /home/work/open-falcon/graph/config/cfg.json |
| hbs | /home/work/open-falcon/hbs/config/cfg.json |
| nodata | /home/work/open-falcon/nodata/config/cfg.json |
| api | /home/work/open-falcon/api/config/cfg.json |
| alarm | /home/work/open-falcon/alarm/config/cfg.json |
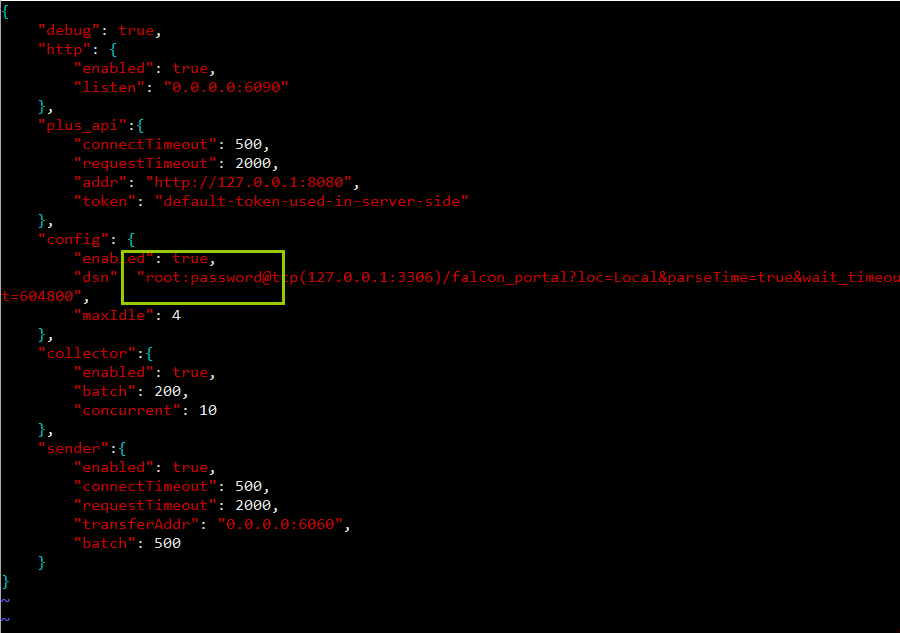
1)修改aggregator的配置文件
vim /home/work/open-falcon/aggregator/config/cfg.json
mysql的root密码为空,则去掉“password”,若不为空,则用root密码替换“password”。
2)修改graph的配置文件
vim /home/work/open-falcon/graph/config/cfg.json
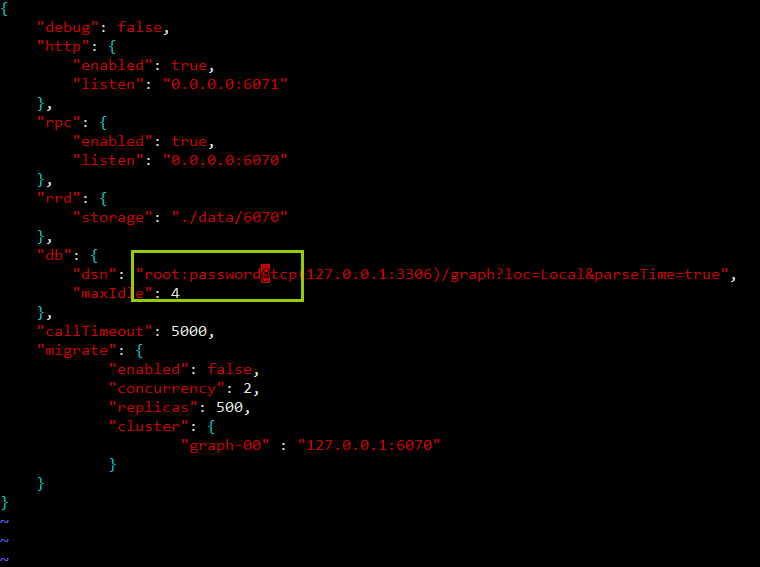
mysql的root密码为空,则去掉“password”,若不为空,则用root密码替换“password”。
3)修改hbs的配置文件
vim /home/work/open-falcon/hbs/config/cfg.json
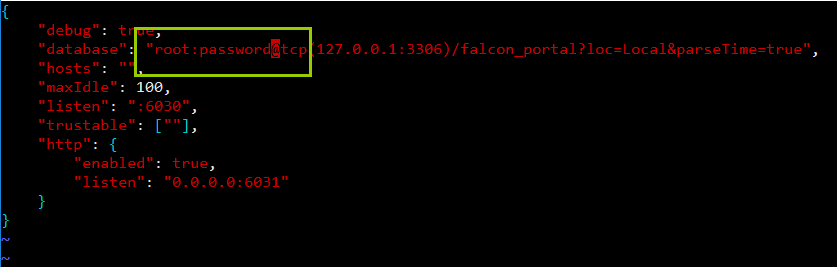
mysql的root密码为空,则去掉“password”,若不为空,则用root密码替换“password”。
4)修改nodata的配置文件
vim /home/work/open-falcon/nodata/config/cfg.json
mysql的root密码为空,则去掉“password”,若不为空,则用root密码替换“password”。
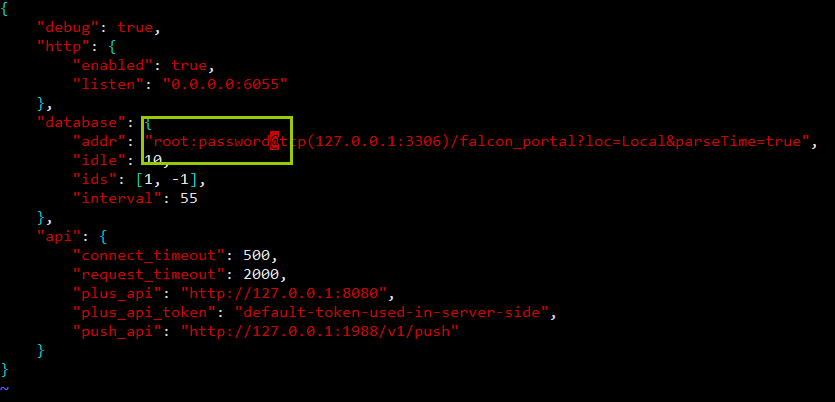
5)修改api的配置文件
vim /home/work/open-falcon/api/config/cfg.json
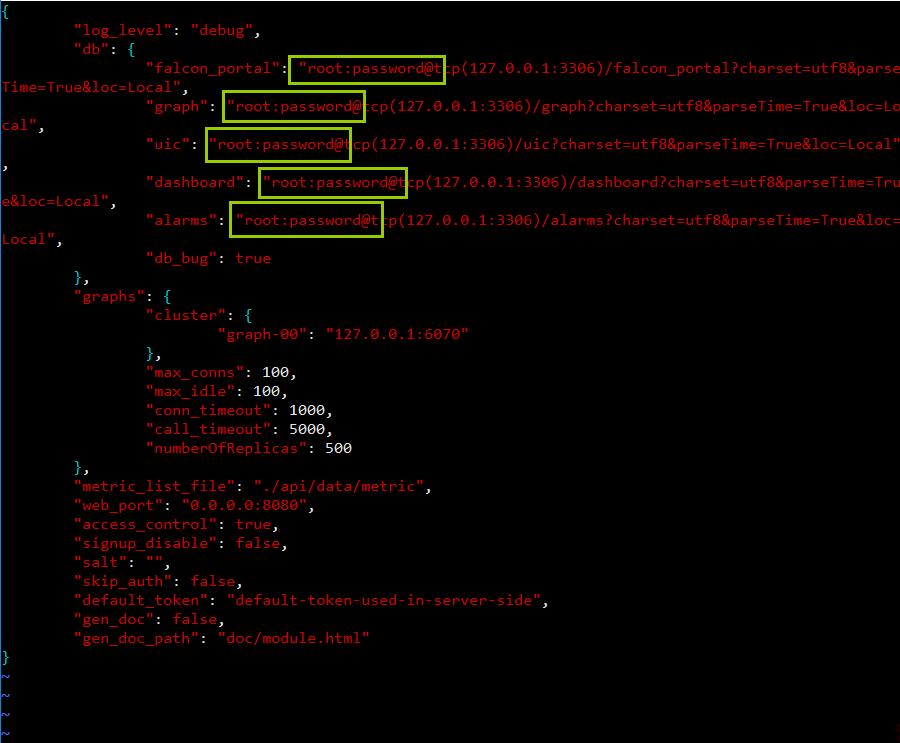
mysql的root密码为空,则去掉“password”,若不为空,则用root密码替换“password”。
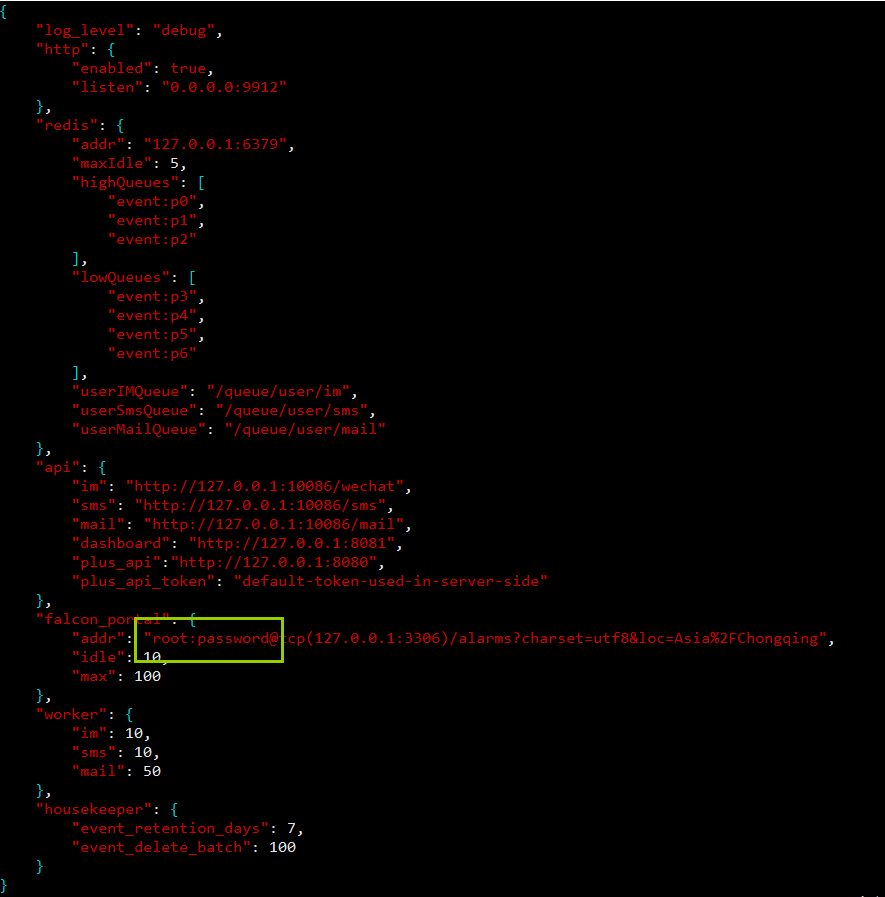
6)修改alarm的配置文件
vim /home/work/open-falcon/alarm/config/cfg.json
mysql的root密码为空,则去掉“password”,若不为空,则用root密码替换“password”。
8、启动后端模块
[root@open-falcon-server open-falcon]# cd /home/work/open-falcon
#启动服务
[root@open-falcon-server open-falcon]# ./open-falcon start
#检查服务启动状态
[root@open-falcon-server open-falcon]# ./open-falcon check
[root@open-falcon-server open-falcon]# ./open-falcon check
falcon-graph UP 8945
falcon-hbs UP 8954
falcon-judge UP 8962
falcon-transfer UP 8968
falcon-nodata UP 8974
falcon-aggregator UP 8981
falcon-agent UP 8989
falcon-gateway UP 8995
falcon-api UP 8999
falcon-alarm UP 9004
#更多的命令行工具用法
# ./open-falcon [start|stop|restart|check|monitor|reload] module
./open-falcon start agent
/open-falcon check
        falcon-graph         UP           53007
          falcon-hbs         UP           53014
        falcon-judge         UP           53020
     falcon-transfer         UP           53026
       falcon-nodata         UP           53032
   falcon-aggregator         UP           53038
        falcon-agent         UP           53044
      falcon-gateway         UP           53050
          falcon-api         UP           53056
        falcon-alarm         UP           53063
至此后端部署完成。
9、其它用法
#重载配置(备注:修改vi cfg.json配置文件后,可以用下面命令重载配置)
curl 127.0.0.1:1988/config/reload
五、前端部署 (备注:在另外一台服务器上面操作)
1、创建工作目录
export HOME=/home/work
export WORKSPACE=$HOME/open-falcon
mkdir -p $WORKSPACE
cd $WORKSPACE
2、克隆前端组件代码
git clone https://github.com/open-falcon/dashboard.git
3、安装依赖包
yum install -y python-virtualenv
yum install -y python-devel
yum install -y openldap-devel
yum install -y mysql-devel
yum groupinstall "Development tools" -y
4、先安装ez_setup.py,再安装pip
#下载ez_setup.py
wget --no-check-certificate https://bootstrap.pypa.io/ez_setup.py
python ez_setup.py --insecure

#下载pip
wget https://pypi.python.org/packages/11/b6/abcb525026a4be042b486df43905d6893fb04f05aac21c32c638e939e447/pip-9.0.1.tar.gz#md5=35f01da33009719497f01a4ba69d63c9

#解压并安装
tar xf pip-9.0.1.tar.gz
cd pip-9.0.1
python setup.py install
cd ..
#查看需要安装的软件
[root@prometheus dashboard]# vim pip_requirements.txt
Flask==0.10.1
Flask-Babel==0.9
Jinja2==2.7.2
Werkzeug==0.9.4
gunicorn==19.1.1
python-dateutil==2.2
requests==2.3.0
mysql-python
python-ldap
#利用pip安装上面这些软件
virtualenv ./env
source env/bin/activate #进入虚拟环境
[root@prometheus]# cd /home/work/open-falcon/dashboard  #安装软件
[root@prometheus dashboard]# pip install -r pip_requirements.txt
5、修改配置
dashboard的配置文件为: 'rrd/config.py',请根据实际情况修改

## API_ADDR 表示后端api组件的地址
API_ADDR = "http://127.0.0.1:8080/api/v1"

## 根据实际情况,修改PORTAL_DB_*, 默认用户名为root,默认密码为""
## 根据实际情况,修改ALARM_DB_*, 默认用户名为root,默认密码为""
#修改方法
[root@Open-Falcon-client]#cd /home/work/open-falcon/dashboard/rrd
[root@Open-Falcon-client rrd]# cp config.py config.py.bak
(env)[root@Open-Falcon-client rrd]# vi config.py
#-*-coding:utf8-*-# Copyright 2017 Xiaomi, Inc.## Licensed under the Apache License, Version 2.0 (the "License");# you may not use this file except in compliance with the License.# You may obtain a copy of the License at## http://www.apache.org/licenses/LICENSE-2.0## Unless required by applicable law or agreed to in writing, software# distributed under the License is distributed on an "AS IS" BASIS,# WITHOUT WARRANTIES OR CONDITIONS OF ANY KIND, either express or implied.# See the License for the specific language governing permissions and# limitations under the License.#-*-coding:utf8-*-# Copyright 2017 Xiaomi, Inc.## Licensed under the Apache License, Version 2.0 (the "License");# you may not use this file except in compliance with the License.# You may obtain a copy of the License at## http://www.apache.org/licenses/LICENSE-2.0## Unless required by applicable law or agreed to in writing, software# distributed under the License is distributed on an "AS IS" BASIS,# WITHOUT WARRANTIES OR CONDITIONS OF ANY KIND, either express or implied.# See the License for the specific language governing permissions and# limitations under the License.# app configimport osLOG_LEVEL = os.environ.get("LOG_LEVEL",'DEBUG')SECRET_KEY = os.environ.get("SECRET_KEY","secret-key")PERMANENT_SESSION_LIFETIME = os.environ.get("PERMANENT_SESSION_LIFETIME",3600 * 24 * 30)SITE_COOKIE = os.environ.get("SITE_COOKIE","open-falcon-ck")# Falcon+ APIAPI_ADDR = os.environ.get("API_ADDR","http://10.0.0.6:8080/api/v1")# portal database# TODO: read from api instead of dbPORTAL_DB_HOST = os.environ.get("PORTAL_DB_HOST","10.0.0.6")PORTAL_DB_PORT = int(os.environ.get("PORTAL_DB_PORT",3306))PORTAL_DB_USER = os.environ.get("PORTAL_DB_USER","root")PORTAL_DB_PASS = os.environ.get("PORTAL_DB_PASS","password")PORTAL_DB_NAME = os.environ.get("PORTAL_DB_NAME","falcon_portal")# alarm database# TODO: read from api instead of dbALARM_DB_HOST = os.environ.get("ALARM_DB_HOST","10.0.0.6")ALARM_DB_PORT = int(os.environ.get("ALARM_DB_PORT",3306))ALARM_DB_USER = os.environ.get("ALARM_DB_USER","root")ALARM_DB_PASS = os.environ.get("ALARM_DB_PASS","password")ALARM_DB_NAME = os.environ.get("ALARM_DB_NAME","alarms")# ldap configLDAP_ENABLED = os.environ.get("LDAP_ENABLED",False)LDAP_SERVER = os.environ.get("LDAP_SERVER","ldap.forumsys.com:389")LDAP_BASE_DN = os.environ.get("LDAP_BASE_DN","dc=example,dc=com")LDAP_BINDDN_FMT = os.environ.get("LDAP_BINDDN_FMT","uid=%s,dc=example,dc=com")LDAP_SEARCH_FMT = os.environ.get("LDAP_SEARCH_FMT","uid=%s")LDAP_ATTRS = ["cn","mail","telephoneNumber"]LDAP_TLS_START_TLS = FalseLDAP_TLS_CACERTDIR = ""LDAP_TLS_CACERTFILE = "/etc/openldap/certs/ca.crt"LDAP_TLS_CERTFILE = ""LDAP_TLS_KEYFILE = ""LDAP_TLS_REQUIRE_CERT = TrueLDAP_TLS_CIPHER_SUITE = ""# i18nBABEL_DEFAULT_LOCALE = 'zh_CN'BABEL_DEFAULT_TIMEZONE = 'Asia/Shanghai'# aviliable translationsLANGUAGES = {'en': 'English','zh_CN': 'Chinese-Simplified',}# portal site configMAINTAINERS = ['root']CONTACT = 'root@open-falcon.org'try:from rrd.local_config import *except:print "[warning] no local config file"#启动服务
有两种方法:
法一:
(env)[root@Open-Falcon-client dashboard]# bash control start
falcon-dashboard started..., pid=40853
法二:
(env)[root@Open-Falcon-client dashboard]# ./control start
falcon-dashboard started..., pid=40853
#查看日志
(env)[root@Open-Falcon-client dashboard]# ./control tail
[2017-10-29 15:30:20 +0000] [40853] [INFO] Starting gunicorn 19.1.1
[2017-10-29 15:30:20 +0000] [40853] [INFO] Listening at: http://0.0.0.0:8081 (40853)
[2017-10-29 15:30:20 +0000] [40853] [INFO] Using worker: sync
[2017-10-29 15:30:20 +0000] [40858] [INFO] Booting worker with pid: 40858
[2017-10-29 15:30:20 +0000] [40863] [INFO] Booting worker with pid: 40863
[2017-10-29 15:30:20 +0000] [40864] [INFO] Booting worker with pid: 40864
[2017-10-29 15:30:20 +0000] [40866] [INFO] Booting worker with pid: 40866
#退出env环境
(env)[root@Open-Falcon-client dashboard]# deactivate
[root@Open-Falcon-client dashboard]#
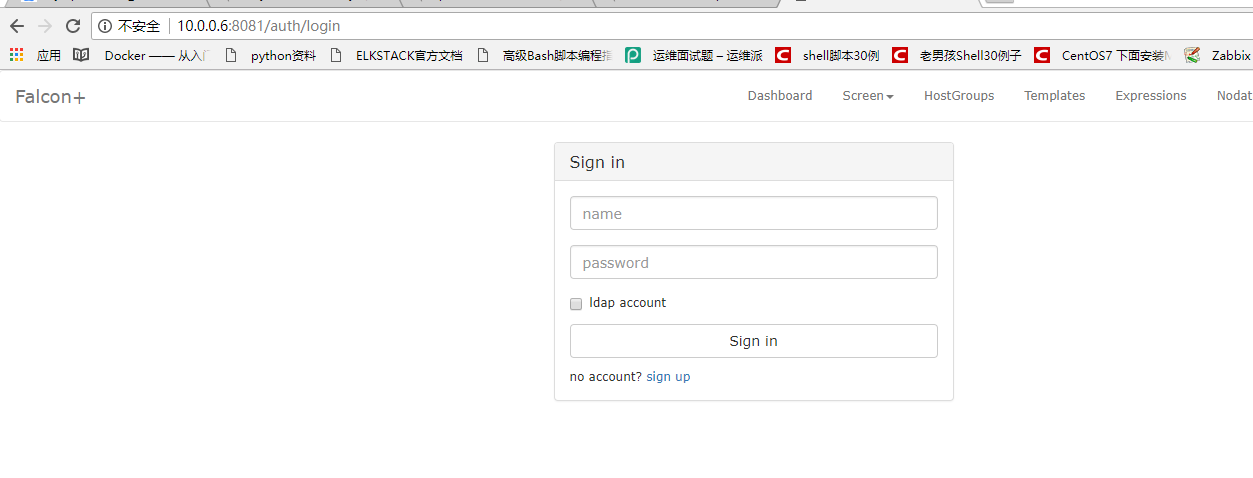
#访问网站
http://10.0.0.6:8081
#登录界面
6、其它用法
#以开发者模式启动
./env/bin/python wsgi.py

open http://127.0.0.1:8081 in your browser.
#开启8081端口 (备注:如果关闭了防火墙,则直接忽略这步)
1)防火墙添加8081端口永久开放
firewall-cmd --add-port=8081/tcp --permanent
2)重新载入防火墙配置
firewall-cmd --reload
#停止dashboard运行
bash control stop
#查看dashboard运行状态
bash control status
六、FAQ
- Q: open-falcon v0.2 有管理员帐号吗?
- A: 可以通过dashboard自行注册新用户,第一个用户名为root的帐号会被认为是超级管理员,超级管理员可以设置其他用户为管理员。
- Q: open-falcon v0.2 dashboard 可以禁止用户自己注册吗?
- A: 可以的,在api组件的配置文件中,将
signup_disable配置项修改为true,重启api即可。
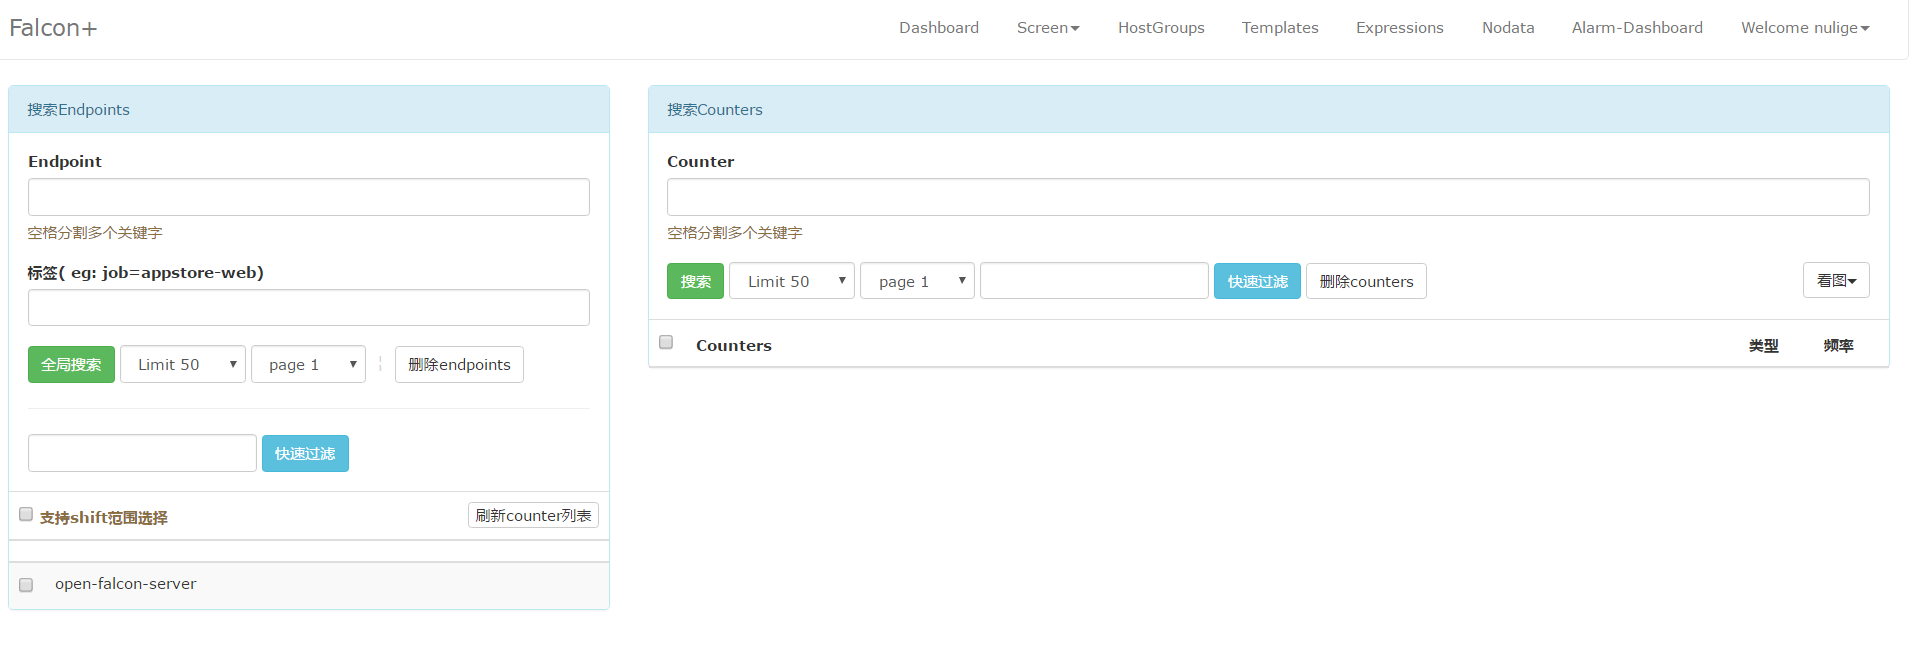
endpoint 查看磁盘相关监控信息。
