
PS:Spring中有各种的Templeate,比如jdncTemplate,主要是为了避免各种模板的代码,抽象出来的
PS:

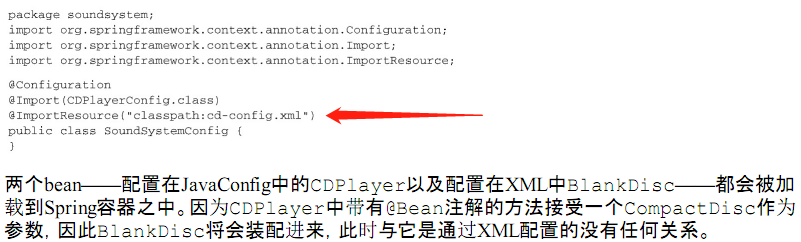
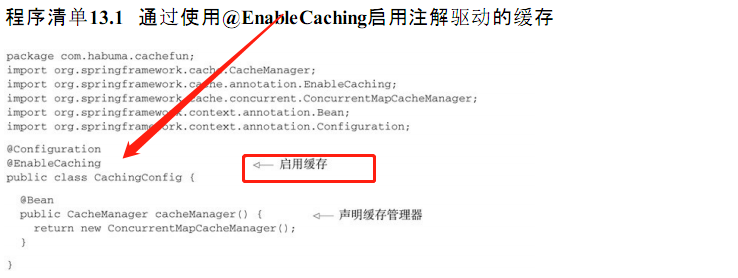
PS: @Configration、@Bean是用来替代xml那种解析方式
----------------------------------------------------------------------------------------------------------
PS: ApplicatonContext加载所有的bean,加载原则的get/set
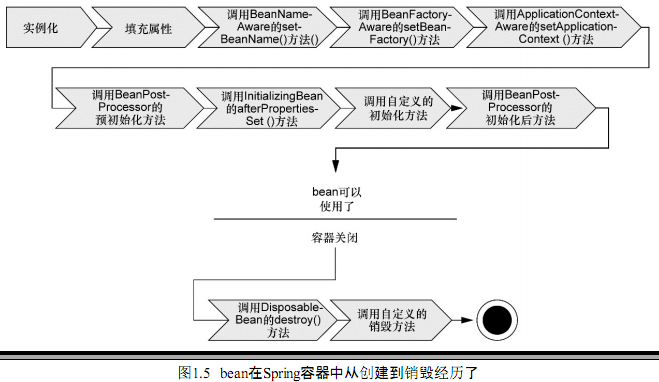
PS:Spring管理下 bean的声明周期
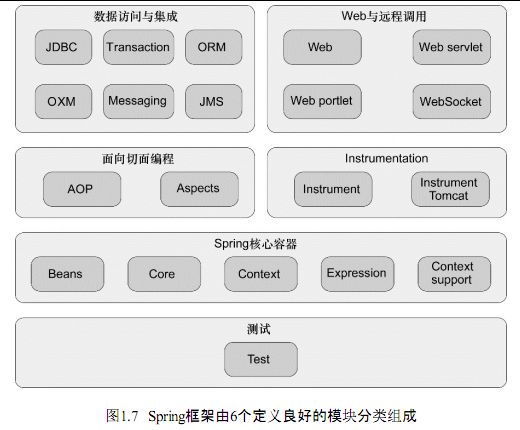
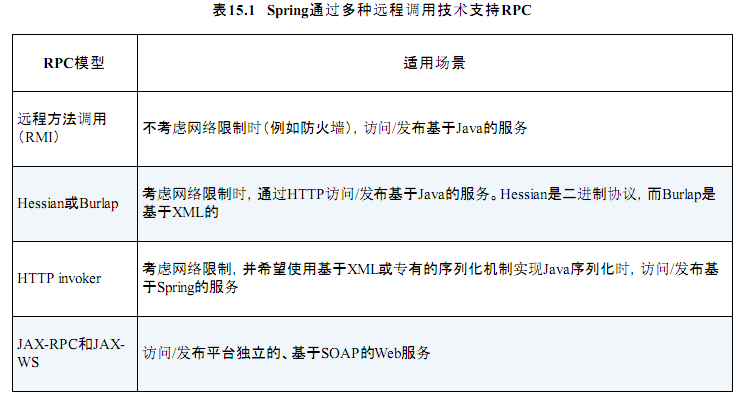
PS:Spring4 的模块

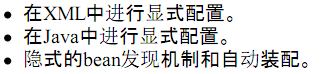
PS: 建议使用自动装配的机制
PS: @Component 会默认以类名第一个字母小写作为id名字, 表明该类会作为组件类
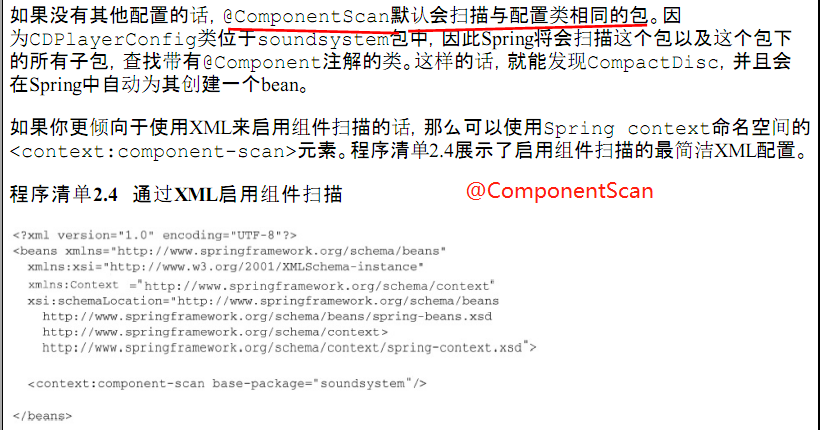
PS: @ComponentScan会默认扫描该类子包所有Component的bean


PS: @Componet只适合单独bean的状态,无依赖,如果说是bean和bean之间有依赖的话,还是要用Autowired(也就是Bean中Bean)
@Autowried 和 @inject可以互换


PS: 传统装配的类型
PS: 有些第三方的类无法装配bean,就只能使用java代码装配了。也就是之前的并不可能解决所有的问题。

PS: 并不是所有的场景都可以自动的装配的,这时候就得使用 xml配置或者 Java(JavaConfig是替代Java更好的解决方案)配置了


1.创建配置类 @Configration(如果ComponentScan去掉就不报错,还必须使用@Bean把对象注入进去)
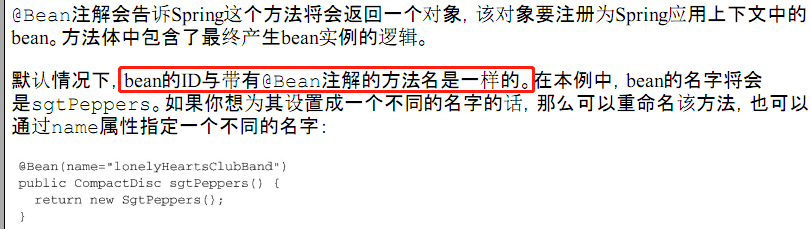
2.声明bean @Bean
3.借助JavaConfig实现注入
package soundsystem;
import org.springframework.context.annotation.Bean;
import org.springframework.context.annotation.Configuration;

@Configuration
public class CDPlayerConfig {

  @Bean
  public CompactDisc compactDisc() {
    return new SgtPeppers();
  }

  @Bean
  public CDPlayer cdPlayer(CompactDisc compactDisc) {
    return new CDPlayer(compactDisc);
  }

}
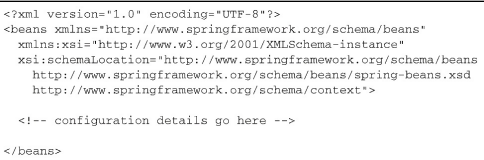
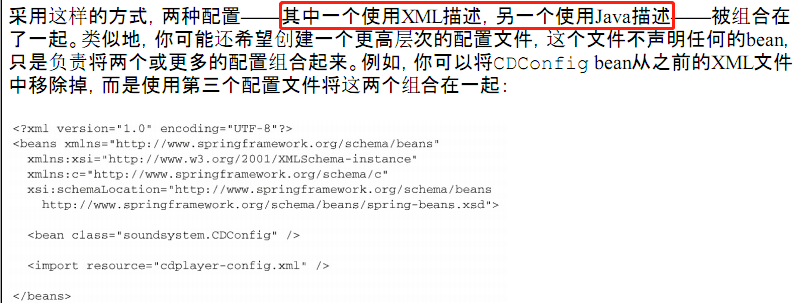
通过xml装配bean


PS: 根据环境的变化,修改配置文件
package com.myapp;

import javax.sql.DataSource;

import org.springframework.context.annotation.Bean;
import org.springframework.context.annotation.Configuration;
import org.springframework.context.annotation.Profile;
import org.springframework.jdbc.datasource.embedded.EmbeddedDatabaseBuilder;
import org.springframework.jdbc.datasource.embedded.EmbeddedDatabaseType;
import org.springframework.jndi.JndiObjectFactoryBean;

@Configuration
public class DataSourceConfig {

  @Bean(destroyMethod = "shutdown")
  @Profile("dev")
  public DataSource embeddedDataSource() {
    return new EmbeddedDatabaseBuilder()
        .setType(EmbeddedDatabaseType.H2)
        .addScript("classpath:schema.sql")
        .addScript("classpath:test-data.sql")
        .build();
  }

  @Bean
  @Profile("prod")
  public DataSource jndiDataSource() {
    JndiObjectFactoryBean jndiObjectFactoryBean = new JndiObjectFactoryBean();
    jndiObjectFactoryBean.setJndiName("jdbc/myDS");
    jndiObjectFactoryBean.setResourceRef(true);
    jndiObjectFactoryBean.setProxyInterface(javax.sql.DataSource.class);
    return (DataSource) jndiObjectFactoryBean.getObject();
  }

}
<?xml version="1.0" encoding="UTF-8"?>
<beans xmlns="http://www.springframework.org/schema/beans"
  xmlns:xsi="http://www.w3.org/2001/XMLSchema-instance" xmlns:jdbc="http://www.springframework.org/schema/jdbc"
  xmlns:jee="http://www.springframework.org/schema/jee" xmlns:p="http://www.springframework.org/schema/p"
  xsi:schemaLocation="
    http://www.springframework.org/schema/jee
    http://www.springframework.org/schema/jee/spring-jee.xsd
    http://www.springframework.org/schema/jdbc
    http://www.springframework.org/schema/jdbc/spring-jdbc.xsd
    http://www.springframework.org/schema/beans
    http://www.springframework.org/schema/beans/spring-beans.xsd">

  <beans profile="dev">
    <jdbc:embedded-database id="dataSource" type="H2">
      <jdbc:script location="classpath:schema.sql" />
      <jdbc:script location="classpath:test-data.sql" />
    </jdbc:embedded-database>
  </beans>

  <beans profile="prod">
    <jee:jndi-lookup id="dataSource"
      lazy-init="true"
      jndi-name="jdbc/myDatabase"
      resource-ref="true"
      proxy-interface="javax.sql.DataSource" />
  </beans>
</beans>


--------------------------在Autowired的时候会存在歧义

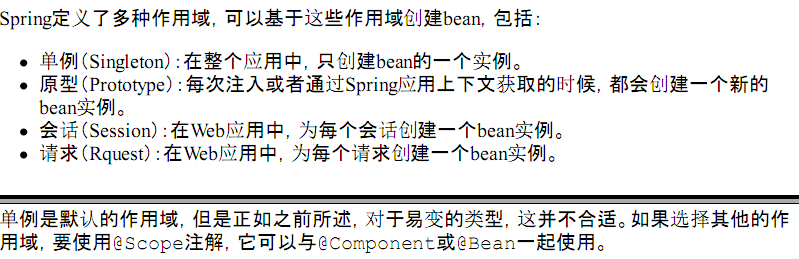
PS: prototype就是多例
@Scope
----------运行时注入,读取配置文件
@ProtertySource
---------------------------------------------------------------------------
 例子是抄电表

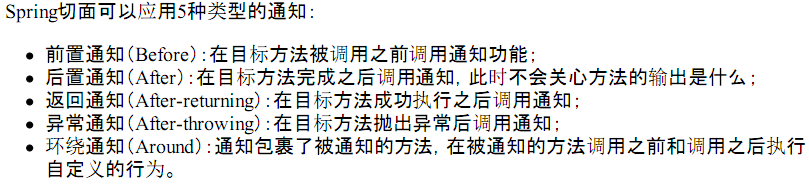
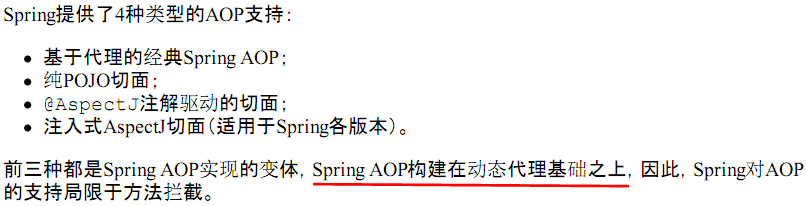
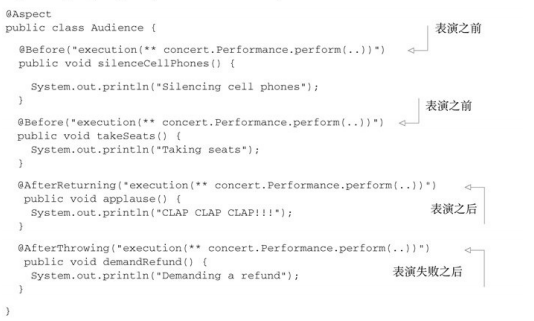
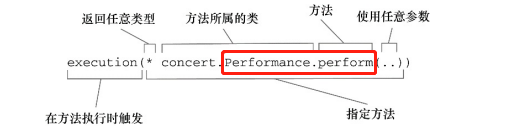
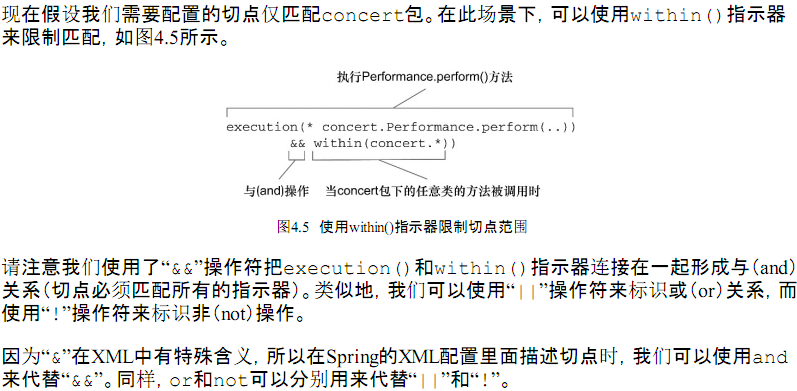
Spring AOP详解

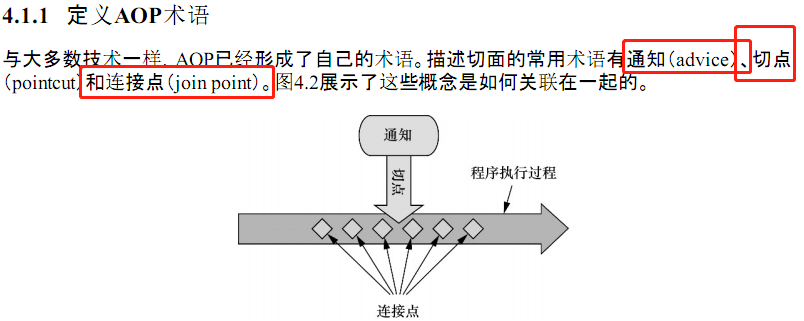

PS: 重点!!!!!!!!!!!! 这五种方式说明何时调用通知


PS: 这两个是一样的

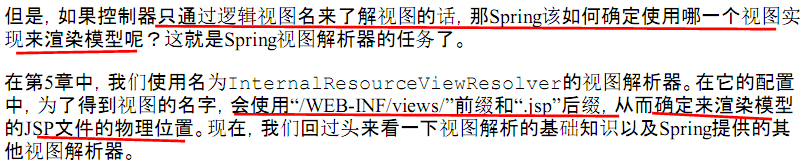
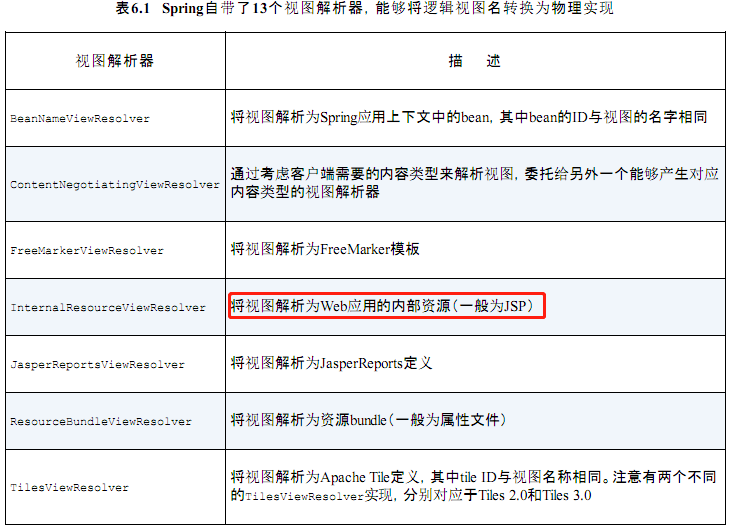
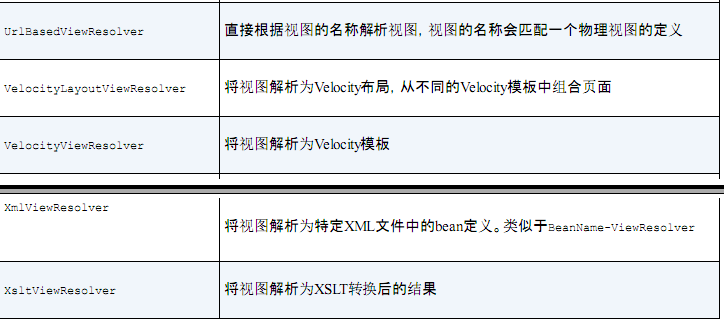
PS: home 视图解析, home将会被解析为/WEB-INF/views/home.jsp

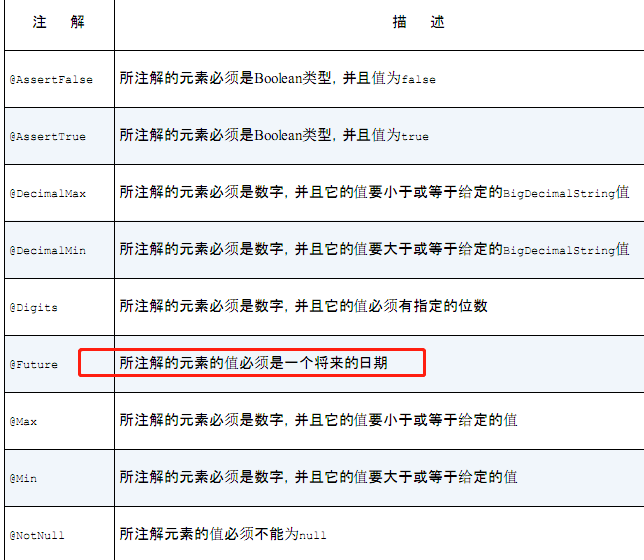
PS:春河说的校验表单参数

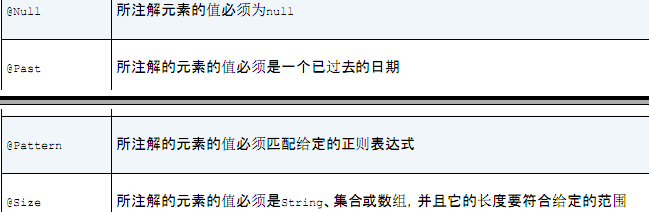
package spittr;

import javax.validation.constraints.NotNull;
import javax.validation.constraints.Size;

import org.apache.commons.lang3.builder.EqualsBuilder;
import org.apache.commons.lang3.builder.HashCodeBuilder;
import org.hibernate.validator.constraints.Email;

public class Spitter {

  private Long id;

  @NotNull
  @Size(min=5, max=16)
  private String username;

  @NotNull
  @Size(min=5, max=25)
  private String password;

  @NotNull
  @Size(min=2, max=30)
  private String firstName;

  @NotNull
  @Size(min=2, max=30)
  private String lastName;

  @NotNull
  @Email
  private String email;

  public Spitter() {}

  public Spitter(String username, String password, String firstName, String lastName, String email) {
    this(null, username, password, firstName, lastName, email);
  }

  public Spitter(Long id, String username, String password, String firstName, String lastName, String email) {
    this.id = id;
    this.username = username;
    this.password = password;
    this.firstName = firstName;
    this.lastName = lastName;
    this.email = email;
  }

  public String getUsername() {
    return username;
  }

  public void setUsername(String username) {
    this.username = username;
  }

  public String getPassword() {
    return password;
  }

  public void setPassword(String password) {
    this.password = password;
  }

  public Long getId() {
    return id;
  }

  public void setId(Long id) {
    this.id = id;
  }

  public String getFirstName() {
    return firstName;
  }

  public void setFirstName(String firstName) {
    this.firstName = firstName;
  }

  public String getLastName() {
    return lastName;
  }

  public void setLastName(String lastName) {
    this.lastName = lastName;
  }

  public String getEmail() {
    return email;
  }

  public void setEmail(String email) {
    this.email = email;
  }

  @Override
  public boolean equals(Object that) {
    return EqualsBuilder.reflectionEquals(this, that, "firstName", "lastName", "username", "password", "email");
  }

  @Override
  public int hashCode() {
    return HashCodeBuilder.reflectionHashCode(this, "firstName", "lastName", "username", "password", "email");
  }

}


 PS: 看公司代码


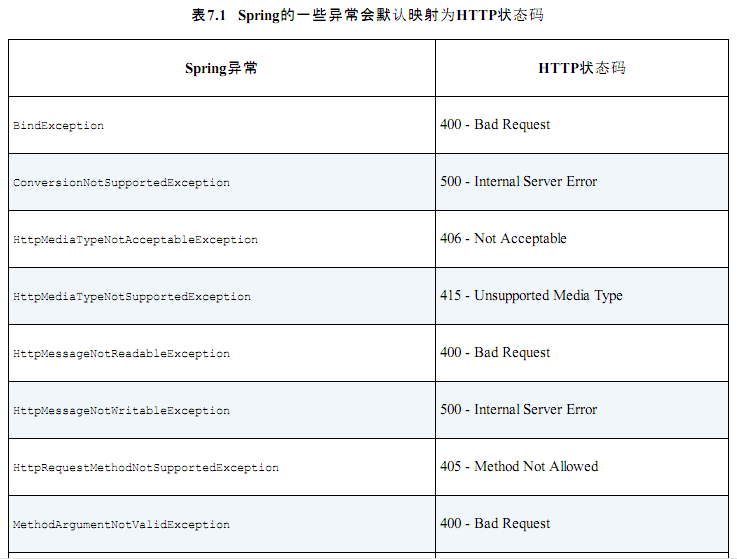
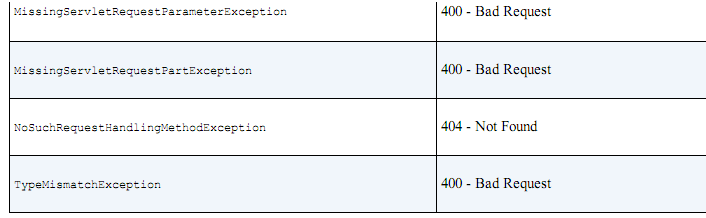


PS:自定义异常处理
通常是使用
@ControllerAdvice


PS: 这个就是 执行的顺序, 有点类似Activity


PS: 使用spring 的拦截器,只用一个就行 了。
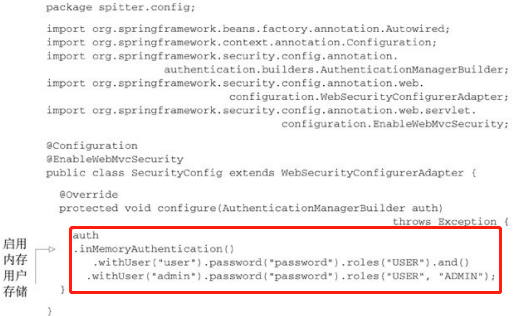
PS: 可以在测试 和 调试阶段添加 验证账户


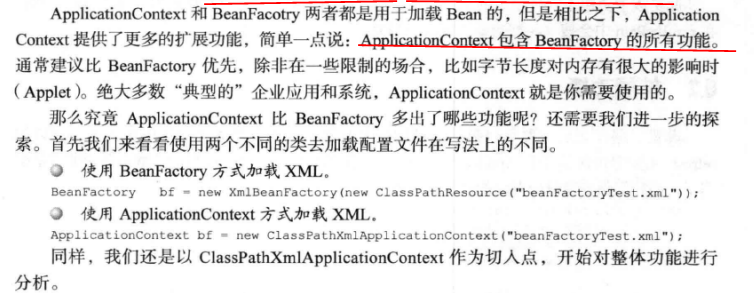
----------------------------------------Spring源码学习
PS:学习的代码是spring 3.2
PS:阅读源码最好的办法就是跟着 事例 操作一遍


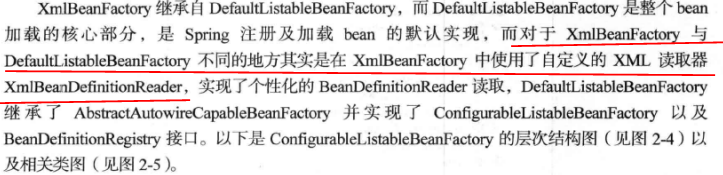
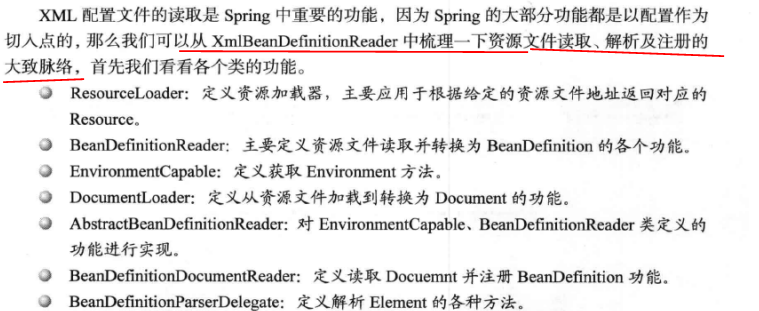
PS: XMLBeanFactory继承自 1, 而 1 是整个bean加载的核心部分;

-------------------------------------------------------------------------------------------------------------------------------


PS: SpringMVC是基于Servlet功能实现的