上一篇博客说要仿写半糖,框架已经搭好了http://www.cnblogs.com/bcblogs/p/5227522.html,今天来写第一个界面
首先看了下第一个界面,可以用tableView来实现,当tableView滑动时,navgationbar的颜色从透明开始慢慢变到粉红色
应该是tableView继承的scrollView,可以在scrollView的代理里面得到tableView滑动的距离,根据距离来改变透明度,so easy
HomeViewController里的代码
import UIKit

class HomeViewController: UIViewController {

    private var tableView:UITableView!


    override func viewDidLoad() {
        super.viewDidLoad()
        bulidTableView()
        settingNav()
    }

    private func settingNav(){
        //开始时将navigationBar的透明度设置为0
        self.navigationController?.navigationBar.alpha = 0
    }
    private func bulidTableView(){
        self.automaticallyAdjustsScrollViewInsets = false
        tableView = UITableView(frame: CGRectMake(0, 0, ScreenWidth, ScreenHeight-49), style:.Plain)
        tableView.delegate = self
        tableView.dataSource = self
        view.addSubview(tableView)
    }

    override func didReceiveMemoryWarning() {
        super.didReceiveMemoryWarning()
    }

}

extension HomeViewController:UITableViewDataSource,UITableViewDelegate,UIScrollViewDelegate{
    func tableView(tableView: UITableView, cellForRowAtIndexPath indexPath: NSIndexPath) -> UITableViewCell {
        let cell = UITableViewCell(style:.Default, reuseIdentifier:"cell")
        cell.textLabel?.text = "测试"
        return cell
    }

    func tableView(tableView: UITableView, numberOfRowsInSection section: Int) -> Int {
        return 20
    }

    func scrollViewDidScroll(scrollView: UIScrollView) {
        let y = scrollView.contentOffset.y

        if(y <= 0){
            //往上滑动,透明度为0
            self.navigationController?.navigationBar.alpha = 0.0
        }else{
            //滑动到距离为100的时候才显示完全
            if y/100 >= 1{
                return
            }
            print(y/100)
            self.navigationController?.navigationBar.alpha = (y)/100
        }
    }
}
运行效果如图
好吧,一开始想的简单了(是我想太多),开始的时候设置navgationbar的透明度不起作用,试着在viewwillappear里写,也没有用
只有在滑动一次之后才有作用,上网找了好久,也不明白这是怎么回事(知道的小伙伴可以评论里告诉我啊),后来还是用了比较蠢得方法
画一张图片....,代码如下,extension文件夹下,多加个UIColor的扩展

import UIKit

class HomeViewController: UIViewController {

    private var tableView:UITableView!


    override func viewDidLoad() {
        super.viewDidLoad()
        bulidTableView()
        settingNav()
    }

    private func settingNav(){
        //开始时将navigationBar的透明度设置为0
        self.navigationController?.navigationBar.alpha = 0

        self.navigationController?.navigationBar.setBackgroundImage(self.imageWitBgColor(UIColor.colorWithCustom(228, g: 57, b: 65, alpha: 0)), forBarMetrics:.Default)
        self.navigationController?.navigationBar.shadowImage = self.imageWitBgColor(UIColor.colorWithCustom(228, g: 57, b: 65, alpha: 0))

    }

    private func bulidTableView(){
        self.automaticallyAdjustsScrollViewInsets = false
        tableView = UITableView(frame: CGRectMake(0, 0, ScreenWidth, ScreenHeight-49), style:.Plain)
        tableView.delegate = self
        tableView.dataSource = self
        view.addSubview(tableView)
    }
    private func imageWitBgColor(color:UIColor) -> UIImage{
        let rect = CGRectMake(0, 0, 1, 1)
        UIGraphicsBeginImageContext(rect.size)
        let context = UIGraphicsGetCurrentContext()
        CGContextSetFillColorWithColor(context,color.CGColor)
        CGContextFillRect(context,rect)
        let image = UIGraphicsGetImageFromCurrentImageContext()
        UIGraphicsEndImageContext()
        return image
    }
    override func didReceiveMemoryWarning() {
        super.didReceiveMemoryWarning()
    }

}

extension HomeViewController:UITableViewDataSource,UITableViewDelegate,UIScrollViewDelegate{
    func tableView(tableView: UITableView, cellForRowAtIndexPath indexPath: NSIndexPath) -> UITableViewCell {
        let cell = UITableViewCell(style:.Default, reuseIdentifier:"cell")
        cell.textLabel?.text = "测试"
        return cell
    }

    func tableView(tableView: UITableView, numberOfRowsInSection section: Int) -> Int {
        return 20
    }

    func scrollViewDidScroll(scrollView: UIScrollView) {
        let y = scrollView.contentOffset.y

        if(y <= 0){
            //往上滑动,透明度为0
            self.navigationController?.navigationBar.setBackgroundImage(self.imageWitBgColor(UIColor.colorWithCustom(228, g: 57, b: 65, alpha: 0)), forBarMetrics:.Default)
        }else{
            //滑动到距离为100的时候才显示完全
            if y/100 >= 1{
                return
            }
            print(y/100)
            self.navigationController?.navigationBar.setBackgroundImage(self.imageWitBgColor(UIColor.colorWithCustom(228, g: 57, b: 65, alpha:y/100)), forBarMetrics:.Default)
        }
    }
}
运行效果

是吧,成功了,但是看到后面,导航栏的颜色太深了,这不符合我这完美主义者啊,所以还是用以前的navgationbar的alpha方法,只是在刚开始时将nav的背景图片设置成透明
顺便将画图片的方法写进UIImage的扩展
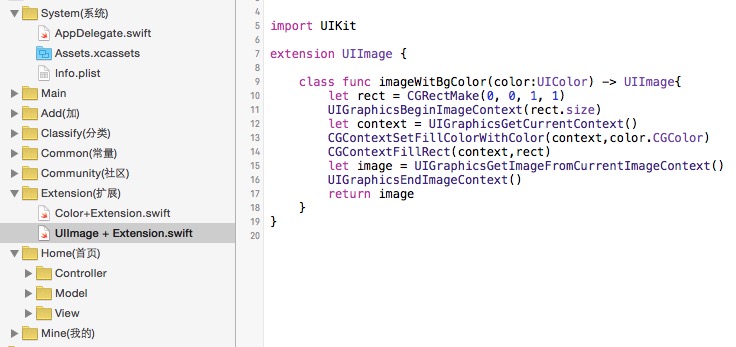
import UIKit

class HomeViewController: UIViewController {

    private var tableView:UITableView!


    override func viewDidLoad() {
        super.viewDidLoad()
        bulidTableView()
        settingNav()
    }

    private func settingNav(){
        //开始时将navigationBar的透明度设置为0
        self.navigationController?.navigationBar.setBackgroundImage(UIImage.imageWitBgColor(UIColor.colorWithCustom(228, g: 57, b: 65, alpha:0)), forBarMetrics:.Default)
        self.navigationController?.navigationBar.shadowImage = UIImage.imageWitBgColor(UIColor.colorWithCustom(228, g: 57, b: 65, alpha:0))
    }

    private func bulidTableView(){
        self.automaticallyAdjustsScrollViewInsets = false
        tableView = UITableView(frame: CGRectMake(0, 0, ScreenWidth, ScreenHeight-49), style:.Plain)
        tableView.delegate = self
        tableView.dataSource = self
        view.addSubview(tableView)
    }

    override func didReceiveMemoryWarning() {
        super.didReceiveMemoryWarning()
    }

}

extension HomeViewController:UITableViewDataSource,UITableViewDelegate,UIScrollViewDelegate{
    func tableView(tableView: UITableView, cellForRowAtIndexPath indexPath: NSIndexPath) -> UITableViewCell {
        let cell = UITableViewCell(style:.Default, reuseIdentifier:"cell")
        cell.textLabel?.text = "测试"
        return cell
    }

    func tableView(tableView: UITableView, numberOfRowsInSection section: Int) -> Int {
        return 20
    }

    func scrollViewDidScroll(scrollView: UIScrollView) {
        let y = scrollView.contentOffset.y
        self.navigationController?.navigationBar.setBackgroundImage(nil, forBarMetrics:.Default)
        self.navigationController?.navigationBar.shadowImage = nil

        if(y <= 0){
            //往上滑动,透明度为0
            self.navigationController?.navigationBar.alpha = 0
        }else{
            //滑动到距离为100的时候才显示完全
            if y/100 >= 1{
                return
            }
            self.navigationController?.navigationBar.alpha = y/100

        }
    }
}
运行效果

perfect,成功,感觉写的好慢,不知道猴年马月才能写完了....,写的慢的原因是我写出了自己的想法和写界面的过程,要是直接写正确的代码估计会很快
,下一篇估计讲的是网络请求,数据解析和cocoapods吧..