以下是学习笔记:
1,分析事件
【1】
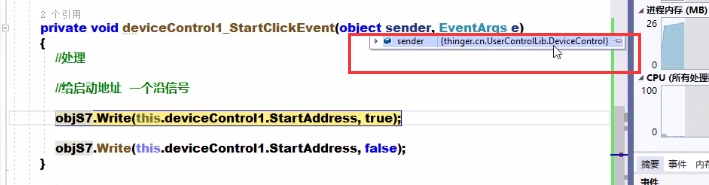
sender是自定义控件的PictureBox,通过PictureBox拿不到地址。需要通过这个自定义的控件this.deviceControl1才能拿到地址。
如果sender是这个自定义的控件this.deviceControl1就可以解决上面的问题了

【2】往上查找deviceControl1_StartCliclkEvent这事件是怎么来的

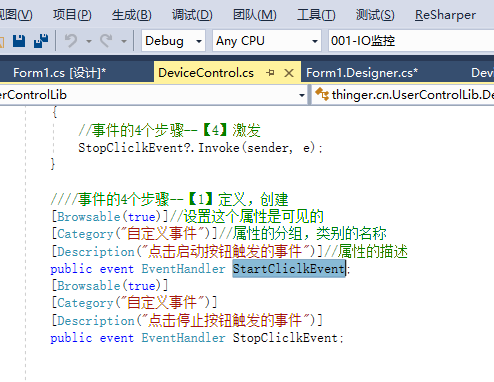
【3】再往上查找StartCliclkEvent这个事件怎么来的,是在自定义控件中自定义的事件
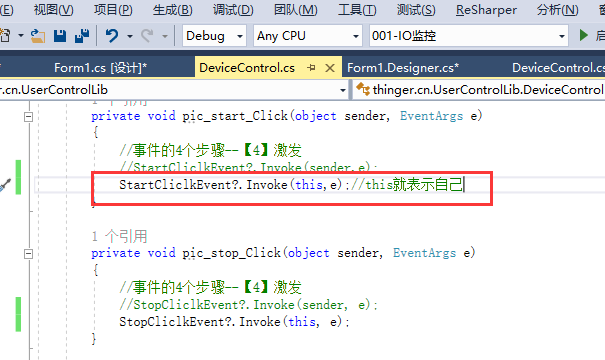
【4】在往上查找StartCliclkEvent是怎么调用的,这里可以看到sender是怎么来的

2,解决sender的问题
【1】所以就只需要把sender换成this就可以了
【2】再运行代码,sender就是DeviceControl类型了
3,这个时候就能做成通用的方法了
4,继续优化,要实现拖入控件后不用绑定事件就能直接用,优化后的代码:
通过代码绑定事件
using System;
using System.Collections.Generic;
using System.ComponentModel;
using System.Data;
using System.Drawing;
using System.Linq;
using System.Text;
using System.Threading.Tasks;
using System.Windows.Forms;
using thinger.cn.UserControlLib;
using xktComm;
namespace _002_自定义控件
{
public partial class Form1 : Form
{
public Form1()
{
InitializeComponent();
if (!objS7.Connect("192.168.1.123", CPU_Type.S71500, 0, 0))
{
MessageBox.Show("PLC连接失败");
}
else
{
myTimer.Interval = 100;
myTimer.Tick += MyTimer_Tick;
myTimer.Enabled = true;
BindEvent();//在这里绑定控件的事件,不要通过双击去绑定。如果已经有绑定过的事件,需要重置一下
} ;
}
private void BindEvent()
{
foreach (var item in this.Controls)
{
if (item is DeviceControl dc)
{
if (dc.StartAddress?.Length > 0 && dc.StopAddress?.Length > 0)
{
dc.StartCliclkEvent += deviceControl1_StartCliclkEvent;
dc.StopCliclkEvent += deviceControl1_StopCliclkEvent;
}
}
}
}
private void MyTimer_Tick(object sender, EventArgs e)
{
//this.deviceControl1.DeviceState =Convert.ToBoolean( objS7.Read(this.deviceControl1.StateAddress, VarType.Bit).ToString());
//this.deviceControl2.DeviceState =Convert.ToBoolean( objS7.Read(this.deviceControl2.StateAddress, VarType.Bit).ToString());
//this.deviceControl3.DeviceState =Convert.ToBoolean( objS7.Read(this.deviceControl3.StateAddress, VarType.Bit).ToString());
foreach (var item in this.Controls)
{
if (item is DeviceControl dc)
{
if (dc.StartAddress?.Length > 0 )
{
dc.DeviceState = Convert.ToBoolean(objS7.Read(dc.StateAddress, VarType.Bit).ToString());
}
}
}
}
private xktComm.SiemensS7 objS7=new SiemensS7();
private Timer myTimer = new Timer();
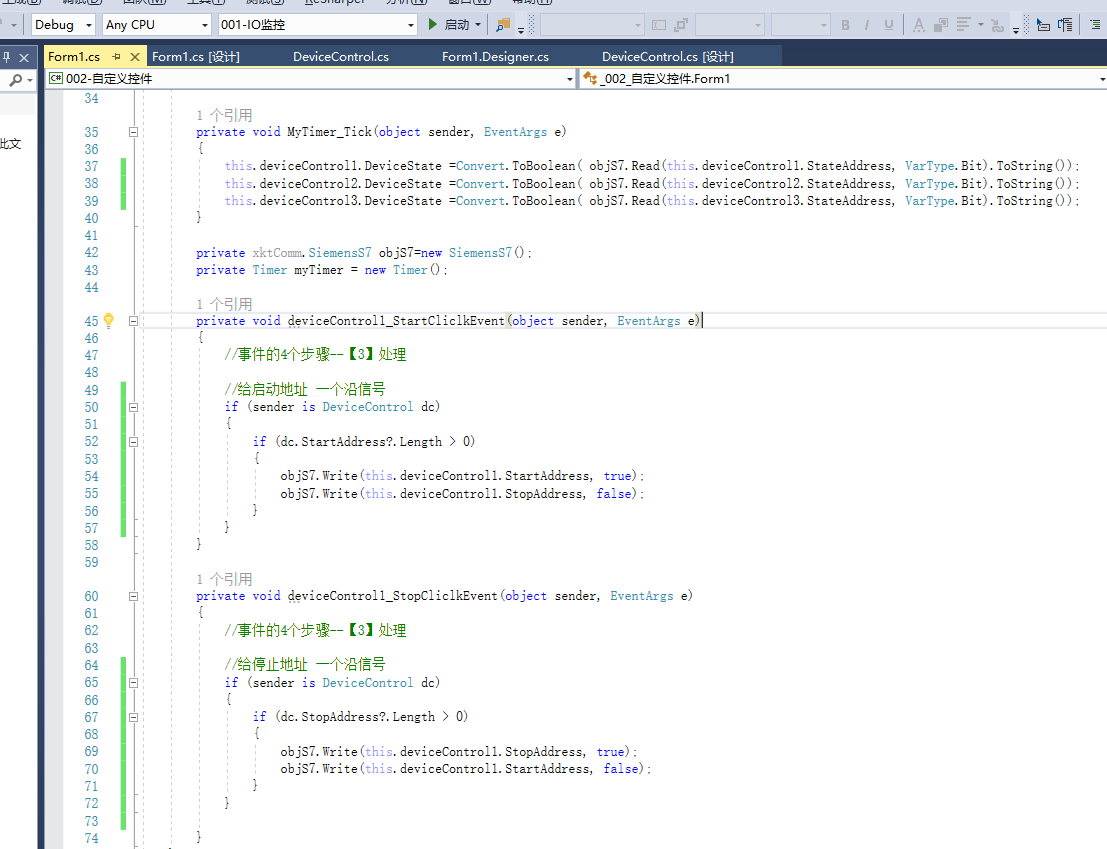
private void deviceControl1_StartCliclkEvent(object sender, EventArgs e)
{
//事件的4个步骤--【3】处理
//给启动地址 一个沿信号
if (sender is DeviceControl dc)
{
if (dc.StartAddress?.Length > 0)
{
objS7.Write(this.deviceControl1.StartAddress, true);
objS7.Write(this.deviceControl1.StopAddress, false);
}
}
}
private void deviceControl1_StopCliclkEvent(object sender, EventArgs e)
{
//事件的4个步骤--【3】处理
//给停止地址 一个沿信号
if (sender is DeviceControl dc)
{
if (dc.StopAddress?.Length > 0)
{
objS7.Write(this.deviceControl1.StopAddress, true);
objS7.Write(this.deviceControl1.StartAddress, false);
}
}
}
}
}
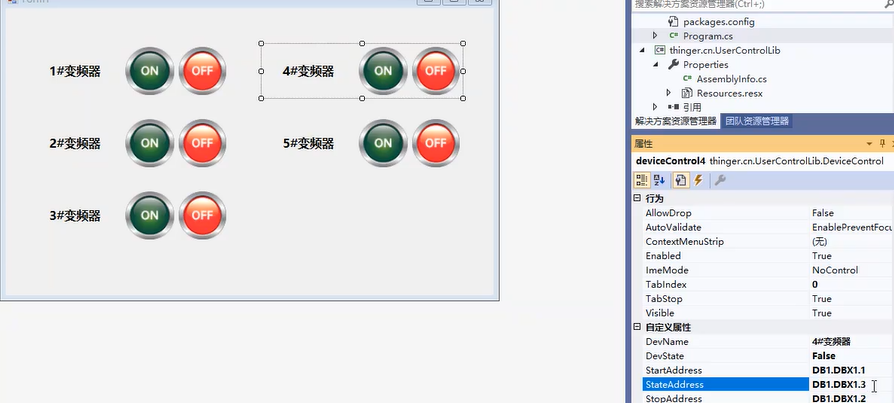
5,以后要增加设备的话,只用拖入自定义控件,修改 设备名称和需要控制的PLC的DB地址就好了