android创建sqlite数据库
●sqlite数据库是开源的用C语言实现的移动平台下的嵌入式数据库,适用于移动平台,处理器比较慢,内存小,iphone的数据库也是sqlite的,类型比mysql数据库少很多
●数据库的创建方法:
步骤一:建一个工程
步骤二:创建一个存储person信息的数据库打开帮助类,使用api SQLiteOpenHelper(数据库创建与打开帮助类),让这个类继承SQLiteOpenHelper
示例代码:
 1 package com.itheima.db;
 2
 3 import android.content.Context;
 4
 5 import android.database.sqlite.SQLiteDatabase;
 6
 7 import android.database.sqlite.SQLiteDatabase.CursorFactory;
 8
 9 import android.database.sqlite.SQLiteOpenHelper;
10
11 public class PersonSQLiteOpenHelper extends SQLiteOpenHelper {
12
13               /**
14
15                * 数据库的构造方法,用于定义数据库的名称  数据库查询的结果集 数据库的版本
16
17                * @param context 上下文
18
19                *
20
21                */
22
23               public PersonSQLiteOpenHelper(Context context) {
24
25                             //name 数据库的名称
26
27                             //factory 结果集的指针,指向数据条目的位置,写成null是使用系统默认的游标工程
28
29                             //version 数据库的版本,最小从1开始
30
31                             super(context, "person.db", null, 1);
32
33               }
34
35               /**
36
37                * 在数据第一次被创建的时候被调用,创建数据库的表结构和存放一些初始化的参数
38
39                *db 被创建的数据库
40
41                */
42
43               @Override
44
45               public void onCreate(SQLiteDatabase db) {
46
47                             //初始化数据库的表结构
48
49                             db.execSQL("create table person (id integer primary key autoincrement,name varchar(20),number varchar(20))");
50
51               }
52
53               @Override
54
55               public void onUpgrade(SQLiteDatabase db, int oldVersion, int newVersion) {
56
57               }
58
59 }
步骤三:测试所写的代码
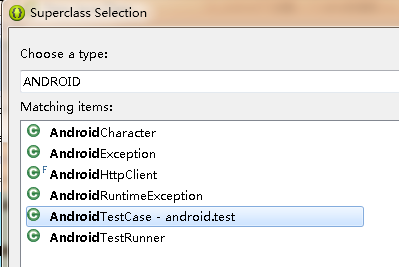
新建一个包,在包里创建出一个class,让这个class继承AndroidTestCase
 1 package com.itheima.db.test;
 2
 3 import com.itheima.db.PersonSQLiteOpenHelper;
 4
 5 import android.test.AndroidTestCase;
 6
 7 public class TestPersonDB extends AndroidTestCase {
 8
 9               public void testCreateDB() throws Exception
10
11               {
12
13                             //这时候不能用this代表上下文了,测试框架提供getContext()获得上下文
14
15                             PersonSQLiteOpenHelper helper = new PersonSQLiteOpenHelper(getContext());
16
17                             helper.getWritableDatabase();
18
19               }
20
21 }
步骤四:配置测试junit框架,如果不会写代码,可以new出来android下面的一个测试工程 ,把里面的manifest.xml文件里面的代码贴到自己创建的工程的manifest.xml文件下
 1 <?xml version="1.0" encoding="utf-8"?>
 2
 3 <manifest xmlns:android="http://schemas.android.com/apk/res/android"
 4
 5     package="com.itheima.db"
 6
 7     android:versionCode="1"
 8
 9     android:versionName="1.0" >
10
11     <uses-sdk
12
13         android:minSdkVersion="19"
14
15         android:targetSdkVersion="19" />
16
17     <instrumentation
18
19         android:name="android.test.InstrumentationTestRunner"
20
21         android:targetPackage="com.itheima.db" />
22
23
24
25     <application
26
27         android:allowBackup="true"
28
29         android:icon="@drawable/ic_launcher"
30
31         android:label="@string/app_name"
32
33         android:theme="@style/AppTheme" >
34
35            <uses-library android:name="android.test.runner" />
36
37         <activity
38
39             android:name="com.itheima.db.MainActivity"
40
41             android:label="@string/app_name" >
42
43             <intent-filter>
44
45                 <action android:name="android.intent.action.MAIN" />
46
47                 <category android:name="android.intent.category.LAUNCHER" />
48
49             </intent-filter>
50
51         </activity>
52
53     </application>
54
55 </manifest>
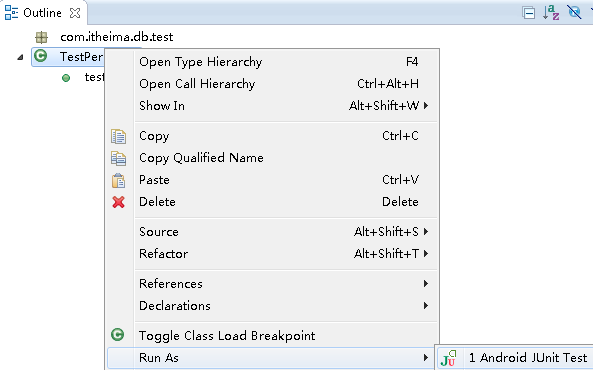
步骤五:运行测试代码:
步骤六:用到数据库的查看工具