1.1 使用nginx实现静态分离得负载均衡集群
1.1.1 Nginx负载均衡基础知识
本实验使用的主机是:
|
主机 |
IP地址 |
角色 |
|
centos23.cn |
192.168.3.23 |
Nginx反向代理服务器 |
|
centos24.cn |
192.168.3.24 |
web服务器 |
|
centos25.cn |
192.168.3.25 |
web服务器 |
网络拓扑图:

Nginx的upstream负载的5种方式,目前最常用得前3种方式
1、轮询(默认)
每个请求按时间顺序逐一分配到不同得后端服务器,如果后端服务器down掉,能自动剔除。
2、weight
指定轮询几率,weight和访问比率成正比,用于后端服务器性能不均得情况。
3、ip_hash
每个请求按访问IP的hash结果分配,这样每个访客固定访问一个后端服务器,可以解决session的问题。
4、fair(第三方)
按后端服务器的相应时间来分配请求,响应时间短的有限分配。
5、usl_hask(第三方) url哈希
按访问url的hash结果来分配请求,使同样的url定向到同一个后端服务器,后端服务器为缓存时比较有效
1.1.2 源码编译安装nginx
1、安装nginx时必须先安装相应的编译工具和相关依赖
[root@centos23 ~]# yum -y install gcc gcc-c++ autoconf automake zlib zlib-devel openssl openssl-devel pcre pcre-devel
zlib:nginx提供gzip模块,需要zlib库支持
openssl:nginx提供ssl功能
pcre:支持地址重写rewrite功能
2、解压压缩包,并配置nginx
[root@centos23 ~]# tar zxf nginx-1.12.2.tar.gz -C /usr/local/src/
[root@centos23 nginx-1.12.2]# ./configure --prefix=/usr/local/nginx --with-http_dav_module --with-http_stub_status_module --with-http_addition_module --with-http_sub_module --with-http_flv_module --with-http_mp4_module
查看参数:
[root@xuegod63 nginx-1.8.0]# ./configure --help | grep mp4
参数:
--with-http_dav_module 启用ngx_http_dav_module支持(增加PUT,DELETE,MKCOL:创建集合,COPY和MOVE方法)默认情况下为关闭,需编译开启
--with-http_stub_status_module 启用ngx_http_stub_status_module支持(获取nginx自上次启动以来的工作状态)
--with-http_addition_module 启用ngx_http_addition_module支持(作为一个输出过滤器,支持不完全缓冲,分部分响应请求)
--with-http_sub_module 启用ngx_http_sub_module支持(允许用一些其他文本替换nginx响应中的一些文本)
--with-http_flv_module 启用ngx_http_flv_module支持(提供寻求内存使用基于时间的偏移量文件)
--with-http_mp4_module 启用对mp4文件支持(提供寻求内存使用基于时间的偏移量文件)
[root@centos23 nginx-1.12.2]# echo $?
0
3、编译和安装
[root@centos23 nginx-1.12.2]# make
[root@centos23 nginx-1.12.2]# echo $?
0
[root@centos23 nginx-1.12.2]# make install
4、创建nginx运行用户并添加环境变量
[root@centos23 nginx-1.12.2]# useradd -M -s /sbin/nologin nginx
[root@centos23 nginx-1.12.2]# id nginx
uid=1000(nginx) gid=1000(nginx) groups=1000(nginx)
[root@centos23 ~]# vim /etc/profile #添加环境变量
export PATH=$PATH:/usr/local/nginx/sbin/
[root@centos23 ~]# source /etc/profile
[root@centos23 ~]# nginx -t #检查语法
nginx: the configuration file /usr/local/nginx/conf/nginx.conf syntax is ok
nginx: configuration file /usr/local/nginx/conf/nginx.conf test is successful
[root@centos23 ~]# nginx #启动服务
[root@centos23 ~]# netstat -antup|grep 80
tcp 0 0 0.0.0.0:80 0.0.0.0:* LISTEN 17958/nginx: master
通过浏览器测试:
5、配置nginx成为分发器,实现动静分离
[root@centos23 ~]# cd /usr/local/nginx/conf/
[root@centos23 conf]# vim nginx.conf
user nginx nginx; #修改用户和组
.........
http {
include mime.types;
default_type application/octet-stream;
#log_format main '$remote_addr - $remote_user [$time_local] "$request" '
# '$status $body_bytes_sent "$http_referer" '
# '"$http_user_agent" "$http_x_forwarded_for"';
#access_log logs/access.log main;
sendfile on;
#tcp_nopush on;
#keepalive_timeout 0;
keepalive_timeout 65;
#gzip on;
#在http{...}中加入以下内容,设定负载均衡器的服务器列表,weight参数表示权值,权值越高被分配到的概率越大。为了使测试效果比较明显,我们把权重设置为一样。
upstream httpdservers { #定义负载均衡的服务器组名称
server 192.168.3.24:80 weight=1; #定义负载均衡设备的IP
server 192.168.3.25:80 weight=1;
}
upstream phpservers {
server 192.168.3.24:80 weight=1;
server 192.168.3.25:80 weight=1;
}
upstream jpgservers {
server 192.168.3.24:80 weight=1;
server 192.168.3.25:80 weight=1;
} #在实际生产环境中,根据自己环境来指定IP地址。
server {
listen 80;
server_name localhost;
#charset koi8-r;
#access_log logs/host.access.log main;
location / {
root html;
index index.html index.htm;
#在location / {...}中加入以下内容,这里加入的内容是与上面添加的内容配对的,实际生产中可以根据实际需求添加。如果上面只有一个httpd字段,这里也只用加入一行(proxy_pass http://httpdservers;)即可,注意,上下的httpdservers字段名字必须一致。
if ($request_uri ~* .html$){
proxy_pass http://httpdservers;
}
if ($request_uri ~* .php$){
proxy_pass http://phpservers;
}
proxy_pass http://jpgservers;
}
........省略
1.1.3 配置后端web服务器
1、在centos24上安装web和php
[root@centos24 ~]# yum -y install php httpd
[root@centos24 ~]# echo "192.168.3.24 apache" >/var/www/html/index.html
[root@centos24 ~]# vim /var/www/html/index.php
192.168.3.24-php
<?php
phpinfo();
?>
[root@centos24 ~]# vim /etc/httpd/conf/httpd.conf #修改为本机IP地址
ServerName 192.168.3.24:80
添加图片:
[root@centos24 ~]# ls /var/www/html/
index.html index.php jpg.png

[root@centos24 ~]# systemctl start httpd #启动httpd服务
2、在centos25上安装web和php
[root@centos25 ~]# yum -y install php httpd
[root@centos25 ~]# echo "192.168.3.25 apache" >/var/www/html/index.html
[root@centos25 ~]# vim /var/www/html/index.php
192.168.3.25-php
<?php
phpinfo();
?>
[root@centos25 ~]# vim /etc/httpd/conf/httpd.conf
ServerName 192.168.3.25:80
添加图片:
[root@centos25 ~]# ls /var/www/html/
index.html index.php jpg.png

[root@centos25 ~]# systemctl start httpd
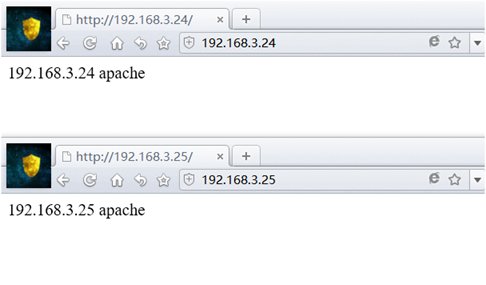
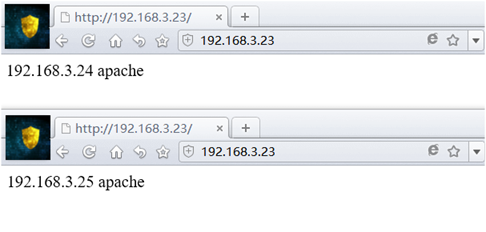
1.1.4 通过浏览器测试两个web服务器
1.1.5 使用nginx代理测试
1、测试转发静态页面
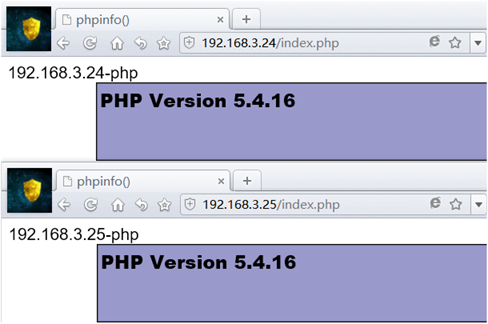
2、测试转发动态页面

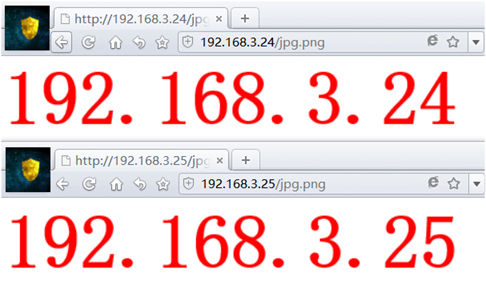
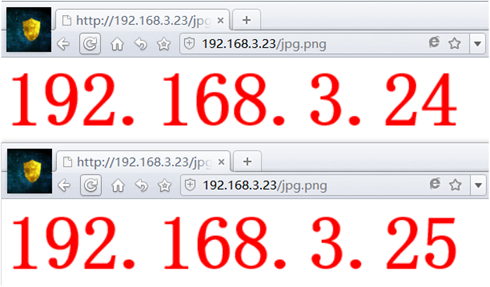
3、测试转发图片
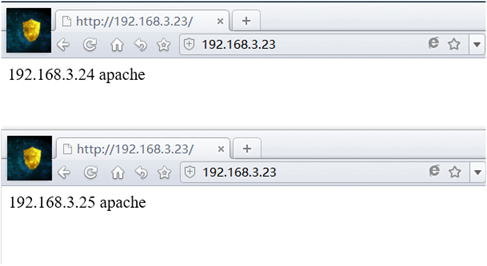
4、测试自动剔除坏的节点
[root@centos24 html]# systemctl stop httpd
访问:
http://192.168.3.23/
http://192.168.3.23/index.php
http://192.168.3.23/jpg.png
都是访问到192.168.3.25,当把centos24.cn的web服务启动之后,可以正常访问

1.1.6 测试性能
安装压力测试工具ab
[root@centos26 ~]# yum -y install httpd-tools
[root@centos26 ~]# ab -n 1000 -c 1000 http://192.168.3.23/index.html #运行正常
This is ApacheBench, Version 2.3 <$Revision: 1430300 $>
Copyright 1996 Adam Twiss, Zeus Technology Ltd, http://www.zeustech.net/
Licensed to The Apache Software Foundation, http://www.apache.org/
Benchmarking 192.168.3.23 (be patient)
Completed 100 requests
Completed 200 requests
Completed 300 requests
Completed 400 requests
Completed 500 requests
Completed 600 requests
Completed 700 requests
Completed 800 requests
Completed 900 requests
Completed 1000 requests
Finished 1000 requests
Server Software: nginx/1.12.2
Server Hostname: 192.168.3.23
Server Port: 80
Document Path: /index.html
Document Length: 20 bytes
Concurrency Level: 1000
Time taken for tests: 1.234 seconds
Complete requests: 1000
Failed requests: 478
(Connect: 0, Receive: 0, Length: 478, Exceptions: 0)
Write errors: 0
Non-2xx responses: 478
Total transferred: 311152 bytes
HTML transferred: 102694 bytes
Requests per second: 810.65 [#/sec] (mean)
Time per request: 1233.574 [ms] (mean)
Time per request: 1.234 [ms] (mean, across all concurrent requests)
Transfer rate: 246.32 [Kbytes/sec] received
Connection Times (ms)
min mean[+/-sd] median max
Connect: 0 39 3.0 39 46
Processing: 32 283 331.4 136 1151
Waiting: 1 283 331.5 136 1151
Total: 48 322 330.5 174 1186
Percentage of the requests served within a certain time (ms)
50% 174
66% 375
75% 430
80% 595
90% 633
95% 1175
98% 1181
99% 1184
100% 1186 (longest request)
[root@centos26 ~]# ab -n 2000 -c 2000 http://192.168.3.23/index.html #报错
This is ApacheBench, Version 2.3 <$Revision: 1430300 $>
Copyright 1996 Adam Twiss, Zeus Technology Ltd, http://www.zeustech.net/
Licensed to The Apache Software Foundation, http://www.apache.org/
Benchmarking 192.168.3.23 (be patient)
socket: Too many open files (24) #测试时,一次打开的socket文件太多。
[root@centos23 ~]# ulimit -a #查看所有参数
core file size (blocks, -c) 0
data seg size (kbytes, -d) unlimited
scheduling priority (-e) 0
file size (blocks, -f) unlimited
pending signals (-i) 3828
max locked memory (kbytes, -l) 64
max memory size (kbytes, -m) unlimited
open files (-n) 1024
pipe size (512 bytes, -p) 8
POSIX message queues (bytes, -q) 819200
real-time priority (-r) 0
stack size (kbytes, -s) 8192
cpu time (seconds, -t) unlimited
max user processes (-u) 3828
virtual memory (kbytes, -v) unlimited
file locks (-x) unlimited
[root@centos23 ~]# ulimit -n
1024 #系统默认一个进程同时允许打开1024个文件
解决:
[root@centos23 ~]# ulimit -n 10240 #报错的解决方法
[root@centos24 ~]# ulimit -n 10240
[root@centos25 ~]# ulimit -n 10240
#更改之后,只能在更改过的机器上测试在这三台机子上测试都可以,当把数值增加到10000后就会丢包
[root@centos23 ~]# ab -n 2000 -c 2000 http://192.168.3.23/index.html
[root@centos24 ~]# ab -n 2000 -c 2000 http://192.168.3.23/index.html
[root@centos25 ~]# ab -n 2000 -c 2000 http://192.168.3.23/index.html
This is ApacheBench, Version 2.3 <$Revision: 1430300 $>
Copyright 1996 Adam Twiss, Zeus Technology Ltd, http://www.zeustech.net/
Licensed to The Apache Software Foundation, http://www.apache.org/
Benchmarking 192.168.3.23 (be patient)
Completed 200 requests
Completed 400 requests
Completed 600 requests
Completed 800 requests
Completed 1000 requests
Completed 1200 requests
Completed 1400 requests
Completed 1600 requests
Completed 1800 requests
Completed 2000 requests
Finished 2000 requests
Server Software: nginx/1.12.2
Server Hostname: 192.168.3.23
Server Port: 80
Document Path: /index.html
Document Length: 20 bytes
Concurrency Level: 2000
Time taken for tests: 0.721 seconds
Complete requests: 2000
Failed requests: 0
Write errors: 0
Total transferred: 542000 bytes
HTML transferred: 40000 bytes
Requests per second: 2773.22 [#/sec] (mean)
Time per request: 721.183 [ms] (mean)
Time per request: 0.361 [ms] (mean, across all concurrent requests)
Transfer rate: 733.93 [Kbytes/sec] received
Connection Times (ms)
min mean[+/-sd] median max
Connect: 0 5 10.4 0 31
Processing: 32 48 18.5 46 247
Waiting: 1 48 18.5 46 247
Total: 32 54 26.6 47 277
Percentage of the requests served within a certain time (ms)
50% 47
66% 47
75% 48
80% 72
90% 100
95% 111
98% 124
99% 134
100% 277 (longest request)
1.1.7 Nginx负载的5中策略设置方法
1、轮询(默认)
每一个请求按时间顺序逐一分配到不同的后端服务器,如果后端服务器down掉,能自动剔除。
upstream backserver{
server 192.168.3.24;
server 192.168.3.25;
}
2、指定权重
指定轮询几率,weight和访问比率成正比,用于后端服务器性能不均的情况。
upstream bakcuserver{
server 192.168.3.24 weight=1;
server 192.168.3.25 weight=2;
}
3、IP绑定ip_hash
每个请求按访问IP的hash结果分配,这样每个访客固定访问一个后端服务器,可以解决session的文件。
upstream backserver{
ip_hash;
server 192.168.3.24:80;
server 192.168.3.25:80;
}
4、fair(第三方)
按后端服务器的响应时间来分配请求,相应时间短的有限分配。
upstream backserver{
server server1;
server server2;
fair;
}
5、url_hash(第三方)
按访问url的hash结果来分配请求,使每个url定向到通一个后端服务器,后端服务器为缓存时比较有效。
upstream backserver{
server squid1:3128;
server squit2:3128;
hash $request_uri;
hash_method crc32;
}
1.1.8 总结扩展:
如果有tomcat,apache,squid配置为如下:
[root@centos23 ~]# cd /usr/local/nginx/conf/
[root@centos23 conf]# vim nginx.conf #在http {...}定义服务器组
upstream tomcat_servers{
server 192.168.1.10:8080;
server 129.168.1.11:8080;
server 192.168.1.12:8080;
}
upstream apache_servers{
server 192.168.1.20:80;
server 192.168.1.21:80;
server 192.168.1.22:80;
}
upstream squid_servers{
server 192.168.1.30:3128;
server 192.168.1.31:3128;
server 192.168.1.32:3128;
}
1.2 使用haproxy实现负载均衡集群
Haproxy概述:
Haproxy提供高可用性、负载均衡以及基于TCP和HTTP应用的代理,支持虚拟主机,它是免费、快速并且可靠的一种解决方案。根据官方数据,其最高极限支持10G的并发。
Haproxy特别适用于那些负载特大的web站点,这些站点通常由需要会话保持或七层处理。Haproxy运行在当前的硬件上,完全可以支持数以万技的并发连接。并且它的运行模式使得它可以很简单安全的整合进您当前的架构中,同时可以保护你的web服务器不被暴漏到网络上。
其支持从4层到7层的网络交换,即覆盖所有的TCP协议。就是说,Haproxy甚至还支持Mysql的负载均衡。
相同点:在功能上,Proxy通过反响代理方式实现web负载均衡。和Nginx,ApacheProxy,lighttpd,Cheroke等一样。
不同点:Haproxy并不是web服务器。以上提到的所有带反响代理负载均衡的产品。都清一色是web服务器。简单说,就是他们能处理解析页面的。而Haproxy仅仅是一款用于负载均衡的应用代理。其自身并不能提供web服务。但其配置简单,拥有非常不错的服务器健康检查功能还有专门的系统状态监控页面,当其他代理的后端服务器出现故障,Haproxy会自动将该服务器摘除,故障恢复后在在自动将该服务器加入。
官网地址:https://www.haproxy.org #打开速度有点慢
http://haproxy.com/ #收费
https://github.com/haproxy/haproxy/releases/ 在github 可以下载
实验拓扑图:
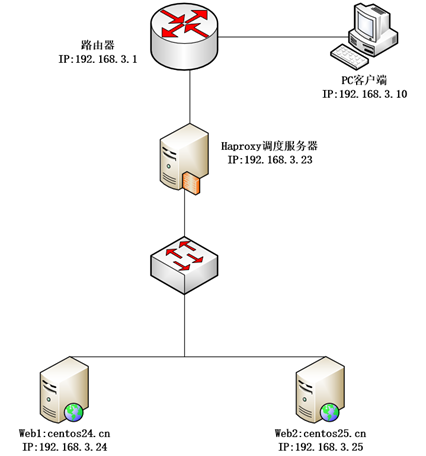
本实验使用的主机是:
|
主机 |
IP地址 |
角色 |
|
centos23.cn |
192.168.3.23 |
Haproxy调度服务器 |
|
centos24.cn |
192.168.3.24 |
web服务器 |
|
centos25.cn |
192.168.3.25 |
web服务器 |
1.2.1 下载并安装Haproxy
1、下载源码包,并安装依赖包
下载地址 https://www.haproxy.org/download/1.7/src/haproxy-1.7.9.tar.gz
[root@centos23 ~]# yum -y install make gcc gcc-c++ openssl-devel
[root@centos23 ~]# tar zxf haproxy-1.7.9.tar.gz
[root@centos23 ~]# cd haproxy-1.7.9/
[root@centos23 haproxy-1.7.9]# uname -r #查看内核版本
3.10.0-693.el7.x86_64
[root@centos23 haproxy-1.7.9]# make TARGET=linux3100 PREFIX=/usr/local/haproxy
#指定系统内核版本核安装路径
2、安装
[root@centos23 haproxy-1.7.9]# make install PREFIX=/usr/local/haproxy
[root@centos23 haproxy-1.7.9]# echo $?
0
[root@centos23 ~]# mkdir /usr/local/haproxy/etc
1.2.2 手动创建配置文件
[root@centos23 ~]# vim /usr/local/haproxy/etc/haproxy.cfg
global
log 127.0.0.1 local0
# log 127.0.0.1 local1 notice
# log loghost local0 info
maxconn 4096
chroot /usr/local/haproxy
uid 99 #所属运行的用户uid
gid 99 #所属运行的用户组
daemon #以后台形式运行haproxy
nbproc 1 #启动1个haproxy实例。##工作进程数量(CPU数量) ,实际工作中,应该设置成和CPU核心数一样。 这样可以发挥出最大的性能。
pidfile /usr/local/haproxy/run/haproxy.pid #将所有进程写入pid文件
# debug #调试错误时用
# quiet #安静
defaults
log global
log 127.0.0.1 local3 #日志文件的输出定向。产生的日志级别为local3. 系统中local1-7,用户自己定义
mode http #工作模式,所处理的类别,默认采用http模式,可配置成tcp作4层消息转发
option httplog #日志类别,记载http日志
option httpclose #每次请求完毕后主动关闭http通道,haproxy不支持keep-alive,只能模拟这种模式的实现
option dontlognull #不记录空连接,产生的日志
option forwardfor #如果后端服务器需要获得客户端真实ip需要配置的参数,可以从Http Header中获得客户端ip
option redispatch #当serverid对应的服务器挂掉后,强制定向到其他健康服务器
retries 2 #2次连接失败就认为服务器不可用,主要通过后面的check检查
maxconn 2000 #最大连接数
balance roundrobin #负载均衡算法
stats uri /haproxy-stats #haproxy 监控页面的访问地址#可通过 http://localhost:80/haproxy-stats
访问
timeout connect 5000 #连接超时时间。 单位:ms 毫秒
timeout client 50000 #客户端连接超时时间
timeout server 50000 #服务器端连接超时时间
mode http
option httpchk GET /index.html #健康检测#注意实际工作中测试时,应该下载某一个页面来进行测试,因此这个页面应该是个小页面,而不要用首页面。这里是每隔一秒检查一次页面。
frontend http #前端配置,http名称可自定义
bind 0.0.0.0:80 #发起http请求80端口,会被转发到设置的ip及端口
default_backend http_back #转发到后端 写上后端名称
backend http_back #后端配置,名称上下关联
server s1 192.168.3.24:80 weight 3 check #后端的主机 IP &权衡
server s2 192.168.3.25:80 weight 3 check #后端的主机 IP &权衡
# server node1 192.168.3.131:8081 check inter 2000 rise 3 fall 3 weight 30
# inter 2000 健康检查时间间隔2秒
# rise 3 检测多少次才认为是正常的
# fall 3 失败多少次才认为是不可用的
# weight 30 权重
关于负载均衡算法:
#source 根据请求源IP
#static-rr 根据权重
#leastconn 最少连接者先处理
#uri 根据请求的uri
#url_param 根据请求的url参数
#rdp-cookie 据据cookie(name)来锁定并哈希每一次请求
#hdr(name) 根据HTTP请求头来锁定每一次HTTP请求
#roundrobin 轮询方式
1.2.3 使用nobody用户运行haproxy,也可以自己添加用户
[root@centos23 ~]# id nobody
uid=99(nobody) gid=99(nobody) groups=99(nobody)
1.2.4 复制haproxy启动脚本,到/etc/init.d/下
[root@centos23 ~]# cp ./haproxy-1.7.9/examples/haproxy.init /etc/init.d/haproxy
[root@centos23 ~]# chmod 755 /etc/init.d/haproxy
[root@centos23 ~]# vim /etc/init.d/haproxy #红色部分是需要修改的位置
#!/bin/sh
#
# chkconfig: - 85 15
# description: HA-Proxy is a TCP/HTTP reverse proxy which is particularly suited
# for high availability environments.
# processname: haproxy
# config: /usr/local/haproxy/etc/haproxy.cfg
# pidfile: /usr/local/haproxy/run/haproxy.pid
# Script Author: Simon Matter <simon.matter@invoca.ch>
# Version: 2004060600
# Source function library.
if [ -f /etc/init.d/functions ]; then
. /etc/init.d/functions
elif [ -f /etc/rc.d/init.d/functions ] ; then
. /etc/rc.d/init.d/functions
else
exit 0
fi
# Source networking configuration.
. /etc/sysconfig/network
# Check that networking is up.
[ ${NETWORKING} = "no" ] && exit 0
# This is our service name
BASENAME=`haproxy`
BIN=/usr/sbin/haproxy
CFG=/usr/local/haproxy/haproxy.cfg
[ -f $CFG ] || exit 1
PIDFILE=/usr/local/haproxy/run/haproxy.pid
LOCKFILE=/usr/local/haproxy/run/haproxy
RETVAL=0
start() {
quiet_check
if [ $? -ne 0 ]; then
echo "Errors found in configuration file, check it with '$BASENAME check'."
return 1
fi
echo -n "Starting $BASENAME: "
daemon $BIN -D -f $CFG -p $PIDFILE
RETVAL=$?
echo
[ $RETVAL -eq 0 ] && touch $LOCKFILE
return $RETVAL
}
stop() {
echo -n "Shutting down $BASENAME: "
killproc $BASENAME -USR1
RETVAL=$?
echo
[ $RETVAL -eq 0 ] && rm -f $LOCKFILE
[ $RETVAL -eq 0 ] && rm -f $PIDFILE
return $RETVAL
}
restart() {
quiet_check
if [ $? -ne 0 ]; then
echo "Errors found in configuration file, check it with '$BASENAME check'."
return 1
fi
stop
start
}
reload() {
if ! [ -s $PIDFILE ]; then
return 0
fi
quiet_check
if [ $? -ne 0 ]; then
echo "Errors found in configuration file, check it with '$BASENAME check'."
return 1
fi
$BIN -D -f $CFG -p $PIDFILE -sf $(cat $PIDFILE)
}
check() {
$BIN -c -q -V -f $CFG
}
quiet_check() {
$BIN -c -q -f $CFG
}
rhstatus() {
status $BASENAME
}
condrestart() {
[ -e $LOCKFILE ] && restart || :
}
# See how we were called.
case "$1" in
start)
start
;;
stop)
stop
;;
restart)
restart
;;
reload)
reload
;;
condrestart)
condrestart
;;
status)
rhstatus
;;
check)
check
;;
*)
echo $"Usage: $BASENAME {start|stop|restart|reload|condrestart|status|check}"
exit 1
esac
exit $?
1.2.5 复制haproxy文件到/usr/sbin下
因为上面得haproxy.init启动脚本默认会去/usr/sbin下找,也可以使用软链接
[root@centos23 ~]# cp /usr/local/haproxy/sbin/haproxy /usr/sbin/
1.2.6 创建目录指定属主
[root@centos23 ~]# mkdir -p /usr/local/haproxy/run
[root@centos23 ~]# chown -R nobody /usr/local/haproxy/
1.2.7 配置日志收集
[root@centos23 ~]# vim /etc/rsyslog.conf
local7.* /var/log/boot.log #添加下面两行
local3.* /var/log/haproxy.log
local0.* /var/log/haprocy.log
[root@centos23 ~]# systemctl restart rsyslog
1.2.8 启动和停止服务
1、特殊启动方法1
[root@centos23 ~]# /usr/local/haproxy/sbin/haproxy -f /usr/local/haproxy/etc/haproxy.cfg
[root@centos23 ~]# netstat -antup|grep 80 #查看端口已经启动
tcp 0 0 0.0.0.0:80 0.0.0.0:* LISTEN 3724/haproxy
停止
[root@centos23 ~]# killall haproxy #提示命令没找到,可以安装或者使用pkill
-bash: killall: command not found
[root@centos23 ~]# pkill haproxy
[root@centos23 ~]# netstat -antup|grep 80
2、Haproxy脚本启动方法2
[root@centos23 ~]# /etc/init.d/haproxy start #或者下面的方法
Starting haproxy (via systemctl): [ OK ]
[root@centos23 ~]# service haproxy start
Starting haproxy (via systemctl): [ OK ]
3、配置开机启动
[root@centos23 ~]# chkconfig --add haproxy
[root@centos23 ~]# chkconfig haproxy on
4、相关配置文件和启动脚本可以从这个配置文件模板中获得
[root@centos23 ~]# cd haproxy-1.7.9/examples/
[root@centos23 examples]# ls
acl-content-sw.cfg debug2ansi haproxy.spec ssl.cfg
auth.cfg debug2html haproxy.vim stats_haproxy.sh
check debugfind init.haproxy transparent_proxy.cfg
check.conf errorfiles option-http_proxy.cfg wurfl-example.cfg
content-sw-sample.cfg haproxy.init seamless_reload.txt
1.2.9 配置后端web服务器
1、在centos24上安装httpd
[root@centos24 ~]# yum -y install httpd
[root@centos24 ~]# echo "192.168.3.24 apache" >/var/www/html/index.html
[root@centos24 ~]# vim /etc/httpd/conf/httpd.conf
ServerName 192.168.3.24:80 #修改为本机IP地址或者是主机名
[root@centos24 ~]# systemctl start httpd #启动httpd服务
2、在centos25上安装httpd
[root@centos25 ~]# yum -y install httpd
[root@centos25 ~]# echo "192.168.3.25 apache" >/var/www/html/index.html
[root@centos25 ~]# vim /etc/httpd/conf/httpd.conf
ServerName 192.168.3.25:80
[root@centos25 ~]# systemctl start httpd
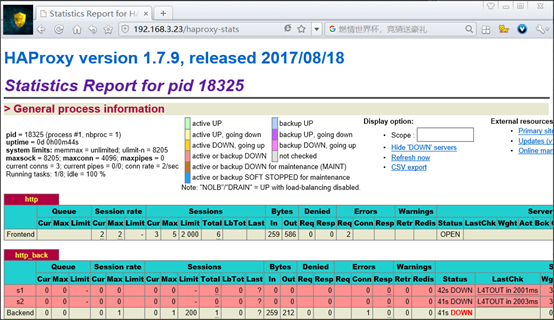
3、查看Haproxy的监控页面
1.2.10 测试Haproxy反向代理
到此整个实验已经完成。