vue教程3-05 vue组件数据传递
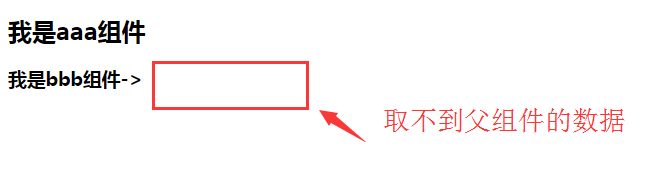
一、vue默认情况下,子组件也没法访问父组件数据
<!DOCTYPE html>
<html lang="en">
<head>
    <meta charset="UTF-8">
    <title>Document</title>
    <script src="bower_components/vue/dist/vue.js"></script>
    <style>
    </style>
</head>
<body>
    <div id="box">
        <aaa>
        </aaa>
    </div>

    <script>
        var vm=new Vue({
            el:'#box',
            data:{
                a:'aaa'
            },
            components:{
                'aaa':{
                    data(){
                        return {
                            msg:'我是父组件的数据'
                        }
                    },
                    template:'<h2>我是aaa组件</h2><bbb></bbb>',
                    components:{
                        'bbb':{
                            template:'<h3>我是bbb组件->{{msg}}</h3>'//这里是子组件,是访问不到父组件的数据msg
                        }
                    }
                }
            }
        });

    </script>
</body>
</html>
二、数据传递
组件数据传递:    √
1. 子组件获取父组件data
    在调用子组件:
        <bbb :m="数据"></bbb>

    子组件之内:
        props:['m','myMsg']

        props:{
            'm':String,
            'myMsg':Number
        }
2. 父级获取子级数据
    *子组件把自己的数据,发送到父级

    vm.$emit(事件名,数据);

    v-on:    @
1、子组件获取父组件data
方法一:
<!DOCTYPE html>
<html lang="en">
<head>
    <meta charset="UTF-8">
    <title>Document</title>
    <script src="bower_components/vue/dist/vue.js"></script>
    <style>
    </style>
</head>
<body>
    <div id="box">
        <aaa></aaa>
    </div>
    <template id="aaa">
        <h1>11111</h1>
        <bbb :mmm="msg2" :my-msg="msg"></bbb>
    </template>
    <script>
        var vm=new Vue({
            el:'#box',
            data:{
                a:'aaa'
            },
            components:{
                'aaa':{
                    data(){
                        return {
                            msg:111,
                            msg2:'我是父组件的数据'
                        }
                    },
                    template:'#aaa',
                    components:{
                        'bbb':{
                            props:['mmm','myMsg'],//my-msg在这里要变成驼峰命名法
                            template:'<h3>我是bbb组件->{{mmm}} <br> {{myMsg}}</h3>'
                        }
                    }
                }
            }
        });
    </script>
</body>
</html>
方法二:
<!DOCTYPE html>
<html lang="en">
<head>
    <meta charset="UTF-8">
    <title>Document</title>
    <script src="bower_components/vue/dist/vue.js"></script>
    <style>
    </style>
</head>
<body>
    <div id="box">
        <aaa></aaa>
    </div>
    <template id="aaa">
        <h1>11111</h1>
        <bbb :mmm="msg2" :my-msg="msg"></bbb>
    </template>
    <script>
        var vm=new Vue({
            el:'#box',
            data:{
                a:'aaa'
            },
            components:{
                'aaa':{
                    data(){
                        return {
                            msg:111,
                            msg2:'我是父组件的数据'
                        }
                    },
                    template:'#aaa',
                    components:{
                        'bbb':{
                            props:{
                                'm':String,//注明数据类型
                                'myMsg':Number
                            },
                            template:'<h3>我是bbb组件->{{mmm}} <br> {{myMsg}}</h3>'
                        }
                    }
                }
            }
        });
    </script>
</body>
</html>
2、 父级获取子级数据
方法一:
<!DOCTYPE html>
<html lang="en">
<head>
    <meta charset="UTF-8">
    <title>Document</title>
    <script src="bower_components/vue/dist/vue.js"></script>
    <style>
    </style>
</head>
<body>
    <div id="box">
        <aaa></aaa>
    </div>
    <template id="aaa">
        <span>我是父级 -> {{msg}}</span>
        <bbb @child-msg="get"></bbb>
    </template>
    <template id="bbb">
        <h3>子组件-</h3>
        <input type="button" value="send" @click="send">
    </template>
    <script>
        var vm=new Vue({
            el:'#box',
            data:{
                a:'aaa'
            },
            components:{
                'aaa':{
                    data(){
                        return {
                            msg:'我是父组件的数据'
                        }
                    },
                    template:'#aaa',
                    methods:{
                        get(msg){
                            // alert(msg);
                            this.msg=msg;
                        }
                    },
                    components:{
                        'bbb':{
                            data(){
                                return {
                                    a:'我是子组件的数据'
                                }
                            },
                            template:'#bbb',
                            methods:{
                                send(){
                                    this.$emit('child-msg',this.a);
                                }
                            }
                        }
                    }
                }
            }
        });
    </script>
</body>
</html>
注意:
vm.$dispatch(事件名,数据) 子级向父级发送数据
vm.$broadcast(事件名,数据) 父级向子级广播数据
配合: event:{}
在vue2.0里面已经,报废了
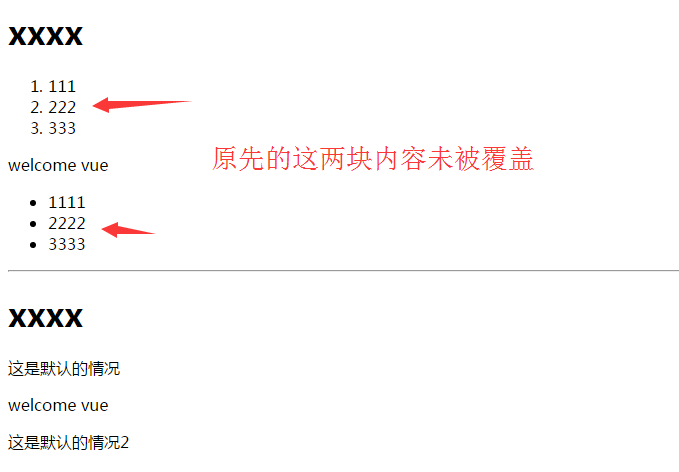
slot:位置、槽口
作用: 占个位置,不覆盖原先的内容
类似ng里面 transclude (指令)
<!DOCTYPE html>
<html lang="en">
<head>
    <meta charset="UTF-8">
    <title>Document</title>
    <script src="bower_components/vue/dist/vue.js"></script>
    <style>
    </style>
</head>
<body>
    <div id="box">
        <aaa>
            <ul slot="ul-slot">
                <li>1111</li>
                <li>2222</li>
                <li>3333</li>
            </ul>
            <ol slot="ol-slot">
                <li>111</li>
                <li>222</li>
                <li>333</li>
            </ol>
        </aaa>
        <hr>
        <aaa>
        </aaa>
    </div>
    <template id="aaa">
        <h1>xxxx</h1>
        <slot name="ol-slot">这是默认的情况</slot>
        <p>welcome vue</p>
        <slot name="ul-slot">这是默认的情况2</slot>
    </template>

    <script>
        var vm=new Vue({
            el:'#box',
            data:{
                a:'aaa'
            },
            components:{
                'aaa':{
                    template:'#aaa'
                }
            }
        });

    </script>
</body>
</html>
效果图:
vue-> SPA应用,单页面应用 vue-router路由
vue-> SPA应用,单页面应用 vue-router路由
    vue-resouce    交互
    vue-router    路由

    路由:根据不同url地址,出现不同效果

    该课程配套用 0.7.13版本 vue-router

主页    home
新闻页    news


html:
    <a v-link="{path:'/home'}">主页</a>    跳转链接

    展示内容:
    <router-view></router-view>
js:
    //1. 准备一个根组件
    var App=Vue.extend();

    //2. Home News组件都准备
    var Home=Vue.extend({
        template:'<h3>我是主页</h3>'
    });

    var News=Vue.extend({
        template:'<h3>我是新闻</h3>'
    });

    //3. 准备路由
    var router=new VueRouter();

    //4. 关联
    router.map({
        'home':{
            component:Home
        },
        'news':{
            component:News
        }
    });

    //5. 启动路由
    router.start(App,'#box');

跳转:
    router.redirect({
        ‘/’:'/home'
    });
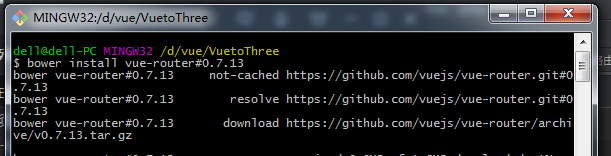
下载vue-router:
vue-router路由:
<!DOCTYPE html>
<html lang="en">
<head>
    <meta charset="UTF-8">
    <title>Document</title>
    <script src="bower_components/vue/dist/vue.js"></script>
    <script src="bower_components/vue-router/dist/vue-router.js"></script>
    <style>
    </style>
</head>
<body>
    <div id="box">
        <ul>
            <li>
                <a v-link="{path:'/home'}">主页</a>
            </li>
            <li>
                <a v-link="{path:'/news'}">新闻</a>
            </li>
        </ul>
        <div>
            <router-view></router-view>
        </div>
    </div>

    <script>
        //1. 准备一个根组件
        var App=Vue.extend();

        //2. Home News组件都准备
        var Home=Vue.extend({
            template:'<h3>我是主页</h3>'
        });

        var News=Vue.extend({
            template:'<h3>我是新闻</h3>'
        });

        //3. 准备路由
        var router=new VueRouter();

        //4. 关联
        router.map({
            'home':{
                component:Home
            },
            'news':{
                component:News
            }
        });

        //5. 启动路由
        router.start(App,'#box');
    </script>
</body>
</html>
跳转:
<!DOCTYPE html>
<html lang="en">
<head>
    <meta charset="UTF-8">
    <title>Document</title>
    <script src="bower_components/vue/dist/vue.js"></script>
    <script src="bower_components/vue-router/dist/vue-router.js"></script>
    <style>
    </style>
</head>
<body>
    <div id="box">
        <ul>
            <li>
                <a v-link="{path:'/home'}">主页</a>
            </li>
            <li>
                <a v-link="{path:'/news'}">新闻</a>
            </li>
        </ul>
        <div>
            <router-view></router-view>
        </div>
    </div>

    <script>
        //1. 准备一个根组件
        var App=Vue.extend();

        //2. Home News组件都准备
        var Home=Vue.extend({
            template:'<h3>我是主页</h3>'
        });

        var News=Vue.extend({
            template:'<h3>我是新闻</h3>'
        });

        //3. 准备路由
        var router=new VueRouter();

        //4. 关联
        router.map({
            'home':{
                component:Home
            },
            'news':{
                component:News
            }
        });

        //5. 启动路由
        router.start(App,'#box');

        //6. 跳转
        router.redirect({
            '/':'home' //访问根目录时,跳转到/home
        });
    </script>
</body>
</html>