spring boot项目中使用redis作为缓存。
先创建spring boot的maven工程,在pom.xml中添加依赖
        <dependency>
            <groupId>org.springframework.boot</groupId>
            <artifactId>spring-boot-starter-web</artifactId>
            <version>1.5.3.RELEASE</version>
        </dependency>
        <dependency>
            <groupId>org.springframework.boot</groupId>
            <artifactId>spring-boot-starter-redis</artifactId>
            <version>1.3.8.RELEASE</version>
        </dependency>
在application.properties中添加配置
server.port:9000        #服务启动的端口

spring.redis.database=0    #redis数据库的索引,默认为0
spring.redis.host=192.168.133.130
#spring.redis.password=
spring.redis.port=6379
spring.redis.pool.max-idle=8  #最大空闲链接数
spring.redis.pool.min-idle=0  #最小空闲连接数
spring.redis.pool.max-active=8 #连接池最大连接数,负数表示无最大连接数
spring.redis.pool.max-wait=-1  #连接池最大阻塞等待时间,负数表示没有
#spring.redis.sentinel.master= #主节点
#spring.redis.sentinel.nodes=   #
spring.data.mongodb.host=192.168.133.130
spring.data.mongodb.port=27017
spring.data.mongodb.database=fzk
在启动类中添加注解
@SpringBootApplication
@EnableCaching
public class Main { public static void main(String[] args) throws Exception { SpringApplication.run(Main.class, args); } }
@EnableCaching会为每个bean中被 @Cacheable, @CachePut and @CacheEvict修饰的public方法进行缓存操作。
缓存的用法
    @Cacheable(value = "test", key = "'user_'.concat(#root.args[0])")
    public User getUser(String userId) {
        System.out.println("in getUser");
        User user = new User();
        user.setId(userId);
        user.setPassword("passwd");
        user.setUsername("username");

        return user;
    }
这个方法在userId相同形同的情况下,第一次调用的时候会执行方法,以后每次在调用的时候会读取缓存中的数据。
缓存的注解介绍:
@Cacheable
这个注解,会每次先检查是否执行过这个方法,在从缓存数据库中查看key是否相等,如果找到了,从缓存中读取,没有匹配的那么执行该方法,将结果缓存。
缓存都是通过key-value进行储存的,value或cacheNames必须指定(value是cacheNames的别名),指定多个value用(value = {"value1", "value2"})如果没有指定key,spring会提供一个默认的KeyGenerator,这个KeyGenerator根据参数生成key,如果方法没有参数返回KeyGenerator.EMPTY,如果有一个参数返回这个实例,如果有多个参数返回包含这些参数的SimpleKey。可以通过继承CachingConfigurerSupport自己指定KeyGenerator,类上加@Configuration注解。也可以像上面那样自己指定key,需要了解SPEL表达式。
多线程的情况下,可能同时会有多个线程同时进入一个没被缓存过的方法,这样会导致多个线程都会执行一遍方法,sync="true"会将第一次计算返回值的这个方法lock,计算完成后将结果缓存
@Cacheable(value="foos", sync="true")
public Foo executeExpensiveOperation(String id) {...}
在某些情况下,可能并不想把结果进行缓存,可通过condition进行筛选
@Cacheable(value="book", condition="#name.length() < 32")
public Book findBook(String name)
上面的#root表示的是返回值,其他一些可用的参数(来自spring官网)

@CachePut
每次都会执行该方法,并将结果进行缓存。用法与@Cacheable用法一致。
@CacheEvict
用于将清空缓存,可以指定key, value, condition,这几个的用法与上面介绍的一致。key和condition可以为空,如果为空,表示用默认策略。
@CacheEvict(value="books", allEntries=true, beforeInvocation=true)
public void loadBooks(InputStream batch)
allEntries=true表示清空books下的所有缓存,默认为false,beforeInvocation=true表示是否在方法执行前就清空缓存,默认为false。
@Caching
可以包含上面介绍的三个注解,key-value分别对应(cachable=[@Cacheable], put=[@CachePut], evict=[@CacheEvict])
@Caching(evict = { @CacheEvict("primary"), @CacheEvict(cacheNames="secondary", key="#p0") })
public Book importBooks(String deposit, Date date)
@CacheConfig
是一个类级的注解
@CacheConfig("books")
public class BookRepositoryImpl implements BookRepository {

    @Cacheable
    public Book findBook(ISBN isbn) {...}
}
这样类下的每个方法的缓存都用的是books,还可以指定自定义的KeyGenerator和CacheManager。
自定义缓存注解
通过使用上面的注解作为元直接实现自定义注解
@Retention(RetentionPolicy.RUNTIME)
@Target({ElementType.METHOD})
@Cacheable(value="books", key="#isbn")
public @interface SlowService {
}
这样我们就可以直接使用@SlowService作为注解
@SlowService
public Book findBook(ISBN isbn, boolean checkWarehouse, boolean includeUsed)
与下面的注解功能相同
@Cacheable(cacheNames="books", key="#isbn")
public Book findBook(ISBN isbn, boolean checkWarehouse, boolean includeUsed)
还有一点上面没说到的是spring用CacheManager管理缓存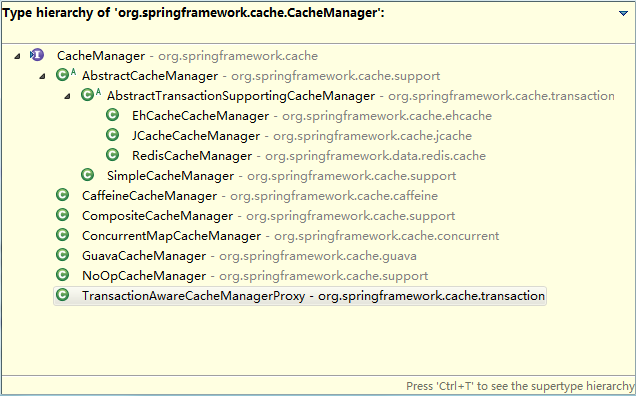
这里用到的redis,所以肯定是用的RedisCacheManager,同样,我们也可以重新配置一下RedisCacheManager,在这里我们也可以配置一些参数,例如过期时间等等。
上面说到过默认的key生成器,我们同样可以定义自己的KeyGenerator,下面是实现
import java.lang.reflect.Method;

import org.springframework.cache.CacheManager;
import org.springframework.cache.annotation.CachingConfigurerSupport;
import org.springframework.cache.interceptor.KeyGenerator;
import org.springframework.context.annotation.Bean;
import org.springframework.context.annotation.Configuration;
import org.springframework.data.redis.cache.RedisCacheManager;
import org.springframework.data.redis.connection.RedisConnectionFactory;
import org.springframework.data.redis.core.RedisTemplate;
import org.springframework.data.redis.core.StringRedisTemplate;
import org.springframework.data.redis.serializer.Jackson2JsonRedisSerializer;

import com.fasterxml.jackson.annotation.JsonAutoDetect;
import com.fasterxml.jackson.annotation.PropertyAccessor;
import com.fasterxml.jackson.databind.ObjectMapper;

@Configuration
public class RedisConfig extends CachingConfigurerSupport {

    @Bean
    public KeyGenerator wiselyKeyGenerator() {
        return new KeyGenerator() {
            @Override
            public Object generate(Object target, Method method, Object... params) {
                StringBuilder sb = new StringBuilder();
                sb.append(target.getClass().getName());
                sb.append(method.getName());
                for (Object obj : params) {
                    sb.append(obj.toString());
                }
                return sb.toString();
            }
        };

    }

    @Bean
    public CacheManager cacheManager(@SuppressWarnings("rawtypes") RedisTemplate redisTemplate) {
        RedisCacheManager cacheManager = new RedisCacheManager(redisTemplate);

        return cacheManager;
    }
}
生成CacheManager用到的RedisTemplate同样可以自定义,这个主要是与redis数据库连接用的