创建完成后, 讲spring mvc加入到项目中
先修改pom.xml文件
注意红色字部分
  1 <project xmlns="http://maven.apache.org/POM/4.0.0" xmlns:xsi="http://www.w3.org/2001/XMLSchema-instance"
  2     xsi:schemaLocation="http://maven.apache.org/POM/4.0.0 http://maven.apache.org/maven-v4_0_0.xsd">
  3     <modelVersion>4.0.0</modelVersion>
  4     <groupId>com.learn.javaee</groupId>
  5     <artifactId>createspringmvc</artifactId>
  6     <packaging>war</packaging>
  7     <version>0.0.1-SNAPSHOT</version>
  8     <name>createspringmvc Maven Webapp</name>
  9     <url>http://maven.apache.org</url>
 10
 11     <properties>
 12         <spring.version>4.3.2.RELEASE</spring.version>
 13
 14     </properties>
 15
 16
 17     <dependencies>
 18         <dependency>
 19             <groupId>junit</groupId>
 20             <artifactId>junit</artifactId>
 21             <version>3.8.1</version>
 22             <scope>test</scope>
 23         </dependency>
 24
 25         <!-- servlet api -->
 26         <dependency>
 27             <groupId>javax.servlet.jsp</groupId>
 28             <artifactId>jsp-api</artifactId>
 29             <version>2.2</version>
 30             <scope>provided</scope>
 31         </dependency>
 32         <dependency>
 33             <groupId>javax.servlet</groupId>
 34             <artifactId>servlet-api</artifactId>
 35             <version>2.5</version>
 36         </dependency>
 37
 38
 39         <!-- Spring -->
 40         <dependency>
 41             <groupId>org.springframework</groupId>
 42             <artifactId>spring-core</artifactId>
 43             <version>${spring.version}</version>
 44         </dependency>
 45         <dependency>
 46             <groupId>org.springframework</groupId>
 47             <artifactId>spring-context</artifactId>
 48             <version>${spring.version}</version>
 49         </dependency>
 50         <dependency>
 51             <groupId>org.springframework</groupId>
 52             <artifactId>spring-beans</artifactId>
 53             <version>${spring.version}</version>
 54         </dependency>
 55         <dependency>
 56             <groupId>org.springframework</groupId>
 57             <artifactId>spring-aop</artifactId>
 58             <version>${spring.version}</version>
 59         </dependency>
 60         <dependency>
 61             <groupId>org.springframework</groupId>
 62             <artifactId>spring-jdbc</artifactId>
 63             <version>${spring.version}</version>
 64         </dependency>
 65         <dependency>
 66             <groupId>org.springframework</groupId>
 67             <artifactId>spring-web</artifactId>
 68             <version>${spring.version}</version>
 69         </dependency>
 70         <dependency>
 71             <groupId>org.springframework</groupId>
 72             <artifactId>spring-webmvc</artifactId>
 73             <version>${spring.version}</version>
 74         </dependency>
 75         <dependency>
 76             <groupId>org.springframework</groupId>
 77             <artifactId>spring-tx</artifactId>
 78             <version>${spring.version}</version>
 79         </dependency>
 80         <dependency>
 81             <groupId>org.springframework</groupId>
 82             <artifactId>spring-context-support</artifactId>
 83             <version>${spring.version}</version>
 84         </dependency>
 85         <dependency>
 86             <groupId>org.springframework</groupId>
 87             <artifactId>spring-orm</artifactId>
 88             <version>${spring.version}</version>
 89         </dependency>
 90         <dependency>
 91             <groupId>org.springframework</groupId>
 92             <artifactId>spring-test</artifactId>
 93             <version>${spring.version}</version>
 94         </dependency>
 95         <dependency>
 96             <groupId>org.springframework</groupId>
 97             <artifactId>spring-websocket</artifactId>
 98             <version>${spring.version}</version>
 99         </dependency>
100         <!-- Spring -->
101
102     </dependencies>
103     <build>
104         <finalName>createspringmvc</finalName>
105     </build>
106 </project>
然后编辑web.xml文件
如果安装过STS插件的话, 直接按alt + 回车

选择后就出来了, 然后改成如下
 1 <?xml version="1.0" encoding="UTF-8"?>
 2 <web-app
 3 xmlns:xsi="http://www.w3.org/2001/XMLSchema-instance"
 4 xmlns="http://xmlns.jcp.org/xml/ns/javaee"
 5 xsi:schemaLocation="http://xmlns.jcp.org/xml/ns/javaee http://xmlns.jcp.org/xml/ns/javaee/web-app_3_1.xsd"
 6 id="WebApp_ID"
 7 version="3.1">
 8
 9   <!-- The front controller of this Spring Web application, responsible for handling all application requests -->
10     <servlet>
11         <servlet-name>springDispatcherServlet</servlet-name>
12         <servlet-class>org.springframework.web.servlet.DispatcherServlet</servlet-class>
13         <init-param>
14             <param-name>contextConfigLocation</param-name>
15             <param-value>classpath:applicationcontext.xml</param-value>
16         </init-param>
17         <load-on-startup>1</load-on-startup>
18     </servlet>
19
20     <!-- Map all requests to the DispatcherServlet for handling -->
21     <servlet-mapping>
22         <servlet-name>springDispatcherServlet</servlet-name>
23         <url-pattern>/</url-pattern>
24     </servlet-mapping>
25
26 </web-app>
红色字体部分是需要修改的,
classpath:applicationcontext.xml 文件名可以修改, 无所谓
按照如图位置创建applicationcontext.xml文件

文件内容如下
 1 <?xml version="1.0" encoding="UTF-8"?>
 2 <beans xmlns="http://www.springframework.org/schema/beans"
 3     xmlns:xsi="http://www.w3.org/2001/XMLSchema-instance" xmlns:context="http://www.springframework.org/schema/context"
 4     xmlns:mvc="http://www.springframework.org/schema/mvc"
 5     xsi:schemaLocation="http://www.springframework.org/schema/beans http://www.springframework.org/schema/beans/spring-beans.xsd
 6         http://www.springframework.org/schema/context http://www.springframework.org/schema/context/spring-context.xsd
 7         http://www.springframework.org/schema/mvc http://www.springframework.org/schema/mvc/spring-mvc.xsd">
 8
 9     <!-- 设置自动扫描的包 -->
10     <context:component-scan base-package="cn.learn.*"></context:component-scan>
                                             要在src/main/java 下创建包为cn.learn, 为了方便就这么写了, 大神别喷我

11     <!-- 开启自动注解支持 -->
12     <mvc:annotation-driven />
13     <!-- 定义静态资源位置 -->
14     <mvc:resources location="/WEB-INF/static/" mapping="/static/**"></mvc:resources>
15
16     <!-- jsp视图处理 start -->
17     <bean
18         class="org.springframework.web.servlet.view.InternalResourceViewResolver">
19         <!-- 视图前缀 -->
20         <property name="prefix" value="/WEB-INF/view/"></property>
21         <!-- 视图后缀 -->
22         <property name="suffix" value=".jsp"></property>
23         <property name="viewClass"
24             value="org.springframework.web.servlet.view.InternalResourceView" />
25         <property name="order" value="1" />
26     </bean>
27     <!-- jsp视图处理 end -->
28
29 </beans>
然后变成这样的目录结构

在cn.learn包下新建一个controller包(这一步不是必须的, 但是一般都要分开, 这东西看项目)
然后在controller包下新建一个类 IndexController
 1 package cn.learn.controller;
 2
 3 import org.springframework.stereotype.Controller;
 4 import org.springframework.web.bind.annotation.RequestMapping;
 5 import org.springframework.web.servlet.ModelAndView;
 6
 7 @Controller
 8 @RequestMapping("/index")
 9 public class IndexController {
10
11     @RequestMapping("/helloword")
12     public ModelAndView hellowordAction(){
13
14         //直接返回到view目录下的 index目录下的helloword.jsp
15         return new ModelAndView("index/helloword");
16     }
17 }
新建文件 在 view/index/helloword.jsp
 1 <%@ page language="java" contentType="text/html; charset=ISO-8859-1"
 2     pageEncoding="ISO-8859-1"%>
 3 <!DOCTYPE html PUBLIC "-//W3C//DTD HTML 4.01 Transitional//EN" "http://www.w3.org/TR/html4/loose.dtd">
 4 <html>
 5 <head>
 6 <meta http-equiv="Content-Type" content="text/html; charset=ISO-8859-1">
 7 <title>helloword</title>
 8 </head>
 9 <body>
10 this is a helloword page
11 </body>
12 </html>
启动tomcat浏览器访问
http://localhost:8080/createspringmvc/index/helloword

应该注意到在applicationcontext.xml文件中配置过一个静态文件访问
<mvc:resources location="/WEB-INF/static/" mapping="/static/**"></mvc:resources>
把web应用的所有 类似于js css images 等, 不需要走框架的都放到这里
例如

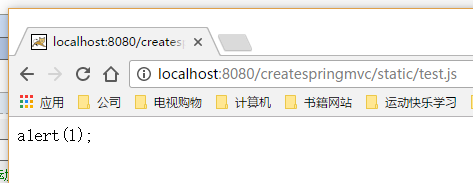
写了一行 alert(1);
在浏览器中访问http://localhost:8080/createspringmvc/static/test.js
如果把这个js在页面中引用的话
在helloword.jsp页面引用<script type="text/javascript" src="${pageContext.request.contextPath}/static/test.js"></script>
再次访问http://localhost:8080/createspringmvc/index/helloword

这样就完成springmvc的最基本的可以访问了