1. 开始
准备好Express+Swig的练习代码:https://github.com/Mengkzhaoyun/nodepractise
准备好AdminLTE后台管理模版:https://www.almsaeedstudio.com/

2. Express特性
2.1 静态文件与动态网页(Asp.Net??)
静态文件:Express示例站点包含public目录,public目录中所有内容如js、css、img、html将作为静态文件直接返回给客户端。
App.js
|
1
|
app.use(express.static(path.join(__dirname, 'public'))); |
动态网页:其中views和routes目录组成的内容用户发布动态网页和RestAPI。(就像是aspx和aspx.cs分开存储了一样)
App.js
|
1
2
3
4
5
6
7
|
// view engine setupapp.set('views', path.join(__dirname, 'views'));app.set('view engine', 'html');app.engine('html', swig.renderFile);app.use('/', routes);app.use('/users', users); |
express.nodejs == asp.net , express.nodejs几乎能做到asp.net的一切。(但貌似如何做单点登录我还不会)
2.2 内存缓存
所有ViewEngine都有内存缓存,以便于下次访问提高效率,使用Swig模版构建动态网页,搭建小中型网站时不用太担心效率问题。
3.Swig特性
3.1Template化开发网页
创建一个模版
|
1
2
3
4
5
6
7
8
|
<h1>{{ pagename|title }}</h1><ul>{% for author in authors %} <li{% if loop.first %} class="first"{% endif %}> {{ author }} </li>{% endfor %}</ul> |
渲染模版
|
1
2
3
4
5
|
var swig = require('swig');swig.renderFile('/path/to/template.html', { pagename: 'awesome people', authors: ['Paul', 'Jim', 'Jane']}); |
最终结果
|
1
2
3
4
5
6
|
<h1>Awesome People</h1><ul> <li class="first">Paul</li> <li>Jim</li> <li>Jane</li></ul> |
3.2模版继承
使用extentds标签,继承母模版的结构,并可以用block xxx等标签,对母板的内容进行重载(很像C#的override)
|
1
2
3
4
5
6
7
8
|
{% extends 'layout.tpl' %}{% block title %}{{ title }}{% endblock %}{% block content %} <h1>{{ title }}</h1> <p>Welcome to {{ title }}</p>{% endblock %} |
4.与Bootstrap框架集成
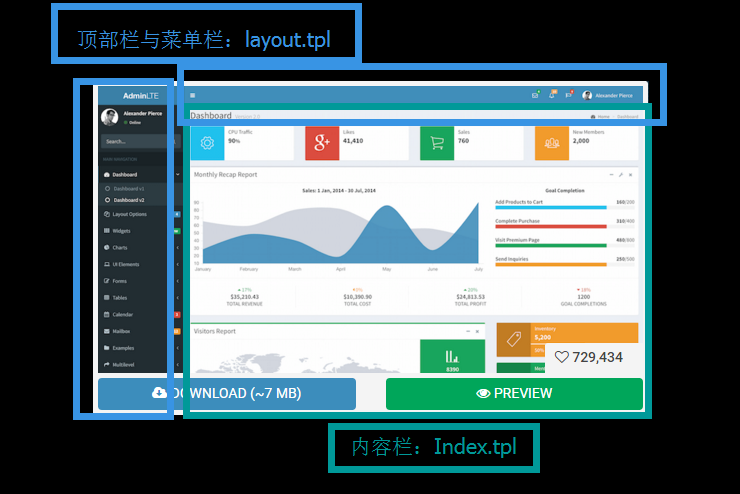
Express+Swig完全就是个小写的Asp.Net。以前开发Asp.Net业务网站时常使用iframe,到Swig模版中完全可以使用模版继承来避免使用iframe,我仿佛看到了这个站点将会比iframe少了一半的js、css加载需求。
可以将上图的AdminLTE,顶部栏与菜单栏代码写到layout.tpl中维护,内容栏写到index.tpl进行维护,这样负责框架的来维护layout.tpl仅关心用户登录、通知、菜单加载,而不比关心内容,负责编写业务内容的也不必关心整体的框架。
Index仅编写业务代码
|
1
2
3
4
5
6
7
8
9
10
11
12
13
14
15
16
17
18
19
20
21
22
23
24
25
26
27
28
29
30
31
32
33
34
35
36
37
38
39
40
41
42
43
44
45
46
47
|
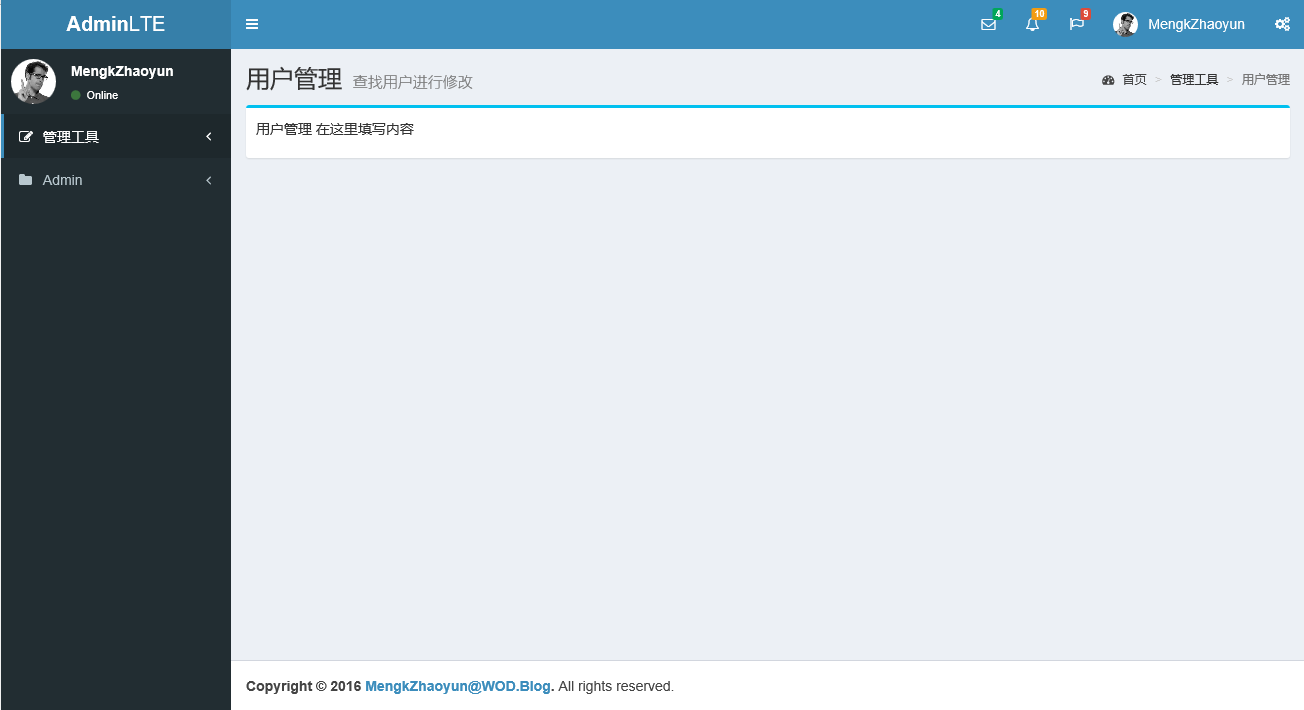
{% extends 'layout.tpl' %}{% block title %}02.Swig&Bootstrap{%endblock%}{% block body %}class="hold-transition skin-blue sidebar-collapse sidebar-mini"{%endblock%}{% block content %}<!-- Content Wrapper. Contains page content --><div class="content-wrapper"> <!-- Content Header (Page header) --> <section class="content-header"> <h1> 用户管理 <small>查找用户进行修改</small> </h1> <ol class="breadcrumb"> <li><a href="#"><i class="fa fa-dashboard"></i> 首页</a></li> <li>管理工具</li> <li class="active">用户管理</li> </ol> </section> <!-- Main content --> <section class="content"> <!-- Your Page Content Here --> <div class="row"> <div class="col-xs-12"> <div class="box box-info"> <div id="toolbar_account"></div> <div class="box-body"> <p>用户管理 在这里填写内容</p> </div> </div> </div> </div> <!-- /.row --> </section> <!-- /.content --></div><!-- /.content-wrapper -->{% endblock %}{% block script %}<!-- AdminLTE App --><script src="plugins/AdminLTE-2.3.0-dist/js/app.min.js"></script>{% endblock %} |
下面是最终效果,将会通过{% extends 'layout.tpl' %} 继承整个母板框架的内容
下载源代码:https://github.com/Mengkzhaoyun/nodepractise
源代码路径:02.Swig&Bootstrap
5.使用Grunt发布前端代码
Grunt是一款Nodejs前端自动化工具,参考http://www.gruntjs.net/。
由于项目上的大部分业务使用IIS作为Web服务器,需要将所有写好的前端代码发布成html部署,使用Grunt,可以很轻松的做到这一切。
首先在CMD中安装Grunt-Cli命令工具
|
1
|
$ npm install grunt-cli -g |
然后打开项目的package.json增加Grunt和Grunt-swig-template模块。
|
1
2
3
4
5
6
7
8
9
10
11
12
13
14
15
16
17
18
19
20
21
|
{ "name": "swigbootstrap", "version": "0.0.0", "private": true, "scripts": { "start": "node ./bin/www" }, "dependencies": { "body-parser": "~1.13.2", "cookie-parser": "~1.3.5", "debug": "~2.2.0", "express": "~4.13.1", "swig": "*", "morgan": "~1.6.1", "serve-favicon": "~2.3.0" }, "devDependencies": { "grunt-swig-templates": "*", "grunt": "*" }} |
新增一个配置文件Gruntfile.js
|
1
2
3
4
5
6
7
8
9
10
11
12
13
14
15
16
17
18
19
20
21
22
23
24
25
26
27
|
module.exports = function(grunt) { grunt.initConfig({ //将views/*.tpl编译输出为htmls/*.html swig: { default_options: { options: { templatePath: 'views/', data: { title: 'Swig Express Samples By MengkZhaoyun' } }, expand: true, cwd: 'views/', src: ['*.tpl'], dest: 'htmls/', ext: '.html' } } }) // 加载包含 "swig" 任务的插件。 grunt.loadNpmTasks('grunt-swig-templates'); // 默认被执行的任务列表。 grunt.registerTask('default', ['swig']);}; |
打开CMD运行Grunt命令
|
1
2
|
$ cd 02.Swig&Bootstrap$ grunt |
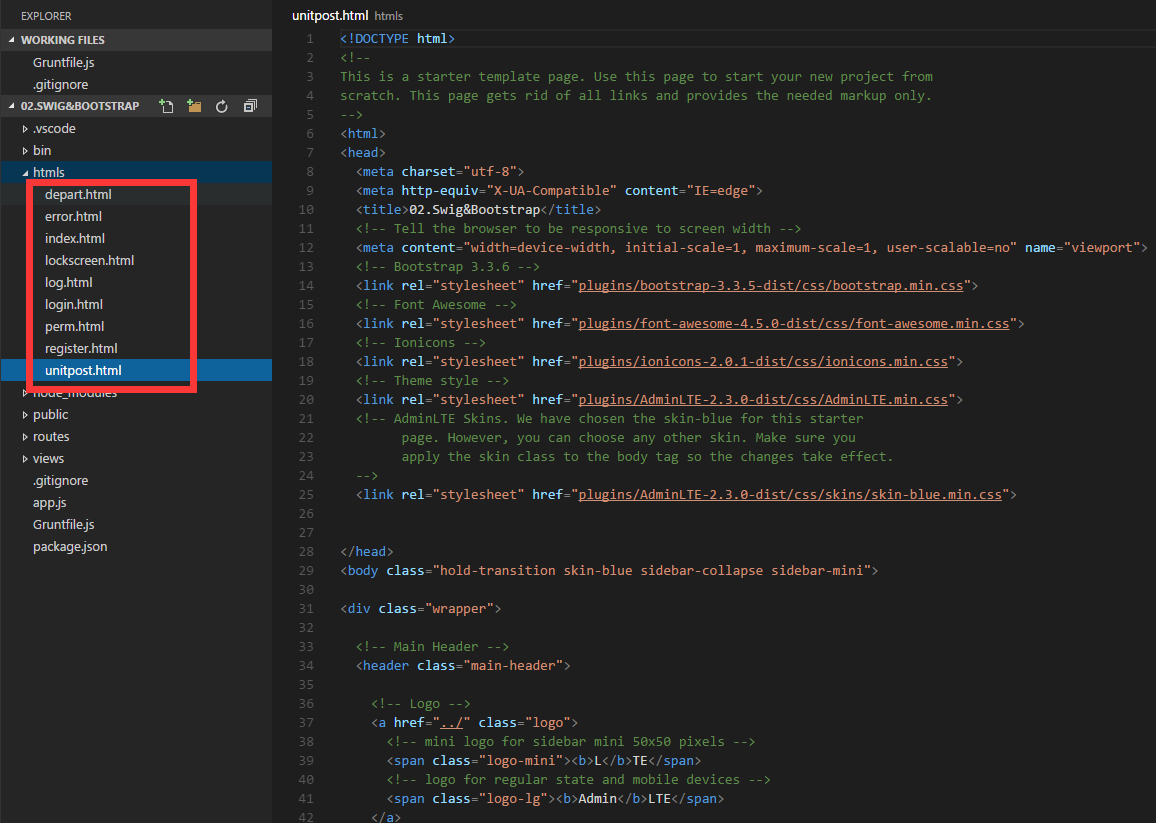
命令执行后多出htmls目录,下面是已编译的html
http://www.cnblogs.com/mengkzhaoyun/p/5358815.html