2.7ImageView
2.7.1插入本地图片
一个图片控件,可以用来显示本地和网络图片。
在首页添加按钮ImageView,指向新页面(步骤与前同,不再详写)。
![]()
activity_image_view.xml文件:
<?xml version="1.0" encoding="utf-8"?>
<!--suppress AndroidDomInspection -->
<RelativeLayout xmlns:android="http://schemas.android.com/apk/res/android"
    android:layout_width="match_parent"
    android:layout_height="match_parent">
    <ImageView
        android:id="@+id/iv_1"
        android:layout_width="300dp"
        android:layout_height="200dp"
        android:background="#FF9900"
        android:src="@drawable/lake" //注意,这里插入的图片不能过大,否则爆红不能显示。猜测因为不是缩略图的原因,大图无法适配手机小屏幕。
        android:layout_marginBottom="10dp"/>
    <ImageView
        android:id="@+id/iv_2"
        android:layout_width="300dp"
        android:layout_height="200dp"
        android:background="#FF9900"
        android:src="@drawable/lake"
        android:scaleType="center" //scaleType为缩放类型,由于上面设置了图片大小300dp×200dp,所以不加此属性会出现边框。其他属性见末。
        android:layout_marginBottom="10dp"
        android:layout_below="@+id/iv_1"/>
</RelativeLayout>
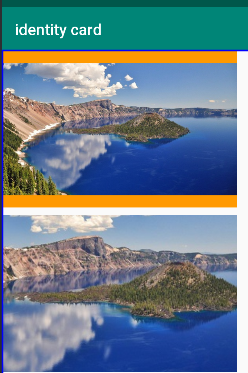
fitXY,通过拉伸撑满框架
fitCenter,保持宽高比缩放,直至能够完全显示
centerCrop,保持宽高比缩放,直至完全覆盖控件,裁剪显示
效果图:(第一张为原图,背景设置的橙色被露出来;第二张使用了scaleType属性,显示了图片中心内容。)
2.7.1插入网络图片
这里我们要使用一下第三方库glide。
打开GitHub,搜索glide,这个就是我们想要的链接,
![]()
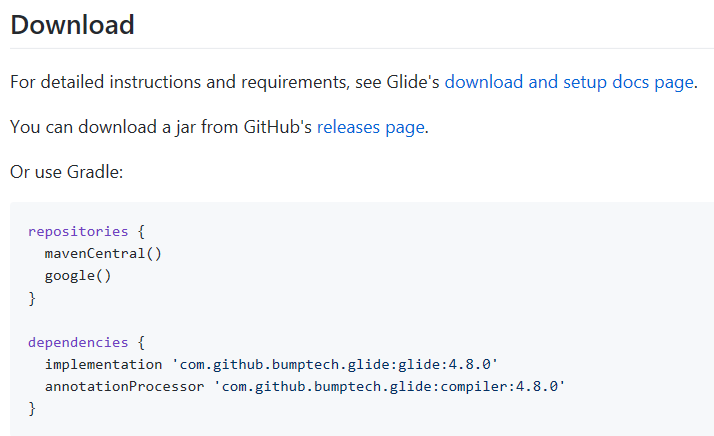
或者直接进入链接https://github.com/bumptech/glide。里面提供了关于这个包的详细说明,包括下载方式、说明文档(很重要)等等。
在靠后位置可以看到使用说明(左图),这里提供了三种下载方式,可以通过下载jar包,移入libs(右图)的方式完成安装,也可以通过gradle,这里采用了第二种方法。
—————————————————————在使用gradle安装的时候踩了个大坑:—————————————————————
第一次安装的时候打开了一个![]() 文件,找到指定位置粘贴了内容进去,但是同步之后报错:
文件,找到指定位置粘贴了内容进去,但是同步之后报错:
![]()
问题出在dependencies里面使用implementation有误,上网查找此问题发现是因为gradle版本没有达到3.0。我???可是我的gradle是4.6的?![]()
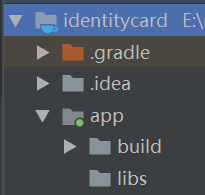
换了台电脑、连了VPN都是报同样的错误,最后发现问题出在依赖书写有误的地方。AS项目里面有两个build.gradle文件,但是这两个文件位置、功能都有区别,具体区别可以参考这篇文章:https://www.jianshu.com/p/2356ecc76e34
把dependencies里面需要依赖的这两行代码写到文件:项目/app/build.gradle,中指定位置即可。
———————————————————————————分割线结束———————————————————————————
接下来添加一个新的图片控件,用以显示我们获取的网络上的图片:
<ImageView
        android:id="@+id/iv_3"
        android:layout_width="300dp"
        android:layout_height="200dp"
        android:background="#FF9900"
        android:layout_below="@+id/iv_2"/>
在ImageViewActivity文件中使用glide,编写详细内容:
import android.support.v7.app.AppCompatActivity;
import android.os.Bundle;
import android.widget.ImageView;
import com.bumptech.glide.Glide; //新引入的包

public class ImageViewActivity extends AppCompatActivity {

    private ImageView mIv3; //定义了控件mIv3

    @Override
    protected void onCreate(Bundle savedInstanceState) {
        super.onCreate(savedInstanceState);
        setContentView(R.layout.activity_image_view);
        mIv3 = findViewById(R.id.iv_3);
        Glide.with(this).load("http://images02.cdn86.net/kps01/M00/32/A7/wKiAiVR_uq_fpgU8AAFBHFRV_gg699.png").into(mIv3); //使用了glide调用了网络上的图片

    }
}
效果图:

2.8ScrollView
按钮变多后,一个页面无法盛下,所以需要通过的滚动方式查看所有内容,这就使用到了ScrollView。
2.8.1垂直滚动
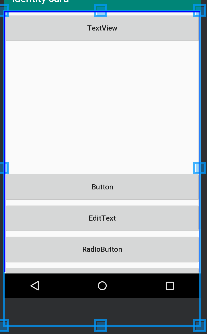
<?xml version="1.0" encoding="utf-8"?>
<ScrollView xmlns:android="http://schemas.android.com/apk/res/android" //使用ScrollView控件将所有内容包裹进去
    android:layout_width="match_parent"
    android:layout_height="match_parent"
    android:orientation="vertical"> //设置方向为垂直

    <LinearLayout //这里注意:ScorllView只能有一个元素,所以通过这样的方法把所有内容都包含进去
        android:layout_width="match_parent"
        android:layout_height="wrap_content"
        android:orientation="vertical">
        <Button
            android:id="@+id/btn_textview"
            android:layout_width="match_parent"
            android:layout_height="61dp"
            android:text="TextView"
            android:textAllCaps="false"
            android:layout_marginBottom="250dp"/> //使第一个按钮与其他按钮的距离拉开,形成滚动条件
        <Button
            android:id="@+id/btn_button"
            android:layout_width="match_parent"
            android:layout_height="61dp"
            android:text="Button"
            android:textAllCaps="false"/>
        <Button
            .../>
        <Button
            .../>
        <Button
            .../>
    </LinearLayout>
</ScrollView>
效果图:
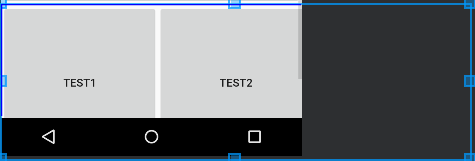
2.8.2水平滚动
代码:
     <HorizontalScrollView //在外面套一层HorizontalScrollView
            android:layout_width="wrap_content"
            android:layout_height="wrap_content">
            <LinearLayout
                android:layout_width="wrap_content"
                android:layout_height="wrap_content"
                android:orientation="horizontal">
                <Button
                    android:id="@+id/btn_1"
                    android:layout_width="200dp"
                    android:layout_height="200dp"
                    android:text="Test1"/>
                <Button
                    android:id="@+id/btn_2"
                    android:layout_width="200dp"
                    android:layout_height="200dp"
                    android:text="Test2"/>
                <Button
                    android:id="@+id/btn_3"
                    android:layout_width="200dp"
                    android:layout_height="200dp"
                    android:text="Test3"/>
            </LinearLayout>
        </HorizontalScrollView>
效果图: