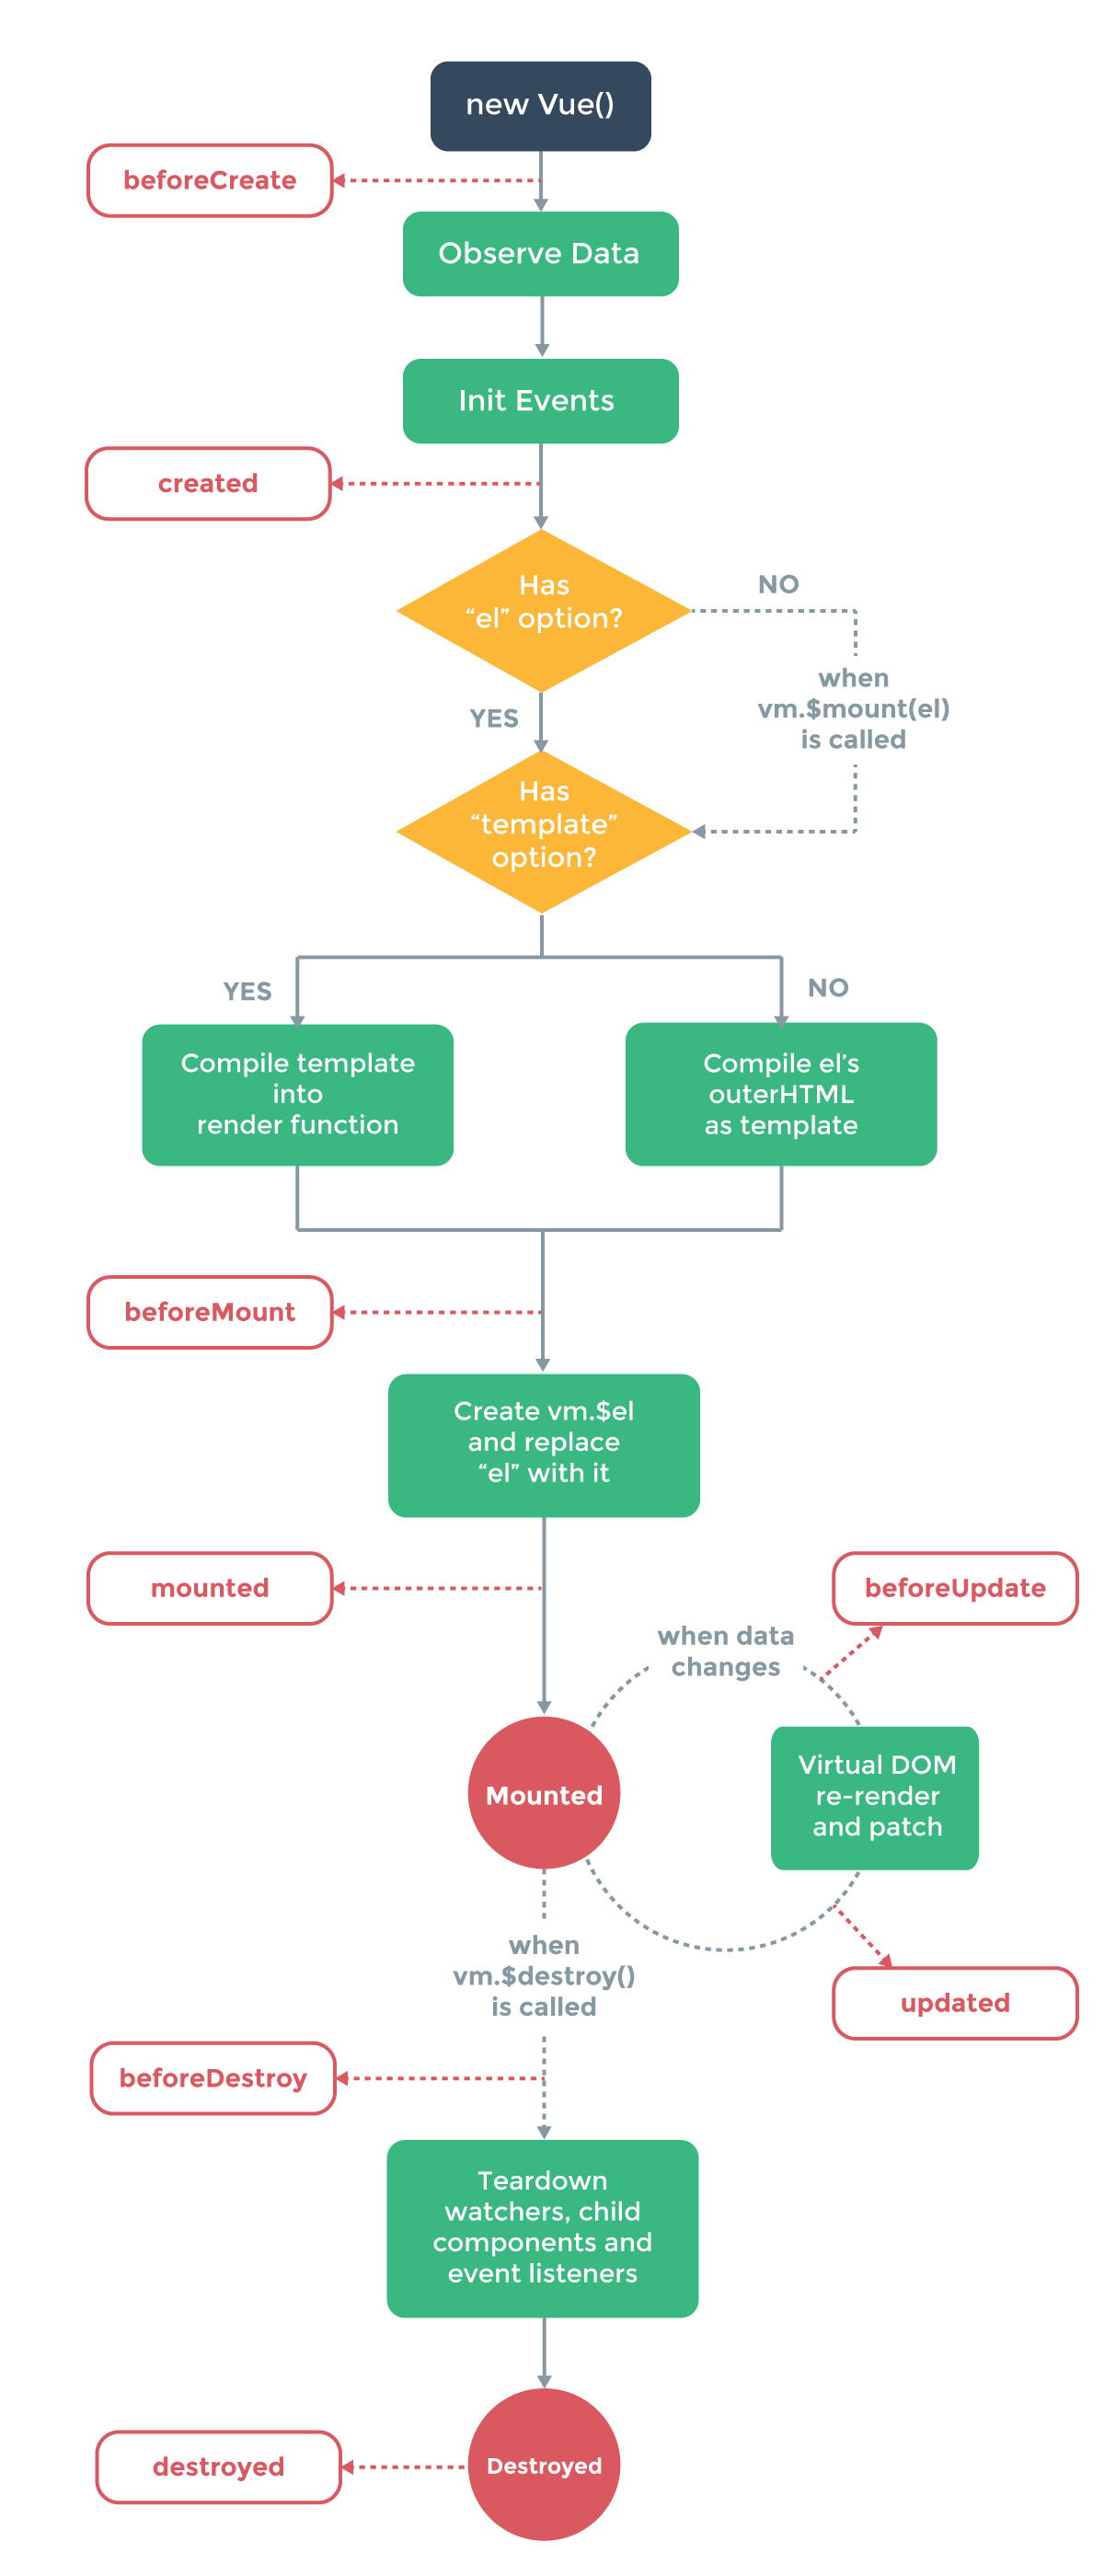
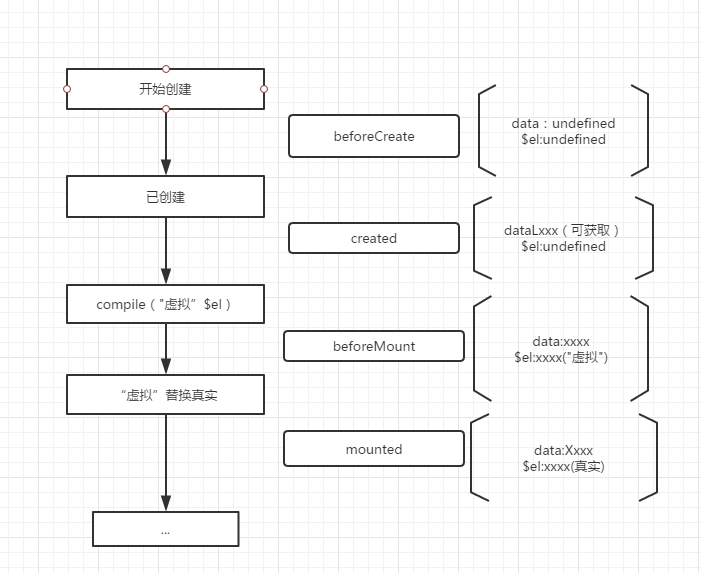
这是Vue文档里关于实例生命周期的解释图
那么下面我们来进行测试一下
<section id="app-8">
{{data}}
</section>
var myVue=new Vue({
el:"#app-8",
data:{
data:"aaaaa",
info:"nono"
},
beforeCreate:function(){
console.log("创建前========")
console.log(this.data)
console.log(this.$el)
},
created:function(){
console.log("已创建========")
console.log(this.info)
console.log(this.$el)
},
beforeMount:function(){
console.log("mount之前========")
console.log(this.info)
console.log(this.$el)
},
mounted:function(){
console.log("mounted========")
console.log(this.info)
console.log(this.$el)
},
beforeUpdate:function(){
console.log("更新前========");
},
updated:function(){
console.log("更新完成========");
},
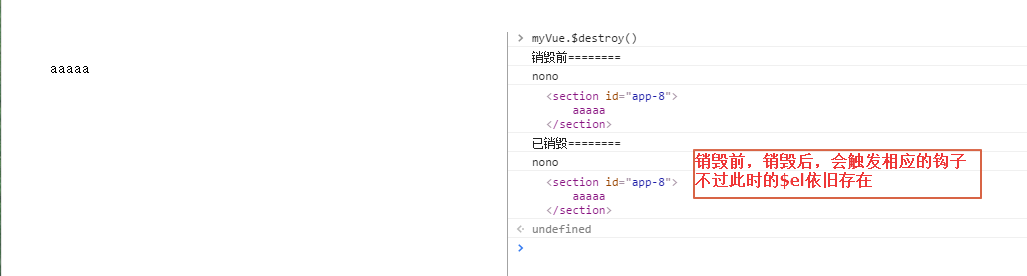
beforeDestroy:function(){
console.log("销毁前========")
console.log(this.info)
console.log(this.$el)
},
destroyed:function(){
console.log("已销毁========")
console.log(this.info)
console.log(this.$el)
}
})
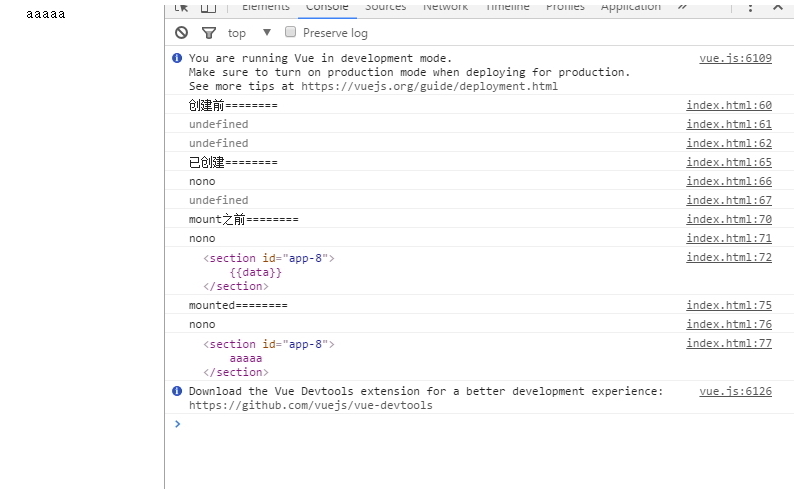
代码如上,浏览器开始加载文件

由上图可知:
1、beforeCreate 此时$el、data 的值都为undefined
2、创建之后,此时可以拿到data的值,但是$el依旧为undefined
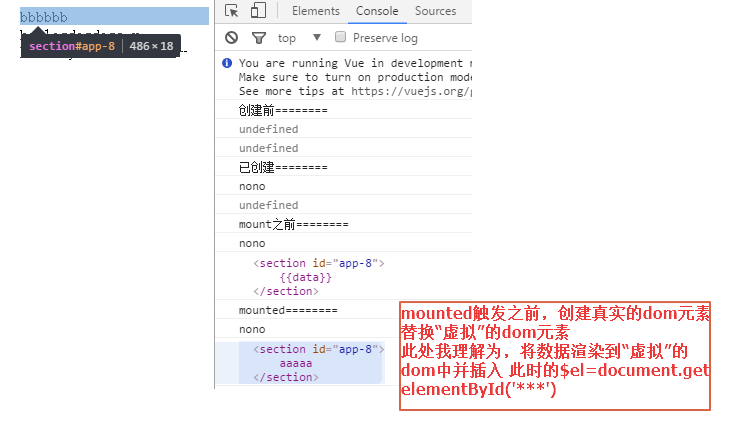
3、mount之前,$el的值为“虚拟”的元素节点
4、mount之后,mounted之前,“虚拟”的dom节点被真实的dom节点替换,并将其插入到dom树中,于是在触发mounted时,可以获取到$el为真实的dom元素()
myVue.$el===document.getElementById("app-8") // true
接着,在console中修改data,更新视图
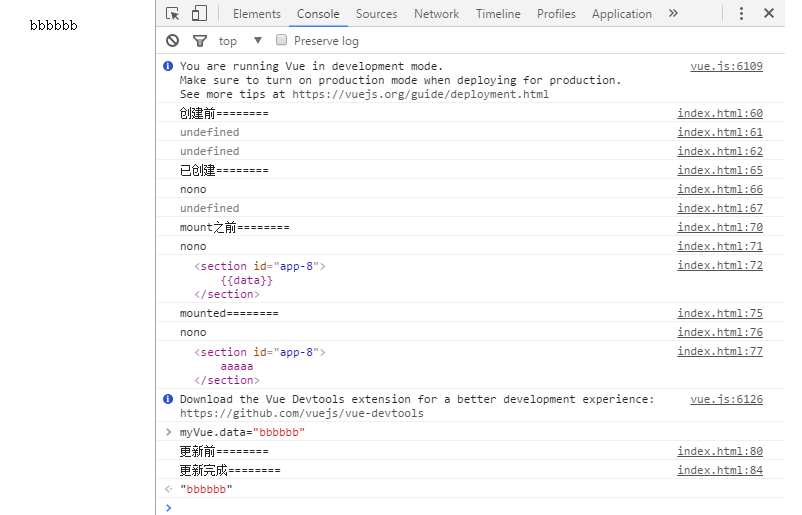
触发beforeUpdata 和updated,接着,执行myVue.$destroy()。
总结一下,对官方文档的那张图简化一下,就得到了这张图:
转载地址:http://www.cnblogs.com/gagag/p/6246493.html