一、热添加网卡
1、基本命令
[root@centoszhu ~]# virsh                                              进入virsh命令行模式
virsh # attach-interface web01 --type bridge --source br0              添加一块桥接网卡
virsh # attach-interface web01 --type bridge --source br0 --model virtio  添加一块网卡,指定模式virtio网卡更快
virsh # attach-interface web01 --type bridge --source br0 --model virtio --config   写进配置文件,永久生效
virsh # domiflist web01                               查看虚拟机有多少块网卡
virsh # domblklist web01                                               查看虚拟机有多少硬盘
virsh # detach-interface web01 --type bridge --mac 52:54:00:8f:96:8f     分离网卡
下面两个实验准备
[root@centoszhu opt]# virsh destroy web02                                 强制关闭虚拟机
[root@centoszhu opt]# virsh undefine web02                                删除配置文件
二、热添加内存
1、安装虚拟机时,需要修改参数。
virt-install --virt-type kvm --os-type=linux --os-variant rhel7 --name web02 --memory 215,maxmemory=2048 --vcpus 1 --disk /opt/web-clone.qcow2 --boot hd --network bridge=br0 --graphics vnc,listen=0.0.0.0 --noautoconsole
--boot hd 不从镜像安装
2、热添加内存
[root@centoszhu opt]# virsh setmem web02 1024M                     临时生效
[root@centoszhu opt]# virsh setmem web02 1024M --config            写入配置文件,永久生效

三、热添加CPU
1、安装虚拟机时,需要修改参数。
virt-install --virt-type kvm --os-type=linux --os-variant rhel7 --name web02 --memory 215,maxmemory=2048 --vcpus 1,maxvcpus=10 --disk /opt/web-clone.qcow2 --boot hd
--network bridge=br0 --graphics vnc,listen=0.0.0.0 --noautoconsole                        系统帮助文档maxvcpus,单词错误,少了一个v
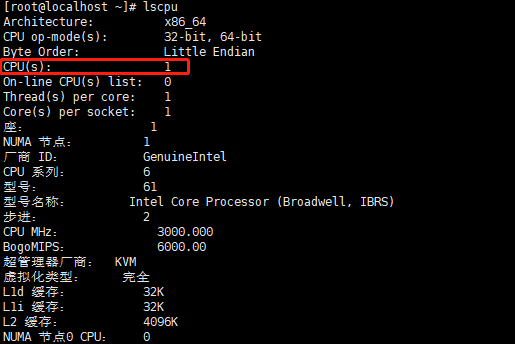
2、热添加CPU
[root@centoszhu opt]# virsh setvcpus web02 2                     临时添加
[root@centoszhu opt]# virsh setvcpus web02 2 --config            写入配置文件,永久生效
添加前:
添加后:

3、以前虚拟机支持热添加CPU和内存,修改配置文件
