【记录】【完整代码最下】
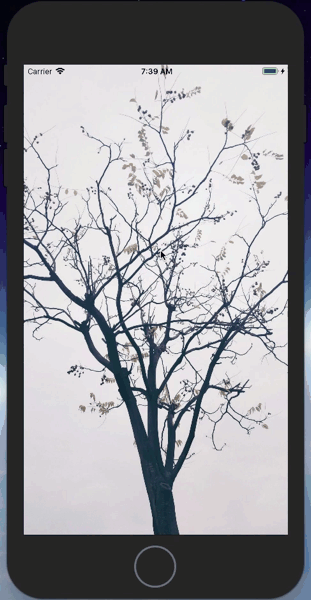
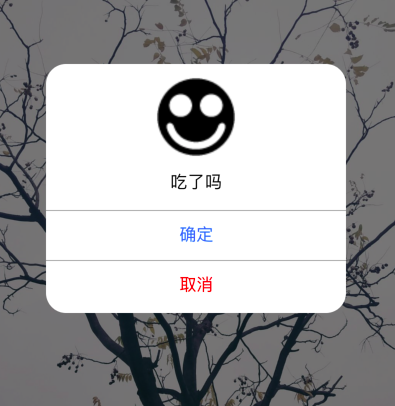
效果如下:
可行性分析:
由于系统自带的UIAlertView样式简单,只有两种样式,想要理想的样式就要自定义控件了
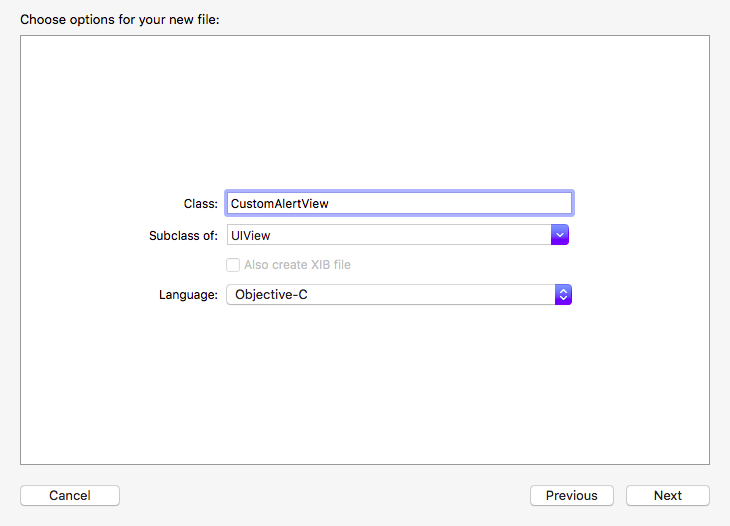
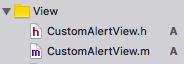
文件名取为:CustomAlertView
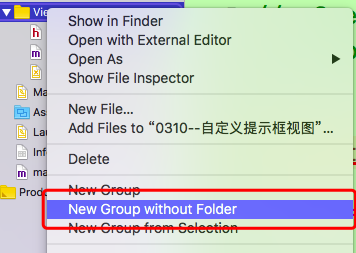
创建文件如下(大型项目最好把全部的view都放进一个group中)
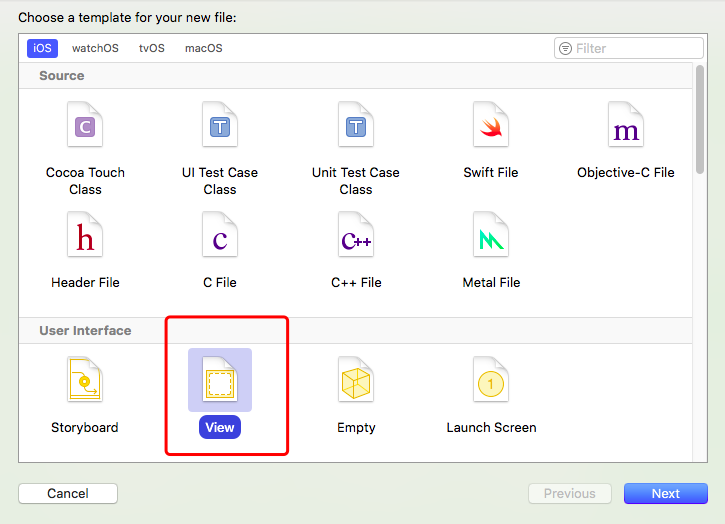
接下来要定义AlertView的界面,用xib来直接拖取控件更加方便
1.创建xib文件
文件名要跟类名一致(方便操作)

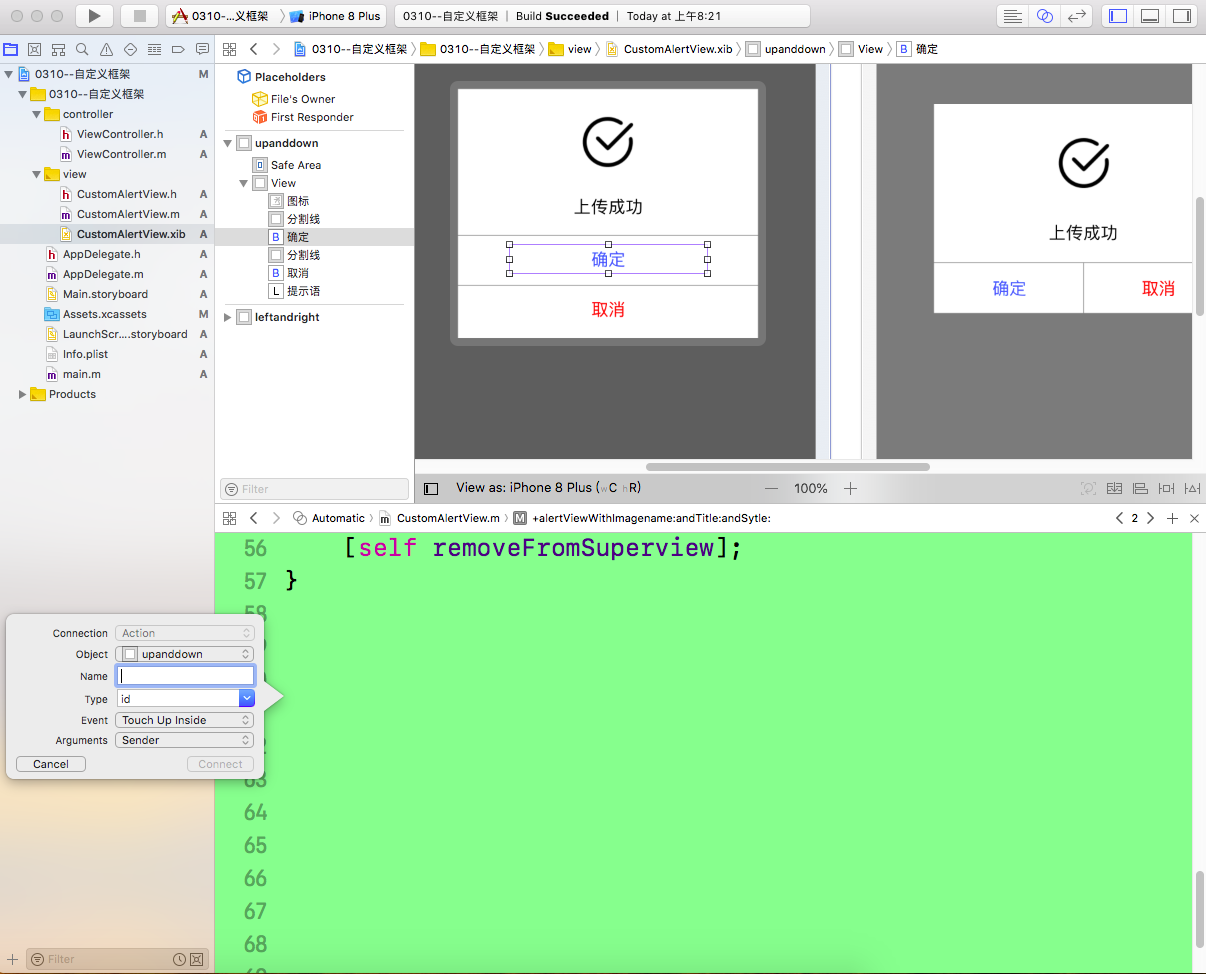
2.在xib文件里面直接拖取控件
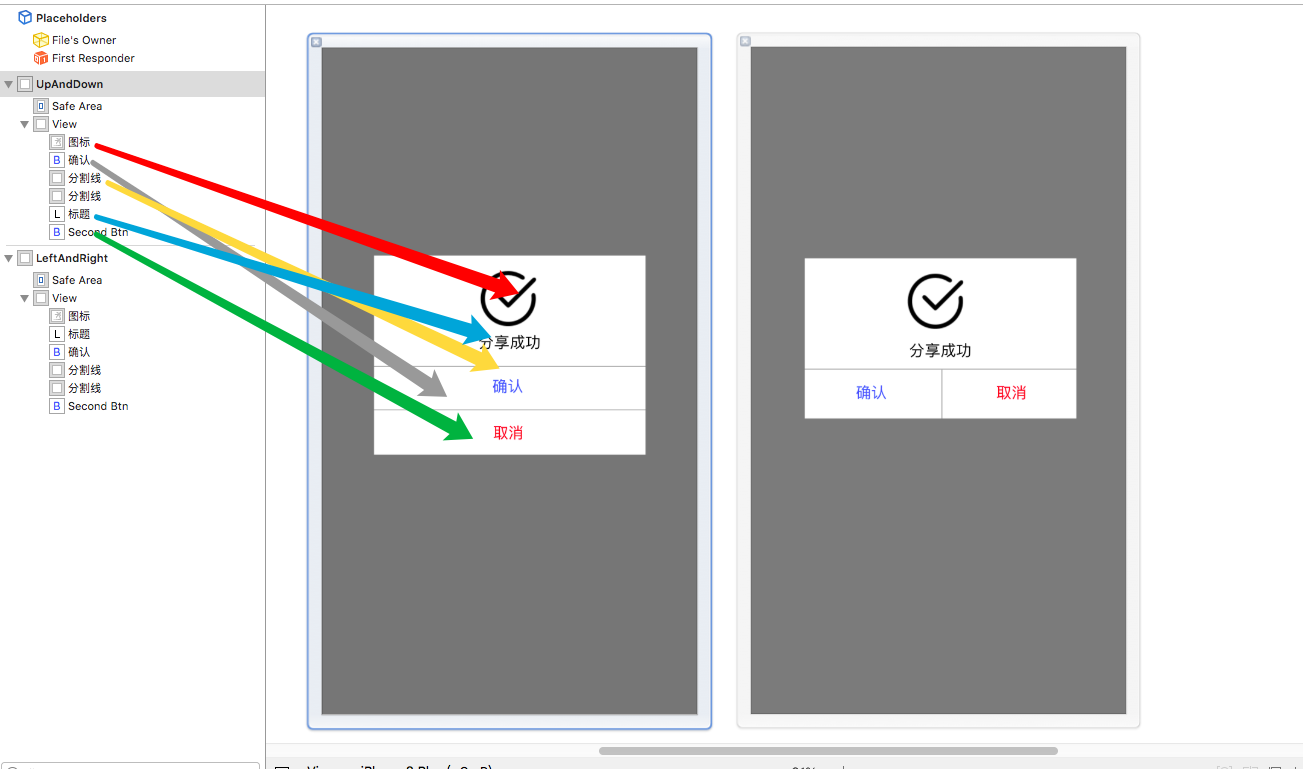
对应的就是这样子 ,把对应的控件名称改成能够清楚看出来的
因为是模仿系统的样式,布局了左右btn样式和上下btn
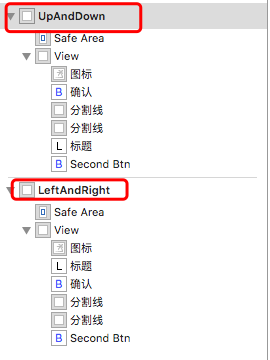
3.修改class的值为类名 两个都要

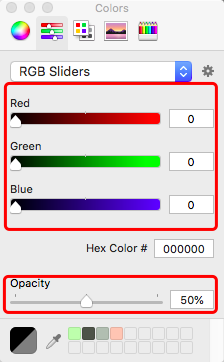
4.将如图框起来的view的背景色改成
5.效果图中的提示框圆角效果
这个效果在xib中设置,要选中这后面的view
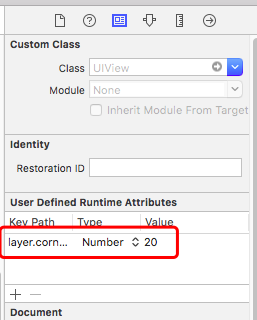
属性名称:layer.cornerRadius
6.在CustomAlertView类中定义一个类方法
这个类方法是一个对外的接口,当外部要使用自定义类创建一个框架时就可以直接调用。
因为我在xib文件里面的创建视图的顺序是先 上下型 再左右型的,因此可以枚举出两种类型的视图。
 1 #import <UIKit/UIKit.h>
 2
 3 typedef enum{
 4     kCustomAlertViewSytleUpAndDown,//默认=0
 5     kCustomAlertViewSytleLeftAndRight//默认=1
 6 }kCustomAlertViewSytle;
 7
 8
 9 @interface CustomAlertView : UIView
10
11 +(CustomAlertView *)alertViewWithImagename:(NSString *)imgName andTitle:(NSString *)title andSytle:(kCustomAlertViewSytle)sytle;
12
13
14
15 @end
7.在CustomAlertView.m文件中读取xib中的自定义控件视图
定义了类方法,下一步在.m文件中实现方法,在实现方法过程中发现要用到xib中的控件属性
因此,在xib中拖属性添加在CustomAlertView.m文件中

虽然我在xib中创建的视图是两套,但是其中的控件都是一一对应的,因此每个属性可以关联两个控件(这是特殊情况,一般一个xib只创建一个视图)
接下来读取xib文件。用到的方法是
- (nullable NSArray *)loadNibNamed:(NSString *)name owner:(nullable id)owner options:(nullable NSDictionary *)options;
注意到,这个方法读出来的返回值是一个数组,xib文件中如果有多个视图,那么读出来数组的顺序就跟下图的顺序一样。

实现代码如下:
 1 +(CustomAlertView *)alertViewWithImagename:(NSString *)imgName andTitle:(NSString *)title andSytle:(kCustomAlertViewSytle)sytle{
 2     //从xib中读取视图数组
 3     NSArray *arr = [[NSBundle mainBundle]loadNibNamed:@"CustomAlertView" owner:nil options:nil];
 4     //根据sytle值读取数组中的第几个
 5     CustomAlertView *aCAV = [arr objectAtIndex:sytle];
 6     //把传过来的图片名称和标题名称赋值
 7     //要先判断是否为空。若为空则默认xib中已设置的
 8     if (imgName != nil) {
 9         [aCAV.iconImageView setImage:[UIImage imageNamed:imgName]];
10     }
11     if (title != nil) {
12         [aCAV.titleLabel setText:title];
13     }
14
15
16     return aCAV;
17 }
8.让自定义提示框显示在界面上和消失(这里还没有给提示框的按钮设置事件)
显示界面有两种方法,一种是在创建完对象给一个参数值,再在方法实现中让addsubview,这种方法的实现相对简单。
实现代码如下:
1 -(void)showInView:(UIView *)fatherView{
2     [fatherView addSubview:self];
3 }
这种方法相对简单,作为一个自己使用的类来说是足够用的。但如果作为一个可导入的第三方工具类来说,就有点麻烦了。
如果能直接用一个方法就能让提示框显示在界面上肯定是更加方便,例如 [self show];
(其实我这里也没有理解清楚appdelegate)
***记得导入#import "AppDelegate.h"
 1 - (void)show{
 2 //    将这个视图添加到当前界面的最外层
 3 //    找到当前的这个界面
 4 //    UIWindow -> 添加视图
 5 //    1.找到应用程序唯一的代理对象AppDelegate
 6    AppDelegate *appD = (AppDelegate *)[UIApplication sharedApplication].delegate;
 7 //
 8 //    2.获取程序的窗口
 9     self.frame = [UIScreen mainScreen].bounds;
10     [appD.window addSubview:self];
11 }
还有一种:
 1 -(void)show{
 2
 3     //找到当前这个界面的那个视图
 4     //UIWindow->rootViewController->UIView ->添加视图
 5     //1.找到应用程序的代理对象
 6     AppDelegate *appD = (AppDelegate *)[UIApplication sharedApplication].delegate;
 7
 8     //2.找到窗口默认控制的那个根视图控制器
 9     UIViewController *rootVC = appD.window.rootViewController;
10
11     //3.在这个控制器的视图上面添加一个子视图
12     self.frame = rootVC.view.bounds;
13     [rootVC.view addSubview:self];
14
15
16
17 }
消失:
1 - (void)dismiss{
2     [self removeFromSuperview];
3 }
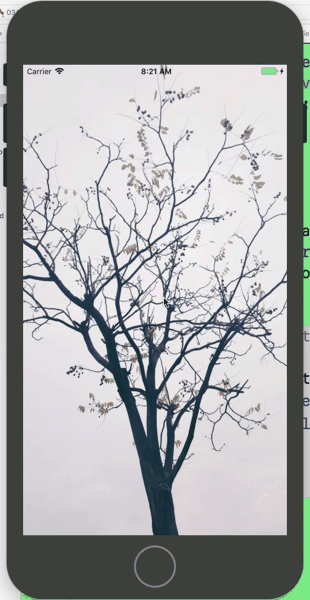
这里先运行一下,在ViewController.m中任意创建图片
1 - (void)viewDidLoad {
2     [super viewDidLoad];
3     // Do any additional setup after loading the view, typically from a nib.
4     UIImageView *imgview = [[UIImageView alloc]initWithImage:[UIImage imageNamed:@"tree"]];
5     imgview.frame = self.view.bounds;
6     [self.view addSubview:imgview];
7 }
1 -(void)touchesBegan:(NSSet<UITouch *> *)touches withEvent:(UIEvent *)event{
2     CustomAlertView *alertView = [CustomAlertView alertViewWithImagename:@"ok" andTitle:@"吃了吗" andSytle:kCustomAlertViewSytleUpAndDown];
3
4     [alertView show];
5
6 }
还没设置按钮点击事件因此不会有反应。
9.接下来设置按钮的点击事件

创建的自定义提示框的按钮的title要可以改变,也可以在点击完按钮之后再完成点别的事件。
因为完成 这些事 是要在按钮被点击后执行的,因此 这些事的执行代码 应该在btndidclicked方法里面。
所以,要有2个block来保存数据,等到点击按钮的时候再执行。(也可以用通知或者delegate来做)
1 //定义两个block 用于接收外部传递过来的block的类型
2 typedef void (^SureBtnBlock)(void);
3 typedef void (^CancelBtnBlock)(void);
1 -(void)setSureBtnWithTitle:(NSString *)title andComlished:(SureBtnBlock)sureblock;
2
3 -(void)setCancelBtnWithTitle:(NSString *)title andComlished:(CancelBtnBlock)cancelblock;
 1 -(void)setSureBtnWithTitle:(NSString *)title andComlished:(SureBtnBlock)sureblock{
 2     //这里判断一下外部是否传title值
 3     if (title != nil) {
 4         [self.sureBtn setTitle:title forState:UIControlStateNormal];
 5     }
 6     //这里发现要用一个属性变量来保存住外部传过来的sureblock
 7     self.sureblock = sureblock;
 8 }
 9
10 -(void)setCancelBtnWithTitle:(NSString *)title andComlished:(CancelBtnBlock)cancelblock{
11     if (title != nil) {
12         [self.cancelBtn setTitle:title forState:UIControlStateNormal];
13     }
14
15     self.cancelblock = cancelblock;
16
17
18
19 }
1 //block 用copy
2 @property (nonatomic , copy) SureBtnBlock sureblock;
3
4 @property (nonatomic , copy) CancelBtnBlock cancelblock;
根据上面的分析,在btn的点击事件中执行外部传来的block
 1 - (IBAction)sureBTNdidClicked:(id)sender {
 2     //先让提示框消失
 3     [self dismiss];
 4     //执行一下block
 5     self.sureblock();
 6 }
 7
 8
 9
10 - (IBAction)cancelBTNdidClicked:(id)sender {
11     //先让提示框消失
12     [self dismiss];
13     //执行一下block
14     self.cancelblock();
15
16 }
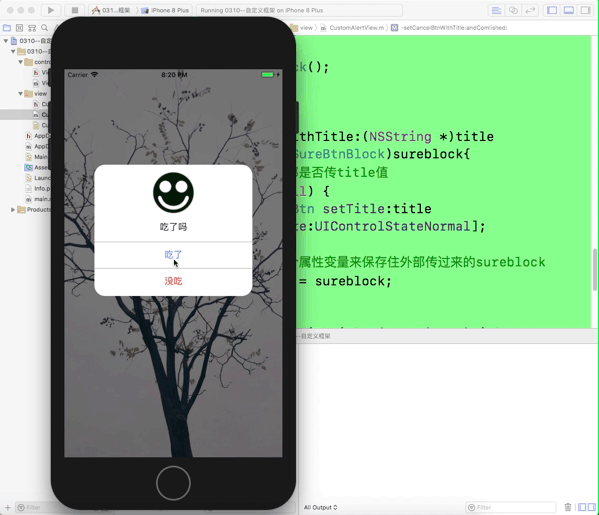
接下来我在viewcontroller的触摸事件中配置了提示框
效果如下:
附源代码
 1 //
 2 //  CustomAlertView.h
 3 //  0310--自定义框架
 4 //
 5 //  Created by MyMac on 2019/3/12.
 6 //  Copyright © 2019年 MyMac. All rights reserved.
 7 //
 8
 9 #import <UIKit/UIKit.h>
10 //定义两个block 用于接收外部传递过来的block的类型
11 typedef void (^SureBtnBlock)(void);
12 typedef void (^CancelBtnBlock)(void);
13
14
15 typedef enum{
16     kCustomAlertViewSytleUpAndDown,
17     kCustomAlertViewSytleLeftAndRight
18 }kCustomAlertViewSytle;
19
20
21 @interface CustomAlertView : UIView
22
23 +(CustomAlertView *)alertViewWithImagename:(NSString *)imgName andTitle:(NSString *)title andSytle:(kCustomAlertViewSytle)sytle;
24
25 -(void)show;
26
27 -(void)dismiss;
28
29 -(void)setSureBtnWithTitle:(NSString *)title andComlished:(SureBtnBlock)sureblock;
30
31 -(void)setCancelBtnWithTitle:(NSString *)title andComlished:(CancelBtnBlock)cancelblock;
32
33
34
35 @end
  1 //
  2 //  CustomAlertView.m
  3 //  0310--自定义框架
  4 //
  5 //  Created by MyMac on 2019/3/12.
  6 //  Copyright © 2019年 MyMac. All rights reserved.
  7 //
  8
  9 #import "CustomAlertView.h"
 10 #import "AppDelegate.h"
 11 @interface CustomAlertView()
 12 @property (weak, nonatomic) IBOutlet UIImageView *iconImageView;
 13
 14 @property (weak, nonatomic) IBOutlet UILabel *titleLabel;
 15
 16 @property (weak, nonatomic) IBOutlet UIButton *sureBtn;
 17
 18 @property (weak, nonatomic) IBOutlet UIButton *cancelBtn;
 19
 20 //block 用copy
 21 @property (nonatomic , copy) SureBtnBlock sureblock;
 22
 23 @property (nonatomic , copy) CancelBtnBlock cancelblock;
 24 @end
 25
 26
 27
 28 @implementation CustomAlertView
 29 +(CustomAlertView *)alertViewWithImagename:(NSString *)imgName andTitle:(NSString *)title andSytle:(kCustomAlertViewSytle)sytle{
 30     //从xib中读取视图数组
 31     NSArray *arr = [[NSBundle mainBundle]loadNibNamed:@"CustomAlertView" owner:nil options:nil];
 32     //根据sytle值读取数组中的第几个
 33     CustomAlertView *aCAV = [arr objectAtIndex:sytle];
 34     //把传过来的图片名称和标题名称赋值
 35     //要先判断是否为空。若为空则默认xib中已设置的
 36     if (imgName != nil) {
 37         [aCAV.iconImageView setImage:[UIImage imageNamed:imgName]];
 38     }
 39     if (title != nil) {
 40         [aCAV.titleLabel setText:title];
 41     }
 42
 43
 44     return aCAV;
 45 }
 46
 47
 48
 49 -(void)show{
 50     //首先找到唯一控制这个viewcontroller的appdelegate
 51     AppDelegate *delegate = (AppDelegate *)[UIApplication sharedApplication].delegate;
 52     //找到默认控制的窗口
 53     [delegate.window addSubview:self];
 54
 55 }
 56
 57
 58 -(void)dismiss{
 59     [self removeFromSuperview];
 60 }
 61
 62
 63
 64 - (IBAction)sureBTNdidClicked:(id)sender {
 65     //先让提示框消失
 66     [self dismiss];
 67     //执行一下block
 68     self.sureblock();
 69 }
 70
 71
 72
 73 - (IBAction)cancelBTNdidClicked:(id)sender {
 74     //先让提示框消失
 75     [self dismiss];
 76     //执行一下block
 77     self.cancelblock();
 78
 79 }
 80
 81 -(void)setSureBtnWithTitle:(NSString *)title andComlished:(SureBtnBlock)sureblock{
 82     //这里判断一下外部是否传title值
 83     if (title != nil) {
 84         [self.sureBtn setTitle:title forState:UIControlStateNormal];
 85     }
 86     //这里发现要用一个属性变量来保存住外部传过来的sureblock
 87     self.sureblock = sureblock;
 88 }
 89
 90 -(void)setCancelBtnWithTitle:(NSString *)title andComlished:(CancelBtnBlock)cancelblock{
 91     if (title != nil) {
 92         [self.cancelBtn setTitle:title forState:UIControlStateNormal];
 93     }
 94
 95     self.cancelblock = cancelblock;
 96 }
 97
 98
 99
100 @end
1 //
2 // ViewController.m
3 // 0310--自定义框架
4 //
5 // Created by MyMac on 2019/3/12.
6 // Copyright © 2019年 MyMac. All rights reserved.
7 //
8
9 #import "ViewController.h"
10 #import "CustomAlertView.h"
11 @interface ViewController ()
12
13 @end
14
15 @implementation ViewController
16
17 - (void)viewDidLoad {
18 [super viewDidLoad];
19 // Do any additional setup after loading the view, typically from a nib.
20 UIImageView *imgview = [[UIImageView alloc]initWithImage:[UIImage imageNamed:@"tree"]];
21 imgview.frame = self.view.bounds;
22 [self.view addSubview:imgview];
23 }
24
25
26
27
28 - (void)didReceiveMemoryWarning {
29 [super didReceiveMemoryWarning];
30 // Dispose of any resources that can be recreated.
31 }
32
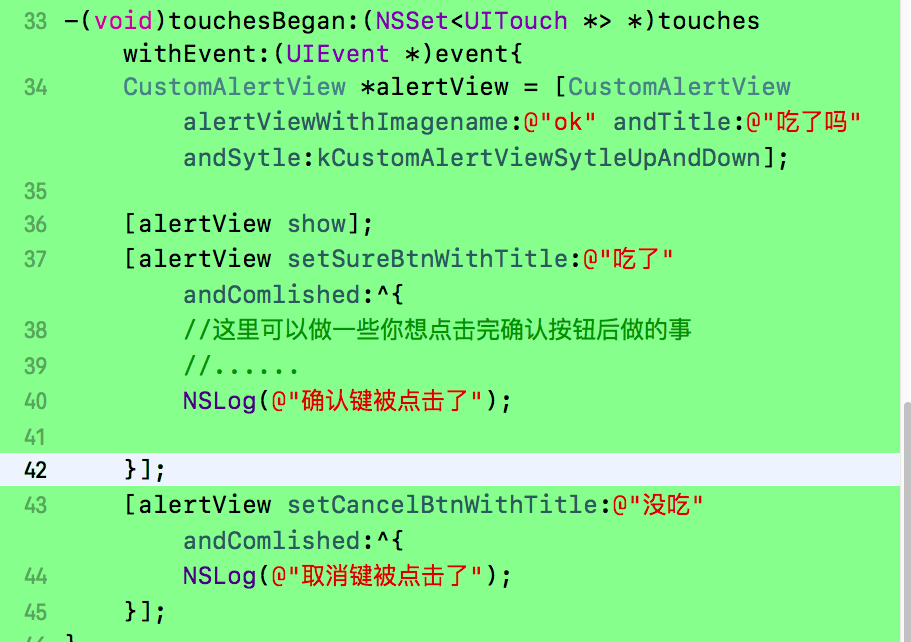
33 -(void)touchesBegan:(NSSet<UITouch *> *)touches withEvent:(UIEvent *)event{
34 CustomAlertView *alertView = [CustomAlertView alertViewWithImagename:@"ok" andTitle:@"吃了吗" andSytle:kCustomAlertViewSytleUpAndDown];
35
36 [alertView show];
37 [alertView setSureBtnWithTitle:@"吃了" andComlished:^{
38 //这里可以做一些你想点击完确认按钮后做的事
39 //......
40 NSLog(@"确认键被点击了");
41
42 }];
43 [alertView setCancelBtnWithTitle:@"没吃" andComlished:^{
44 NSLog(@"取消键被点击了");
45 }];
46 }
47
48
49
50 @end