环境说明:
window7 X64
python 2.7.6 、celery 3.1.25、redis 2.10.6
本地安装的redis服务端版本号:Redis-x64-3.2.100
工程结构说明:源文件下载请访问https://i.cnblogs.com/Files.aspx
1、tasks.py:实例化celery,并定义生成任务的方法add()
# -*- coding: utf-8 -*-

'''
Created on 2019年8月27日

@author: lenovo
'''
import  time
from celery import Celery
from celery.bin.multi import celery_exe

#实例化一个celery
broker='redis://localhost:6379/1' #接收发送过来的任务,并等待celery的worker进行消费
backend='redis://localhost:6379/2' #celery的worker消费完任务后,backend保存任务执行结果
app=Celery('my_task',broker=broker,backend=backend)

#在add()方法上方添加装饰器,将该方法转换为异步的
@app.task
def add(x,y):
    print 'enter call func...'
    time.sleep(4)
    return x+y
2、app.py:
# -*- coding: utf-8 -*-

'''
Created on 2019年8月27日

@author: lenovo
'''
from tasks import add

if __name__ == '__main__':
    print 'start task...'
    result=add.delay(3, 8) #将任务发送给tasks.py中celery的broker
    print 'end task...'
    print result
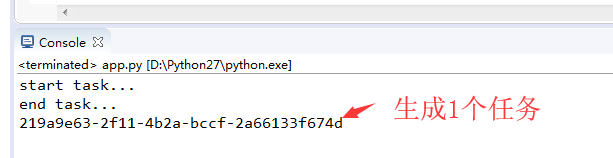
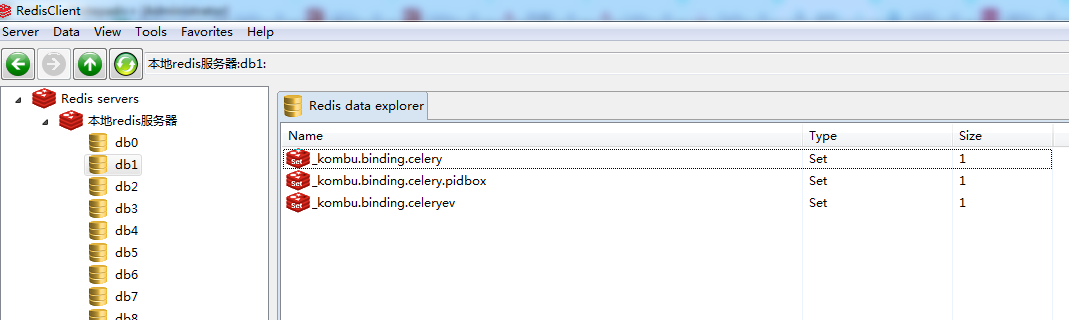
3、执行app.py生成新任务,在未启动worker前,该任务保存在broker指定的redis数据库中等待worker进行消费;
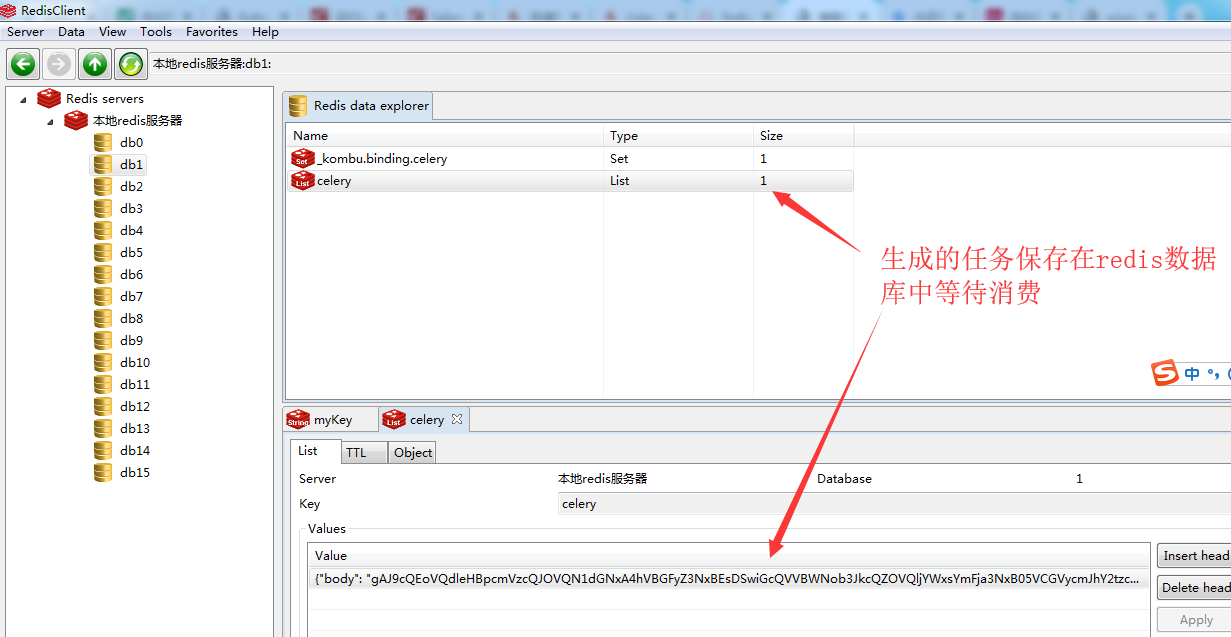
{"body": "gAJ9cQEoVQdleHBpcmVzcQJOVQN1dGNxA4hVBGFyZ3NxBEsDSwiGcQVVBWNob3JkcQZOVQljYWxsYmFja3NxB05VCGVycmJhY2tzcQhOVQd0YXNrc2V0cQlOVQJpZHEKVSQyMTlhOWU2My0yZjExLTRiMmEtYmNjZi0yYTY2MTMzZjY3NGRxC1UHcmV0cmllc3EMSwBVBHRhc2txDVUJdGFza3MuYWRkcQ5VCXRpbWVsaW1pdHEPTk6GVQNldGFxEE5VBmt3YXJnc3ERfXESdS4=", "headers": {}, "content-type": "application/x-python-serialize", "properties": {"body_encoding": "base64", "correlation_id": "219a9e63-2f11-4b2a-bccf-2a66133f674d", "reply_to": "fa6b65cc-0efa-3ddc-bd74-246023f65e8d", "delivery_info": {"priority": 0, "routing_key": "celery", "exchange": "celery"}, "delivery_mode": 2, "delivery_tag": "aa0f8035-a256-46b3-84a9-acf8e9d490db"}, "content-encoding": "binary"}
4、启动worker,消费该任务;
cmd到celery实例化文件tasks.py所在路径下,执行命令:python -m celery -A tasks worker --loglevel=info 或者 celery -A tasks worker --loglevel=info

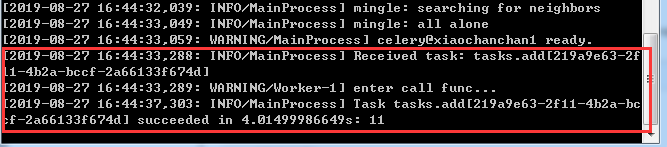
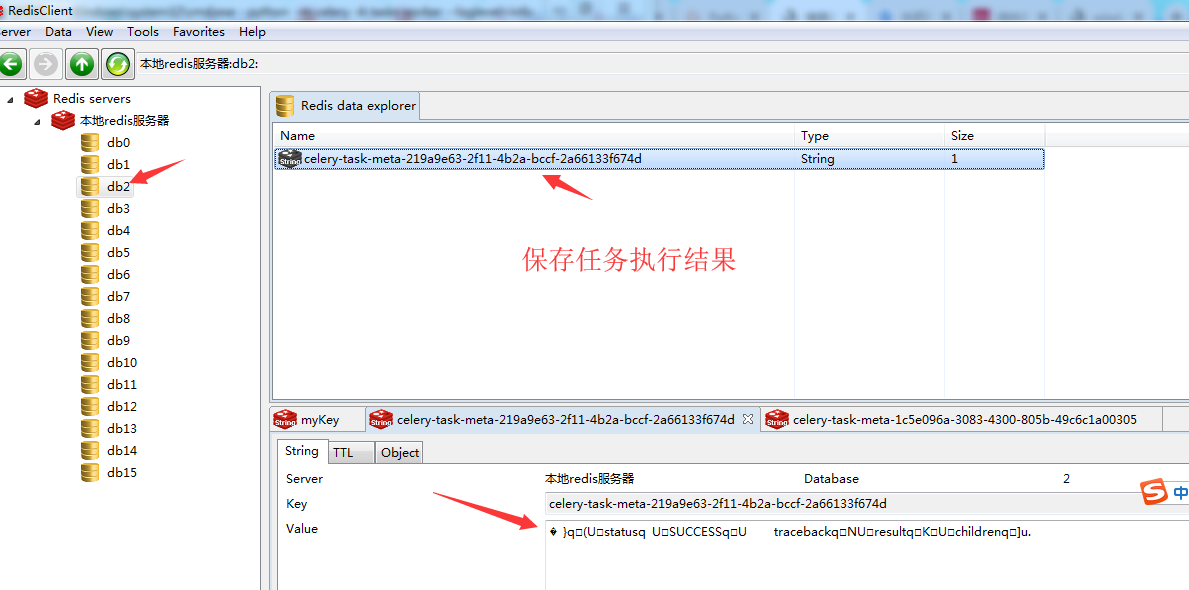
从日志打印和下图redis数据库可以看到,worker启动后,立刻从redis中将未消费的任务进行了消费;
任务执行的结果保存在backend设定的redis数据库中,如下图所示:
5、测试新任务:
发送任务:
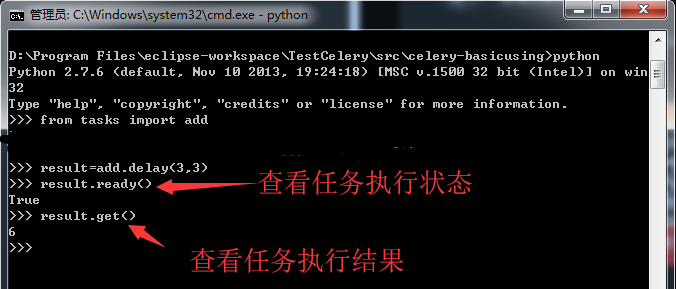
查看worker执行情况:

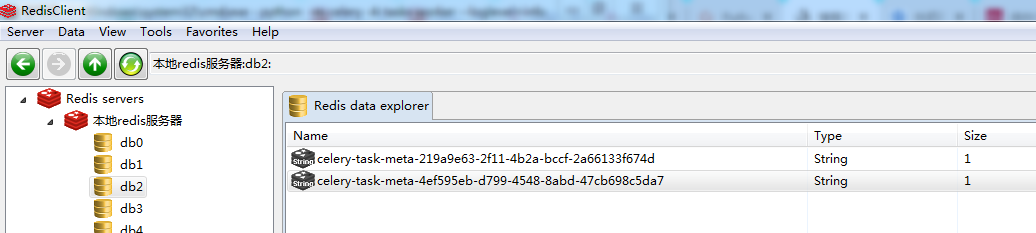
查看backend保存结果:
6、异步与同步效果比对:
同步处理任务:
工程结构:

app.py:同步处理任务
# -*- coding: utf-8 -*-
import time

'''
Created on 2019年8月27日

@author: lenovo
'''
def add(x,y):
    print 'enter call func...'
    time.sleep(4)
    return x+y


if __name__ == '__main__':
    print 'start task...'
    result=add(2, 8)
    print 'end task...'
    print result


异步处理任务:
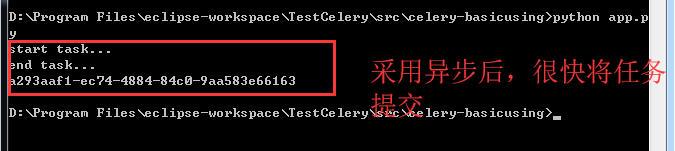

可以看出,同步执行任务时需要等待任务过程执行完毕后才会继续,执行任务过程中存在阻塞现象;而采用异步处理,生成任务后里面就结束了,执行任务不存在阻塞现象;