1 - Vagrant
- HomePage: https://www.vagrantup.com/
- Download: https://www.vagrantup.com/downloads.html
- Get Started: https://www.vagrantup.com/intro/index.html
- Documentation:https://www.vagrantup.com/docs/
Vagrant是一个虚拟环境构建工具,可以使基础设施代码化(虚拟机创建、配置和应用等),简化个人开发环境的构建操作。
Vagrant通过Vagrantfile记录虚拟机环境相关的构建步骤和配置信息,通过共享Vagrantfile可以容易地共享和创建统一的环境,也利于理解和维护。
可以简单理解为Vagrant抛弃了开发环境中所有让人头痛的设置,而是用一个单一的配置文件来替代,并且可以选择性地保留所需要的特性。
Vagrant能够很好解决只使用VirtualBox时遇到的一些问题。
- 配置完整的环境要花费一定的时间和精力
- 虚拟机镜像文件庞大,共享困难
- 对共享出来的镜像文件,难以掌握其构建步骤和配置信息
- 需要实施相应的镜像维护工作,来保持构建步骤、配置信息和镜像本身的一致性
1.1 Vagrant的功能特性
Vagrant默认使用Oracle开源的VirtualBox虚拟化系统,使用Chef创建自动化虚拟环境。
    支持快速新建一个或同时多个虚拟机
    支持快速设置端口转发
    支持自定义镜像打包(原始镜像方式、增量补丁方式)
    基本上日常能用到的基础配置都能快速设置
    支持开机启动自动运行命令
    可以自己写扩展
1.2 Vagrant 常用命令
  vagrant init    初始化
  vagrant up    启动虚拟机
  vagrant halt    关闭虚拟机
  vagrant ssh    SSH至虚拟机
  vagrant suspend    挂起虚拟机
  vagrant resume    唤醒虚拟机
  vagrant status    查看虚拟机运行状态
  vagrant destroy    销毁当前虚拟机
  vagrant reload    修改配置文件后,重启虚拟化开发环境
  vagrant box list    查看当前可用的虚拟化开发环境
  vagrant box add box-name box-file    添加指定的box环境
  vagrant box remove box-name    删除指定的box环境
  vagrant package    当前正在运行的VirtualBox虚拟环境打包成一个可重复使用的box
1.3 Vagrant的下载与安装
从Download页面(https://www.vagrantup.com/downloads.html)下载对应安装包,根据提示安装即可。
Livenan@DESKTOP-Livenan /d/
λ cd /d/Logs/Vagrant/

Livenan@DESKTOP-Livenan /d/logs/Vagrant
λ vagrant -v
Vagrant 2.2.6
Livenan@DESKTOP-Livenan /d/logs/Vagrant
λ vagrant -h
Usage: vagrant [options] <command> [<args>]

    -v, --version                    Print the version and exit.
    -h, --help                       Print this help.

Common commands:
     box             manages boxes: installation, removal, etc.
     cloud           manages everything related to Vagrant Cloud
     destroy         stops and deletes all traces of the vagrant machine
     global-status   outputs status Vagrant environments for this user
     halt            stops the vagrant machine
     help            shows the help for a subcommand
     init            initializes a new Vagrant environment by creating a Vagrantfile
     login
     package         packages a running vagrant environment into a box
     plugin          manages plugins: install, uninstall, update, etc.
     port            displays information about guest port mappings
     powershell      connects to machine via powershell remoting
     provision       provisions the vagrant machine
     push            deploys code in this environment to a configured destination
     rdp             connects to machine via RDP
     reload          restarts vagrant machine, loads new Vagrantfile configuration
     resume          resume a suspended vagrant machine
     snapshot        manages snapshots: saving, restoring, etc.
     ssh             connects to machine via SSH
     ssh-config      outputs OpenSSH valid configuration to connect to the machine
     status          outputs status of the vagrant machine
     suspend         suspends the machine
     up              starts and provisions the vagrant environment
     upload          upload to machine via communicator
     validate        validates the Vagrantfile
     version         prints current and latest Vagrant version
     winrm           executes commands on a machine via WinRM
     winrm-config    outputs WinRM configuration to connect to the machine

For help on any individual command run `vagrant COMMAND -h`

Additional subcommands are available, but are either more advanced
or not commonly used. To see all subcommands, run the command
`vagrant list-commands`.

Livenan@DESKTOP-Livenan /d/Logs/Vagrant
2 - virtualbox文件
- 寻找和下载virtualbox 文件(.box后缀)并保存到指定目录。
- 运行“vagrant box add
”命令添加指定的box环境 - 运行“vagrant box list”查看当前可用的虚拟化开发环境
VirtualBox文件下载地址
示例:
Livenan@DESKTOP-Livenan /d/Logs/Vagrant
λ vagrant box list
There are no installed boxes! Use `vagrant box add` to add some.

Livenan@DESKTOP-Livenan /d/Logs/Vagrant
λ vagrant box add demo /d/Temp/CentOS-7-x86_64-Vagrant-1905_01.VirtualBox.box
==> box: Box file was not detected as metadata. Adding it directly...
==> box: Adding box 'demo' (v0) for provider:
    box: Unpacking necessary files from: file:///D:/Temp/CentOS-7-x86_64-Vagrant-1905_01.VirtualBox.box
    box:
==> box: Successfully added box 'demo' (v0) for 'virtualbox'!

Livenan@DESKTOP-Livenan /d/Logs/Vagrant
λ vagrant box list
demo (virtualbox, 0)
3 - 使用示例
3.1 示例步骤
- 在Vagrant工作目录(有Vagrantfile文件的目录)运行“vagrant init
"命令初始化Vagrant,得到一个Vagrantfile文件 - 根据需求和规则更改Vagrantfile文件内容
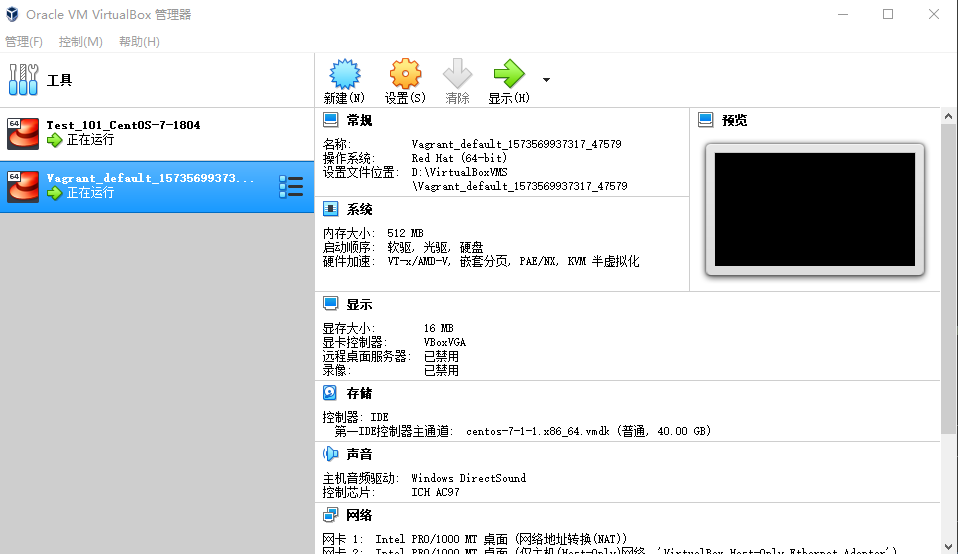
- 运行“vagrant up”命令启动虚拟机,出现“Machine booted and ready!”表示虚拟机正常启动,也可以在VirtualBox界面中看到Vagrant启动的虚拟机
- 运行“vagrant ssh”命令(默认账号和密码都为vagrant)登录到虚拟机,运行系统命令“uname -n”和“ip addr show”确认虚拟机的主机名和IP地址
- 运行“vagrant halt”命令可以停止虚拟机,运行“vagrant status”命令可以查看虚拟机状态
- 运行“vagrant destroy”命令直接删除虚拟机
- 运行"vagrant provision"命令可以在已运行的虚拟机中执行Vagrantfile文件中provision部分定义的操作
3.2 示例日志
Livenan@DESKTOP-Livenan /d/Logs/Vagrant
λ ll
total 4
drwxr-xr-x 1 Livenan 197121 0 11月 12 13:31 bin/
drwxr-xr-x 1 Livenan 197121 0 11月 12 13:31 embedded/
Livenan@DESKTOP-Livenan /d/Logs/Vagrant
λ vagrant init demo
A `Vagrantfile` has been placed in this directory. You are now
ready to `vagrant up` your first virtual environment! Please read
the comments in the Vagrantfile as well as documentation on
`vagrantup.com` for more information on using Vagrant.
Livenan@DESKTOP-Livenan /d/Logs/Vagrant
λ ll
total 8
drwxr-xr-x 1 Livenan 197121    0 11月 12 13:31 bin/
drwxr-xr-x 1 Livenan 197121    0 11月 12 13:31 embedded/
-rw-r--r-- 1 Livenan 197121 3081 11月 12 22:39 Vagrantfile
Livenan@DESKTOP-Livenan /d/Logs/Vagrant
λ cat -n Vagrantfile
     1  # -*- mode: ruby -*-
     2  # vi: set ft=ruby :
     3
     4  # All Vagrant configuration is done below. The "2" in Vagrant.configure
     5  # configures the configuration version (we support older styles for
     6  # backwards compatibility). Please don't change it unless you know what
     7  # you're doing.
     8  Vagrant.configure("2") do |config|
     9    # The most common configuration options are documented and commented below.
    10    # For a complete reference, please see the online documentation at
    11    # https://docs.vagrantup.com.
    12
    13    # Every Vagrant development environment requires a box. You can search for
    14    # boxes at https://vagrantcloud.com/search.
    15    config.vm.box = "demo"
    16
    17    # Disable automatic box update checking. If you disable this, then
    18    # boxes will only be checked for updates when the user runs
    19    # `vagrant box outdated`. This is not recommended.
    20    # config.vm.box_check_update = false
    21
    22    # Create a forwarded port mapping which allows access to a specific port
    23    # within the machine from a port on the host machine. In the example below,
    24    # accessing "localhost:8080" will access port 80 on the guest machine.
    25    # NOTE: This will enable public access to the opened port
    26    # config.vm.network "forwarded_port", guest: 80, host: 8080
    27
    28    # Create a forwarded port mapping which allows access to a specific port
    29    # within the machine from a port on the host machine and only allow access
    30    # via 127.0.0.1 to disable public access
    31    # config.vm.network "forwarded_port", guest: 80, host: 8080, host_ip: "127.0.0.1"
    32
    33    # Create a private network, which allows host-only access to the machine
    34    # using a specific IP.
    35    # config.vm.network "private_network", ip: "192.168.33.10"
    36
    37    # Create a public network, which generally matched to bridged network.
    38    # Bridged networks make the machine appear as another physical device on
    39    # your network.
    40    # config.vm.network "public_network"
    41
    42    # Share an additional folder to the guest VM. The first argument is
    43    # the path on the host to the actual folder. The second argument is
    44    # the path on the guest to mount the folder. And the optional third
    45    # argument is a set of non-required options.
    46    # config.vm.synced_folder "../data", "/vagrant_data"
    47
    48    # Provider-specific configuration so you can fine-tune various
    49    # backing providers for Vagrant. These expose provider-specific options.
    50    # Example for VirtualBox:
    51    #
    52    # config.vm.provider "virtualbox" do |vb|
    53    #   # Display the VirtualBox GUI when booting the machine
    54    #   vb.gui = true
    55    #
    56    #   # Customize the amount of memory on the VM:
    57    #   vb.memory = "1024"
    58    # end
    59    #
    60    # View the documentation for the provider you are using for more
    61    # information on available options.
    62
    63    # Enable provisioning with a shell script. Additional provisioners such as
    64    # Puppet, Chef, Ansible, Salt, and Docker are also available. Please see the
    65    # documentation for more information about their specific syntax and use.
    66    # config.vm.provision "shell", inline: <<-SHELL
    67    #   apt-get update
    68    #   apt-get install -y apache2
    69    # SHELL
    70  end
Livenan@DESKTOP-Livenan /d/Logs/Vagrant
λ
Livenan@DESKTOP-Livenan /d/Logs/Vagrant
λ vim Vagrantfile
Livenan@DESKTOP-Livenan /d/Logs/Vagrant
λ cat -n Vagrantfile
     1  # -*- mode: ruby -*-
     2  # vi: set ft=ruby :
     3
     4  Vagrant.configure(2) do |config|
     5          config.vm.box = "demo"
     6          config.vm.hostname = "samplehost"
     7          config.vm.network :private_network, ip: "192.168.16.10"
     8          config.vm.synced_folder ".", "/home/vagrant/sync", disabled: true
     9          config.vm.provision "shell", inline: $script
    10  end
    11
    12  $script = <<SCRIPT
    13          yum -y install epel-release
    14          yum -y install nginx
    15          echo "hello, vagrant" > /usr/share/nginx/html/index.html
    16          systemctl start nginx
    17  SCRIPT
Livenan@DESKTOP-Livenan /d/Logs/Vagrant
λ
Livenan@DESKTOP-Livenan /d/Logs/Vagrant
λ vagrant up
Bringing machine 'default' up with 'virtualbox' provider...
==> default: Importing base box 'demo'...
==> default: Matching MAC address for NAT networking...
==> default: Setting the name of the VM: Vagrant_default_1573569937317_47579
==> default: Clearing any previously set network interfaces...
==> default: Preparing network interfaces based on configuration...
    default: Adapter 1: nat
    default: Adapter 2: hostonly
==> default: Forwarding ports...
    default: 22 (guest) => 2222 (host) (adapter 1)
==> default: Booting VM...
==> default: Waiting for machine to boot. This may take a few minutes...
    default: SSH address: 127.0.0.1:2222
    default: SSH username: vagrant
    default: SSH auth method: private key
    default:
    default: Vagrant insecure key detected. Vagrant will automatically replace
    default: this with a newly generated keypair for better security.
    default:
    default: Inserting generated public key within guest...
    default: Removing insecure key from the guest if it's present...
    default: Key inserted! Disconnecting and reconnecting using new SSH key...
==> default: Machine booted and ready!
==> default: Checking for guest additions in VM...
    default: No guest additions were detected on the base box for this VM! Guest
    default: additions are required for forwarded ports, shared folders, host only
    default: networking, and more. If SSH fails on this machine, please install
    default: the guest additions and repackage the box to continue.
    default:
    default: This is not an error message; everything may continue to work properly,
    default: in which case you may ignore this message.
==> default: Setting hostname...
==> default: Configuring and enabling network interfaces...
==> default: Rsyncing folder: /cygdrive/d/Logs/Vagrant/ => /vagrant
==> default: Running provisioner: shell...
    default: Running: inline script
......
......
......
    default: Complete!
Livenan@DESKTOP-Livenan /d/Logs/Vagrant
λ
Livenan@DESKTOP-Livenan /d/Logs/Vagrant
λ vagrant ssh
[vagrant@samplehost ~]$ uname -n
samplehost
[vagrant@samplehost ~]$ ip addr show eth1
3: eth1: <BROADCAST,MULTICAST,UP,LOWER_UP> mtu 1500 qdisc pfifo_fast state UP group default qlen 1000
    link/ether 08:00:27:bd:fa:f8 brd ff:ff:ff:ff:ff:ff
    inet 192.168.16.10/24 brd 192.168.16.255 scope global noprefixroute eth1
       valid_lft forever preferred_lft forever
    inet6 fe80::a00:27ff:febd:faf8/64 scope link
       valid_lft forever preferred_lft forever
[vagrant@samplehost ~]$ exit
logout
Connection to 127.0.0.1 closed.
Livenan@DESKTOP-Livenan /d/Logs/Vagrant
λ
Livenan@DESKTOP-Livenan /d/Logs/Vagrant
λ vagrant status
Current machine states:

default                   running (virtualbox)

The VM is running. To stop this VM, you can run `vagrant halt` to
shut it down forcefully, or you can run `vagrant suspend` to simply
suspend the virtual machine. In either case, to restart it again,
simply run `vagrant up`.
Livenan@DESKTOP-Livenan /d/Logs/Vagrant
λ vagrant halt
==> default: Attempting graceful shutdown of VM...
Livenan@DESKTOP-Livenan /d/Logs/Vagrant
λ vagrant status
Current machine states:

default                   poweroff (virtualbox)

The VM is powered off. To restart the VM, simply run `vagrant up`
Livenan@DESKTOP-Livenan /d/Logs/Vagrant
λ
Livenan@DESKTOP-Livenan /d/Logs/Vagrant
λ vagrant destroy
    default: Are you sure you want to destroy the 'default' VM? [y/N] y
==> default: Destroying VM and associated drives...
Livenan@DESKTOP-Livenan /d/Logs/Vagrant
λ vagrant box list
demo (virtualbox, 0)
Livenan@DESKTOP-Livenan /d/Logs/Vagrant
λ vagrant status
Current machine states:

default                   not created (virtualbox)

The environment has not yet been created. Run `vagrant up` to
create the environment. If a machine is not created, only the
default provider will be shown. So if a provider is not listed,
then the machine is not created for that environment.
Livenan@DESKTOP-Livenan /d/Logs/Vagrant
λ
3.3 示例Vagrantfile讲解
# -*- mode: ruby -*-
# vi: set ft=ruby :

Vagrant.configure(2) do |config|  # 配置文件的版本
        config.vm.box = "demo"  # 构建虚拟机所使用的基础镜像
        config.vm.hostname = "samplehost"  # 虚拟机主机名
        config.vm.network :private_network, ip: "192.168.16.10"  # 虚拟机的私有IP
        config.vm.synced_folder ".", "/home/vagrant/sync", disabled: true  # 宿主机与虚拟机的同步文件夹设置
        config.vm.provision "shell", inline: $script  # 指定执行脚本
end

$script = <<SCRIPT  # 执行脚本内容
        yum -y install epel-release  # 安装企业版Linux附加软件包
        yum -y install nginx  # 安装nginx
        echo "hello, vagrant" > /usr/share/nginx/html/index.html
        systemctl start nginx  # 启动nginx
SCRIPT