1 - GitLab安装
1.1 信息确认
[Anliven@node102 ~]$ uname -a
Linux node102 3.10.0-957.el7.x86_64 #1 SMP Thu Nov 8 23:39:32 UTC 2018 x86_64 x86_64 x86_64 GNU/Linux
[Anliven@node102 ~]$ cat /etc/system-release
CentOS Linux release 7.5.1804 (Core)
[Anliven@node102 ~]$
1.2 准备步骤
# 安装依赖
sudo yum install -y curl policycoreutils-python openssh-server postfix

# 启动SSH和postfix
sudo systemctl enable sshd
sudo systemctl start sshd
sudo systemctl enable postfix
sudo systemctl start postfix

# 开放端口
sudo firewall-cmd --add-service=ssh --permanent
sudo firewall-cmd --add-service=http --permanent
sudo firewall-cmd --reload
1.3 安装方式1:Yum
curl https://packages.gitlab.com/install/repositories/gitlab/gitlab-ce/script.rpm.sh | sudo bash
sudo yum install -y gitlab-ce
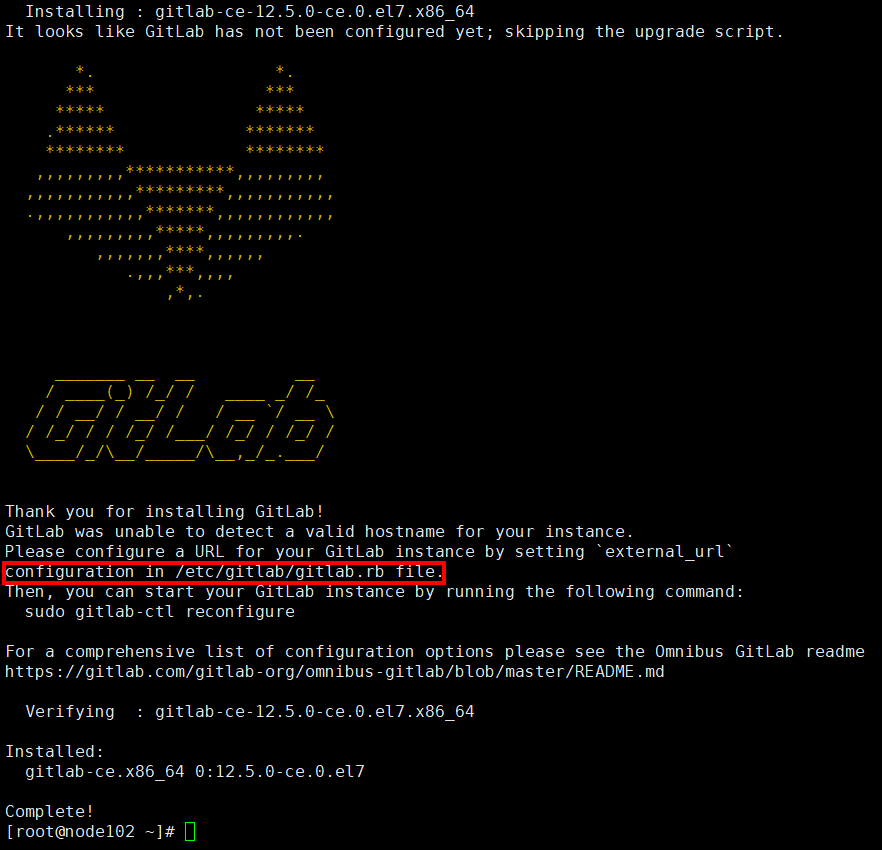
1.4 安装方式2:下载并安装rpm包
清华镜像:https://mirrors.tuna.tsinghua.edu.cn/gitlab-ce/yum/el7/

注意:可以单独下载RPM包,然后上传到Server,要节约时间点。
wget https://mirrors.tuna.tsinghua.edu.cn/gitlab-ce/yum/el7/gitlab-ce-12.5.0-ce.0.el7.x86_64.rpm
rpm -i gitlab-ce-12.5.0-ce.0.el7.x86_64.rpm

2 - 初始化配置
GitLab默认的配置文件路径:/etc/gitlab/
- /etc/gitlab/gitlab.rb:主配置文件,包含外部URL、仓库目录、备份目录等
- /etc/gitlab/gitlab-secrets.json:(执行gitlab-ctl reconfigure命令行后生成),包含各类密钥的加密信息
2.1 初始化配置
- 配置首页地址(需将设置的域名DNS解析到服务器IP,或者修改本地host将域名指向服务器IP)
- 修改服务端口,避免和其他服务端口冲突
- 重新配置并启动,使配置生效,并确认相关组件或进程的状态
- 设置账号密码和管理员信息
[root@node102 ~]# ll /etc/gitlab/
total 96
-rw------- 1 root root 97727 Nov 26 23:05 gitlab.rb
[root@node102 ~]#
[root@node102 ~]# cat /etc/gitlab/gitlab.rb |grep -v "#" |grep -Ev "^$"
external_url 'http://gitlab.example.com'
[root@node102 ~]#
[root@node102 ~]# vim /etc/gitlab/gitlab.rb
[root@node102 ~]#
[root@node102 ~]# cat /etc/gitlab/gitlab.rb |grep -v "#" |grep -Ev "^$"
external_url 'http://192.168.16.102'
unicorn['listen'] = '192.168.16.102'
unicorn['port'] = 8081
[root@node102 ~]#
[root@test102 ~]# gitlab-ctl diff-config
diff --git a/etc/gitlab/gitlab.rb b/opt/gitlab/etc/gitlab.rb.template
index 3e27e40..31c0b45 100644
--- a/etc/gitlab/gitlab.rb
+++ b/opt/gitlab/etc/gitlab.rb.template
@@ -20,7 +20,7 @@
 ##! URL on which GitLab will be reachable.
 ##! For more details on configuring external_url see:
 ##! https://docs.gitlab.com/omnibus/settings/configuration.html#configuring-the-external-url-for-gitlab
-external_url 'http://192.168.16.102'
+external_url 'GENERATED_EXTERNAL_URL'

 ## Roles for multi-instance GitLab
 ##! The default is to have no roles enabled, which results in GitLab running as an all-in-one instance.
@@ -740,8 +740,8 @@ external_url 'http://192.168.16.102'
 # unicorn['worker_processes'] = 2

 ### Advanced settings
-unicorn['listen'] = '192.168.16.102'
-unicorn['port'] = 8081
+# unicorn['listen'] = 'localhost'
+# unicorn['port'] = 8080
 # unicorn['socket'] = '/var/opt/gitlab/gitlab-rails/sockets/gitlab.socket'
 # unicorn['pidfile'] = '/opt/gitlab/var/unicorn/unicorn.pid'
 # unicorn['tcp_nopush'] = true
[root@test102 ~]#
[root@node102 ~]#  firewall-cmd --zone=public --permanent --add-port=8081/tcp
success
[root@node102 ~]# firewall-cmd --reload
success
[root@node102 ~]#
[root@node102 ~]# firewall-cmd --list-all
public (active)
  target: default
  icmp-block-inversion: no
  interfaces: enp0s3 enp0s8
  sources:
  services: ssh dhcpv6-client http
  ports: 8081/tcp
  protocols:
  masquerade: no
  forward-ports:
  source-ports:
  icmp-blocks:
  rich rules:

[root@node102 ~]#
[root@node102 ~]# gitlab-ctl reconfigure
Starting Chef Client, version 14.13.11
resolving cookbooks for run list: ["gitlab"]
Synchronizing Cookbooks:
  - gitlab (0.0.1)
  - package (0.1.0)
  - postgresql (0.1.0)
  - redis (0.1.0)
  - monitoring (0.1.0)
  - registry (0.1.0)
  - mattermost (0.1.0)
  - consul (0.1.0)
  - gitaly (0.1.0)
  - nginx (0.1.0)
  - praefect (0.1.0)
  - letsencrypt (0.1.0)
  - runit (4.3.0)
  - acme (4.0.0)
  - crond (0.1.0)
Installing Cookbook Gems:
Compiling Cookbooks...
Recipe: gitlab::default
......
......
......
Recipe: <Dynamically Defined Resource>
  * service[alertmanager] action restart
    - restart service service[alertmanager]
  * service[postgres-exporter] action restart
    - restart service service[postgres-exporter]
  * service[grafana] action restart
    - restart service service[grafana]
Running handlers:
Running handlers complete
Chef Client finished, 543/1455 resources updated in 04 minutes 09 seconds
gitlab Reconfigured!
[root@node102 ~]#
[root@node102 ~]# gitlab-ctl status
run: alertmanager: (pid 6469) 45s; run: log: (pid 6123) 128s
run: gitaly: (pid 6335) 50s; run: log: (pid 5516) 263s
run: gitlab-exporter: (pid 6380) 48s; run: log: (pid 5972) 146s
run: gitlab-workhorse: (pid 6358) 49s; run: log: (pid 5882) 174s
run: grafana: (pid 6529) 44s; run: log: (pid 6273) 74s
run: logrotate: (pid 5920) 159s; run: log: (pid 5929) 158s
run: nginx: (pid 5893) 171s; run: log: (pid 5905) 167s
run: node-exporter: (pid 6367) 49s; run: log: (pid 5960) 152s
run: postgres-exporter: (pid 6488) 45s; run: log: (pid 6150) 121s
run: postgresql: (pid 5632) 255s; run: log: (pid 5644) 254s
run: prometheus: (pid 6406) 47s; run: log: (pid 6080) 132s
run: redis: (pid 5471) 272s; run: log: (pid 5479) 271s
run: redis-exporter: (pid 6384) 48s; run: log: (pid 6003) 140s
run: sidekiq: (pid 5842) 183s; run: log: (pid 5853) 180s
run: unicorn: (pid 5803) 189s; run: log: (pid 5835) 186s
[root@node102 ~]#
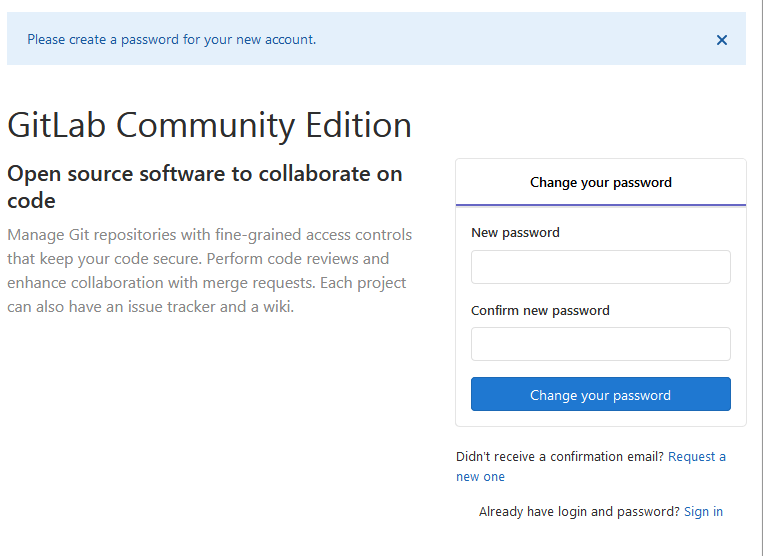
2.2 登录
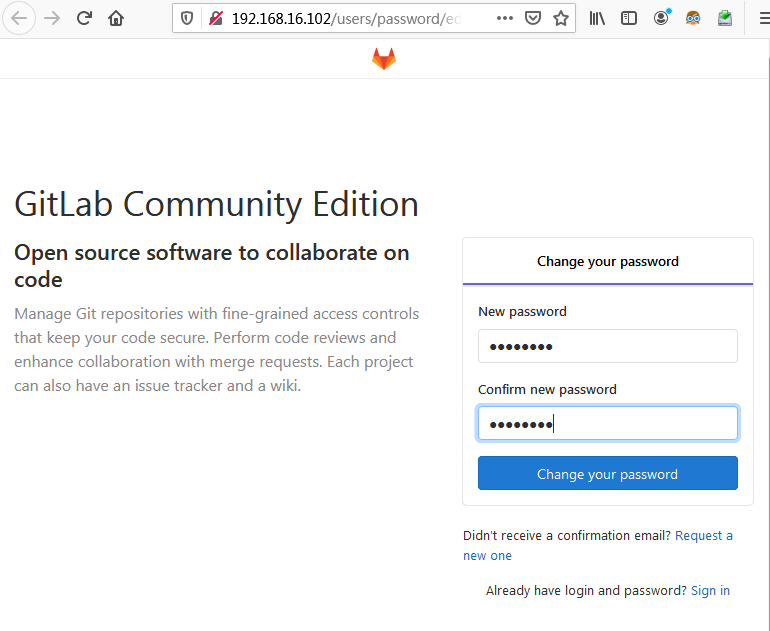
http://192.168.16.102 注意:这个地址是“external_url 'http://192.168.16.102'”
首次登录显示为密码设置界面,设置管理员密码,管理员账号默认username是root
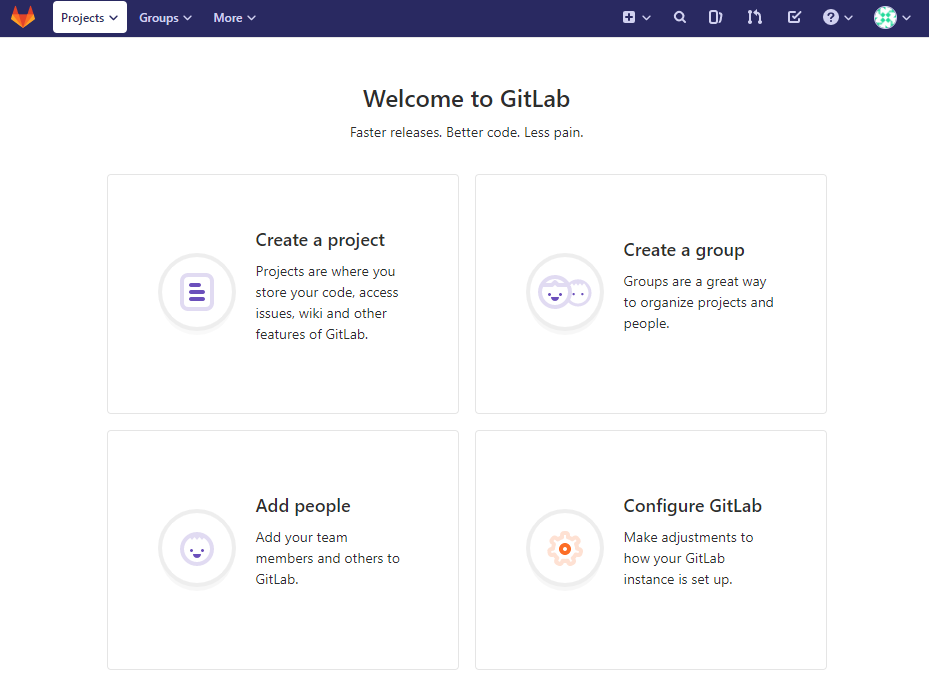
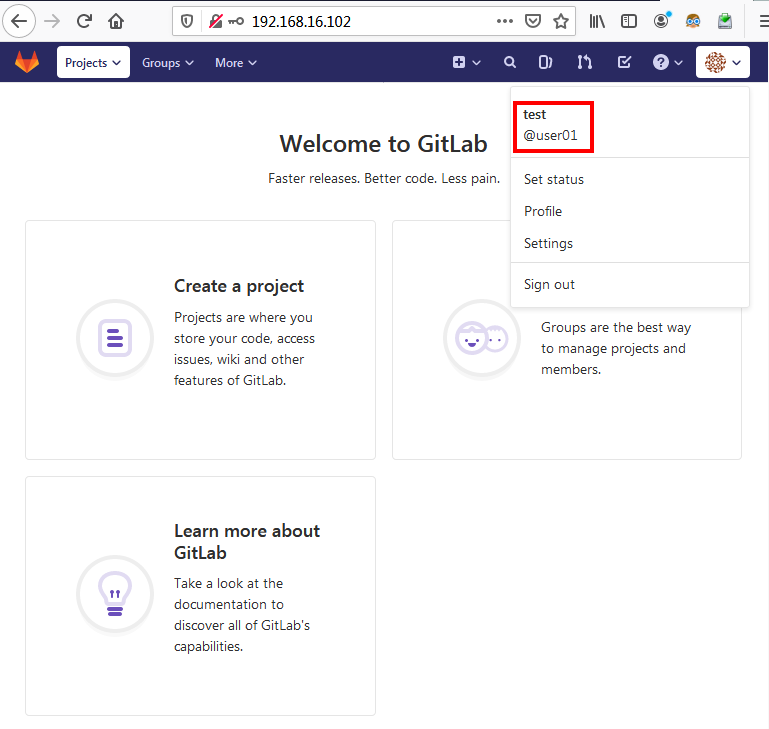
设置完成之后,刷新即可使用root账号登录,登陆后会进入欢迎界面。

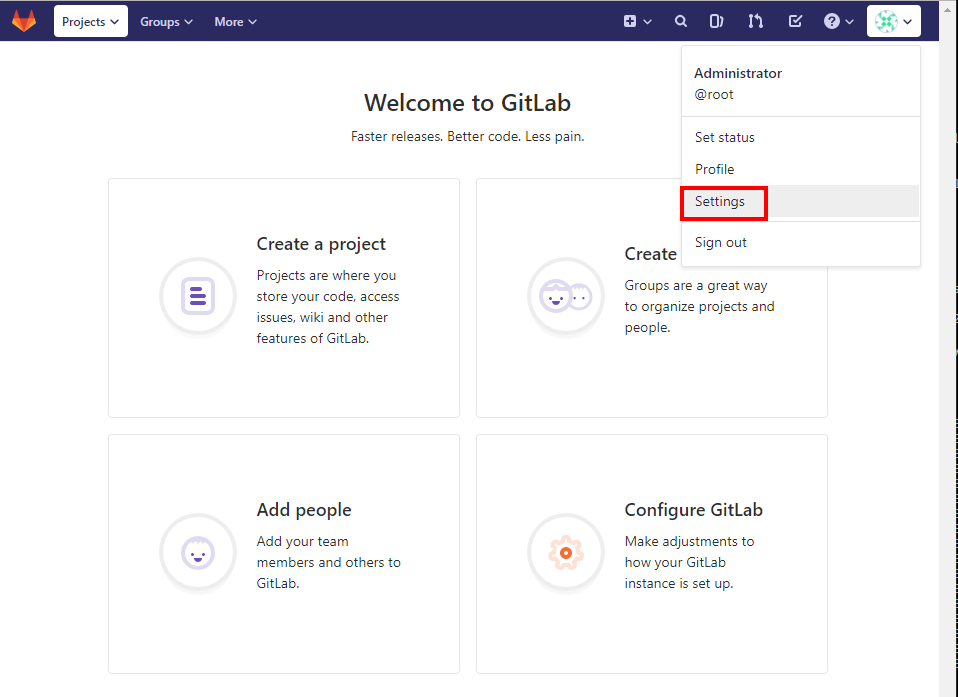
2.3 更新管理员资料
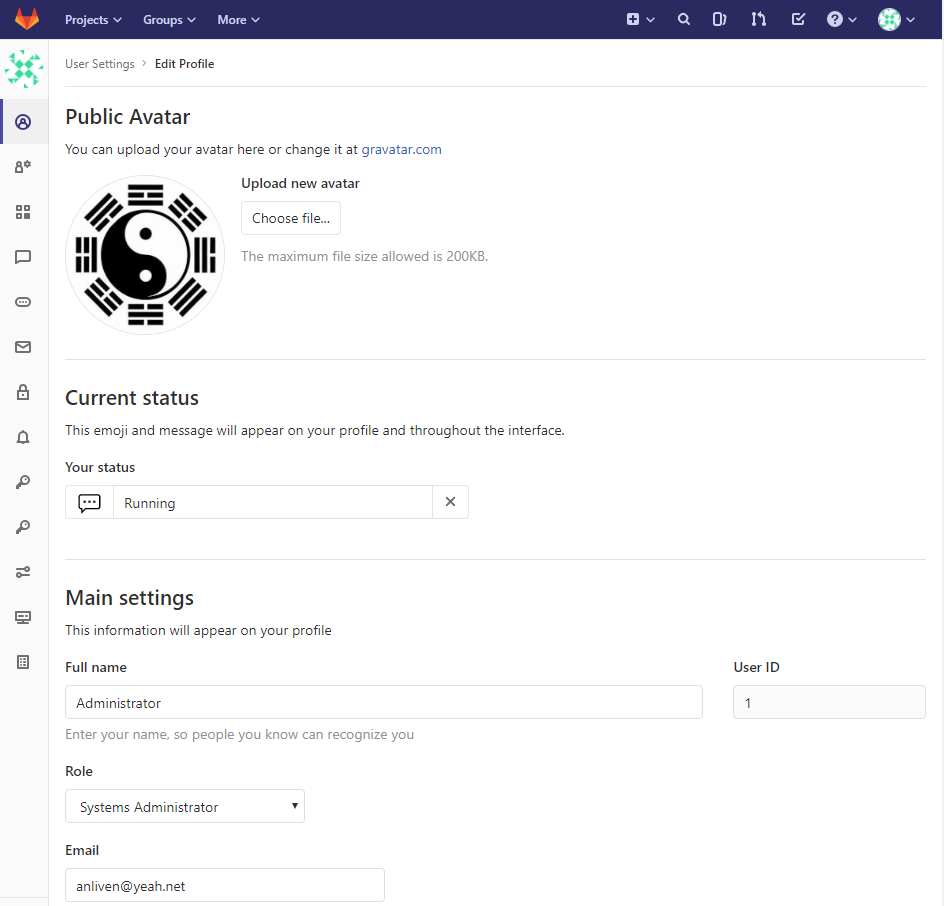
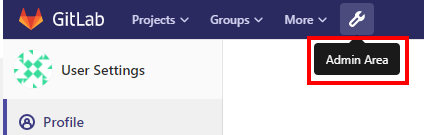
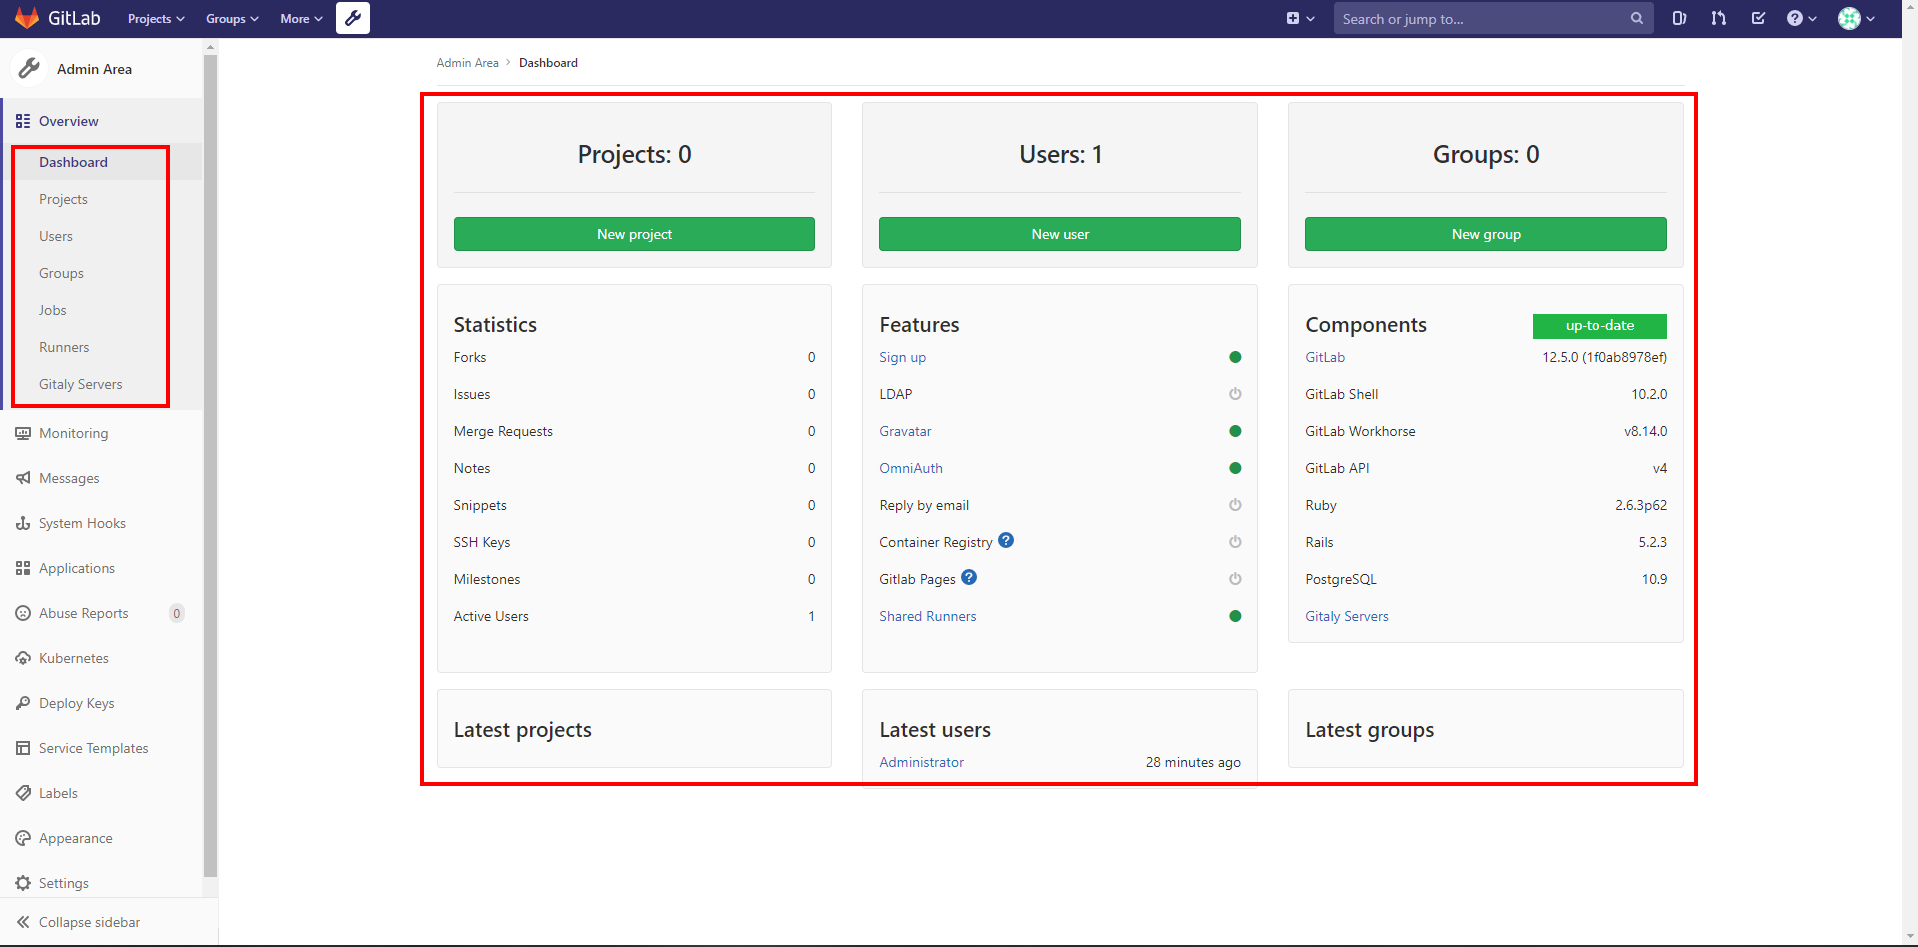
2.4 查看管理员面板
Admin Area的主面板显示整体数据,左侧导航菜单可以查看具体的分类信息
2.5 创建新用户
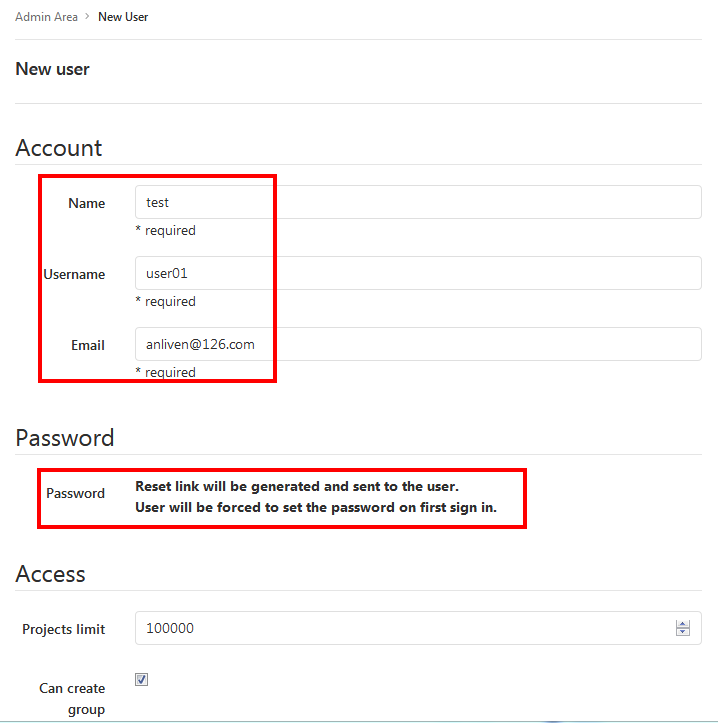
方式1:管理员直接创建用户
Admin Area ---》New user,根据规则和需要分别设置Account、Access部分,Password部分可以由本人进行设置。


查看邮箱,点击邮件中的链接,设置密码并登陆

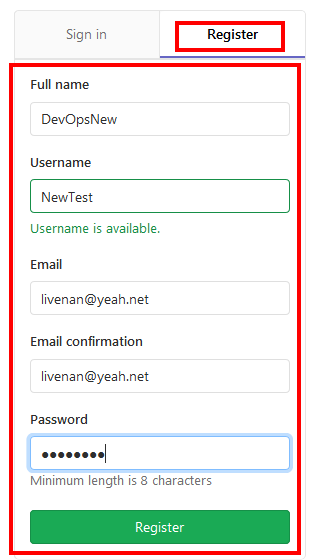
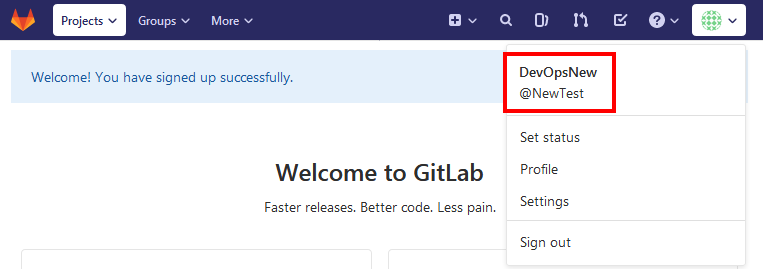
方式2:用户直接注册新的账户
在GitLab登录界面,直接点击“Register”,添加用户相关信息。
3 - GitLab常用配置
3.1 配置Git存储仓库目录
默认存储目录为/var/opt/gitlab/git-data/repositories
[root@test102 ~]# ll /var/opt/gitlab/git-data/
total 0
drwxrws--- 3 git root 45 Nov 27 13:53
[root@test102 ~]#
如果要更新或增加存储仓库目录,可以修改/etc/gitlab/gitlab.rb配置文件中git_data_dirs部分的内容,然后执行“gitlab-ctl reconfigure”命令使之生效。
例如:
git_data_dirs({
  "default" => {"path" => "/var/opt/gitlab/git-data"}
  "newrepo" => {"path" => "/mnt/nfs-01/git-data"}
})
特别注意:
- 如果修改仓库目录,用户有权限访问,否则重新配置时会报错。
- 修改仓库目录后,必须将旧仓库的数据迁移到新目录下,否则相关项目会提示“没有仓库”。
sudo gitlab-ctl upgrade  # 组件更新(可选)
sudo gitlab-ctl stop  # 停止服务
sudo rsync -av <old-dir>  <new-dir>/  # 目录同步(注意斜杠的作用)
ls <new-dir>  # 检查文件及目录层级
sudo gitlab-ctl start  # 启动服务
sudo gitlab-ctl reconfigure  # 重配置
3.2 配置邮件SMTP
GitLab可以直接发送邮件,但如果内网对网络访问有限制,就需要配置内部的SMTP服务来发送邮件。
[root@test102 ~]# cat -n /etc/gitlab/gitlab.rb |grep smtp
   559  ###! Docs: https://docs.gitlab.com/omnibus/settings/smtp.html
   560  ###! **Use smtp instead of sendmail/postfix.**
   562  # gitlab_rails['smtp_enable'] = true
   563  # gitlab_rails['smtp_address'] = "smtp.server"
   564  # gitlab_rails['smtp_port'] = 465
   565  # gitlab_rails['smtp_user_name'] = "smtp user"
   566  # gitlab_rails['smtp_password'] = "smtp password"
   567  # gitlab_rails['smtp_domain'] = "example.com"
   568  # gitlab_rails['smtp_authentication'] = "login"
   569  # gitlab_rails['smtp_enable_starttls_auto'] = true
   570  # gitlab_rails['smtp_tls'] = false
   574  # gitlab_rails['smtp_openssl_verify_mode'] = 'none'
   576  # gitlab_rails['smtp_ca_path'] = "/etc/ssl/certs"
   577  # gitlab_rails['smtp_ca_file'] = "/etc/ssl/certs/ca-certificates.crt"
[root@test102 ~]#
此外,也可以修改邮件的默认发送地址、显示名称等信息。
[root@test102 ~]# cat -n /etc/gitlab/gitlab.rb |grep gitlab_email
    60  # gitlab_rails['gitlab_email_enabled'] = true
    61  # gitlab_rails['gitlab_email_from'] = 'example@example.com'
    62  # gitlab_rails['gitlab_email_display_name'] = 'Example'
    63  # gitlab_rails['gitlab_email_reply_to'] = 'noreply@example.com'
    64  # gitlab_rails['gitlab_email_subject_suffix'] = ''
    65  # gitlab_rails['gitlab_email_smime_enabled'] = false
    66  # gitlab_rails['gitlab_email_smime_key_file'] = '/etc/gitlab/ssl/gitlab_smime.key'
    67  # gitlab_rails['gitlab_email_smime_cert_file'] = '/etc/gitlab/ssl/gitlab_smime.crt'
[root@test102 ~]#
邮件发送测试
[root@test102 ~]# gitlab-rails console
--------------------------------------------------------------------------------
 GitLab:       12.5.0 (1f0ab8978ef)
 GitLab Shell: 10.2.0
 PostgreSQL:   10.9
--------------------------------------------------------------------------------
Loading production environment (Rails 5.2.3)
irb(main):001:0> Notify.test_email('anliven@126.com','test','test').deliver_now
Notify#test_email: processed outbound mail in 1.4ms
Sent mail to anliven@126.com (73.0ms)
Date: Wed, 27 Nov 2019 15:12:58 +0800
From: GitLab <gitlab@192.168.16.102>
Reply-To: GitLab <noreply@192.168.16.102>
To: anliven@126.com
Message-ID: <5dde21fa612d4_3a1b3fcb38fcf9c0651b@test102.mail>
Subject: test
Mime-Version: 1.0
Content-Type: text/html;
 charset=UTF-8
Content-Transfer-Encoding: 7bit
Auto-Submitted: auto-generated
X-Auto-Response-Suppress: All
<!DOCTYPE html PUBLIC "-//W3C//DTD HTML 4.0 Transitional//EN" "http://www.w3.org/TR/REC-html40/loose.dtd">
<html><body><p>test</p></body></html>
=> #<Mail::Message:70141649239780, Multipart: false, Headers: <Date: Wed, 27 Nov 2019 15:12:58 +0800>, <From: GitLab <gitlab@192.168.16.102>>, <Reply-To: GitLab <noreply@192.168.16.102>>, <To: anliven@126.com>, <Message-ID: <5dde21fa612d4_3a1b3fcb38fcf9c0651b@test102.mail>>, <Subject: test>, <Mime-Version: 1.0>, <Content-Type: text/html; charset=UTF-8>, <Content-Transfer-Encoding: 7bit>, <Auto-Submitted: auto-generated>, <X-Auto-Response-Suppress: All>>
irb(main):002:0>
irb(main):003:0> exit
[root@test102 ~]#
3.3 禁用创建组权限
GitLab默认所有的注册用户都可以创建组,在实际使用中,通常只会给指定的少部分用户相关权限。
将/etc/gitlab/gitlab.rb中的gitlab_rails['gitlab_default_can_create_group']参数设为false,然后重载配置即可。
[root@test102 ~]# cat -n /etc/gitlab/gitlab.rb |grep "create_group"
    70  # gitlab_rails['gitlab_default_can_create_group'] = true
[root@test102 ~]#
3.4 集成OpenLDAP
设置/etc/gitlab/gitlab.rb文件中关于LDAP的内容,并重载配置,然后通过“gitlab-rake gitlab:ldap:check
”命令验证是否是否能正常获取用户列表,最后重启gitlab服务。
[root@test102 ~]# cat -n /etc/gitlab/gitlab.rb |grep "LDAP Settings"
   296  ### LDAP Settings
[root@test102 ~]#
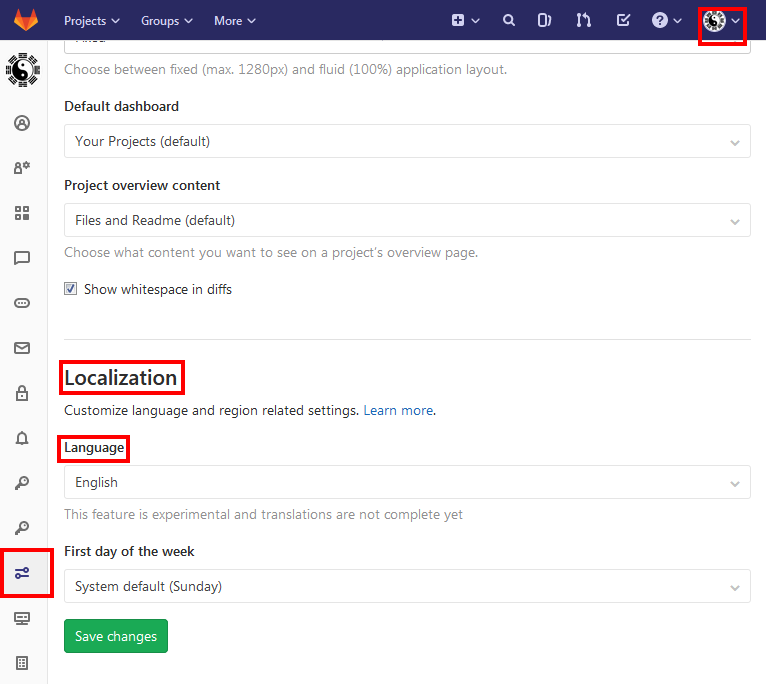
3.5 GitLab个人中文界面
登录后,点击右上角用户头像---》Settings---》Preferences---》Localization部分的Language项目---》选择“简体中文”并保存更改---》刷新页面。

4 - 日志查看
gitlab-ctl tail     # 查看所有GitLab日志
gitlab-ctl tail <module-name>    # 查看某个组件的日志
gitlab-ctl tail <module-name>/<log-name>    # 查看某个组件的某个类型日志
日志目录:/var/log/gitlab/
[root@test102 ~]# ll /var/log/gitlab/
total 0
drwx------ 2 gitlab-prometheus root        47 Nov 27 13:55 alertmanager
drwx------ 2 git               root        47 Nov 27 13:53 gitaly
drwx------ 2 git               root        47 Nov 27 13:55 gitlab-exporter
drwx------ 2 git               root       238 Nov 27 14:00 gitlab-rails
drwx------ 2 git               root         6 Nov 27 13:53 gitlab-shell
drwx------ 2 git               root        47 Nov 27 13:54 gitlab-workhorse
drwx------ 2 gitlab-prometheus root        47 Nov 27 13:56 grafana
drwx------ 2 root              root        47 Nov 27 13:55 logrotate
drwxr-x--- 2 root              gitlab-www 131 Nov 27 13:54 nginx
drwx------ 2 gitlab-prometheus root        47 Nov 27 13:55 node-exporter
drwx------ 2 gitlab-psql       root        47 Nov 27 13:55 postgres-exporter
drwx------ 2 gitlab-psql       root        47 Nov 27 13:53 postgresql
drwx------ 2 gitlab-prometheus root        47 Nov 27 13:55 prometheus
drwxr-xr-x 2 root              root        50 Nov 27 15:04 reconfigure
drwx------ 2 gitlab-redis      root        47 Nov 27 13:53 redis
drwx------ 2 gitlab-redis      root        47 Nov 27 13:55 redis-exporter
drwx------ 2 git               root        47 Nov 27 13:54 sidekiq
drwx------ 2 git               root        99 Nov 27 13:54 unicorn
[root@test102 ~]#
[root@test102 ~]# ll /var/log/gitlab/nginx/
total 32
-rw-r--r-- 1 root root     0 Nov 27 13:54 access.log
-rw-r--r-- 1 root root    30 Nov 27 13:54 config
-rw-r--r-- 1 root root     0 Nov 27 13:54 current
-rw-r--r-- 1 root root     0 Nov 27 13:54 error.log
-rw-r--r-- 1 root root 28553 Nov 27 15:25 gitlab_access.log
-rw-r--r-- 1 root root     0 Nov 27 13:54 gitlab_error.log
-rw------- 1 root root     0 Nov 27 13:54 lock
[root@test102 ~]#
5 - GitLab-ctl常用命令
gitlab-ctl reconfigure    # 重载配置
gitlab-ctl check-config    # 检查配置并启动
gitlab-ctl diff-config    # 将用户配置与包可用配置进行比较
gitlab-ctl status    # 查看所有启动组件的进程和状态
gitlab-ctl service-list    # 查看所有服务
gitlab-ctl stop    # 停止GitLab服务
gitlab-ctl start    # 启动GitLab服务
gitlab-ctl restart    # 重启GitLab服务
gitlab-ctl once    # 如果GitLab服务已停止则启动服务,如果GitLab服务已启动则重启GitLab服务
gitlab-ctl help
# gitlab-ctl help
omnibus-ctl: command (subcommand)
check-config
  Check if there are any configuration in gitlab.rb that is removed in specified version
deploy-page
  Put up the deploy page
diff-config
  Compare the user configuration with package available configuration
prometheus-upgrade
  Upgrade the Prometheus data to the latest supported version
remove-accounts
  Delete *all* users and groups used by this package
reset-grafana
  Reset Grafana instance to its initial state by removing the data directory
set-grafana-password
  Reset admin password for Grafana
upgrade
  Run migrations after a package upgrade
General Commands:
  cleanse
    Delete *all* gitlab data, and start from scratch.
  help
    Print this help message.
  reconfigure
    Reconfigure the application.
  show-config
    Show the configuration that would be generated by reconfigure.
  uninstall
    Kill all processes and uninstall the process supervisor (data will be preserved).
Service Management Commands:
  graceful-kill
    Attempt a graceful stop, then SIGKILL the entire process group.
  hup
    Send the services a HUP.
  int
    Send the services an INT.
  kill
    Send the services a KILL.
  once
    Start the services if they are down. Do not restart them if they stop.
  restart
    Stop the services if they are running, then start them again.
  service-list
    List all the services (enabled services appear with a *.)
  start
    Start services if they are down, and restart them if they stop.
  status
    Show the status of all the services.
  stop
    Stop the services, and do not restart them.
  tail
    Watch the service logs of all enabled services.
  term
    Send the services a TERM.
  usr1
    Send the services a USR1.
  usr2
    Send the services a USR2.
Backup Commands:
  backup-etc
    Backup GitLab configuration [accepts directory path]
Let's Encrypt Commands:
  renew-le-certs
    Renew the existing Let's Encrypt certificates
Database Commands:
  pg-password-md5
    Generate MD5 Hash of user password in PostgreSQL format
  pg-upgrade
    Upgrade the PostgreSQL DB to the latest supported version
  revert-pg-upgrade
    Run this to revert to the previous version of the database
  set-replication-password
    Set database replication password
Container Registry Commands:
  registry-garbage-collect
    Run Container Registry garbage collection.
6 - 问题处理
修改root密码
https://docs.gitlab.com/ce/security/reset_root_password.html
[root@node102 ~]# gitlab-rails console -e production
--------------------------------------------------------------------------------
 GitLab:       12.5.0 (1f0ab8978ef)
 GitLab Shell: 10.2.0
 PostgreSQL:   10.9
--------------------------------------------------------------------------------
Loading production environment (Rails 5.2.3)
irb(main):001:0> user = User.where(id: 1).first
=> #<User id:1 @root>
irb(main):002:0> user = User.find_by(email: 'admin@example.com')
=> #<User id:1 @root>
irb(main):003:0> user.password = 'secret_pass'
=> "secret_pass"
irb(main):004:0> user.password_confirmation = 'secret_pass'
=> "secret_pass"
irb(main):005:0> user.save!
Enqueued ActionMailer::DeliveryJob (Job ID: 90526cdc-8d61-458f-bb85-bd1f2797c5b1) to Sidekiq(mailers) with arguments: "DeviseMailer", "password_change", "deliver_now", #<GlobalID:0x00007fc0b4541088 @uri=#<URI::GID gid://gitlab/User/1>>
=> true
irb(main):006:0> exit
[root@node102 ~]#
7 - 参考信息
- 官网:https://about.gitlab.com/install/#centos-7
- CentOS 7 下 GitLab安装部署教程:https://ken.io/note/centos7-gitlab-install-tutorial