一、编写自己的自定义View
最简单的自定义View,继承View
通过覆盖View的onDraw方法来实现自主显示
利用Canvas和paint来绘制显示元素(文字,几何图形等)

<com.myview.v1.MyView
    android:layout_width="match_parent"
    android:layout_height="match_parent"
    android:background="#00ff00" />
public class MyView extends View {

    private Bitmap bitmap;

    public MyView(Context context, AttributeSet attrs) {
        super(context, attrs);
        bitmap = BitmapFactory.decodeResource(getResources(),
                R.drawable.ic_launcher);
    }

    public MyView(Context context) {
        super(context);
        bitmap = BitmapFactory.decodeResource(getResources(),
                R.drawable.ic_launcher);
    }

    @Override    // 加入绘制元素
    protected void onDraw(Canvas canvas) {

        Paint paint = new Paint();
        paint.setTextSize(30);
        // a,r,g,b(透明度,红色,绿色,蓝色)
        paint.setColor(0xffff0000);
        /**
         * 绘制文字
         * Android 中绘制文字的方向是,左下。 所以需要把Y坐标改成30下移,就可以显示了。
         * 0, 30 分别为 X Y坐标
         * drawText(String text, float x, float y, Paint paint)
         */
        canvas.drawText("this is onDraw", 0, 30, paint);
        /**
         * drawLine(float startX, float startY, float stopX, float stopY, Paint paint)
         * 在文字下30的地方绘制一条线,所以开始和结束的Y坐标就是(30+30)。
         */
        canvas.drawLine(0, 60, 100, 60, paint);

        paint.setStyle(Style.STROKE);

        // 通过坐标绘制矩形
        // canvas.drawRect(0, 90, 100, 190, paint);
        // 通过Rect绘制矩形
        // Rect r = new Rect(0, 90, 100, 190);
        // canvas.drawRect(r, paint);
        // 通过RectF绘制矩形
        RectF rect = new RectF(0, 90, 100, 190);
        // canvas.drawRect(rect, paint);
        // 绘制圆角矩形
        // drawRoundRect(RectF rect, float rx, float ry, Paint paint)
        canvas.drawRoundRect(rect, 10, 10, paint);

        // 绘制圆形
        canvas.drawCircle(50, 270, 50, paint);

        canvas.drawBitmap(bitmap, 0, 350, paint);
    }

}
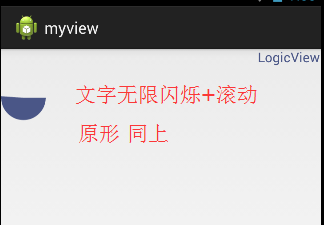
二、加入逻辑线程
让文字动起来,改变坐标
在线程中修改坐标(加入循环,时间睡眠)
重新绘制元素(两种方式)
线程休眠时间控制(去除逻辑处理时间)
 1 import java.util.Random;
 2 import android.content.Context;
 3 import android.graphics.Canvas;
 4 import android.graphics.Paint;
 5 import android.graphics.RectF;
 6 import android.util.AttributeSet;
 7 import android.view.View;
 8
 9 public class LogicView extends View {
10
11     // 实例化 画笔。
12     private Paint paint = new Paint();
13     //
14     private float rx = 0;
15     // 添加线程属性
16     private MyThread thread;
17     /**
18      * 绘制在文字下,30的地方。
19      * RectF(float left, float top, float right, float bottom)
20      *         0           30+30                宽度100       60+100
21      */
22     private RectF rectF = new RectF(0, 60, 100, 160);
23     // 区间角度
24     private float sweepAngle = 0;
25
26     // 在布局当中使用。
27     public LogicView(Context context, AttributeSet attrs) {
28         super(context, attrs);
29     }
30
31     // 在代码当中使用。
32     public LogicView(Context context) {
33         super(context);
34     }
35
36     @Override
37     protected void onDraw(Canvas canvas) {
38         paint.setTextSize(30);
39         canvas.drawText("LogicView", rx, 30, paint);
40         /**
41          * 绘制一个圆。
42          * drawArc(RectF oval, float startAngle, float sweepAngle, boolean useCenter,
43               Paint paint)
44          * sweepAngle:区间角度。
45          * useCenter:true ,false. 绘制的效果不同。
46          */
47         canvas.drawArc(rectF, 0, sweepAngle, true, paint);
48
49         if (thread == null) {
50             thread = new MyThread();
51             thread.start();
52         }
53     }
54
55     class MyThread extends Thread {
56         // 随机对象,产生随机值。
57         Random rand = new Random();
58         @Override
59         public void run() {
60             while (true) {
61                 rx += 3;
62                 // 当超出屏幕的宽度时。
63                 if (rx > getWidth()) {
64                     /**
65                      * 走出屏幕后,重新回到屏幕。
66                      * 0 - 文字的宽度,这样 “LogicView”文字,从左边出来的时候,
67                      * 就可以从w开始一点点移出屏幕。
68                      */
69                     rx = 0 - paint.measureText("LogicView");
70                 }
71
72                 sweepAngle++;
73                 if (sweepAngle > 360) {
74                     sweepAngle = 0;
75                 }
76
77                 // 取到 0-255的随机数。
78                 int r = rand.nextInt(256);
79                 int g = rand.nextInt(256);
80                 int b = rand.nextInt(256);
81
82                 // 设置颜色。
83                 paint.setARGB(255, r, g, b);
84
85                 postInvalidate(); // 重绘
86                 try {
87                     Thread.sleep(30); // 睡眠30毫秒
88                 } catch (InterruptedException e) {
89                     e.printStackTrace();
90                 }
91             }
92         }
93     }
94
95 }
把以上代码进行封装。
import android.content.Context;
import android.graphics.Canvas;
import android.util.AttributeSet;
import android.view.View;

// 基类
public abstract class BaseView extends View {
    private MyThread thread;
    private boolean running = true;

    public BaseView(Context context, AttributeSet attrs) {
        super(context, attrs);
    }

    public BaseView(Context context) {
        super(context);
    }

    protected abstract void drawSub(Canvas canvas);

    protected abstract void logic();

    @Override
    protected final void onDraw(Canvas canvas) {

        if (thread == null) {
            thread = new MyThread();
            thread.start();
        } else {
            drawSub(canvas);
        }

    }

    @Override
    protected void onDetachedFromWindow() {
        running = false;
        super.onDetachedFromWindow();
    }

    class MyThread extends Thread {
        @Override
        public void run() {
            while (running) {
                logic();
                postInvalidate();
                try {
                    Thread.sleep(30);
                } catch (InterruptedException e) {
                    e.printStackTrace();
                }
            }
        }
    }

}
 1 import java.util.Random;
 2 import android.content.Context;
 3 import android.graphics.Canvas;
 4 import android.graphics.Paint;
 5 import android.graphics.RectF;
 6 import android.util.AttributeSet;
 7
 8 public class LogicView extends BaseView {
 9
10     private Paint paint = new Paint();
11     private float rx = 0;
12     private RectF rectF = new RectF(0, 60, 100, 160);
13     private float sweepAngle = 0;
14     Random rand = new Random();
15
16     public LogicView(Context context, AttributeSet attrs) {
17         super(context, attrs);
18     }
19
20     public LogicView(Context context) {
21         super(context);
22     }
23
24     @Override
25     protected void drawSub(Canvas canvas) {
26         paint.setTextSize(30);
27         canvas.drawText("LogicView", rx, 30, paint);
28         canvas.drawArc(rectF, 0, sweepAngle, true, paint);
29     }
30
31     @Override
32     protected void logic() {
33         rx += 3;
34
35         if (rx > getWidth()) {
36             rx = 0 - paint.measureText("LogicView");
37         }
38
39         sweepAngle++;
40         if (sweepAngle > 360) {
41             sweepAngle = 0;
42         }
43
44         int r = rand.nextInt(256);
45         int g = rand.nextInt(256);
46         int b = rand.nextInt(256);
47
48         paint.setARGB(255, r, g, b);
49     }
50
51 }
import android.content.Context;
import android.graphics.Canvas;
import android.graphics.Paint;
import android.util.AttributeSet;


public class MyText extends BaseView {

    private Paint paint = new Paint();
    private float rx = 0;

    public MyText(Context context, AttributeSet attrs) {
        super(context, attrs);
    }

    public MyText(Context context) {
        super(context);
    }

    @Override
    protected void drawSub(Canvas canvas) {
        paint.setTextSize(30);
        canvas.drawText("MyText", rx, 30, paint);
    }

    @Override
    protected void logic() {
        rx += 3;
        if (rx > getWidth()) {
            rx = -paint.measureText("MyText");
        }
    }

}
三、利用xml中定义样式来影响显示效果
在xml中定义样式和属性
在布局中使用属性(命名空间需要声明)
在代码中解析样式的属性
在代码中使用属性对显示效果产生影响
范例:绘制相同的文字,不同的行数。从左边移动到右边。
布局文件:activity_main.xml
<FrameLayout xmlns:android="http://schemas.android.com/apk/res/android"
    xmlns:tools="http://schemas.android.com/tools"
    xmlns:nt="http://schemas.android.com/apk/res/com.myview"
    android:id="@+id/container"
    android:layout_width="match_parent"
    android:layout_height="match_parent" >   nt:这个名字是自定义的。

    <com.myview.v4.NumText
        android:layout_width="match_parent"
        android:layout_height="match_parent"
        nt:lineNum="6"
        nt:xScroll="true"/>
</FrameLayout>
import android.content.Context;
import android.content.res.TypedArray;
import android.graphics.Canvas;
import android.graphics.Paint;
import android.util.AttributeSet;
import com.myview.R;
import com.myview.v3.BaseView;

// 效果:竖着一排文字,无限 从左移动到右边
public class NumText extends BaseView {

    private Paint paint = new Paint();
    private int lineNum = 0;
    private int mx = 0;
    private boolean xScroll = false;

    public NumText(Context context) {
        super(context);
    }

    public NumText(Context context, AttributeSet attrs) {
        super(context, attrs);

        // 在代码中解析 “样式属性”。
        TypedArray ta = context.obtainStyledAttributes(attrs,
                R.styleable.NumText);
        //  1  是默认的一行。
        lineNum = ta.getInt(R.styleable.NumText_lineNum, 1);
        // 默认为不滚动(文字从左滚动到右边)
        xScroll = ta.getBoolean(R.styleable.NumText_xScroll, false);
        ta.recycle();
    }

    @Override
    protected void drawSub(Canvas canvas) {
        for (int i = 0; i < lineNum; i++) {
            int textSize = 30 + i;
            paint.setTextSize(textSize);
            canvas.drawText("百度百科", mx, textSize + textSize * i, paint);
        }
    }

    @Override
    protected void logic() {
        if (xScroll) {
            mx += 3;
            if (mx > getWidth()) {
                mx = (int) -paint.measureText("百度百科");
            }
        }
    }

}
四、通过代码添加自定义控件。
setContentView(new MyView(this));