时隔多年,又来搞微信支付了。这次是《微信支付分》。
想到多年前的,微信支付,就把人搞的半死不活。官方SDK死活跑不通,微信那帮技术想必都是JAVA抓来的壮丁
想想过了这么久,微信应该对.net该重视了吧。
话不多说,撸起袖子,干!!!
哇塞、官方文档写的不错噢~~
微信支付分文档地址:https://pay.weixin.qq.com/wiki/doc/apiv3/wxpay/pages/payscore.shtml
看了下接入流程,一步步按照操作。
第一步,获取微信支付分server_id
商户向wechatpay_scoreBD@tencent.com发送邮件接入申请,微信侧在3-5个工作日内进行评估并回复审核结果。申请需包含以下信息:

经过几天漫长的等待,终于收到邮件了,让加一个微信号。
提交了一些信息后,终于收到了server_id.
第二步,创建微信支付分订单
创建微信支付订单API文档地址:https://pay.weixin.qq.com/wiki/doc/apiv3/wxpay/payscore/chapter3_1.shtml
看了下接口说明
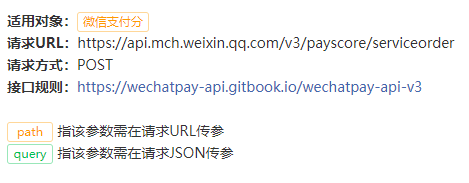
这里有个接口规则,这里要划重点了。
进行不下去了,要仔细研究wechatpay-api-v3接口规则
wechatpay-api-v3接口地址:https://wechatpay-api.gitbook.io/wechatpay-api-v3/
这个文档看着也简单,也看的明白。
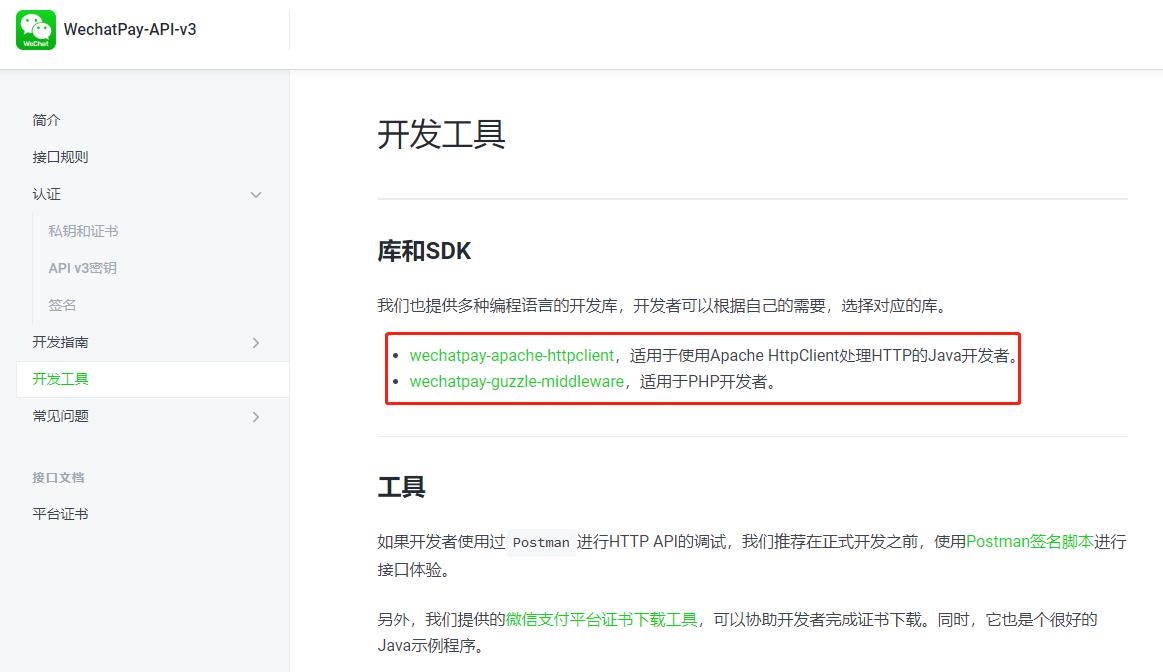
尼玛.NET是被微信歧视了么,又没有.NET的SDK.
反正是习惯了,继续看下去吧。
看着看着,这里进入了无尽的深渊,只想说太他么难了。
万万没想到,这才是开端。
wechatpay-api-v3签名生成
微信官方有.NET的代码示例,我就不贴了。
用了官方的实例,调了很长时间。终于调通了client.GetAsync("https://api.mch.weixin.qq.com/v3/certificates");
client.GetAsync可以用。(这里说明下,System.Net.Http必须要.net framework 4.5以上)
<%@ Page Async="true" %>
这里必须要加 这个表头,不然就跑不通的。
client.PostAsync就死活用不了。
可是微信支付分全部都是POST的接口。
实在没有办法,搞了好久,全网搜索相关信息,发现有的只是JAVA,PHP的一些零星的片段。
这里贴出我重新自己写的代码
 public static string setAuthorization(string method, string noHttps, string data, string timestamp, string nonce_str)
        {
            string signature = Sign($"{method}
{noHttps}
{timestamp}
{nonce_str}
{data}
", config.wx_privateKey);
            return $"WECHATPAY2-SHA256-RSA2048 mchid="{config.wx_mchid}",nonce_str="{nonce_str}",timestamp="{timestamp}",serial_no="{config.wx_serial_no}",signature="{signature}"";
        }

        public static HttpClient gClient() {
            HttpClient client = new HttpClient();
            client.DefaultRequestHeaders.Add("Accept", "application/json");
            client.DefaultRequestHeaders.Add("User-Agent", "Mozilla/5.0 (Windows NT 6.1; WOW64) AppleWebKit/537.11 (KHTML, like Gecko) Chrome/23.0.1271.95 Safari/537.11");//这里必须要填,不填接口会没反应。
            return client;
        }
        public static string get(HttpClient client,string https)
        {     var cg = client.GetAsync(https);
                cg.Wait();
                cg.Result.EnsureSuccessStatusCode();
                var cgContent = cg.Result.Content.ReadAsStringAsync();
                cgContent.Wait();
                return cgContent.Result;
        }

        public static string post(HttpClient client, string https,string data)
        {
var cp = client.PostAsync(https, new StringContent(data, Encoding.UTF8, "application/json"));
                cp.Wait();
                cp.Result.EnsureSuccessStatusCode();
                var cpContent = cp.Result.Content.ReadAsStringAsync();
                cpContent.Wait();
                return cpContent.Result;
        }
终于完成了对wechatpay-api-v3的封装。
可以接着上面第二步,创建微信支付分订单。
第2.5步,创建微信支付分订单。
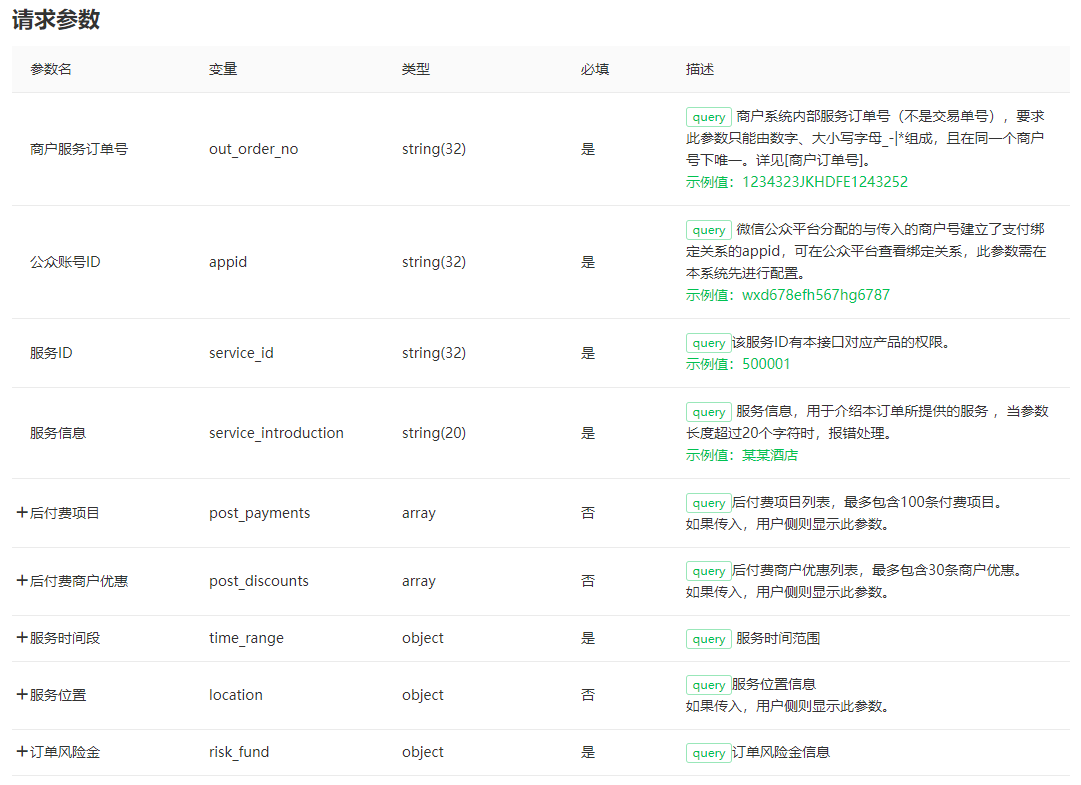

按照要求将上面的请求参数,转换成json字符串POST提交到https://api.mch.weixin.qq.com/v3/payscore/serviceorder
这里还挺顺利的,很快得到了数据反馈。

这里主要要保存这个package信息,下面要用到
H5调起支付分-确认订单
这里不要问我为什么用H5,我只想说,其他的小程序APP,用的时候都要审核,我嫌麻烦,就是懒。
下面是官方贴出来的代码。
let wechatInfo = navigator.userAgent.match(/MicroMessenger/([d.]+)/i);
let wechatVersion = wechatInfo[1];
if (compareVersion(wechatVersion, '7.0.5') >= 0) {
goToWXScore();
} else {
// 提示用户升级微信客户端版本
window.href = 'https://support.weixin.qq.com/cgi-bin/readtemplate?t=page/common_page__upgrade&
text=text005&btn_text=btn_text_0'
}
/**
* 跳转微信支付分
*/
function goToWXScore() {
wx.checkJsApi({
jsApiList: ['openBusinessView'], // 需要检测的JS接口列表
success: function (res) {
// 以键值对的形式返回,可用的api值true,不可用为false
// 如:{"checkResult":{"openBusinessView":true},"errMsg":"checkJsApi:ok"}
if (res.checkResult.openBusinessView) {
wx.invoke(
'openBusinessView', {
businessType: 'wxpayScoreUse',
queryString
: 'mch_id=1230000109&package=xxxxx&
timestamp=1530097563&nonce_str=zyx53Nkey8o4bHpxTQvd8m7e92nG5mG2&sign_type=HMAC-SHA256&
sign=029B52F67573D7E3BE74904BF9AEA'
},
function (res) {
// 从支付分返回时会执行这个回调函数
if (parseInt(res.err_code) === 0) {
// 返回成功
} else {
// 返回失败
}
});
}
}
});
}
/**
* 版本号比较
* @param {string
} v1
* @param {string
} v2
*/
function compareVersion(v1, v2) {
v1 = v1.split('.')
v2 = v2.split('.')
const len = Math.max(v1.length, v2.length)
while (v1.length < len) {
v1.push('0')
}
while (v2.length < len) {
v2.push('0')
}
for (let i = 0; i < len; i++) {
const num1 = parseInt(v1[i])
const num2 = parseInt(v2[i])
if (num1 > num2) {
return 1
} else if (num1 < num2) {
return -1
}
}
return 0
}
其中重要的信息是:queryString,sign
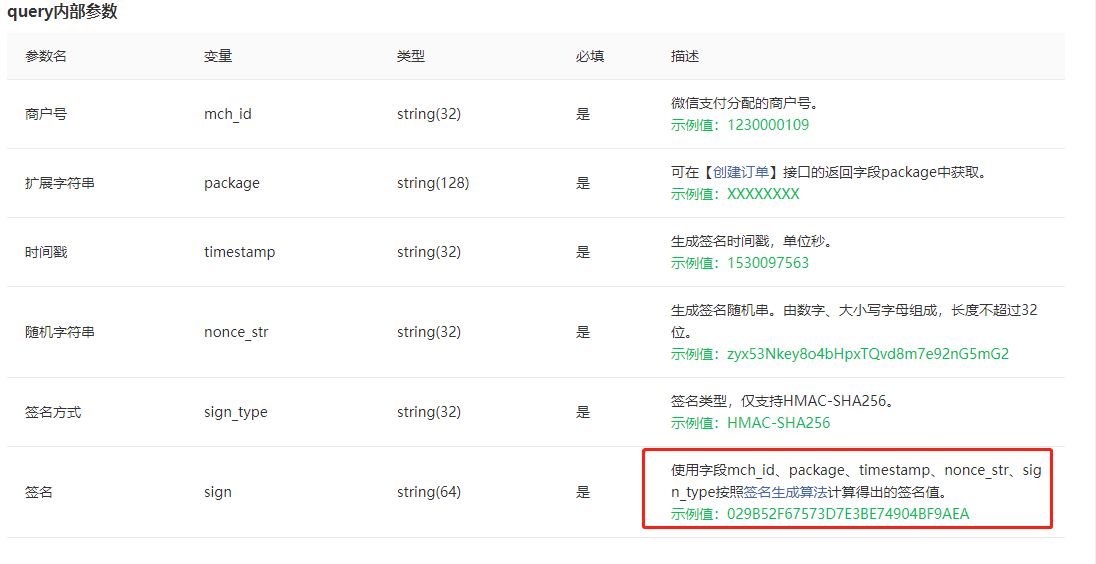
这里需要按照签名生成法计算出签名值。
签名算法
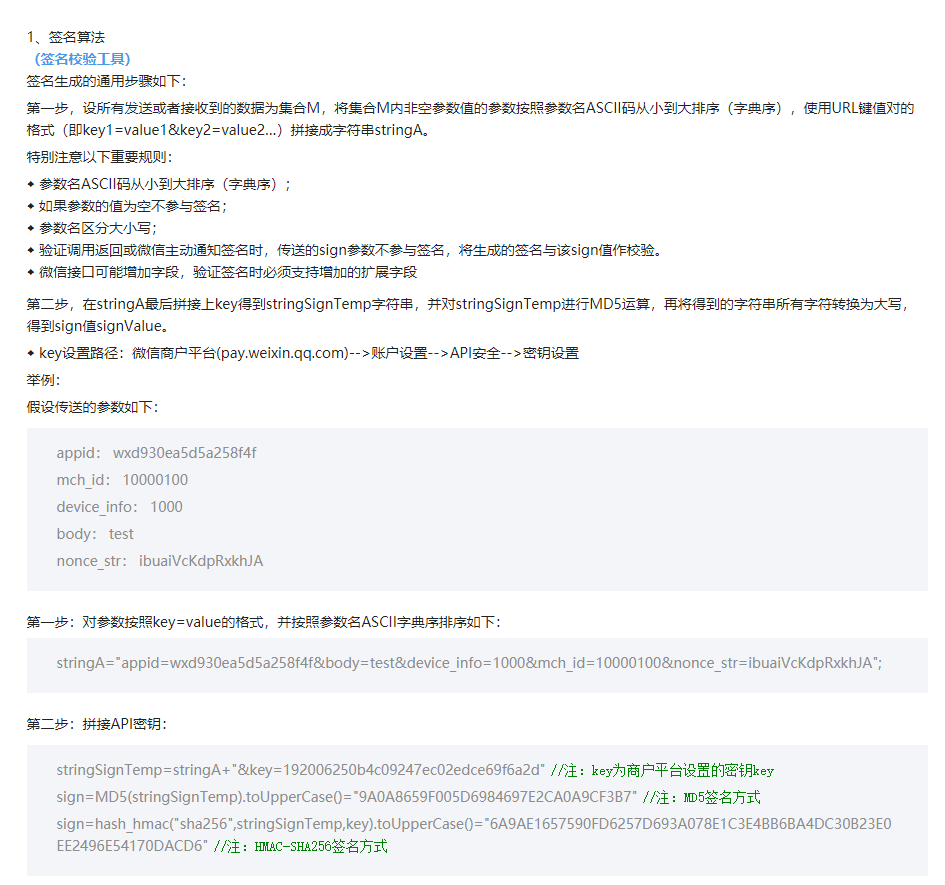
这个是官方给出的算法说明。
我贴一下.NET的相应的算法代码
 public static string SHA256(string plaintext,string APIKey)
        {
            string result = "";
            var enc = Encoding.Default;
            byte[]
            baText2BeHashed = enc.GetBytes(plaintext),
            baSalt = enc.GetBytes(APIKey);
            HMACSHA256 hasher = new HMACSHA256(baSalt);
            byte[] baHashedText = hasher.ComputeHash(baText2BeHashed);
            result = string.Join("", baHashedText.ToList().Select(b => b.ToString("x2")).ToArray());
            return result.ToUpper();
        }
终于算出queryString。
填入,开始运行没有成功。
原来要先微信先wx.config验证
 wx.config({
        debug: false, appId: '<%=appId%>', timestamp: <%=timestamp%>, nonceStr: '<%=nonceStr%>', signature: '<%=signature%>', jsApiList: ['openBusinessView']
    });
    var pay = function () {
        wx.ready(function () {
            wx.invoke('openBusinessView', { businessType: 'wxpayScoreUse', queryString: '<%=queryString%>' }, function (res) {

            });
        });
    };
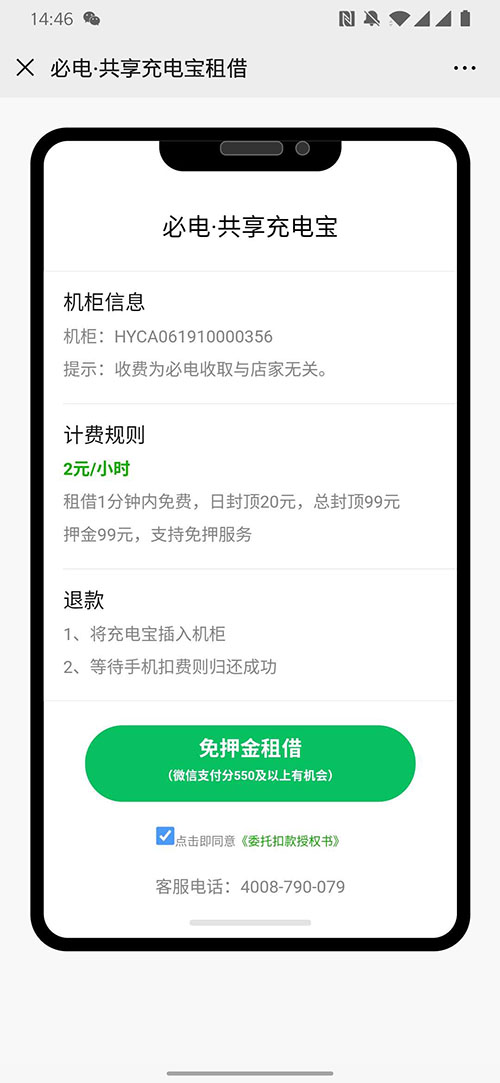
这样就成功了。
附上两张实用图。