自动添加注释:
https://blog.csdn.net/qq_33157666/article/details/84961271
使用Mybatis时,几乎每张表都需要写-Mapper.xml,Mapper.java,以及PO类,重复性工作大,且容易与表字段不对应。通过代码生成的方式,可以提高生产力,避免部分错误。
本人亲自尝试,使用Mybatis-Generator插件来完成代码的自动生成,整体步骤如下:
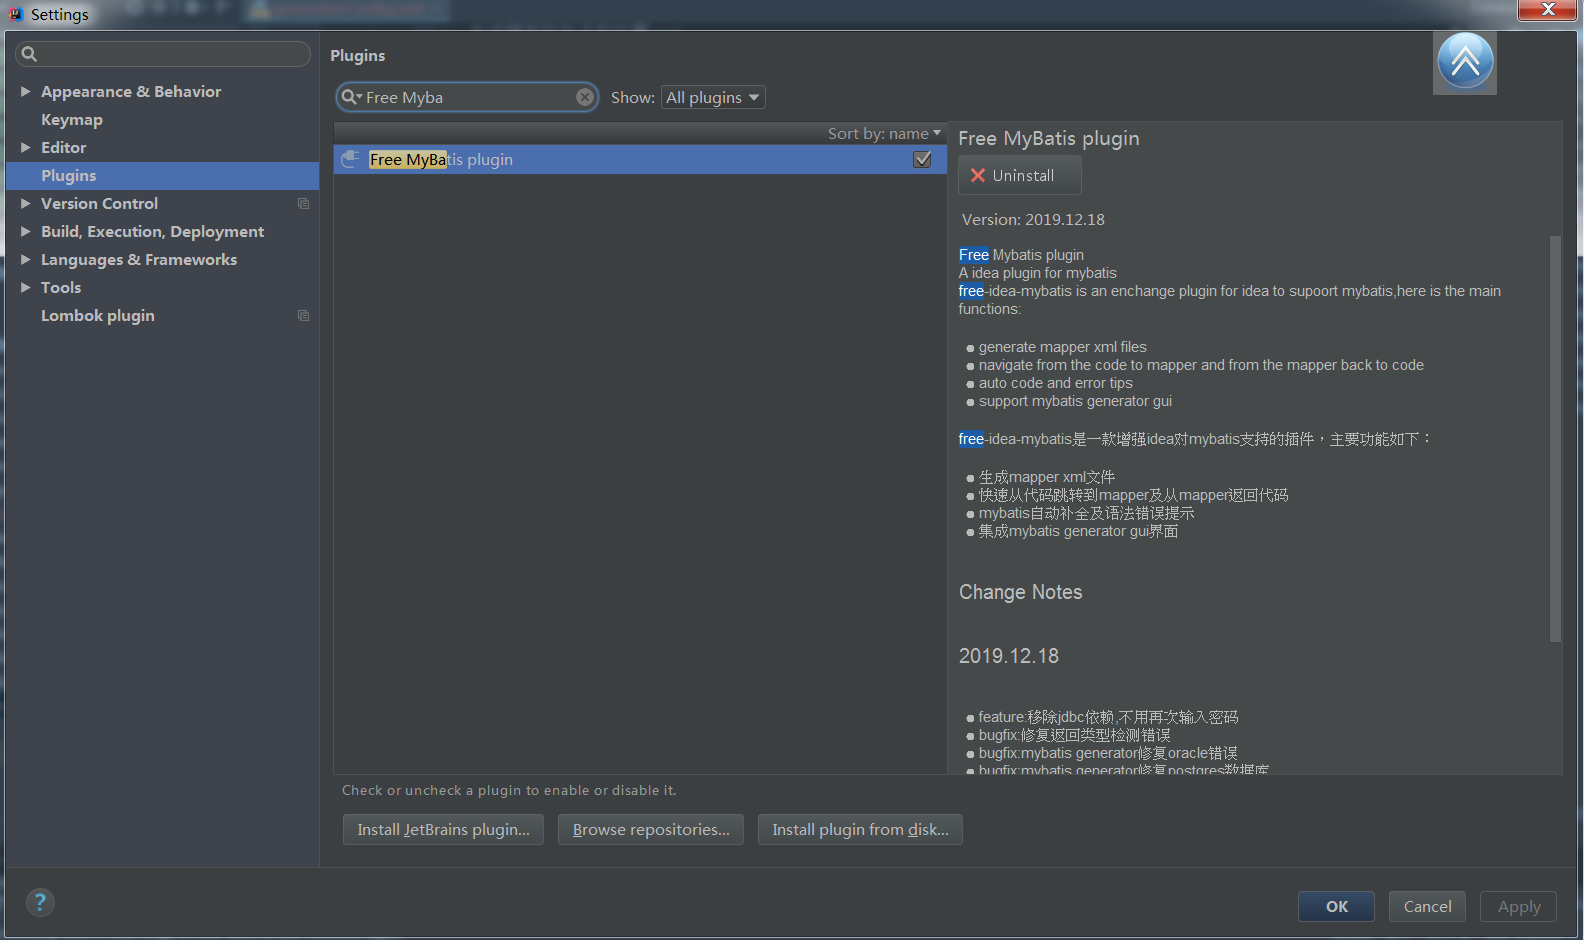
1、在Idea中安装“Free Mybatis plugin”插件
2、在pom.xml中引入mybatis-generator-maven-plugin插件依赖
3、配置generator.xml文件,设置代码生成的执行策略
4、配置Idea,运行代码生成命令
具体步骤如下:
1、在Idea中安装“Free Mybatis plugin”插件,安装完成后,需要重启Idea
2、在pom.xml中引入mybatis-generator-maven-plugin插件依赖
在你的pom.xml中的build-->plugins中加上如下依赖:
<build>
        <plugins>
            <plugin>
                <groupId>org.springframework.boot</groupId>
                <artifactId>spring-boot-maven-plugin</artifactId>
            </plugin>

            <plugin>
                <groupId>org.mybatis.generator</groupId>
                <artifactId>mybatis-generator-maven-plugin</artifactId>
                <version>1.3.5</version>
                <configuration>
                    <!--配置文件的位置--><configurationFile>src/main/resources/generatorConfig.xml</configurationFile>
                    <overwrite>true</overwrite>
                    <verbose>true</verbose>
                </configuration>
            </plugin>


        </plugins>
    </build>
3、配置generator.xml文件,设置代码生成的执行策略
在src/main/resources目录下创建generatorConfig.xml文件,并复制如下内容(红色部分是你需要修改的地方):
<?xml version="1.0" encoding="UTF-8"?>
<!DOCTYPE generatorConfiguration
    PUBLIC "-//mybatis.org//DTD MyBatis Generator Configuration 1.0//EN"
    "http://mybatis.org/dtd/mybatis-generator-config_1_0.dtd">
<generatorConfiguration>
    <!-- 数据库驱动:选择你的本地硬盘上面的数据库驱动包-->
    <classPathEntry  location="D:MyAppDatamaven3
epomysqlmysql-connector-java5.1.47mysql-connector-java-5.1.47.jar"/>
    <context id="DB2Tables"  targetRuntime="MyBatis3">
        <commentGenerator>
            <property name="suppressDate" value="true"/>
            <!-- 是否去除自动生成的注释 true:是 : false:否 -->
            <property name="suppressAllComments" value="true"/>
        </commentGenerator>
        <!--数据库链接URL,用户名、密码 -->
        <jdbcConnection driverClass="com.mysql.jdbc.Driver" connectionURL="jdbc:mysql://10.1.011.12/sjbm" userId="root" password="123456">
        </jdbcConnection>
        <javaTypeResolver>
            <property name="forceBigDecimals" value="false"/>
        </javaTypeResolver>
        <!-- 生成模型的包名和位置-->
        <javaModelGenerator targetPackage="com.test.admin.model.po" targetProject="src/main/java">
            <property name="enableSubPackages" value="true"/>
            <property name="trimStrings" value="true"/>
        </javaModelGenerator>
        <!-- 生成映射文件的包名和位置-->
        <sqlMapGenerator targetPackage="main.resources.mapper" targetProject="src">
            <!-- enableSubPackages:是否让schema作为包的后缀 -->
            <property name="enableSubPackages" value="false" />
        </sqlMapGenerator>
        <!-- 生成DAO的包名和位置-->
        <javaClientGenerator type="XMLMAPPER" targetPackage="com.test.admin.dao" targetProject="src/main/java">
            <property name="enableSubPackages" value="true"/>
        </javaClientGenerator>
        <!-- 要生成的表 tableName是数据库中的表名或视图名 domainObjectName是实体类名-->
        <table tableName="course"
               domainObjectName="Course"
               enableCountByExample="true"
               enableUpdateByExample="true"
               enableDeleteByExample="true"
               enableSelectByExample="true"
               selectByExampleQueryId="true">
        </table>
    </context>
</generatorConfiguration>
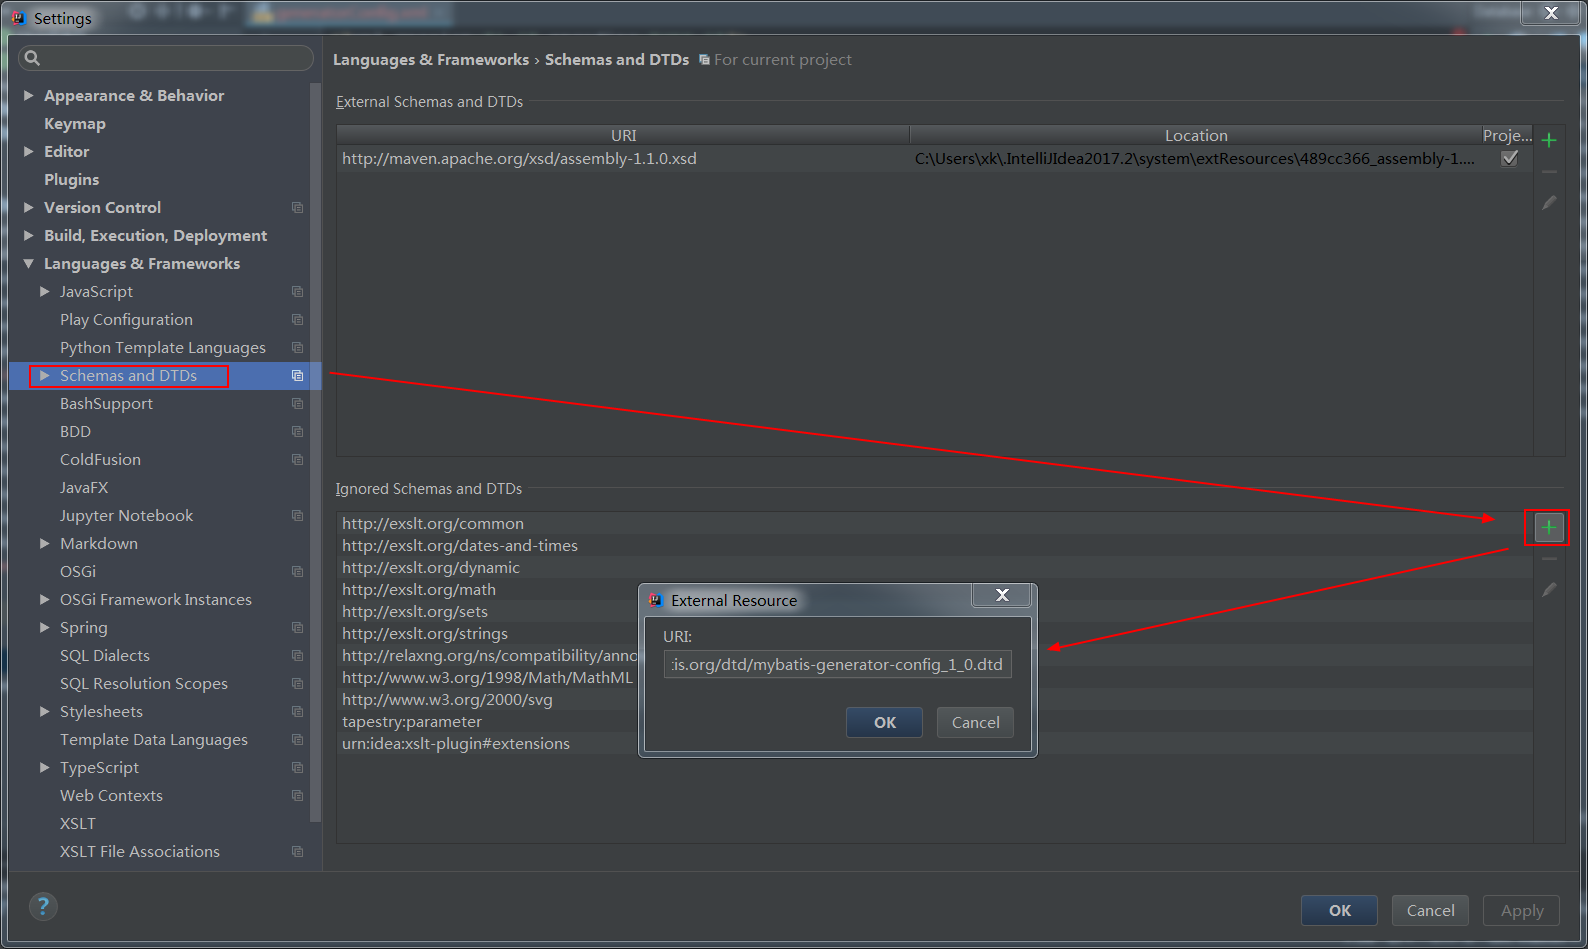
此处可能头部报错如下:

可将报错的url复制后,填到此处即可:
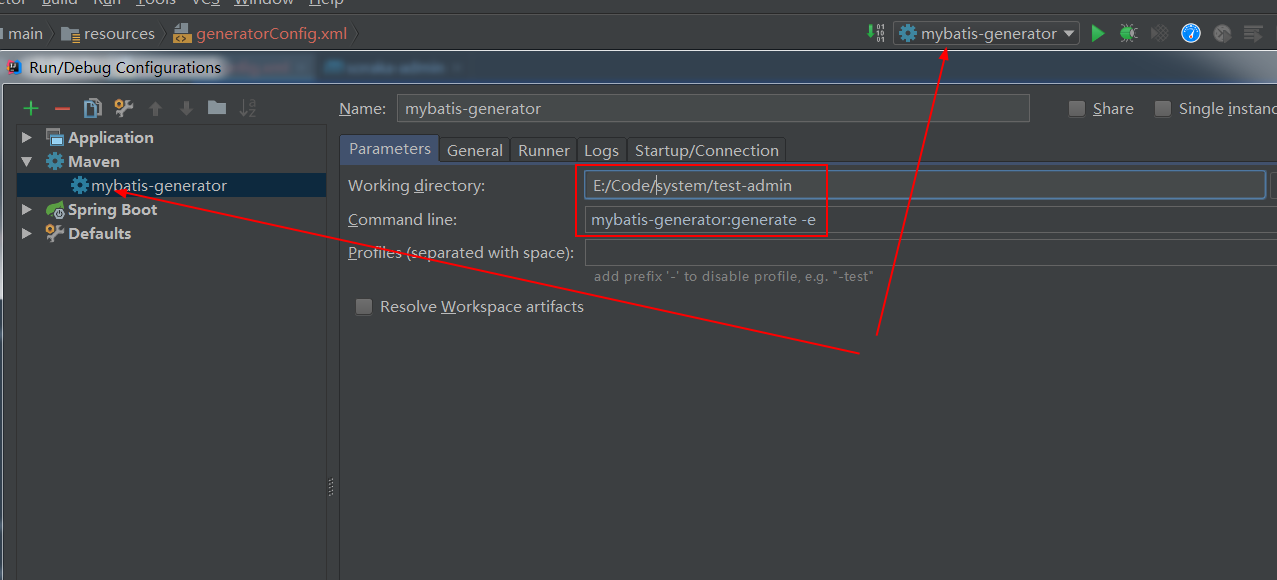
4、配置Idea,运行代码生成命令
配置Maven命令,配置完成后,点击运行即可生成代码。后面增加表时,只需修改generator.xml中的tableName相关配置即可: