环境 win7 + Idea2018
Classpath commons-logging-1.2 + spring-framework-4.1.6.RELEASE
Step1 创建工程
File -> New -> Project
选择Spring项目,“Addtionnal Lib and Frameworks” 选择第一个 ”Spring”, next 命名项目HelloSpring
Step2 添加jar
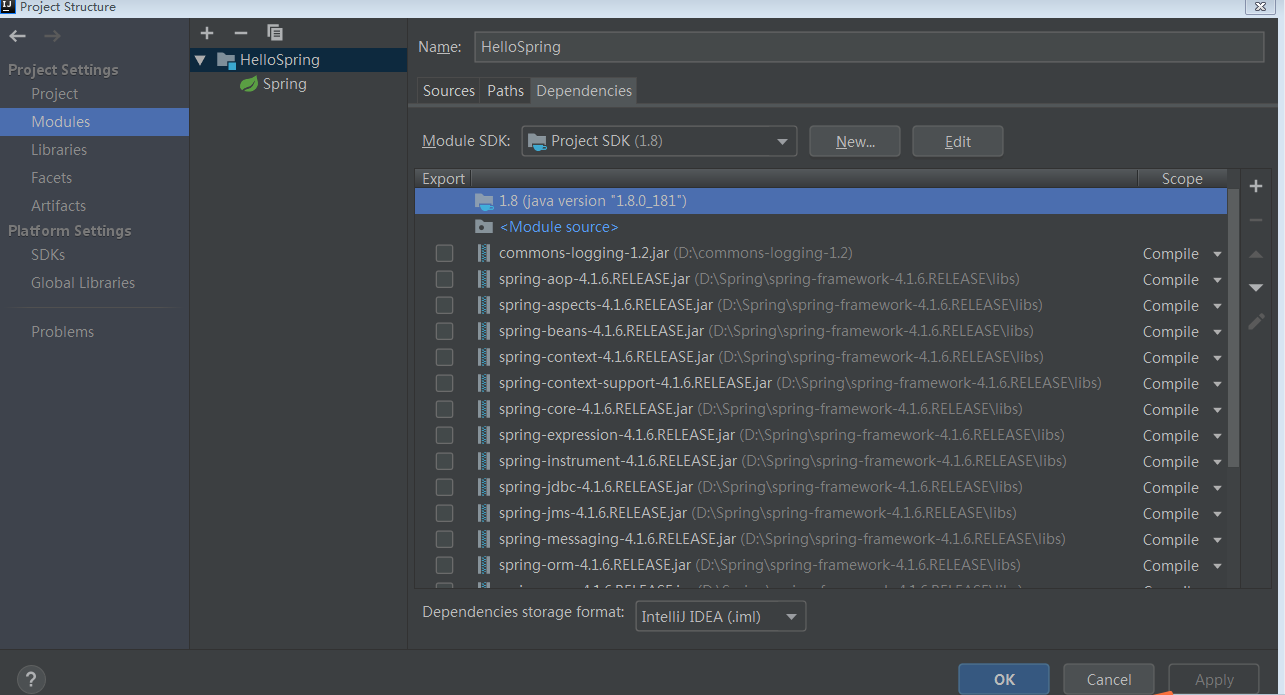
选择项目HelloSpring File –> Project Structure->Modules,选中项目HelloSpring,选中Dependancies 页签,点击“+” 添加jar包,效果如下
commons-logging-1.1.1
spring-aop-4.1.6.RELEASE
spring-aspects-4.1.6.RELEASE
spring-beans-4.1.6.RELEASE
spring-context-4.1.6.RELEASE
spring-context-support-4.1.6.RELEASE
spring-core-4.1.6.RELEASE
spring-expression-4.1.6.RELEASE
spring-instrument-4.1.6.RELEASE
spring-instrument-tomcat-4.1.6.RELEASE
spring-jdbc-4.1.6.RELEASE
spring-jms-4.1.6.RELEASE
spring-messaging-4.1.6.RELEASE
spring-orm-4.1.6.RELEASE
spring-oxm-4.1.6.RELEASE
spring-test-4.1.6.RELEASE
spring-tx-4.1.6.RELEASE
spring-web-4.1.6.RELEASE
spring-webmvc-4.1.6.RELEASE
spring-webmvc-portlet-4.1.6.RELEASE
spring-websocket-4.1.6.RELEASE

Step3 创建源代码
HelloWorld.java MainApp.java
主程序逻辑如下:
public static void main(String[] args) {
ApplicationContext context = new ClassPathXmlApplicationContext("Beans.xml");
HelloWorld obj = (HelloWorld) context.getBean("helloWorld");
obj.getMessage();
}
首先适用framework API ClassPathXmlApplicationContext()创建application context,这个API接口会加载beans配置文件,并根据所提供api去创建、初始化对象(即 配置文件中的beans);
其次,使用上步创建的contex getBean()方法获取对象bean ID,并最终向上cast得到实际对象,进而调用所有对象方法。
Step4 创建bean配置文件
Bean.xml配置文件的功能是将所有的bean粘合在一起;命名可以任意,但必须在ClassPath路径配置,并且创建application context时使用的名称一致;
Beans.xml 给beans分别指派唯一Id,并且创建对象时可以传入参数值,例如“message”变量:
<bean id = "helloWorld" class = "com.tutorialspoint.HelloWorld">
<property name = "message" value = "Hello World!"/>
</bean>
Step5 运行程序
控制台输出
Your Message : Hello World!