1.通过工厂方法配置bean
beans-factory.xml
<?xml version="1.0" encoding="UTF-8"?>
<beans xmlns="http://www.springframework.org/schema/beans"
    xmlns:xsi="http://www.w3.org/2001/XMLSchema-instance" xmlns:p="http://www.springframework.org/schema/p"
    xsi:schemaLocation="http://www.springframework.org/schema/beans http://www.springframework.org/schema/beans/spring-beans.xsd">

    <!-- 通过静态工厂方法配置 bean 注意 不是配置静态工厂方法实例, 而是配置bean实例 -->
    <!--   class 属性指向 静态工厂方法的全类名
             factory-method :指向静态工厂方法的名字
             constructor-args:如果工厂方法需要传入参数, 则使用constructor-args 类配参数 -->
    <bean id="car1" class="com.aff.spring.beans.factory.StaticCarFactory"
        factory-method="getCar">
        <constructor-arg value="audi"></constructor-arg>
    </bean>


    <!-- 配置工厂的实例 -->
    <bean id="carFactory" class="com.aff.spring.beans.factory.InstanceCarFactory"></bean>

    <!--通过实例工厂方法来配置bean -->
        <!--   class 属性指向 实例工厂方法的全类名
                 factory-bean:指向实例工厂方法的名字
                 factory-method :指向实例工厂方法的名字
                constructor-args:如果工厂方法需要传入参数, 则使用constructor-args 类配参数 -->
    <bean id="car2" factory-bean="carFactory" factory-method="getCar">
        <constructor-arg value="audi"></constructor-arg>
    </bean>
</beans>
Main
package com.aff.spring.beans.factory;

import org.springframework.context.ApplicationContext;
import org.springframework.context.support.ClassPathXmlApplicationContext;

public class Main {
    public static void main(String[] args) {
        ApplicationContext ctx = new ClassPathXmlApplicationContext("beans-factory.xml");
        Car car1 = (Car) ctx.getBean("car1");
        System.out.println(car1);
        // Car [brand=audi, price=20000.0]

        Car car2 = (Car) ctx.getBean("car2");
        System.out.println(car2);
        //Car [brand=audi, price=309000.0]


    }

}
①通过调用静态工厂方法创建 Bean
调用静态工厂方法创建 Bean是将对象创建的过程封装到静态方法中. 当客户端需要对象时, 只需要简单地调用静态方法, 而不同关心创建对象的细节.
要声明通过静态方法创建的 Bean, 需要在 Bean 的 class 属性里指定拥有该工厂的方法的类, 同时在 factory-method 属性里指定工厂方法的名称.
最后, 使用 <constrctor-arg> 元素为该方法传递方法参数.
StaticCarFactory.java
package com.aff.spring.beans.factory;

import java.util.HashMap;
import java.util.Map;

//静态工厂犯法: 直接 调用一个类的静态方法就可以返回一个bean的实例
public class StaticCarFactory {

    private static Map<String, Car> cars = new HashMap<String, Car>();

    static {
        cars.put("audi", new Car("audi", 20000));
        cars.put("ford", new Car("ford", 300000));
    }

    // 静态工厂方法
    public static Car getCar(String name) {
        return cars.get(name);
    }

}
②通过调用实例工厂方法创建 Bean
实例工厂方法: 将对象的创建过程封装到另外一个对象实例的方法里. 当客户端需要请求对象时, 只需要简单的调用该实例方法而不需要关心对象的创建细节.
要声明通过实例工厂方法创建的 Bean
在 bean 的 factory-bean 属性里指定拥有该工厂方法的 Bean
在 factory-method 属性里指定该工厂方法的名称
使用 construtor-arg 元素为工厂方法传递方法参数
InstanceCarFactory.java
package com.aff.spring.beans.factory;

import java.util.HashMap;
import java.util.Map;

//实例工厂方法实例工厂的方法, 即需要创建工厂本身, 在调用 工厂的实例方法来返回bean 的实例
public class InstanceCarFactory {
    private Map<String, Car> cars = null;

    public InstanceCarFactory() {
        cars = new HashMap<String, Car>();
        cars.put("audi", new Car("audi", 309000));
        cars.put("ford", new Car("ford", 2823309));
    }

    public Car getCar(String brand) {
        return cars.get(brand);
    }

}
Car
package com.aff.spring.beans.factory;

public class Car {
    private  String  brand;
    private  double price;
    public String getBrand() {
        return brand;
    }
    public void setBrand(String brand) {
        this.brand = brand;
    }
    public double getPrice() {
        return
                price;
    }
    public void setPrice(double price) {
        this.price = price;
    }
    @Override
    public String toString() {
        return "Car [brand=" + brand + ", price=" + price + "]";
    }
    public Car() {
        System.out.println("car 的无参构造器");
    }
    public Car(String brand, double price) {
        super();
        this.brand = brand;
        this.price = price;
    }

}
2. 通过FactoryBean 配置bean的实例
CarFactoryBean.java
package com.aff.spring.beans.factorybean;

import org.springframework.beans.factory.FactoryBean;

//自定义FactoryBean 需要实现FactoryBean  接口
public class CarFactoryBean implements FactoryBean<Car> {
    private String brand;

    public void setBrand(String brand) {
        this.brand = brand;
    }

    // 返回bean 的对象
    @Override
    public Car getObject() throws Exception {
        return new Car("ford", 320000);
    }

    /**
     * 返回 bean 的类型
     */
    @Override
    public Class<?> getObjectType() {
        return Car.class;
    }

    @Override
    public boolean isSingleton() {
        return true;
    }

}
beans-factorybean.xml
<?xml version="1.0" encoding="UTF-8"?>
<beans xmlns="http://www.springframework.org/schema/beans"
    xmlns:xsi="http://www.w3.org/2001/XMLSchema-instance" xmlns:p="http://www.springframework.org/schema/p"
    xsi:schemaLocation="http://www.springframework.org/schema/beans http://www.springframework.org/schema/beans/spring-beans.xsd">

    <!-- 通过FactoryBean 配置bean的实例
           class指向FactoryBean 的全类名
           property  :配置FactoryBean 的属性
           但实际返回的实例却是 FactoryBean 的getObject()方法 返回的实例
    -->
    <bean id="car" class="com.aff.spring.beans.factorybean.CarFactoryBean">
        <property name="brand" value="audi"></property>
    </bean>
</beans>
Main
package com.aff.spring.beans.factorybean;

import org.springframework.context.ApplicationContext;
import org.springframework.context.support.ClassPathXmlApplicationContext;

public class Main {
    public static void main(String[] args) {
        ApplicationContext    ctx =  new  ClassPathXmlApplicationContext("beans-factorybean.xml");

        Car car = (Car) ctx.getBean("car");
        System.out.println(car);
        //Car [brand=ford, price=320000.0]

    }

}
3.通过注解配置bean
@Component: 基本注解, 标识了一个受 Spring 管理的组件
@Respository: 标识持久层组件
@Service: 标识服务层(业务层)组件
@Controller: 标识表现层组件
当在组件类上使用了特定的注解之后, 还需要在 Spring 的配置文件中声明 <context:component-scan> :
base-package 属性指定一个需要扫描的基类包,Spring 容器将会扫描这个基类包里及其子包中的所有类.
当需要扫描多个包时, 可以使用逗号分隔.
@Autowired 注解自动装配具有兼容类型的单个 Bean属性
构造器, 普通字段(即使是非 public), 一切具有参数的方法都可以应用@Authwired 注解
默认情况下, 所有使用 @Authwired 注解的属性都需要被设置. 当 Spring 找不到匹配的 Bean 装配属性时, 会抛出异常,
若某一属性允许不被设置, 可以设置 @Authwired 注解的 required 属性为 false
默认情况下, 当 IOC 容器里存在多个类型兼容的 Bean 时, 通过类型的自动装配将无法工作.
此时可以在 @Qualifier 注解里提供 Bean 的名称. Spring 允许对方法的入参标注 @Qualifiter 已指定注入 Bean 的名称
@Authwired 注解也可以应用在数组类型的属性上, 此时 Spring 将会把所有匹配的 Bean 进行自动装配.
@Authwired 注解也可以应用在集合属性上, 此时 Spring 读取该集合的类型信息, 然后自动装配所有与之兼容的 Bean.
@Authwired 注解用在 java.util.Map 上时, 若该 Map 的键值为 String, 那么 Spring 将自动装配与之 Map 值类型兼容的 Bean, 此时 Bean 的名称作为键值
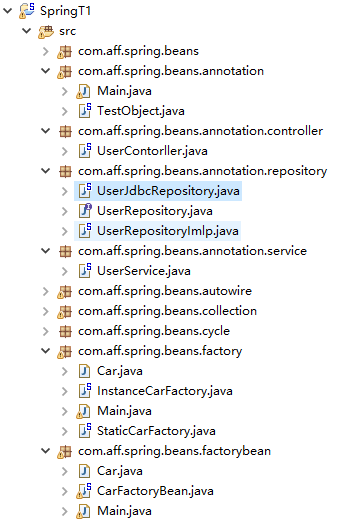
目录
beans-annotation.xml
<?xml version="1.0" encoding="UTF-8"?>
<beans xmlns="http://www.springframework.org/schema/beans"
    xmlns:xsi="http://www.w3.org/2001/XMLSchema-instance" xmlns:p="http://www.springframework.org/schema/p"
    xmlns:context="http://www.springframework.org/schema/context"
    xsi:schemaLocation="http://www.springframework.org/schema/beans http://www.springframework.org/schema/beans/spring-beans.xsd
        http://www.springframework.org/schema/context http://www.springframework.org/schema/context/spring-context-4.0.xsd">
    <!--指定Spring IOC容器扫描的包 -->
    <context:component-scan base-package="com.aff.spring.beans.annotation"></context:component-scan>
    <!--可以通过 resource-pattern 指定扫描的资源 -->
    <!-- <context:component-scan base-package="com.aff.spring.beans.annotation"
        resource-pattern="repository/*.class"></context:component-scan> -->

    <!--context:exclude-filter 子节点指定排除那些指定表达式的组件 -->
<!--     <context:component-scan base-package="com.aff.spring.beans.annotation"
        use-default-filters="false">
        <context:exclude-filter type="annotation" expression="org.springframework.stereotype.Repository"/>
        context:include-filter:只包含它,其他的不行 需要默认的过滤器设置为false
        <context:include-filter type="annotation"
            expression="org.springframework.stereotype.Repository" />
    </context:component-scan>
 -->

<!--     <context:component-scan base-package="com.aff.spring.beans.annotation">
        assignable  不包含这个接口以及这个接口的所有实现类了
        <context:include-filter type="assignable"
            expression="com.aff.spring.beans.annotation.repository.UserRepository" />
    </context:component-scan>

    <context:component-scan base-package="com.aff.spring.beans.annotation" use-default-filters="false">
        assignable  只包含这个接口以及这个接口的所有实现类了
        <context:include-filter type="assignable"
            expression="com.aff.spring.beans.annotation.repository.UserRepository" />
    </context:component-scan>
 -->
</beans>
Main
package com.aff.spring.beans.annotation;

import org.springframework.context.ApplicationContext;
import org.springframework.context.support.ClassPathXmlApplicationContext;

import com.aff.spring.beans.annotation.controller.UserContorller;
import com.aff.spring.beans.annotation.repository.UserRepository;
import com.aff.spring.beans.annotation.service.UserService;

public class Main {
    public static void main(String[] args) {
        ApplicationContext ctx = new ClassPathXmlApplicationContext("beans-annotation.xml");
//
//        TestObject to = (TestObject) ctx.getBean("testObject");
//        System.out.println(to);

        UserContorller userContorller = (UserContorller) ctx.getBean("userContorller");
        System.out.println(userContorller);
        userContorller.execute();
/*        com.aff.spring.beans.annotation.controller.UserContorller@36b4cef0
        UseController execute...
        UserService add...
        UserRepository Save...*/

//        UserRepository userRepository = (UserRepository) ctx.getBean("userRepository");
//        System.out.println(userRepository);
//
//        UserService userService = (UserService) ctx.getBean("userService");
//        System.out.println(userService);
//
    }


    // com.aff.spring.beans.annotation.TestObject@467aecef
    // com.aff.spring.beans.annotation.controller.UserContorller@4d50efb8
    // com.aff.spring.beans.annotation.repository.UserRepositoryImlp@7e2d773b
    // com.aff.spring.beans.annotation.service.UserService@2173f6d9
}
TestObject.java
@Component
public class TestObject {

}
UserContorller.java
@Controller
public class UserContorller {
    @Autowired
    private  UserService userService ;
    public  void  execute(){
        System.out.println("UseController execute...");
        userService.add();
    }

}
UserRepository.java
public interface UserRepository {

    void save();
}
UserRepositoryImlp.java
package com.aff.spring.beans.annotation.repository;

import org.springframework.stereotype.Repository;
//实现类 持久化层 repository

//@Repository("userRepository")
@Repository
public class UserRepositoryImlp implements UserRepository{

    @Override
    public void save() {
        System.out.println("UserRepository Save...");

    }

}
UserService.java
package com.aff.spring.beans.annotation.service;

import org.springframework.beans.factory.annotation.Autowired;
import org.springframework.beans.factory.annotation.Qualifier;
import org.springframework.stereotype.Service;

import com.aff.spring.beans.annotation.repository.UserRepository;

@Service
public class UserService {
    private UserRepository userRepository;

    //在进行装配的时候使用 userRepositoryImlp, 可以放到里面去
    @Autowired
    public void setUserRepository(@Qualifier("userRepositoryImlp") UserRepository userRepository) {
        this.userRepository = userRepository;
    }

    public void add() {
        System.out.println("UserService add...");
        userRepository.save();
    }

}
UserJdbcRepository.java
package com.aff.spring.beans.annotation.repository;

import org.springframework.stereotype.Repository;

@Repository
public class UserJdbcRepository   implements UserRepository{

    @Override
    public void save() {
        System.out.println("UserJdbcRepository save...");
    }

}
整个目录
