Hexo
一个把markdown文件渲染成静态网页的框架。
可以作为博客、网页展示、文档等。
运行于Node.js(javascript独立于浏览器外的运行环境)。
官网:https://hexo.io/
安装
Node.js (Node.js 版本需不低于 10.13,建议使用 Node.js 12.0 及以上版本)
Git(hexo初始化的模板需要从github上down)
$ npm install -g hexo-cli
建站
$ hexo init <folder>
$ cd <folder>
$ npm install
新建完成后,指定文件夹的目录如下:
.
├── _config.yml
├── package.json
├── scaffolds
├── source
| ├── _drafts
| └── _posts
└── themes
_config.yml配置
替代配置文件
hexo server --config custom.yml
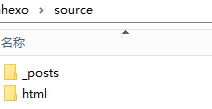
不需要渲染的文件夹
在source下面新建一个文件夹html
_config.yml配置如下
忽略渲染html文件夹
skip_render:
  - "html/**"
重新编译发布
$ hexo generate
$ hexo deploy
发现多了个html结构

常用命令
新建一篇文章。如果没有设置 layout 的话,默认使用_config.yml中的 default_layout参数代替。
hexo new [layout] <title>
生成静态文件
$ hexo generate
$ hexo generate --watch  #监测文件变化
发表草稿
$ hexo publish [layout] <filename>
启动服务器
hexo server
部署到Git
安装hexo-deployer-git
npm install hexo-deployer-git --save
修改配置
deploy:
  type: git
  repo: <repository url>
  branch: [branch]
部署网站
hexo deploy
post插入图片
配置文件_config.yml
post_asset_folder:true
安装插件
在hexo目录下安装0.0.5版本的hexo-asset-image插件
npm install https://github.com/CodeFalling/hexo-asset-image --save
使用
hexo n xxxx 来生成md博文时,/source/_posts文件夹内除了xxxx.md文件还有一个同名的文件夹
把图片放入xxxx博文的同名文件夹,md中使用如下格式引用图片.

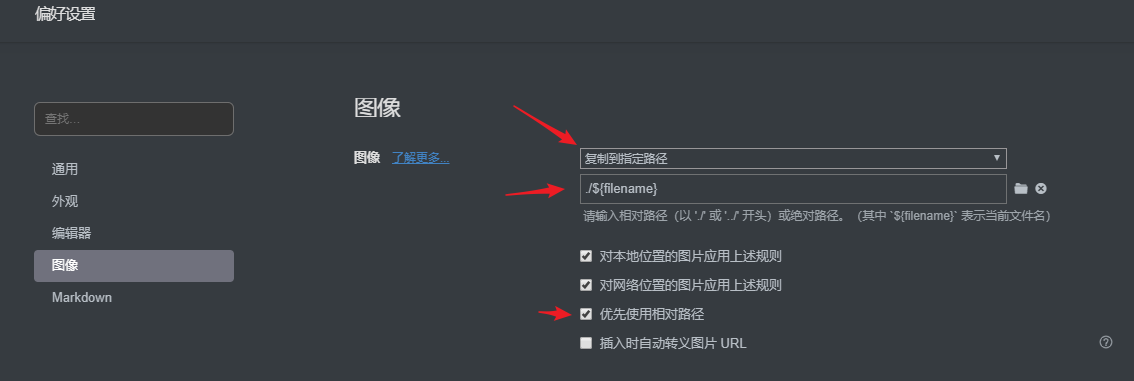
设置typora
文件->偏好设置->图像,设置粘贴时图片存储的位置。
发布后图片格式如下

如果图片中间路径是.io,那么可能是插件版本安装问题,需要npm查看版本卸载重装
主题安装
下载fluid主题
https://github.com/fluid-dev/hexo-theme-fluid/releases/tag/v1.8.10
在themes文件夹中解压,文件夹重命名为fluid,主题相关配置去themesfluid下面的配置文件修改。
激活主题,修改_config.yml配置文件
theme: fluid
板娘插件
安装hexo-helper-live2d
进入到hexo项目下面
npm install --save hexo-helper-live2d
下载模型
模型作者博客
选择自己喜欢的模型,进入到hexo项目下面,下载
#z16 haru hibiki koharu
npm install --save live2d-widget-model-haru
配置Hexo的_config.yml
# Live2D
## https://github.com/EYHN/hexo-helper-live2d
## https://l2dwidget.js.org/docs/class/src/index.js~L2Dwidget.html#instance-method-init
live2d:
  enable: true
  scriptFrom: local # 默认
  pluginRootPath: live2dw/ # 插件在站点上的根目录(相对路径)
  pluginJsPath: lib/ # 脚本文件相对与插件根目录路径
  pluginModelPath: assets/ # 模型文件相对与插件根目录路径
  # scriptFrom: jsdelivr # jsdelivr CDN
  # scriptFrom: unpkg # unpkg CDN
  # scriptFrom: https://cdn.jsdelivr.net/npm/live2d-widget@3.x/lib/L2Dwidget.min.js # 你的自定义 url
  tagMode: false # 标签模式, 是否仅替换 live2d tag标签而非插入到所有页面中
  debug: false # 调试, 是否在控制台输出日志
  model:
    use: live2d-widget-model-koharu
    # use: live2d-widget-model-wanko # npm-module package name
    # use: wanko # 博客根目录/live2d_models/ 下的目录名
    # use: ./wives/wanko # 相对于博客根目录的路径
    # use: https://cdn.jsdelivr.net/npm/live2d-widget-model-wanko@1.0.5/assets/wanko.model.json # 你的自定义 url
  display:
    position: right
     140
    height: 300
  mobile:
    show: false # 是否在移动设备上显示
    scale: 0.5 # 移动设备上的缩放
  react:
    opacityDefault: 0.7
    opacityOnHover: 0.8

插件
hexo-generator-sitemap
hexo-generator-baidu-sitemap
hexo-generator-json-content
hexo-generator-restful
常见问题
err: YAMLException: can not read a block mapping entry; a multiline key may not be an implicit key at line 4, column 1
文章中title、date、tags等标签:后面一定要有空格。不然hexo g的时候会报错。
请求错误
如果clean generate server后发现请求错误,查看public是否生成html,如果没生成就是hexo-renderer-marked插件没装,在项目目录下安装即可npm install hexo-renderer-marked