本例将会运行两个服务器,两个服务提供者实例和一个服务调用者实例,通过服务调用者请求服务,实现集群部署并通过HttpClient的REST客户端访问服务调用者发布的服务看到负载均衡的效果。
1.本例集群结构图
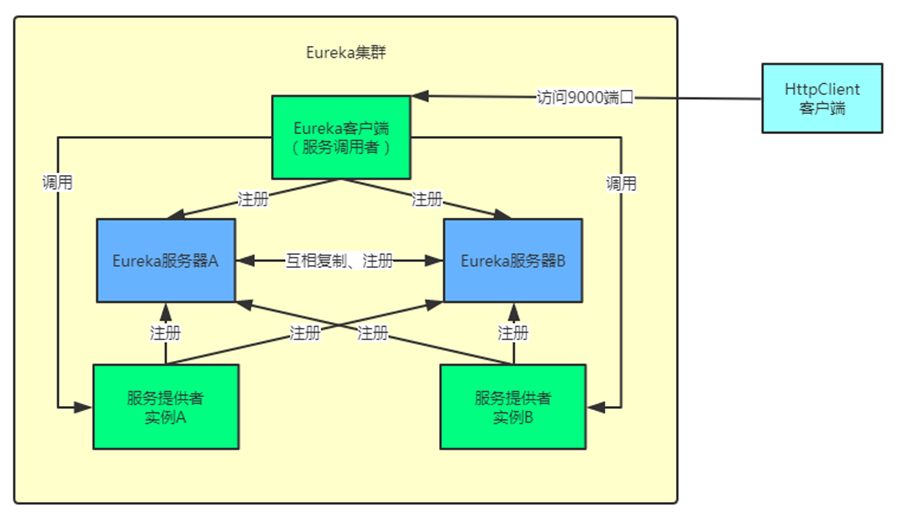
由于本例的开发环境只有一台电脑,操作系统为Windows,如果要构建集群,需要修改hosts文件,为其添加主机名的映射,修改C:WindowsSystem32driversetchosts文件,添加以下内容:
127.0.0.1 slave1 slave2
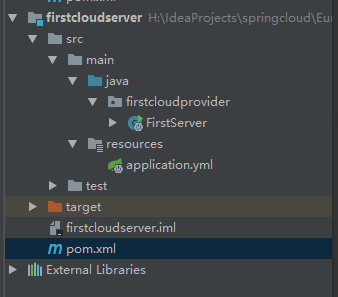
2.构建服务器端
新建一个maven项目first-cloud-server,项目的目录结构如下图
引入相关依赖
pom.xml代码清单


 1 <?xml version="1.0" encoding="UTF-8"?>
 2 <project xmlns="http://maven.apache.org/POM/4.0.0"
 3          xmlns:xsi="http://www.w3.org/2001/XMLSchema-instance"
 4          xsi:schemaLocation="http://maven.apache.org/POM/4.0.0 http://maven.apache.org/xsd/maven-4.0.0.xsd">
 5     <modelVersion>4.0.0</modelVersion>
 6
 7     <groupId>com.triheart</groupId>
 8     <artifactId>first-cloud-server</artifactId>
 9     <version>1.0-SNAPSHOT</version>
10
11     <dependencyManagement>
12         <dependencies>
13             <dependency>
14                 <groupId>org.springframework.cloud</groupId>
15                 <artifactId>spring-cloud-dependencies</artifactId>
16                 <version>Dalston.SR1</version>
17                 <type>pom</type>
18                 <scope>import</scope>
19             </dependency>
20         </dependencies>
21     </dependencyManagement>
22
23     <dependencies>
24         <dependency>
25             <groupId>org.springframework.cloud</groupId>
26             <artifactId>spring-cloud-starter-eureka-server</artifactId>
27         </dependency>
28     </dependencies>
29
30 </project>
编写配置文件,由于对同一个应用程序需要启动两次(IDEA启动多次应用程序),因此需要在配置文件中使用spring的profiles配置,配置文件的代码清单如下
 1 server:
 2   port: 8761
 3 spring:
 4   application:
 5     name: first-cloud-server
 6   profiles: slave1
 7 eureka:
 8   instance:
 9     hostname: slave1
10   client:
11     serviceUrl:
12       defaultZone: http://slave2:8762/eureka/
13 ---
14 server:
15   port: 8762
16 spring:
17   application:
18     name: first-cloud-server
19   profiles: slave2
20 eureka:
21   instance:
22     hostname: slave2
23   client:
24     serviceUrl:
25       defaultZone: http://slave1:8761/eureka/
在配置文件中配置了两个profiles,名称分别为slave1和slave2。在slave1中,配置应用端口为8761,主机名为slave1,当实用slave1这个profiles来启动服务器时,将会向http://slave2:8762/eureka/注册自己;同理,使用slave2的profiles来启动服务器时,会像slave1这台服务器注册自己。简单地说,就是两个服务器启动之后,他们会互相注册。
编写启动类FirstServer.java,让其在启动时读取控制台的输入来决定使用哪个profiles来启动相应的Eureka服务。
FirstServer.java代码清单
 1 package firstcloudprovider;
 2
 3 import org.springframework.boot.autoconfigure.SpringBootApplication;
 4 import org.springframework.boot.builder.SpringApplicationBuilder;
 5 import org.springframework.cloud.netflix.eureka.server.EnableEurekaServer;
 6
 7 import java.util.Scanner;
 8
 9 /**
10  * @author 阿遠
11  * Date: 2018/8/24
12  * Time: 15:17
13  */
14 @SpringBootApplication
15 @EnableEurekaServer
16 public class FirstServer {
17
18     public static void main(String[] args) {
19         Scanner scan = new Scanner(System.in);
20         String profiles = scan.nextLine();
21         new SpringApplicationBuilder(FirstServer.class).profiles(profiles).run(args);
22     }
23 }
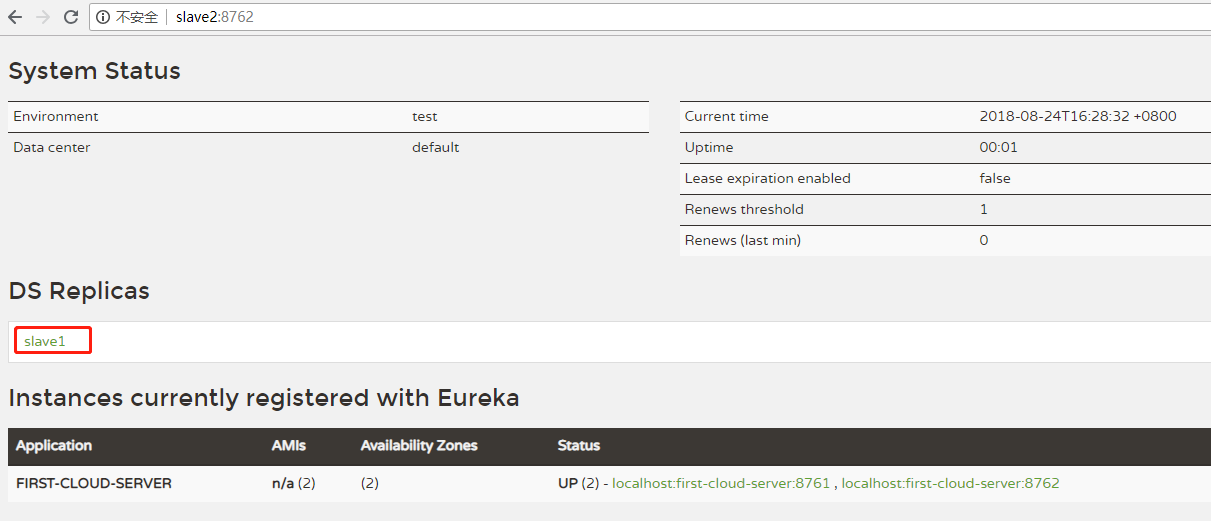
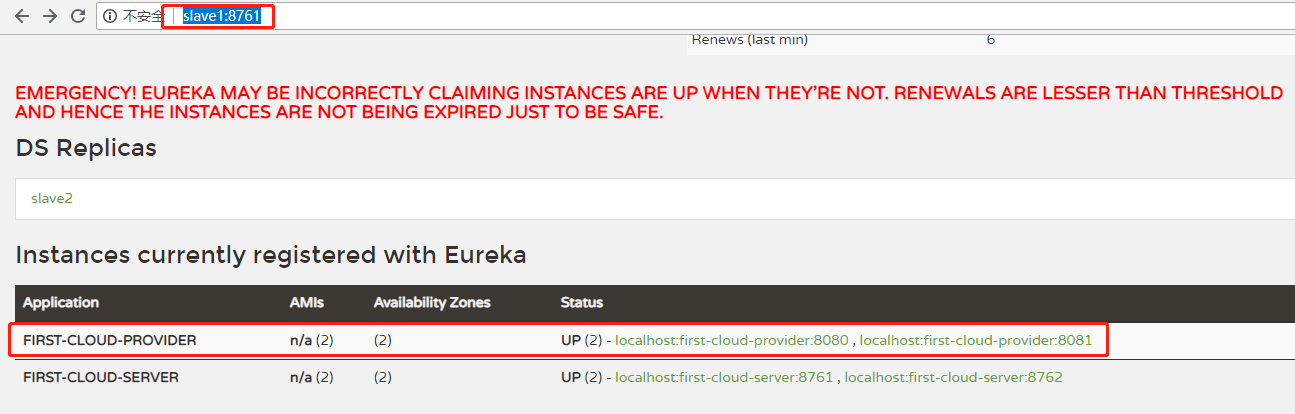
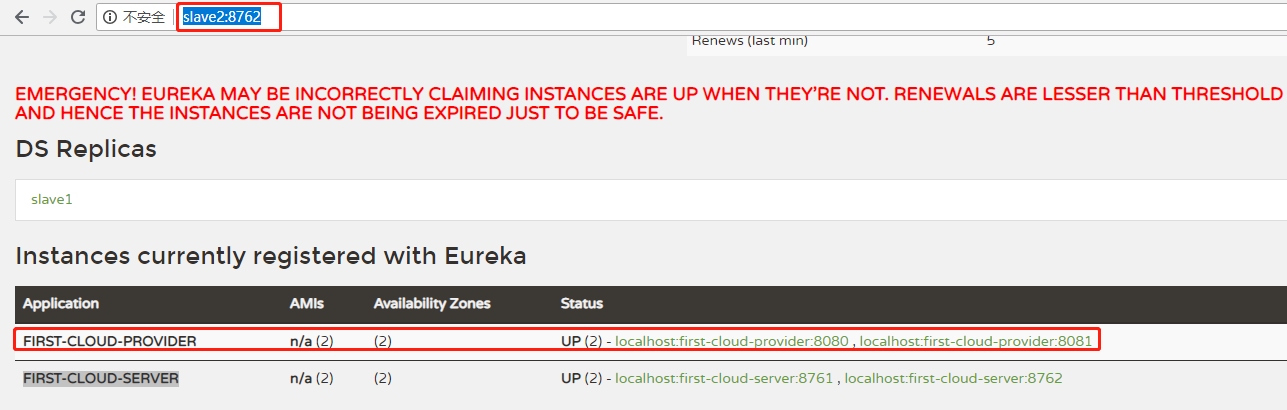
在启动类中,先从控制台输入profiles的值,再根据输入的值启动相应的Eureka服务器,需要注意的是,当我们启动第一个服务器时会抛异常,这是因为我们第一个服务器会去找第二个服务器来注册自己,而我们的第二个服务器还没有启动,我们把第二个服务器启动之后,分别访问http://slave1:8761和http://slave2:8762,可以在Eureka服务器的控制台上看到,两个服务器已经相互注册了 。

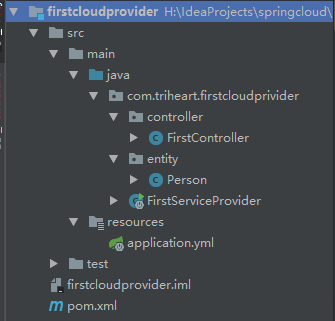
3.构建服务提供者
服务提供者也需要启动两个实例,其构建与服务器的构建类似。新建一个maven项目first-cloud-provider,项目的目录结构如下
在pom.xml文件中引入相关依赖。
pom.xml代码清单
 1 <?xml version="1.0" encoding="UTF-8"?>
 2 <project xmlns="http://maven.apache.org/POM/4.0.0"
 3          xmlns:xsi="http://www.w3.org/2001/XMLSchema-instance"
 4          xsi:schemaLocation="http://maven.apache.org/POM/4.0.0 http://maven.apache.org/xsd/maven-4.0.0.xsd">
 5     <modelVersion>4.0.0</modelVersion>
 6
 7     <groupId>com.triheart</groupId>
 8     <artifactId>first-cloud-provider</artifactId>
 9     <version>1.0-SNAPSHOT</version>
10
11     <dependencyManagement>
12         <dependencies>
13             <dependency>
14                 <groupId>org.springframework.cloud</groupId>
15                 <artifactId>spring-cloud-dependencies</artifactId>
16                 <version>Dalston.SR1</version>
17                 <type>pom</type>
18                 <scope>import</scope>
19             </dependency>
20         </dependencies>
21     </dependencyManagement>
22
23     <dependencies>
24         <dependency>
25             <groupId>org.springframework.cloud</groupId>
26             <artifactId>spring-cloud-starter-config</artifactId>
27         </dependency>
28         <dependency>
29             <groupId>org.springframework.cloud</groupId>
30             <artifactId>spring-cloud-starter-eureka</artifactId>
31         </dependency>
32     </dependencies>
33 </project>
编写配置文件,将Eureka客户端的两个服务提供者注册到Eureka服务器。
配置文件application.yml代码清单
1 spring:
2   application:
3     name: first-cloud-provider
4 eureka:
5   instance:
6     hostname: localhost
7   client:
8     serviceUrl:
9       defaultZone: http://localhost:8761/eureka/,http://localhost:8762/eureka/
编写启动类,由于默认端口只有8080,而我们有两个服务提供者,为了避免端口冲突,我们让启动类启动时从控制台读取输入的端口来决定使用哪个端口提供服务。
启动类FirstServiceProvider.java代码清单
 1 package com.triheart.firstcloudprivider;
 2
 3 import org.springframework.boot.autoconfigure.SpringBootApplication;
 4 import org.springframework.boot.builder.SpringApplicationBuilder;
 5 import org.springframework.cloud.netflix.eureka.EnableEurekaClient;
 6
 7 import java.util.Scanner;
 8
 9 /**
10  * @author 阿遠
11  * Date: 2018/8/24
12  * Time: 16:42
13  */
14 @SpringBootApplication
15 @EnableEurekaClient
16 public class FirstServiceProvider {
17
18     public static void main(String[] args) {
19         // 读取控制台输入的端口,避免端口冲突
20         Scanner scan = new Scanner(System.in);
21         String port = scan.nextLine();
22         new SpringApplicationBuilder(FirstServiceProvider.class).properties("server.port=" + port).run(args);
23     }
24 }
为了看到服务提供者提供的服务,我们还需要编写控制器来供后面的服务调用者调用。
实体类Person.java代码清单
 1 package com.triheart.firstcloudprivider.entity;
 2
 3 public class Person {
 4
 5     private Integer id;
 6
 7     private String name;
 8
 9     private Integer age;
10
11     private String message;
12
13     public Person() {
14         super();
15     }
16
17     public Person(Integer id, String name, Integer age) {
18         super();
19         this.id = id;
20         this.name = name;
21         this.age = age;
22     }
23
24     public Integer getId() {
25         return id;
26     }
27
28     public void setId(Integer id) {
29         this.id = id;
30     }
31
32     public String getName() {
33         return name;
34     }
35
36     public void setName(String name) {
37         this.name = name;
38     }
39
40     public Integer getAge() {
41         return age;
42     }
43
44     public void setAge(Integer age) {
45         this.age = age;
46     }
47
48     public String getMessage() {
49         return message;
50     }
51
52     public void setMessage(String message) {
53         this.message = message;
54     }
55
56 }
控制器FirstController.java代码清单
 1 package com.triheart.firstcloudprivider.controller;
 2
 3 import javax.servlet.http.HttpServletRequest;
 4
 5 import com.triheart.firstcloudprivider.entity.Person;
 6 import org.springframework.http.MediaType;
 7 import org.springframework.web.bind.annotation.PathVariable;
 8 import org.springframework.web.bind.annotation.RequestMapping;
 9 import org.springframework.web.bind.annotation.RequestMethod;
10 import org.springframework.web.bind.annotation.RestController;
11
12 @RestController
13 public class FirstController {
14
15     @RequestMapping(value = "/person/{personId}", method = RequestMethod.GET,
16             produces = MediaType.APPLICATION_JSON_VALUE)
17     public Person findPerson(@PathVariable("personId") Integer personId, HttpServletRequest request) {
18         Person person = new Person(personId, "Crazyit", 30);
19         // 为了查看结果,将请求的URL设置到Person实例中
20         person.setMessage(request.getRequestURL().toString());
21         return person;
22     }
23 }
控制器的findPerson方法将请求的服务URL保存到Person对象的message属性中,因此在调用服务后我们可以根据message属性来查看我们请求的URL。
我们将启动类启动两次,分别在控制台输入端口8080和8081,然后分别访问http://slave1:8761和http://slave1:8762,可以看到first-cloud-provider这个服务已经被注册到slave1和slave2这两个Eureka服务器里面了。
4.构建服务调用者
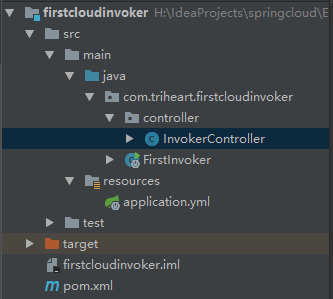
服务调用者只需启动一个实例。新建一个maven项目first-cloud-invoker,项目的目录结构如下
引入相关依赖
pom.xml代码清单
 1 <?xml version="1.0" encoding="UTF-8"?>
 2 <project xmlns="http://maven.apache.org/POM/4.0.0"
 3          xmlns:xsi="http://www.w3.org/2001/XMLSchema-instance"
 4          xsi:schemaLocation="http://maven.apache.org/POM/4.0.0 http://maven.apache.org/xsd/maven-4.0.0.xsd">
 5     <modelVersion>4.0.0</modelVersion>
 6
 7     <groupId>com.triheart</groupId>
 8     <artifactId>first-cloud-invoker</artifactId>
 9     <version>1.0-SNAPSHOT</version>
10
11     <dependencyManagement>
12         <dependencies>
13             <dependency>
14                 <groupId>org.springframework.cloud</groupId>
15                 <artifactId>spring-cloud-dependencies</artifactId>
16                 <version>Dalston.SR1</version>
17                 <type>pom</type>
18                 <scope>import</scope>
19             </dependency>
20         </dependencies>
21     </dependencyManagement>
22
23     <dependencies>
24         <dependency>
25             <groupId>org.springframework.cloud</groupId>
26             <artifactId>spring-cloud-starter-config</artifactId>
27         </dependency>
28         <dependency>
29             <groupId>org.springframework.cloud</groupId>
30             <artifactId>spring-cloud-starter-eureka</artifactId>
31         </dependency>
32         <dependency>
33             <groupId>org.springframework.cloud</groupId>
34             <artifactId>spring-cloud-starter-ribbon</artifactId>
35         </dependency>
36     </dependencies>
37
38 </project>
编写配置文件,将Eureka客户端的服务调用者注册两个Eureka服务器
application.yml代码清单
 1 server:
 2   port: 9000
 3 spring:
 4   application:
 5     name: first-cloud-invoker
 6 eureka:
 7   instance:
 8     hostname: localhost
 9   client:
10     service-url:
11       defaultZone: http://localhost:8761/eureka/,http://localhost:8762/eureka/
编写启动类以及控制类,控制器通过RestTemplate类的对象来访问服务提供者提供的服务
启动类FirstInvoker.java代码清单
 1 package com.triheart.firstcloudinvoker;
 2
 3 import org.springframework.boot.SpringApplication;
 4 import org.springframework.boot.autoconfigure.SpringBootApplication;
 5 import org.springframework.cloud.client.discovery.EnableDiscoveryClient;
 6
 7 /**
 8  * @author 阿遠
 9  * Date: 2018/8/24
10  * Time: 20:04
11  */
12 @SpringBootApplication
13 @EnableDiscoveryClient
14 public class FirstInvoker {
15
16     public static void main(String[] args) {
17         SpringApplication.run(FirstInvoker.class, args);
18     }
19 }
控制器InvokerController.java代码清单
 1 package com.triheart.firstcloudinvoker.controller;
 2
 3 import org.springframework.cloud.client.loadbalancer.LoadBalanced;
 4 import org.springframework.context.annotation.Bean;
 5 import org.springframework.context.annotation.Configuration;
 6 import org.springframework.http.MediaType;
 7 import org.springframework.web.bind.annotation.RequestMapping;
 8 import org.springframework.web.bind.annotation.RequestMethod;
 9 import org.springframework.web.bind.annotation.RestController;
10 import org.springframework.web.client.RestTemplate;
11
12 /**
13  * @author 阿遠
14  * Date: 2018/8/24
15  * Time: 20:07
16  */
17 @RestController
18 @Configuration
19 public class InvokerController {
20
21     @Bean
22     @LoadBalanced
23     public RestTemplate getRestTemplate() {
24         return new RestTemplate();
25     }
26
27     @RequestMapping(value = "/router", method = RequestMethod.GET, produces = MediaType.APPLICATION_JSON_VALUE)
28     public String router() {
29         RestTemplate restTpl = getRestTemplate();
30         // 根据应用名称调用服务
31         String json = restTpl.getForObject(
32                 "http://first-cloud-provider/person/1", String.class);
33         return json;
34     }
35 }
在浏览器中分别打开两个窗口访问http://localhost:9000/router,可以看到下图的效果


前后两次分别访问的是端口是8081和8080的服务提供者,此时已有负载均衡的效果,为了让负载均衡的效果看得更明显,我们编写一个REST客户端进行测试。
5.编写REST客户端进行测试
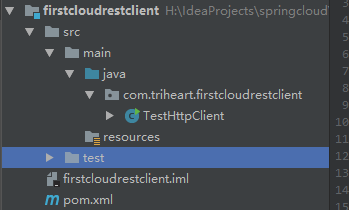
新建一个maven项目,项目的目录结构如下
引入httpclient的依赖
pom.xml代码清单
 1 <?xml version="1.0" encoding="UTF-8"?>
 2 <project xmlns="http://maven.apache.org/POM/4.0.0"
 3          xmlns:xsi="http://www.w3.org/2001/XMLSchema-instance"
 4          xsi:schemaLocation="http://maven.apache.org/POM/4.0.0 http://maven.apache.org/xsd/maven-4.0.0.xsd">
 5         <modelVersion>4.0.0</modelVersion>
 6
 7         <artifactId>first-cloud-rest-client</artifactId>
 8         <groupId>com.triheart</groupId>
 9         <version>1.0-SNAPSHOT</version>
10
11         <dependencies>
12             <dependency>
13                 <groupId>org.apache.httpcomponents</groupId>
14                 <artifactId>httpclient</artifactId>
15                 <version>4.5.2</version>
16             </dependency>
17         </dependencies>
18 </project>
编写启动类TestHttpClient.java,在main方法编写中调用REST服务的代码
TestHttpClient.java代码清单
 1 package com.triheart.firstcloudrestclient;
 2
 3 import org.apache.http.HttpResponse;
 4 import org.apache.http.client.methods.HttpGet;
 5 import org.apache.http.impl.client.CloseableHttpClient;
 6 import org.apache.http.impl.client.HttpClients;
 7 import org.apache.http.util.EntityUtils;
 8
 9 /**
10  * @author 阿遠
11  * Date: 2018/8/24
12  * Time: 20:48
13  */
14 public class TestHttpClient {
15
16     public static void main(String[] args) throws Exception {
17         // 创建默认的HttpClient
18         CloseableHttpClient httpclient = HttpClients.createDefault();
19         // 调用6次服务并输出结果
20         for(int i = 0; i < 6; i++) {
21             // 调用 GET 方法请求服务
22             HttpGet httpget = new HttpGet("http://localhost:9000/router");
23             // 获取响应
24             HttpResponse response = httpclient.execute(httpget);
25             // 根据 响应解析出字符串
26             System.out.println(EntityUtils.toString(response.getEntity()));
27         }
28     }
29 }
在main方法中,通过for循环调用了6次9000端口的route服务并输出结果。我们按以下顺序启动各个组件:
a.启动两个服务器端,在控制台分别输入slave1和slave2。
b.启动两个服务提供者,在控制台分别输入8080和8081。
c.启动服务调用者。
启动了整个集群后,运行TestHttpClient,就可以看到控制台上输出如下

此时,就有了明显的负载均衡的效果。