1、SpringMVC介绍
Spring Web MVC是一种基于Java的实现了Web MVC设计模式的请求驱动类型的轻量级Web框架,即使用了MVC架构模式的思想,将web层进行职责解耦,基于请求驱动指的就是使用请求-响应模型,框架的目的就是帮助我们简化开发,Spring Web MVC也是要简化我们日常Web开发的 Servlet进行Web开发。
2、SpringMVC执行流程

3、SpringMVC案例
3.1 导入依赖


<!-- https://mvnrepository.com/artifact/org.springframework/spring-webmvc -->
<dependency>
  <groupId>org.springframework</groupId>
  <artifactId>spring-webmvc</artifactId>
  <version>5.1.5.RELEASE</version>
</dependency>
<!-- https://mvnrepository.com/artifact/org.springframework/spring-web -->
<dependency>
  <groupId>org.springframework</groupId>
  <artifactId>spring-web</artifactId>
  <version>5.1.5.RELEASE</version>
</dependency>

<!-- https://mvnrepository.com/artifact/javax/javaee-api -->
<dependency>
  <groupId>javax</groupId>
  <artifactId>javaee-api</artifactId>
  <version>7.0</version>
  <scope>provided</scope>
</dependency>
3.2 SpringMVC案例(xml式)
(1)FirstController类
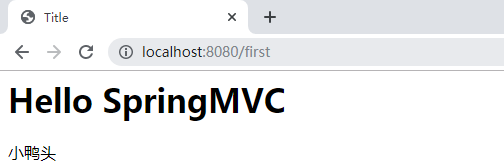
package com.springmvc.controller;

import org.springframework.web.servlet.ModelAndView;
import org.springframework.web.servlet.mvc.Controller;

import javax.servlet.http.HttpServletRequest;
import javax.servlet.http.HttpServletResponse;

public class FirstController implements Controller {
    /**
     * 处理请求
     * @param httpServletRequest   请求对象
     * @param httpServletResponse  响应对象
     * @return  ModelAndView  moedel是用来传递数据用的     View是 所需跳转的页面
     * @throws Exception
     */
    @Override
    public ModelAndView handleRequest(HttpServletRequest httpServletRequest, HttpServletResponse httpServletResponse) throws Exception {
        ModelAndView modelAndView=new ModelAndView();
        //携带给页面数据
        modelAndView.addObject("user","小鸭头");
        //指定跳转页面地址
        modelAndView.setViewName("index");

        return modelAndView;
    }

}
(2)Spring-mvc.xml
<?xml version="1.0" encoding="UTF-8"?>
<beans xmlns="http://www.springframework.org/schema/beans"
       xmlns:xsi="http://www.w3.org/2001/XMLSchema-instance" xmlns:mvc="http://www.springframework.org/schema/mvc"
       xmlns:context="http://www.springframework.org/schema/context"
       xsi:schemaLocation="http://www.springframework.org/schema/beans
       http://www.springframework.org/schema/beans/spring-beans.xsd http://www.springframework.org/schema/mvc http://www.springframework.org/schema/mvc/spring-mvc.xsd http://www.springframework.org/schema/context http://www.springframework.org/schema/context/spring-context.xsd">
    <!--配置视图解析器-->
    <bean class="org.springframework.web.servlet.view.InternalResourceViewResolver">
        <property name="prefix" value="/jsp/"></property>
        <!--return "index"  /jsp/.jsp-->
        <property name="suffix" value=".jsp"></property>
    </bean>

    <!--将Controller注入到容器中   -->
    <bean id="/first" class="com.springmvc.controller.FirstController"></bean>
</beans>
(3)web.xml
<?xml version="1.0" encoding="UTF-8"?>
<web-app xmlns="http://xmlns.jcp.org/xml/ns/javaee"
         xmlns:xsi="http://www.w3.org/2001/XMLSchema-instance"
         xsi:schemaLocation="http://xmlns.jcp.org/xml/ns/javaee
         http://xmlns.jcp.org/xml/ns/javaee/web-app_4_0.xsd"
         version="4.0">
  <servlet>
    <servlet-name>SpringMVC</servlet-name>
    <servlet-class>org.springframework.web.servlet.DispatcherServlet</servlet-class>
    <init-param>
      <param-name>contextConfigLocation</param-name>
      <param-value>classpath:spring-mvc.xml</param-value>
    </init-param>
  </servlet>

  <servlet-mapping>
    <servlet-name>SpringMVC</servlet-name>
    <url-pattern>/</url-pattern>
  </servlet-mapping>
</web-app>
(4)index.jsp
<%--
  Created by IntelliJ IDEA.
  User: zheng
  Date: 2019/11/5
  Time: 17:05
  To change this template use File | Settings | File Templates.
--%>
<%@ page contentType="text/html;charset=UTF-8" language="java" isELIgnored="false" %>
<html>
<head>
    <title>Title</title>
</head>
<body>
<h1>Hello SpringMVC</h1>
${user}<br/>
</body>
</html>
(5)页面效果
3.3 SpringMVC案例(注解式)
(1)HelloWorldController
package com.springmvc.controller;

import org.springframework.stereotype.Controller;
import org.springframework.web.bind.annotation.RequestMapping;
import org.springframework.web.bind.annotation.ResponseBody;

import javax.annotation.Resource;

@Controller   //标识该类为一个控制器
public class HelloWorldController {

    //RequestMapping设置处理器方法与用户请求的URL直接的映射关系 @WebServlet
    @RequestMapping("/hello")
    public String toIndex(){
        return "index";
    }
}
(2)spring-mvc.xml
<?xml version="1.0" encoding="UTF-8"?>
<beans xmlns="http://www.springframework.org/schema/beans"
       xmlns:xsi="http://www.w3.org/2001/XMLSchema-instance" xmlns:mvc="http://www.springframework.org/schema/mvc"
       xmlns:context="http://www.springframework.org/schema/context"
       xsi:schemaLocation="http://www.springframework.org/schema/beans
       http://www.springframework.org/schema/beans/spring-beans.xsd http://www.springframework.org/schema/mvc http://www.springframework.org/schema/mvc/spring-mvc.xsd http://www.springframework.org/schema/context http://www.springframework.org/schema/context/spring-context.xsd">
    <!--配置视图解析器-->
    <bean class="org.springframework.web.servlet.view.InternalResourceViewResolver">
        <property name="prefix" value="/jsp/"></property>
        <!--return "index"  /jsp/.jsp-->
        <property name="suffix" value=".jsp"></property>
    </bean>

    <!--开启MVC的注解配置-->
    <mvc:annotation-driven/>

    <!--包扫描器  扫描MVC中的注解-->
    <context:component-scan base-package="com.springmvc"></context:component-scan>
</beans>
(3)web.xml
<?xml version="1.0" encoding="UTF-8"?>
<web-app xmlns="http://xmlns.jcp.org/xml/ns/javaee"
         xmlns:xsi="http://www.w3.org/2001/XMLSchema-instance"
         xsi:schemaLocation="http://xmlns.jcp.org/xml/ns/javaee
         http://xmlns.jcp.org/xml/ns/javaee/web-app_4_0.xsd"
         version="4.0">
  <servlet>
    <servlet-name>SpringMVC</servlet-name>
    <servlet-class>org.springframework.web.servlet.DispatcherServlet</servlet-class>
    <init-param>
      <param-name>contextConfigLocation</param-name>
      <param-value>classpath:spring-mvc.xml</param-value>
    </init-param>
  </servlet>

  <servlet-mapping>
    <servlet-name>SpringMVC</servlet-name>
    <url-pattern>/</url-pattern>
  </servlet-mapping>
</web-app>
(4)index.jsp
<%--
  Created by IntelliJ IDEA.
  User: zheng
  Date: 2019/11/5
  Time: 17:05
  To change this template use File | Settings | File Templates.
--%>
<%@ page contentType="text/html;charset=UTF-8" language="java" isELIgnored="false" %>
<html>
<head>
    <title>Title</title>
</head>
<body>
<h1>Hello SpringMVC</h1>
${user}<br/>
</body>
</html>
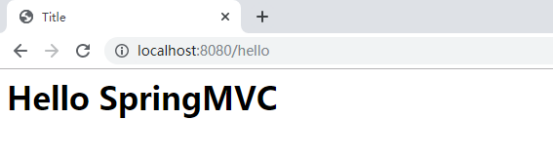
(5)页面效果
4、Spring MVC静态资源拦截的问题
4.1 案例情况
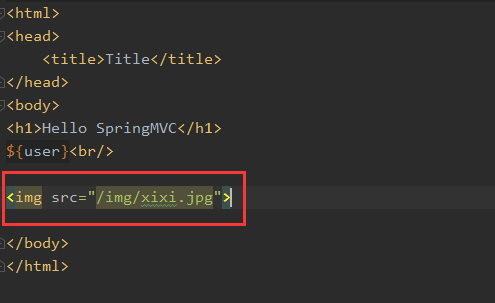
在上述案例中加入对应的图片
再次访问页面(图片无法展示)
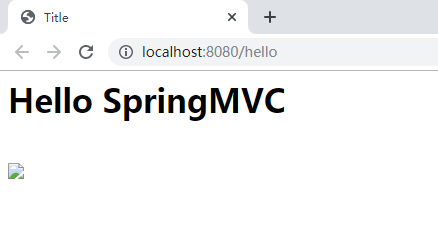
解决方案如下:
4.2配置web.xml文件
<!--方式一-->
<!--基于DefaultServlet:默认访问前会执行DefaultServlet-->
<servlet-mapping>
  <servlet-name>default</servlet-name>
  <url-pattern>*.png</url-pattern>
</servlet-mapping>
<servlet-mapping>
  <servlet-name>default</servlet-name>
  <url-pattern>*.jpg</url-pattern>
</servlet-mapping>
<servlet-mapping>
  <servlet-name>default</servlet-name>
  <url-pattern>*.gif</url-pattern>
</servlet-mapping>
4.3配置spring-mvc.xml文件
<!--方式二-->
<!--利用default-servlet放行资源-->
<mvc:default-servlet-handler/>
4.4配置spring-mvc.xml文件
<!--方式三-->
<mvc:resources mapping="/**" location="/img"/>