组件复用
React组件复用概述
- 思考:如果两个组件中的部分功能相似或相同,该如何处理?
- 处理方式:复用相似的功能
- 复用什么?
- state
- 操作state的方法
- 两种方式:
- render props模式
- 高阶组件(HOC)
- 注意: 这两种方式不是新的API,而是利用React自身特点的编码技巧,演化而成的固定模式
1- render-props模式
- 思路:将要复用的state和操作state的方法封装到一个组件中
- 如何拿到该组件中复用的state
- 在使用组件时,添加一个值为函数的prop,通过函数参数来获取
-
<Component render={(props) =>{}} />
- 如何渲染到任意的UI
- 使用该函数的返回值作为要渲染的UI内容
-
<Component render={(props) =>
	<p>{props.attributeA} --- {props.attributeB}</p>
} />
使用步骤
- 创建Mouse组件,在组件中提供复用的逻辑代码
- 将要复用的状态作为 props.render(state)方法的参数,暴露到组件外部
- 使用props.render() 的返回值作为要渲染的内容
children代替render属性
- 注意:并不是该模式叫 render props就必须使用名为render的prop,实际上可以使用任意名称的prop
- 把prop是一个函数并且告诉组件要渲染什么内容的技术叫做: render props模式
- 推荐:使用childre代替render属性
优化代码
-
推荐给render props模式添加props校验
-
移除鼠标事件的监听
// 添加校验规则
Mouse.propTypes = {
children: PropTypes.func.isRequired
};// 在组件卸载时移除事件绑定
componentWillUnmount() {
window.removeEventListener('mousemove', this.handleMousMove)
}
code
// 导入图片资源
import img from './res/img/9d82d158ccbf6c814204fcabbf3eb13533fa4046.gif'
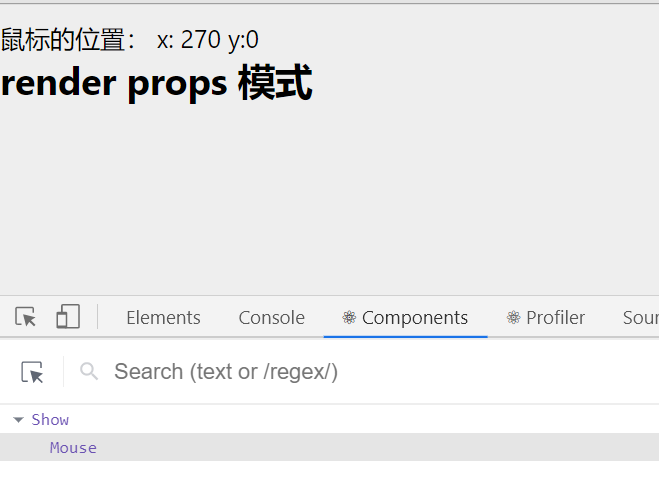
/* render props 模式*/
// 创建mouse组件
class Mouse extends React.Component {
// 鼠标位置
state = {
x: 0,
y: 0
};
handleMousMove = (e) =>{
console.log(e);
this.setState({
x: e.clientX,
y: e.clientY
})
};
// 监听鼠标移动事件
componentDidMount() {
window.addEventListener('mousemove', this.handleMousMove)
}
// 在组件卸载时移除事件绑定
componentWillUnmount() {
window.removeEventListener('mousemove', this.handleMousMove)
}
render() {
return this.props.children(this.state)
}
}
// 添加校验规则
Mouse.propTypes = {
children: PropTypes.func.isRequired
};
class Show extends React.Component {
render() {
return (
<div>
{/* <Mouse render={(mouse) => {
return <p>鼠标的位置: x: {mouse.x} y:{mouse.y} </p>
}}/>*/}
<h2>render props 模式</h2>
{/* children*/}
<Mouse >
{ (mouse) => {
return <p>use children 鼠标的位置: x: {mouse.x} y:{mouse.y} </p>
}}
</Mouse>
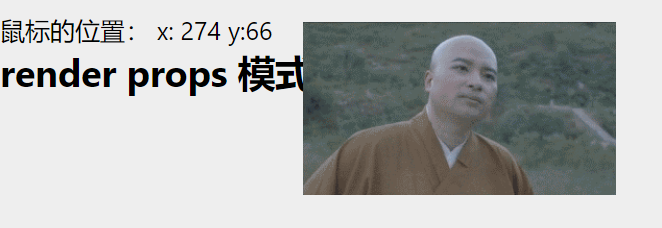
{/* pic 图片跟随鼠标移动 */}
{/*<Mouse render={(mouse) => {
return <img src={img} alt="pic" style={{position: 'absolute', top: mouse.y - 50, left: mouse.x - 80, '200px',}} />
}}/>*/}
<Mouse>
{(mouse) => {
return <img src={img} alt="pic" style={{position: 'absolute', top: mouse.y - 50, left: mouse.x - 80, '200px',}} />
}}
</Mouse>
</div>
)
}
}
ReactDOM.render(<Show/>, document.getElementById('root'));
2 - 高阶组件 (★★★)
目标
- 知道高阶组件的作用
- 能够说出高阶的使用步骤
概述
- 目的:实现状态逻辑复用
- 采用 包装模式
- 手机:获取保护功能
- 手机壳:提供保护功能
- 高阶组件就相当于手机壳,通过包装组件,增强组件功能
思路分析
- 高阶组件(HOC、Higher-Order Component) 是一个函数,接收要包装的组件,返回增强后的组件
const EnhancedComponent = withHOC(WrappedComponent) - 高阶组件内部创建了一个类组件,在这个类组件中提供复用的状态逻辑代码,通过prop将复用的状态传递给被包装组件WrappedComponent
// 高阶组件内部创建的类组件
class Mouse extends React.Component {
render() {
return (
<EnhancedComponent {...this.state} />
      )
  }
}
使用步骤
-
创建一个函数,名称约定以with开头
-
指定函数参数,参数应该以大写字母开头
-
在函数内部创建一个类组件,提供复用的状态逻辑代码,并返回
function withMouse(WrappedComponent){
class Mouse extends React.Component {}
return Mouse
} -
在该组件中,渲染参数组件,同时将状态通过prop传递给参数组件
-
调用该高阶组件,传入要增强的组件,通过返回值拿到增强后的组件,并将其渲染到页面
/* 高阶组件*/
// 导入图片资源
import img from './res/img/9d82d158ccbf6c814204fcabbf3eb13533fa4046.gif'
// 创建高阶组件
function withMouse(WrappedComponent){
// 该组件提供复用的状态逻辑
class Mouse extends React.Component {
// 鼠标状态
state = {
x: 0,
y: 0
}
// 控制鼠标状态的逻辑
handleMouseMove = (e) =>{
// console.log(e);
this.setState({
x: e.clientX,
y: e.clientY
})
};
// 监听鼠标移动事件
componentDidMount() {
window.addEventListener('mousemove', this.handleMouseMove)
}// 在组件卸载时移除事件绑定 componentWillUnmount() { window.removeEventListener('mousemove', this.handleMouseMove) } render() { return <WrappedComponent {...this.state} {...this.props}/> } } // 设置diaplayName Mouse.displayName = `WithMouse${getDisplayName(WrappedComponent)}`; return Mouse}
function getDisplayName(WrappedComponent) {
return WrappedComponent.displayName || WrappedComponent.name || 'Component'
}// 测试组件
const Position = props => {
return鼠标的位置: x: {props.x} y:{props.y}
};
const PicMove = props => (
<img src={img} alt="pic" style={{position: 'absolute', top: props.y - 50, left: props.x - 80, '200px',}} />
);// 获取增强后的组件
const MousePosition = withMouse(Position);// 图片跟随鼠标移动
const PicPosition = withMouse(PicMove);class Show extends React.Component {
render() {
return (
高阶组件
{/* 渲染高阶组件*/}
) }}
ReactDOM.render(
, document.getElementById('root'));
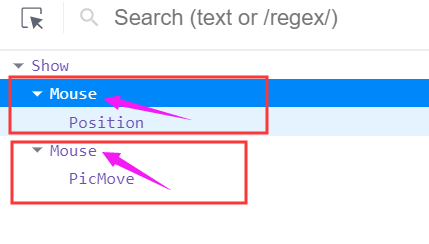
设置displayName
-
使用高阶组件存在的问题:得到两个组件的名称相同(React默认使用组件的名称为displayname)
-
原因:默认情况下,React使用组件名称作为displayName
-
解决方式:为高阶组件设置displayName,便于调试时区分不同的组件
-
displayName的作用:用于设置调试信息(React Developer Tools信息)
-
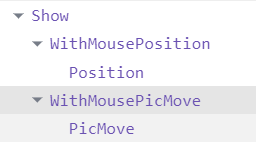
设置方式:
// 设置diaplayName
Mouse.displayName =WithMouse${getDisplayName(WrappedComponent)};function getDisplayName(WrappedComponent) {
return WrappedComponent.displayName || WrappedComponent.name || 'Component'
}

传递props
-
问题:如果没有传递props,会导致props丢失问题
-
解决方式: 渲染WrappedComponent时,将state和props一起传递给组件
render() {
return <WrappedComponent {...this.state} {...this.props}/>
}
React 组件进阶:
- 组件通讯是构建React应用必不可少的一环
- props的灵活性让组件更加强大
- 状态提升是React组件的常用模式
- 组件生命周期有助于理解组件的运行过程
- 钩子函数让开发者可以在特定的时机执行某些功能
- render props 模式和高阶组件都可以实现组件状态逻辑的复用
- 组件极简模型: (state,props) => UI