1.项目创建
使用Visual Studio 2019 创建一个Asp.NetCore WebApplication 并选择MVC项目命名为OnePublish。

确认运行无误后我们来探讨一下Asp.NetCore项目的运行启动方式以及他与Asp.Net的区别。
2.项目运行
IIS Express运行效果:
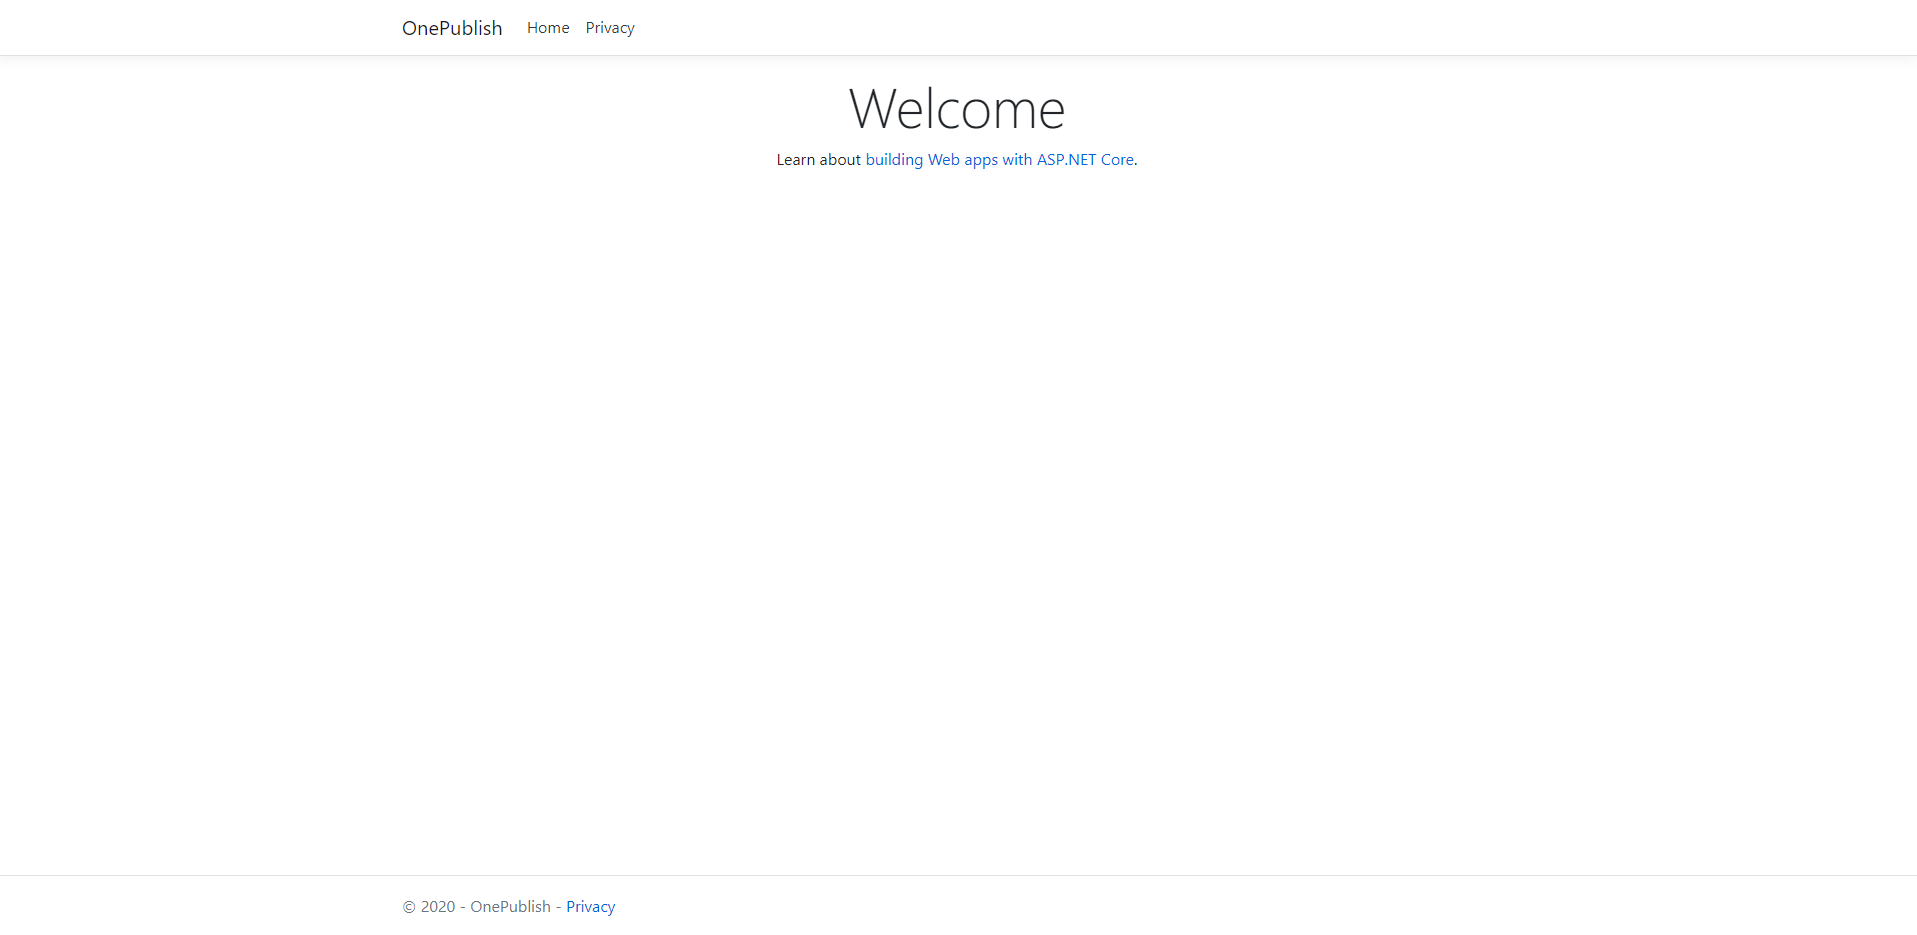
结果不出乎意料和Asp.Net相似都能成功的运行Web项目,但在Asp.NetCore中新增了一种使用CommandLine运行的方式,我们可以从配置文件或者VS设置中可以看出。
项目属性设置:

LaunchSettings.json
 1 {
 2   "iisSettings": {
 3     "windowsAuthentication": false,
 4     "anonymousAuthentication": true,
 5     "iisExpress": {
 6       "applicationUrl": "http://localhost:54012",
 7       "sslPort": 0
 8     }
 9   },
10   "profiles": {
11     "IIS Express": {
12       "commandName": "IISExpress",
13       "launchBrowser": true,
14       "environmentVariables": {
15         "ASPNETCORE_ENVIRONMENT": "Development"
16       }
17     },
18     "OnePublish": {
19       "commandName": "Project",
20       "launchBrowser": true,
21       "applicationUrl": "http://localhost:5000",
22       "environmentVariables": {
23         "ASPNETCORE_ENVIRONMENT": "Development"
24       }
25     }
26   }
27 }
我们可以看见以"OnePublish"为名的CommandLine也可以成功运行Web项目,那Asp.NetCore是如何做到从命令行实现Web项目的呢?
原因在于ASP.NET Core不再是由IIS工作进程(w3wp.exe)托管,而是使用自托管Web服务器(Kestrel)运行,IIS则是作为反向代理的角色转发请求到Kestrel不同端口的ASP.NET Core程序中,随后就将接收到的请求推送至中间件管道中去,处理完你的请求和相关业务逻辑之后再将HTTP响应数据重新回写到IIS中,最终转达到不同的客户端(浏览器,APP,客户端等)。
官方文档图解:
Kestrel used as an edge (Internet-facing) web server:

Kestrel used in a reverse proxy configuration:

我的理解为:当Kestrel作为Eage Server监听某一个ip或者端口时,它可以接受所有由该端口发送的信息并解决他们的请求。但当有反向代理的存在时如(IIS,Nginx,Apache),反向代理可以接受多个Kestrel托管的端口来接受他们的信息并完成他们的请求。总结来说在Asp.NetCore中Kestrel已经组成一个完整的生态,而代理服务器大多起一个监听的作用了。那Kestrel在哪里启动的呢?
首先我们来观察一下这两个类文件。

Program.cs:
 1 using Microsoft.AspNetCore.Hosting;
 2 using Microsoft.Extensions.Hosting;
 3
 4 namespace OnePublish
 5 {
 6     public class Program
 7     {
 8         public static void Main(string[] args)
 9         {
10             CreateHostBuilder(args).Build().Run();
11         }
12
13         public static IHostBuilder CreateHostBuilder(string[] args) =>
14             Host.CreateDefaultBuilder(args)
15                 .ConfigureWebHostDefaults(webBuilder =>
16                 {
17                     webBuilder.UseStartup<Startup>();
18                 });
19     }
20 }
我们知道Main函数一般为程序的入口。在此函数中我们可以看见是调用了一系列方法,这可能还不够简单明了,我们对此方法做一点简化。
1 public static void Main(string[] args)
2         {
3             var hostBuilder = CreateHostBuilder(args);
4             var host = hostBuilder.Build();
5             host.Run();
6         }
现在我们可以理解为它使用CreateHsotBuilder()方法创建了一个hostBuilder,在利用hostBuilder创建了一个host主机实体对象,在Run这个Host主机。
那么这个HostBuiler到底做了什么配置又创建了一些什么东西呢?
我们对源码进行解读一下:
 1 public static IHostBuilder CreateDefaultBuilder(string[] args)
 2     {
 3       HostBuilder hostBuilder = new HostBuilder();
 4       hostBuilder.UseContentRoot(Directory.GetCurrentDirectory());
 5       hostBuilder.ConfigureHostConfiguration((Action<IConfigurationBuilder>) (config =>
 6       {
 7         config.AddEnvironmentVariables("DOTNET_");
 8         if (args == null)
 9           return;
10         config.AddCommandLine(args);
11       }));
12       hostBuilder.ConfigureAppConfiguration((Action<HostBuilderContext, IConfigurationBuilder>) ((hostingContext, config) =>
13       {
14         IHostEnvironment hostingEnvironment = hostingContext.HostingEnvironment;
15         config.AddJsonFile("appsettings.json", true, true).AddJsonFile("appsettings." + hostingEnvironment.EnvironmentName + ".json", true, true);
16         if (hostingEnvironment.IsDevelopment() && !string.IsNullOrEmpty(hostingEnvironment.ApplicationName))
17         {
18           Assembly assembly = Assembly.Load(new AssemblyName(hostingEnvironment.ApplicationName));
19           if (assembly != (Assembly) null)
20             config.AddUserSecrets(assembly, true);
21         }
22         config.AddEnvironmentVariables();
23         if (args == null)
24           return;
25         config.AddCommandLine(args);
26       })).ConfigureLogging((Action<HostBuilderContext, ILoggingBuilder>) ((hostingContext, logging) =>
27       {
28         int num = RuntimeInformation.IsOSPlatform(OSPlatform.Windows) ? 1 : 0;
29         if (num != 0)
30           logging.AddFilter<EventLogLoggerProvider>((Func<LogLevel, bool>) (level => level >= LogLevel.Warning));
31         logging.AddConfiguration((IConfiguration) hostingContext.Configuration.GetSection("Logging"));
32         logging.AddConsole();
33         logging.AddDebug();
34         logging.AddEventSourceLogger();
35         if (num == 0)
36           return;
37         logging.AddEventLog();
38       })).UseDefaultServiceProvider((Action<HostBuilderContext, ServiceProviderOptions>) ((context, options) =>
39       {
40         bool flag = context.HostingEnvironment.IsDevelopment();
41         options.ValidateScopes = flag;
42         options.ValidateOnBuild = flag;
43       }));
44       return (IHostBuilder) hostBuilder;
45     }
可以看到它对路径做了一个默认的规定,并的确的使用的CommandLine并可接受参数,这也是为什么我们可以通过CommandLine控制Web程序的原因,还有对appsettings.json文件的引用,从这里我们可以看出我们也是可以自定义配置文件的。还添加了Logging这些基本功能。
继续向源码解读可以看到在ConfigureWebDefaults方法中,Asp.NetCore确实使用了Kestrel并对他的一些option进行了默认的规定。到这里我们就基本了明白了Asp.NetCore WebApplication的启动流程了。
internal static void ConfigureWebDefaults(IWebHostBuilder builder)
    {
      builder.ConfigureAppConfiguration((Action<WebHostBuilderContext, IConfigurationBuilder>) ((ctx, cb) =>
      {
        if (!ctx.HostingEnvironment.IsDevelopment())
          return;
        StaticWebAssetsLoader.UseStaticWebAssets(ctx.HostingEnvironment, ctx.Configuration);
      }));
      builder.UseKestrel((Action<WebHostBuilderContext, KestrelServerOptions>) ((builderContext, options) => options.Configure((IConfiguration) builderContext.Configuration.GetSection("Kestrel")))).ConfigureServices((Action<WebHostBuilderContext, IServiceCollection>) ((hostingContext, services) =>
      {
        services.PostConfigure<HostFilteringOptions>((Action<HostFilteringOptions>) (options =>
        {
          if (options.AllowedHosts != null && options.AllowedHosts.Count != 0)
            return;
          string str = hostingContext.Configuration["AllowedHosts"];
          string[] strArray1;
          if (str == null)
            strArray1 = (string[]) null;
          else
            strArray1 = str.Split(new char[1]{ ';' }, StringSplitOptions.RemoveEmptyEntries);
          string[] strArray2 = strArray1;
          HostFilteringOptions filteringOptions = options;
          string[] strArray3;
          if (strArray2 == null || strArray2.Length == 0)
            strArray3 = new string[1]{ "*" };
          else
            strArray3 = strArray2;
          filteringOptions.AllowedHosts = (IList<string>) strArray3;
        }));
        services.AddSingleton<IOptionsChangeTokenSource<HostFilteringOptions>>((IOptionsChangeTokenSource<HostFilteringOptions>) new ConfigurationChangeTokenSource<HostFilteringOptions>(hostingContext.Configuration));
        services.AddTransient<IStartupFilter, HostFilteringStartupFilter>();
        if (string.Equals("true", hostingContext.Configuration["ForwardedHeaders_Enabled"], StringComparison.OrdinalIgnoreCase))
        {
          services.Configure<ForwardedHeadersOptions>((Action<ForwardedHeadersOptions>) (options =>
          {
            options.ForwardedHeaders = ForwardedHeaders.XForwardedFor | ForwardedHeaders.XForwardedProto;
            options.KnownNetworks.Clear();
            options.KnownProxies.Clear();
          }));
          services.AddTransient<IStartupFilter, ForwardedHeadersStartupFilter>();
        }
        services.AddRouting();
      })).UseIIS().UseIISIntegration();
    }
3.区别:
在我看来Asp.Net就像一个全家桶,在我默认使用框架中基本上包含了所有进行Web开发的框架如HttpContext,Session等。而Asp.NetCore更像是一个自选桶你可以在StartUp.cs中自定义的添加你需要的Services。在我看来,Asp.NetCore变得更加透明和更加灵活了。
4.部署和发布。
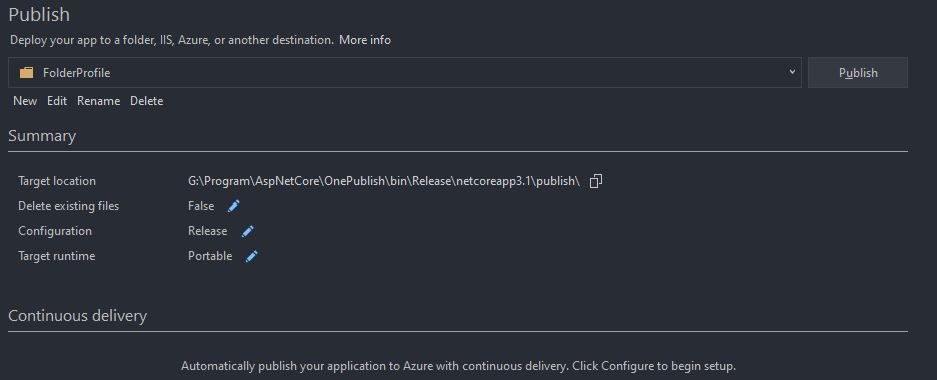
1. 我们将此项目用文件系统打包部署到本地即可。点击Publish即可。

2. 确保打开Windows的IIS服务。
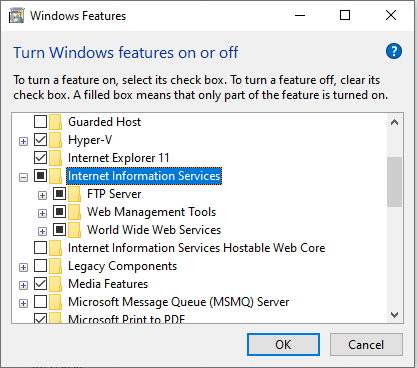
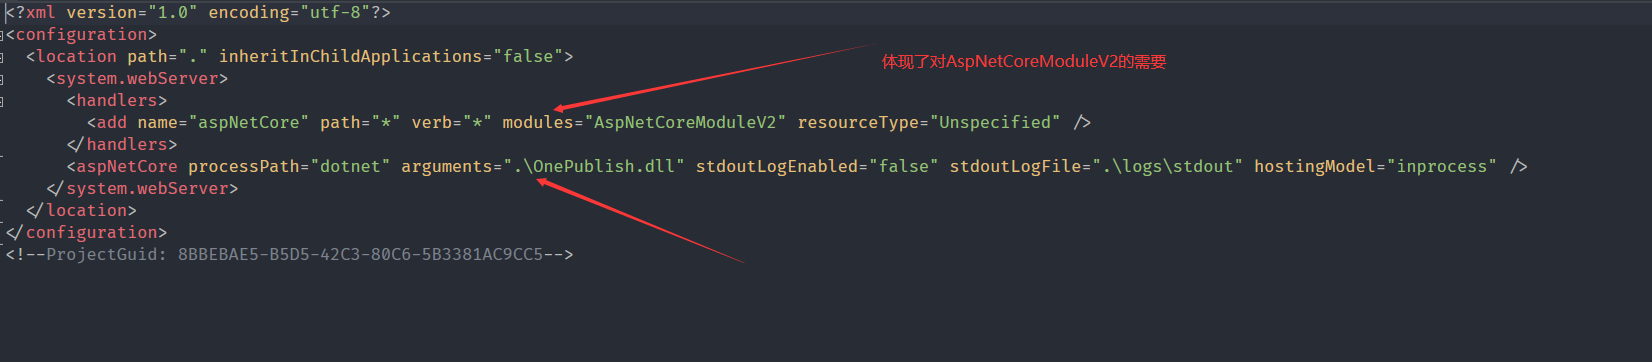
确保IIS中安装了AspNetCoreModule.
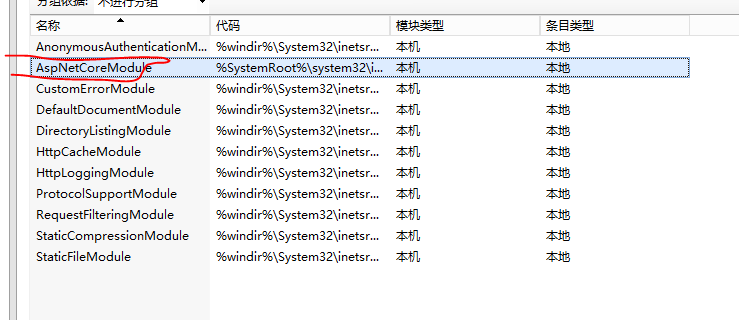
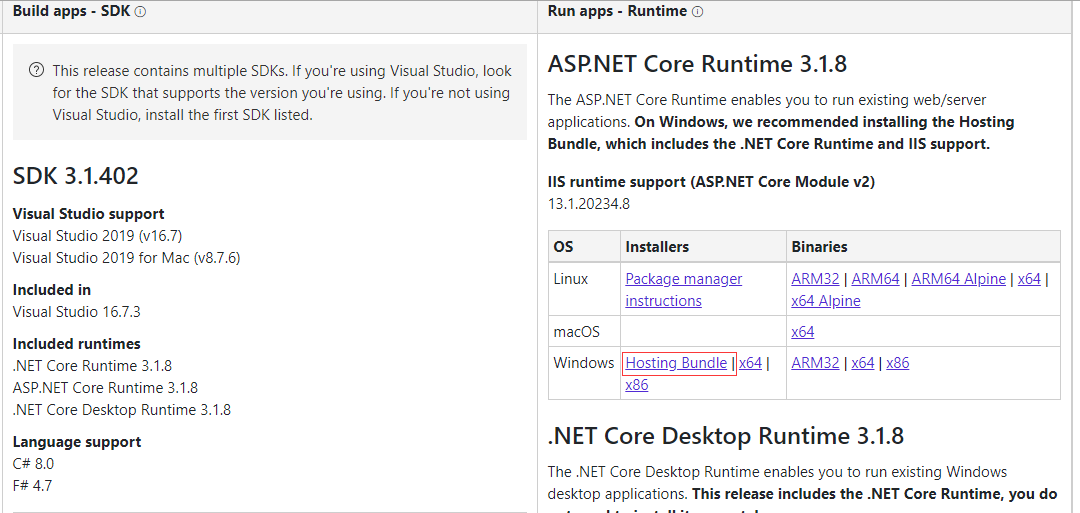
若无安装(去安装):下载安装即可
现在来添加IIS服务

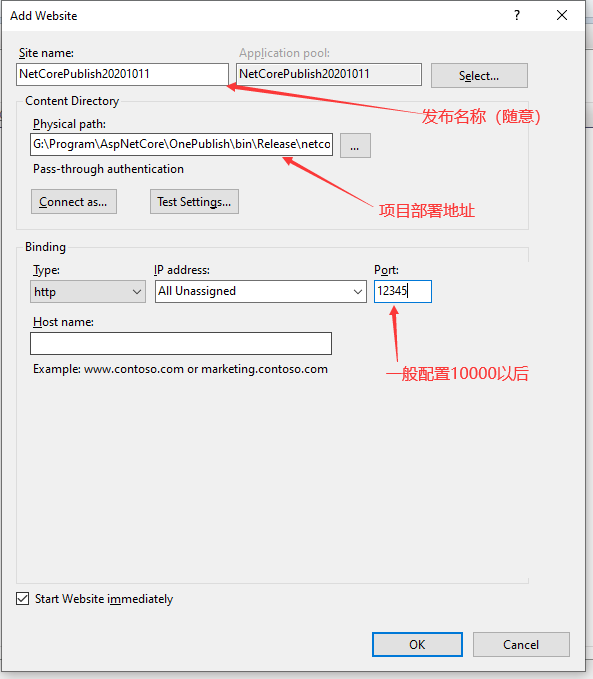

运行成功,即发布成功了。
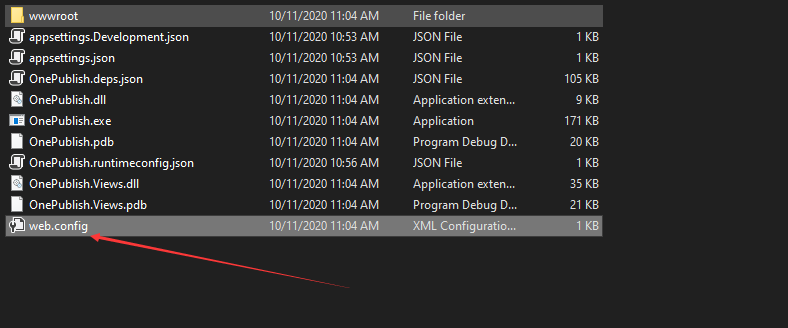
若不能成功运行请检查部署目录中是否有此文件。