一、环境准备:
1、安装allure
2、安装allure-pytest:pip install allure-pytest
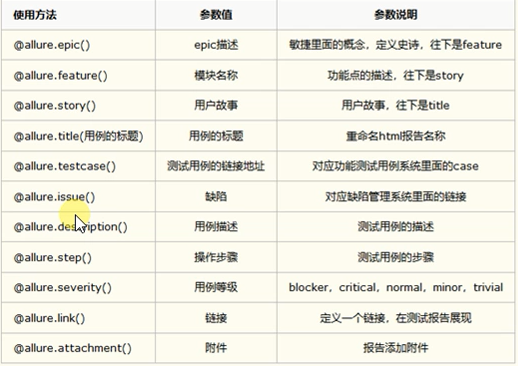
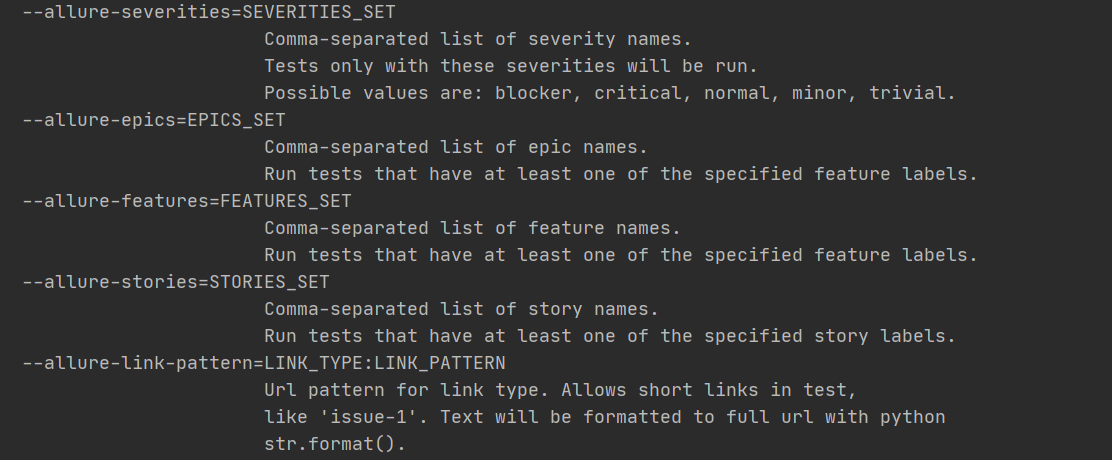
二、allure基本参数说明
三、实践代码
#conftest.py
import pytest


@pytest.fixture(scope="session")
def login_fixture():
    """需要先登录"""
    print("前置条件")
    yield
    print("后置条件")
#steps.py
import allure


@allure.step("步骤1")
def step1():
    pass


@allure.step("步骤2")
def step2():
    pass


@allure.step("步骤3")
def step3():
    pass
#test_demo.py
import pytest
import allure

from test_allure.step import step1, step2, step3


@allure.feature("用户管理模块")
class TestDemo():
    @allure.story("测试用例标题")
    @allure.issue("http://bug.html")
    @allure.testcase("http://testcase.html")
    def test_update(self):
        """测试更新接口"""
        print("测试更新接口")
        step1()
        step2()
        step3

    @allure.story("测试用例标题1")
    @allure.issue("http://bug1.html")
    @allure.testcase("http://testcase1.html")
    def test_del(self):
        """测试删除接口"""
        print("测试删除接口")
        step1()
        step2()
        step3


@allure.feature("商品管理模块")
class TestDemo1():
    @allure.story("测试用例标题")
    @allure.issue("http://bug.html")
    @allure.testcase("http://testcase.html")
    @allure.severity("blocker")
    def test_update(self):
        """测试更新接口"""
        print("测试更新接口")
        step1()
        step2()
        step3

    @allure.story("测试用例标题1")
    @allure.issue("http://bug1.html")
    @allure.testcase("http://testcase1.html")
    @allure.severity("critical")
    def test_del(self):
        """测试删除接口"""
        print("测试删除接口")
        step1()
        step2()
        step3
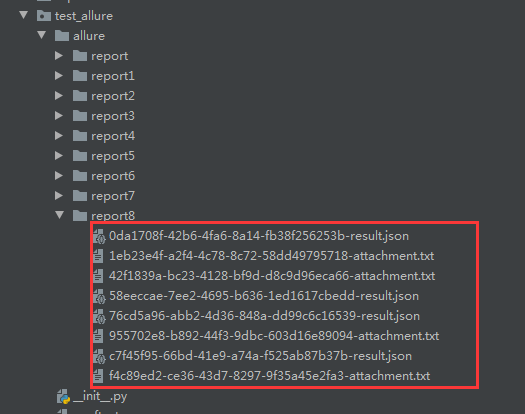
命令行执行pytest命令生成allure的测试报告
pytest --alluredir ./allure/report8
可以看到生成的是json、txt格式的数据
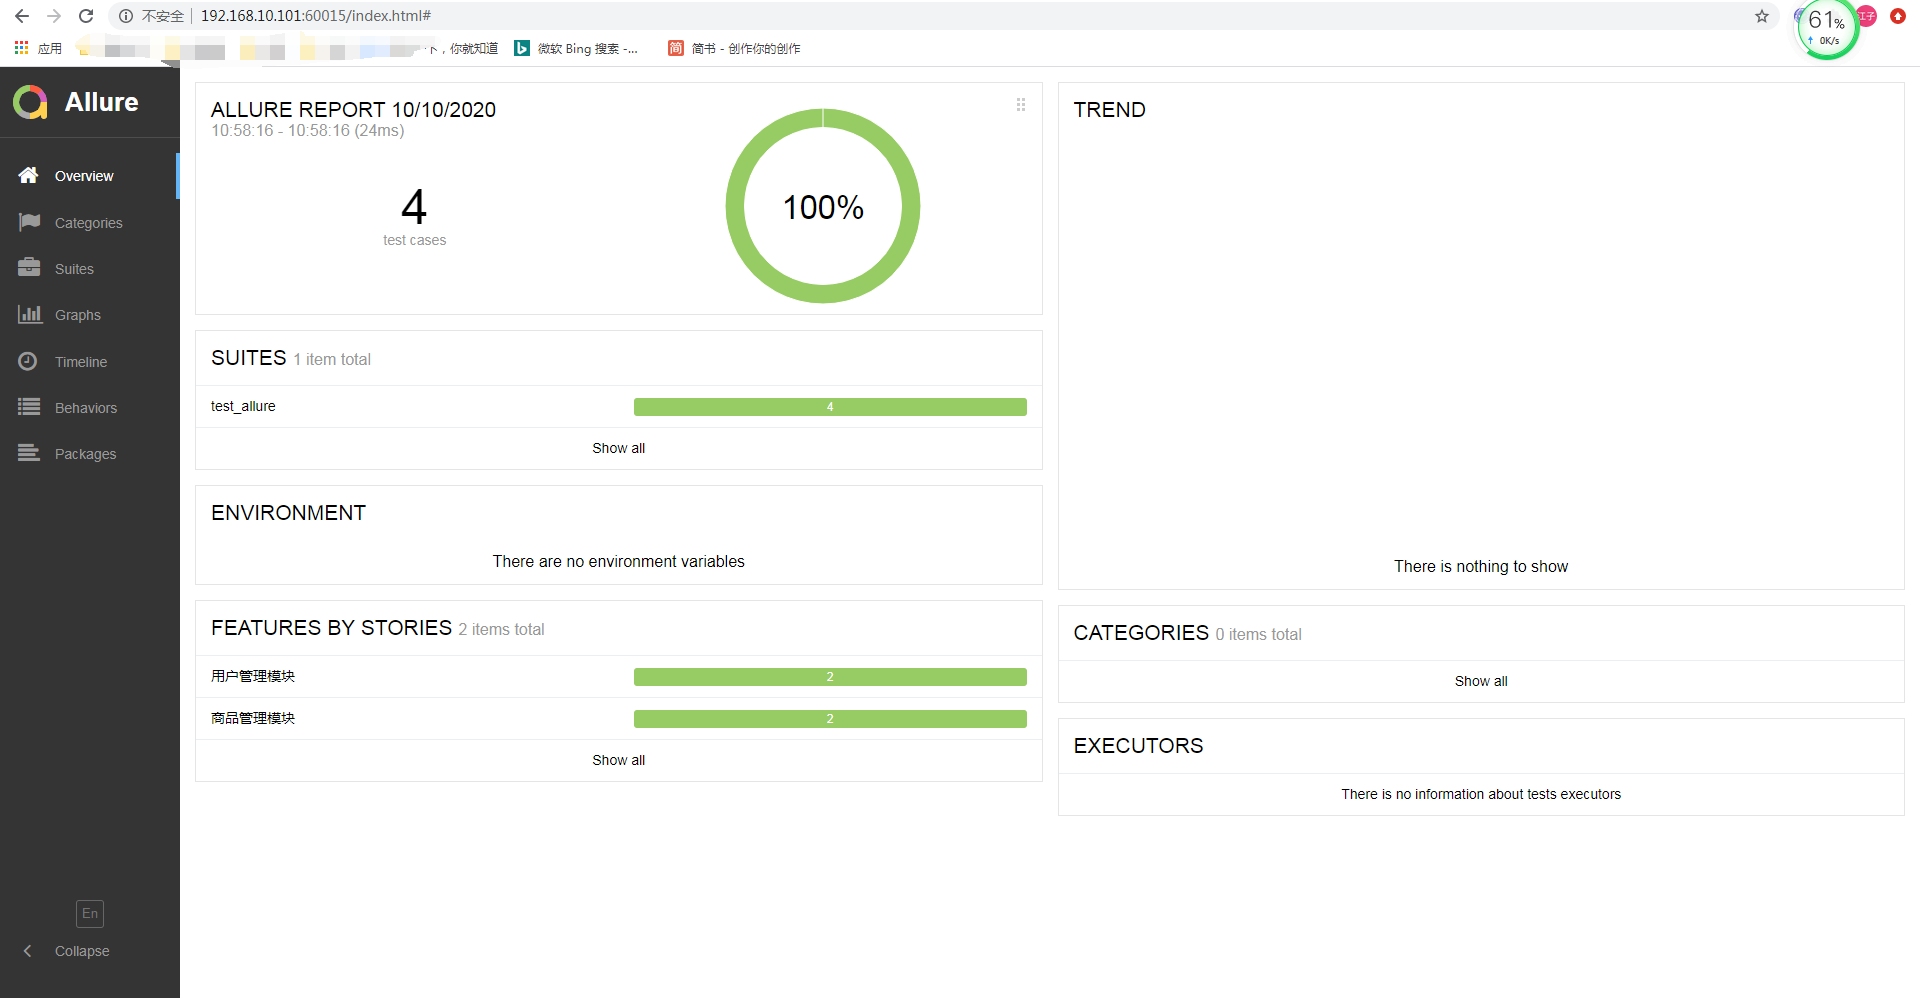
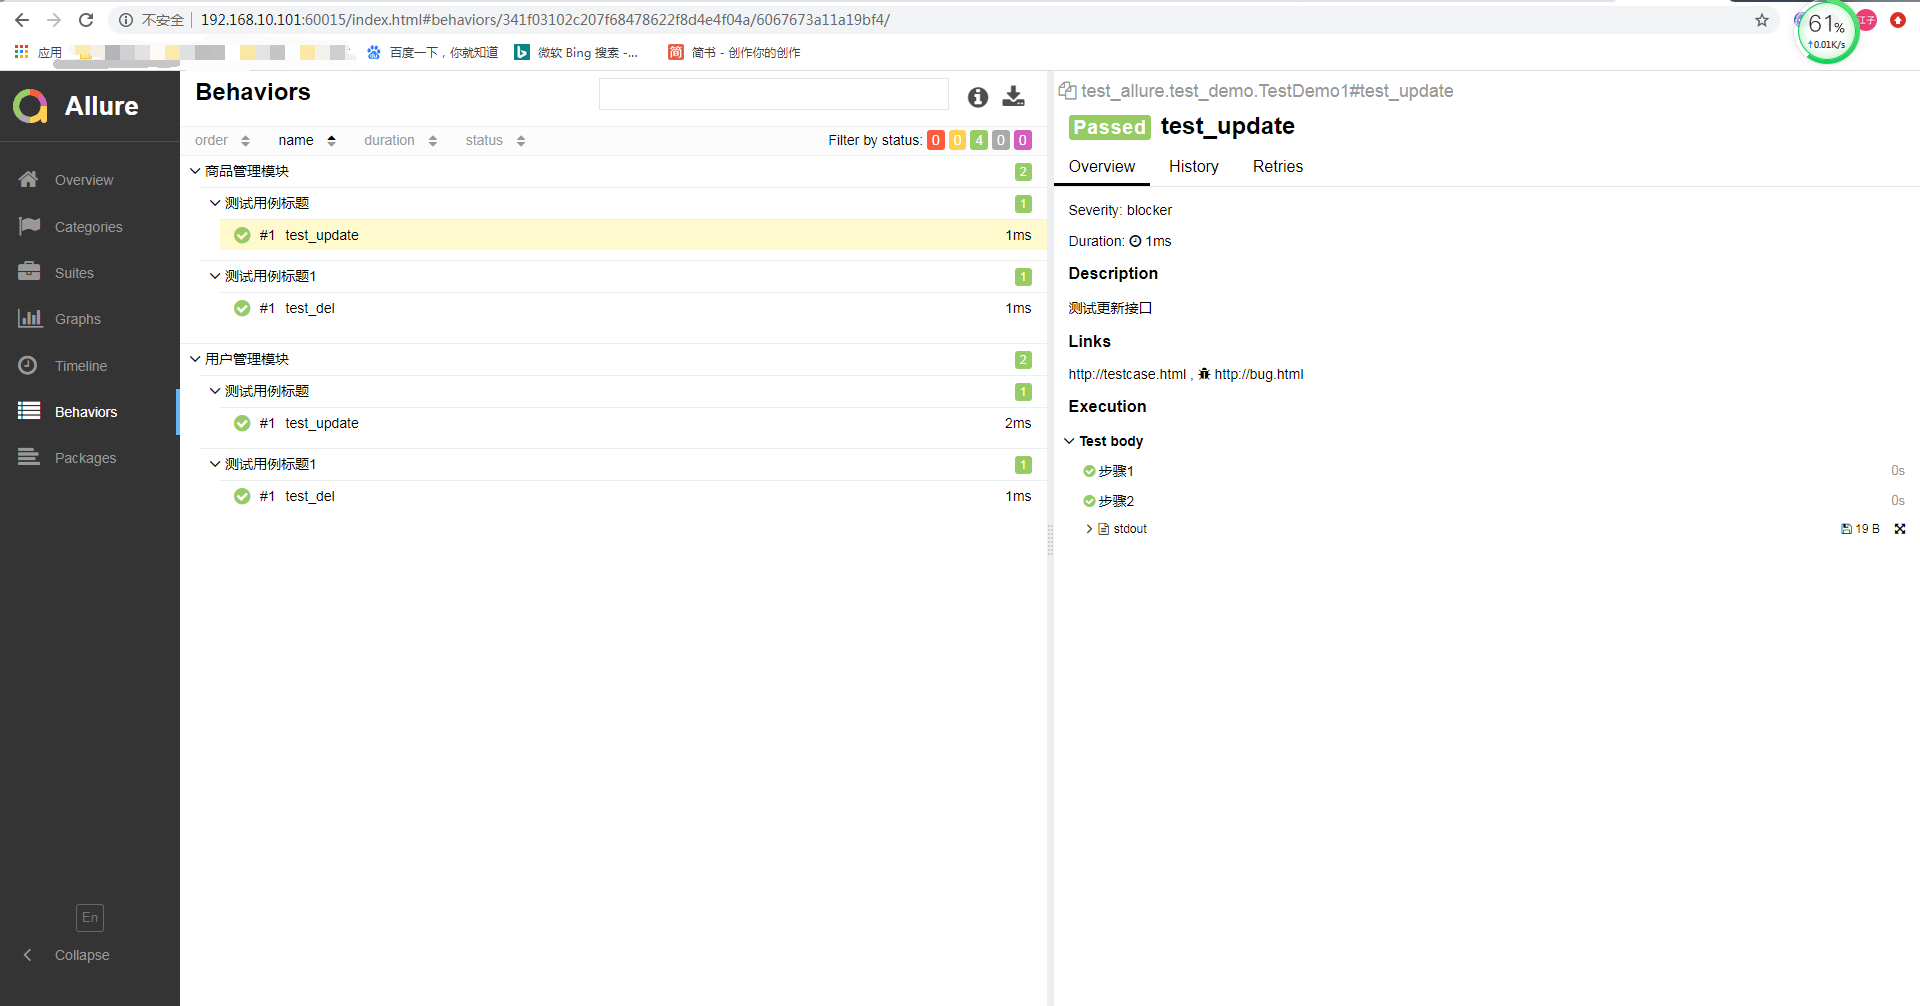
在命令行执行allure命令,启动一个web服务,将上一步生成的数据生成HTML进行可视化
allure serve ./allure/report8
最后,可以按照allure标记过滤执行部分测试用例:
比如:
pytest --alluredir ./allure/report7 --allure-features 用户管理模块,商品管理模块