#TDD #测试驱动开发 #mocha #chai #前端
测试驱动开发TDD
测试驱动开发(简称TDD(Test Drived Development )),是敏捷开发中的一项核心实践和技术,也是一种设计方法论。
即在编写代码实现某个功能前,先编写对应的单元测试代码。他的优点在于能降低代码开发的复杂度,使每个函数或类等专注于自己的功能和该做的事。但是因为要给每个功能或函数编写测试代码,所以会大大的增加代码量,通常会让代码量增加一倍以上,不过同时,也减少了调试和测试的时间,所以其中的利弊要根据实际情况进行取舍。
此外还有BDD(Behavior Driven Development),行为驱动开发。
mocha是一个比较流行的javascript测试框架,用官网的话来说就是 making asynchronous testing simple and fun.
chai是一个js断言库。断言库有很多,像node.js中自带的assert也是一个断言库,于此之外还有expect,should等断言库,但是其中chai也支持expect(),assert(),should风格的断言方式,所以我们选择使用chai断言库。
安装
全局安装Mocha / 在项目路径下安装Mocha
npm install -g mocha/npm install --save-dev mocha
安装chai
npm install --save-dev chai
在package.json中添加脚本
“scripts”: {
    "test":"mocha"
}
编写测试代码 —— mocha的简单演示
首先我们创建一个项目文件夹mochaTest,安装好mocha和chai,并创建一下内容
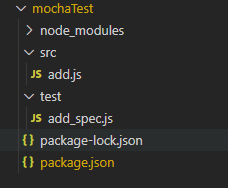
在add.js中我们添加一个add方法
// 在代码中要测试的方法
function add(num1,num2) {
    return num1+num2
}

module.exports = add
然后在test文件夹下的add_spec.js中编写add的测试
const {expect}=require("chai")        // 在代码中引用chai

const add = require("../src/add.js")         // 在代码中引用要测试的方法

describe("我是这段测试代码的描述,我将用于测试add方法",function(){
    it("这段测试代码的目的,add返回两数之和",()=>{
        expect(add(1,1)).to.equal(2)    // 因为我们的add方法的功能是实现两数之和,所以当我们这里调用add(1,1)后,我们期望得到的值为2
    })
})
然后在项目根路径下,运行
npm test
会返回
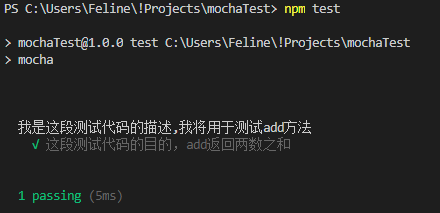
这代表我们的add方法通过了测试。
如果此时我们将add方法改成如下的形式,让他返回错误的结果。
// 在代码中要测试的方法
function add(num1,num2) {
    return num1+num2+1
}

module.exports = add
再次运行npm test,测试结果如下:

从测试结果中,我们能看到是哪个方法发生了错误。还给出了正确和错误的值分别是多少。
箭头函数 / babel
Mocha不鼓励将箭头函数("lambdas") 传递给Mocha,因为labmdas词法绑定this,无法访问Macha上下文。但是我们可以借助babel来实现。
首先安装babel及相关组件
npm install --save-dev babel-core babel-preset-es2015
然后将package.json中“sceipts”的内容改为:
  "scripts": {
      "test": "mocha --require babel-core/register"
  },
同时添加一下内容:
  "babel": {
    "presets": [
      "es2015"
    ]
  },
添加 --require babel-core/register 表明我们在使用mocha执行测试代码前,先用babel将其中的es6语法转换一下。
Mocha中的Hook
除了describe 和 it 以外,Mocha还提供了四种Asynchronous hooks —— before(),after(),beforeEach(),afterEach()
所有四种 hooks 都能作为同步或异步使用,以用于设置前置条件或在测试后清理。
describe('hooks', function() {
  before(function() {
    // 在当前describe区块的第一个测试前运行
  });

  after(function() {
    // 在当前describe区块的最后一个测试后运行
  });

  beforeEach(function() {
    // 在当前describe区块中每个测试前运行
  });

  afterEach(function() {
    // 在当前describe区块中每个测试后运行
  });

  // 一个或多个测试用例
});
执行顺序:
hooks 将按照他们定义的顺序运行。执行顺序如下
运行before() hooks 且只运行一次 => 在每次测试前运行 beforeEach() hooks => 运行测试 => 在每次测试后运行 afterEach() hooks => 最后运行 after() hooks 且只运行一次.
同样,在所有hooks中都可以加入描述,就像在describe() 和 it() 中那样,或者也可以给hook传入一个已命名的函数,如果这个hook中没有添加描述,则会使用该函数名作为替代。以beforeEach() 为例:
beforeEach(function() {
  // 显示:beforeEach hook
});

beforeEach(function namedFun() {
  // 显示:beforeEach:namedFun
});

beforeEach('some description', function() {
  // 显示:beforeEach:some description
});
待定测试 —— pending
如果某项功能或函数需要测试,但暂时还未添加测试,我们可以通过不添加回调函数的方式来穿件一个待定测试。
describe('Array', function() {
  describe('#indexOf()', function() {
    // pending test below
    it('should return -1 when the value is not present');
  });
});
待定测试也会被包含近测试结果中,并且标记为待定而不是失败。
运行指定的测试 —— .only()
通过给函数添加 .only(),可以让你只运行指定了 only 的测试用例。
describe('Array', function() {
  describe('#indexOf()', function() {
    it.only('should return -1 unless present', function() {
      // 只会运行这个测试用例
    });

    it('should return the index when present', function() {
      // ...
    });
  });
});
在v3.0.0 或 更新的版本中,.only() 可以使用多次以创建一个测试子集来运行:
describe('Array', function() {
  describe('#indexOf()', function() {
    it.only('should return -1 unless present', function() {
      // 这个测试用例将会运行
    });

    it.only('should return the index when present', function() {
      // 这个测试用例也会运行
    });

    it('should return -1 if called with a non-Array context', function() {
      // 这个测试用例不会运行
    });
  });
});
同样也可以在一个或多个describe() 中指定 .only()
describe('Array', function() {
  describe.only('#indexOf()', function() {
    it('should return -1 unless present', function() {
      // this test will be run
    });

    it('should return the index when present', function() {
      // this test will also be run
    });
  });

  describe.only('#concat()', function() {
    it('should return a new Array', function() {
      // this test will also be run
    });
  });

  describe('#slice()', function() {
    it('should return a new Array', function() {
      // this test will not be run
    });
  });
});
跳过指定的测试 —— .skip()
和 .only() 用法类似,当我们想要跳过某个测试时,我们可以通过添加 .skip() 来指定。被跳过的测试将会被标记为 待定测试。
describe('Array', function() {
  describe('#indexOf()', function() {
    it.skip('should return -1 unless present', function() {
      // this test will not be run
    });

    it('should return the index when present', function() {
      // this test will be run
    });
  });
});
.skip() 同样可以添加到 describe() 中。
另外,我们可以通过使用条件语句来让程序自行判断是否跳过测试:
it('should only test in the correct environment', function() {
  if (/* check test environment */) {
    // make assertions
  } else {
    this.skip();
  }
});
###