传统模式下单节点容器网络
在不同ns中创建网卡并对接公共网桥

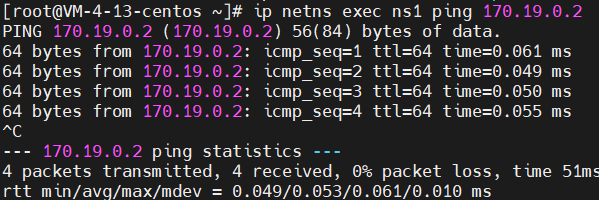
 1 # centos8 安装brctl命令
 2 rpm -ivh http://mirror.centos.org/centos/7/os/x86_64/Packages/bridge-utils-1.5-9.el7.x86_64.rpm
 3
 4 # 创建ns
 5 ip netns add ns1
 6 ip netns add ns2
 7
 8 # 创建br3
 9 brctl addbr br3
10 ip addr add 170.19.0.3/24 dev br3
11 ip link set dev br3 up
12
13 # 创建veth00和veth01这个veth对并设置
14 ip link add veth00 type veth peer name veth01
15 brctl addif br3 veth01
16 ip link set veth00 netns ns1
17 ip netns exec ns1 ip addr add 170.19.0.1/24 dev veth00
18 ip netns exec ns1 ip link set dev veth00 up
19 ip link set dev veth01 up
20
21 # 创建veth10和veth11这个veth对并设置
22 ip link add veth10 type veth peer name veth11
23 brctl addif br3 veth11
24 ip link set veth10 netns ns2
25 ip netns exec ns2 ip addr add 170.19.0.2/24 dev veth10
26 ip netns exec ns2 ip link set dev veth10 up
27 ip link set dev veth11 up
28
29 # ns1中的veth00和ns2中的veth10互通
30 ip netns exec ns1 ping 170.19.0.2
1 # 查看ns1内自动添加的路由
2 ip netns exec ns1 route -n

1 # 查看虚拟机上自动添加的路由
2 route -n

解决问题1:ns内无法ping通veth自己(启动回环设备)
1 ip netns exec ns1 ip a

1 ip netns exec ns1 ping 170.19.0.1

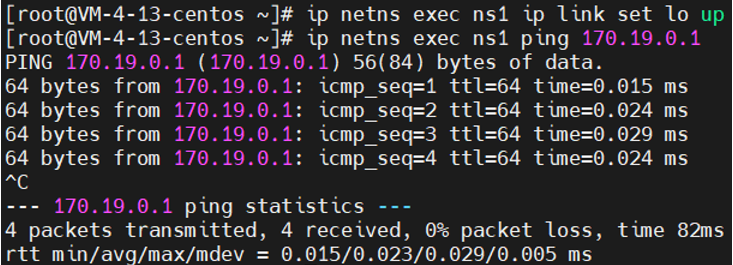
1 # 启动回环设备
2 ip netns exec ns1 ip link set lo up
3 ip netns exec ns1 ping 170.19.0.1
解决问题2:ns内无法ping通宿主机网卡IP(ns内添加默认路由)
1 ip netns exec ns1 ping 10.0.4.13

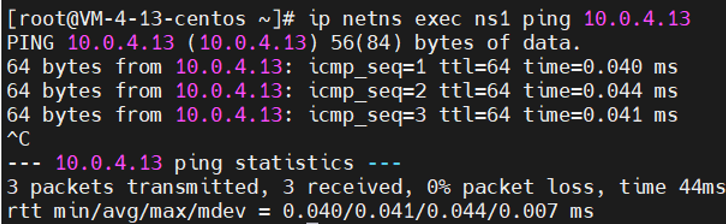
1 # 在ns1内添加默认路由(从veth到网卡)
2 ip netns exec ns1 route add default gw 170.19.0.3 dev veth00
3 ip netns exec ns1 ping 10.0.4.13
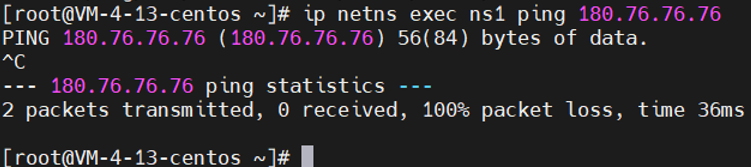
解决问题3:ns内无法ping通外部(SNAT)
1 # 开启转发
2 sysctl -w net.ipv4.conf.all.forwarding=1
3 # 添加SNAT规则
4 iptables -t nat -A POSTROUTING -s 170.19.0.0/24 -o eth0 -j MASQUERADE

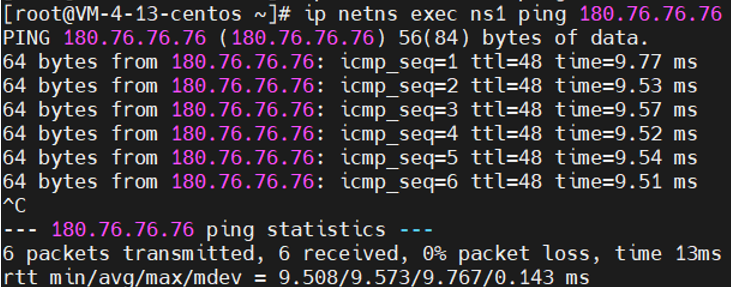
1 ip netns exec ns1 ping 180.76.76.76
请求路径
从容器内veth00出发 -> 根据容器内路由到达docker0网桥 -> 根据宿主机路由到达宿主机的eth0网卡 -> iptables的SNAT转换 -> 到达外部主机
响应路径
响应来到宿主机的eth0网卡 -> 源地址由Linux的NAT表转换成原容器IP -> 开启FORWARD转发后,根据容器网段路由到达docker0 -> 通过veth进入容器
解决问题4:外部无法访问容器端口(DNAT)
 1 # 启动nginx容器
 2 docker pull nginx
 3 docker run -d --rm --name test nginx:latest
 4
 5 # 进入Nginx容器,安装ping和ip以及netstat命令
 6 docker exec -it test bash
 7 apt-get update
 8 apt-get install -y inetutils-ping
 9 apt-get install -y iproute2
10 apt-get install -y net-tools
11
12 # 查看容器IP
13 ip a s eth0

1 # 查看端口
2 netstat -tunlp

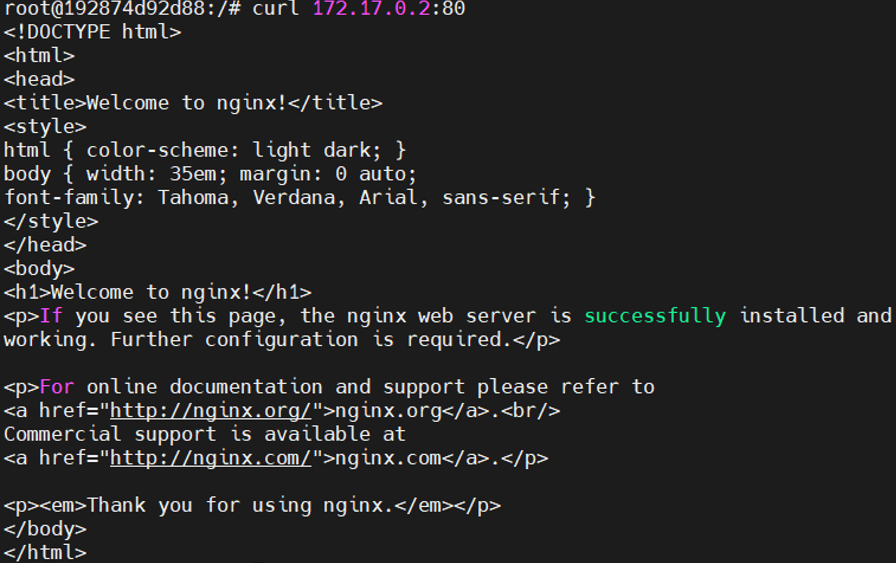
1 # 宿主机上直接访问该容器IP+80端口
2 curl 172.17.0.2:80
1 # 外部无法访问到该端口,因为IP ping不通
2 curl 172.17.0.2:80
![]()
1 ping 172.17.0.2

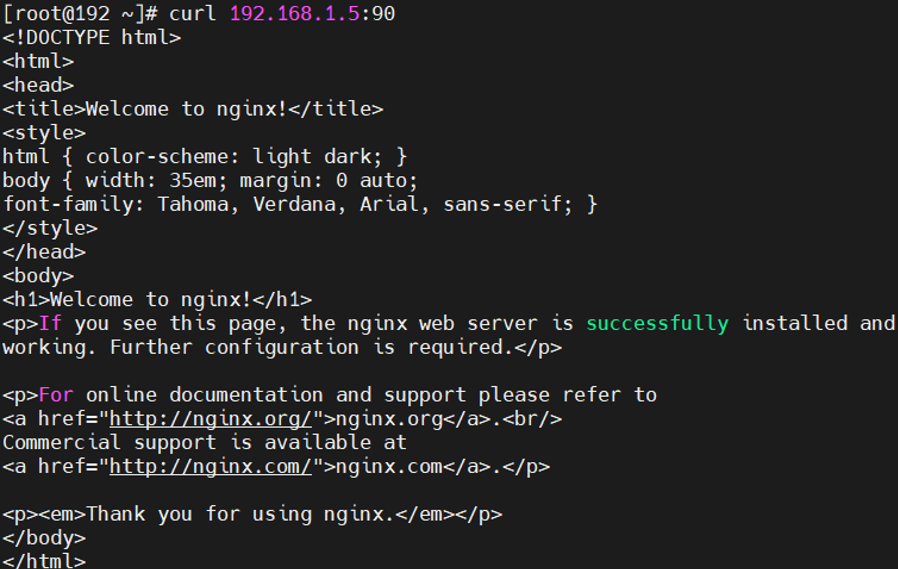
1 # 在Nginx容器所在的宿主机上,开启转发并添加DNAT规则
2 sysctl -w net.ipv4.ip_forward=1
3 iptables -t nat -A PREROUTING -p tcp -m tcp --dport 90 -j DNAT --to-destination 172.17.0.2:80
4 # 外部虚拟机可以curl通当前虚拟机的90端口,从而访问到Nginx服务
5 curl 192.168.0.103:90
请求路径
请求的主机向容器所在的宿主机发送请求 -> 宿主机上iptables的DNAT转换 -> 开启FORWARD转发后,根据容器网段路由到达docker0 -> 通过veth进入容器
响应路径
响应来到宿主机的eth0网卡 -> 源地址和端口由Linux的NAT表转换成宿主机网卡地址和端口 -> 通过宿主机eth0网卡把响应返回给请求的主机
使用ovs来打通容器网络
把容器网卡挂到ovs网桥上
 1 # 创建容器(设置net=none可以防止docker0默认网桥影响连通性测试)
 2 docker run -itd --name con6 --net=none busybox:latest sh
 3 docker run -itd --name con7 --net=none busybox:latest sh
 4 docker run -itd --name con8 --net=none busybox:latest sh
 5 # 创建网桥
 6 ovs-vsctl add-br ovs0
 7 # 使用ovs-docker给容器添加网卡,并挂到ovs0网桥上
 8 ovs-docker add-port ovs0 eth0 con6 --ipaddress=100.1.1.6/24
 9 ovs-docker add-port ovs0 eth0 con7 --ipaddress=100.1.1.7/24
10 ovs-docker add-port ovs0 eth0 con8 --ipaddress=100.1.1.8/24
11
12 查看网桥
13 # ovs-vsctl show
14 7d0c41f2-8ed4-4303-b5a5-ae7f7436f712
15     Bridge "ovs0"
16         Port "bae7fe5cd8b54_l"
17             Interface "bae7fe5cd8b54_l"
18         Port "ed183fa308494_l"
19             Interface "ed183fa308494_l"
20         Port "b0289815131a4_l"
21             Interface "b0289815131a4_l"
22         Port "ovs0"
23             Interface "ovs0"
24                 type: internal
25 ovs_version: "2.11.1"
26
27 测试连通性
28 docker exec -it con8 sh
29 ping 100.1.1.6
30 # 结果正常
31 ping 100.1.1.7
32 # 结果正常
33 ping 100.1.1.8
34 # 结果正常
单节点设置VLAN tag(相同tag的Port互通)
 1 查看interface
 2 # ovs-vsctl list interface bae7fe5cd8b54_l
 3 ...
 4 external_ids        : {container_id="con8", container_iface="eth0"}
 5 ...
 6 mac                 : []
 7 mac_in_use          : "f6:c3:75:12:3d:33"
 8 ...
 9 ofport              : 3
10 ...
11
12 # 设置vlan tag
13 ovs-vsctl set port bae7fe5cd8b54_l tag=100 // con8
14 ovs-vsctl set port ed183fa308494_l tag=100 // con7
15 ovs-vsctl set port b0289815131a4_l tag=200 // con6
16
17 测试连通性
18 docker exec -it con8 sh
19 ping 100.1.1.2 -c 3
20 # 结果不正常
21
22 ping 100.1.1.3 -c 3
23 # 结果正常
vxlan同网段跨主机通信
 1 环境
 2 host1 192.168.0.103
 3 网桥:  ovs0
 4 容器:
 5 con6  100.1.1.2
 6 con7  100.1.1.3
 7 con8  100.1.1.4
 8
 9 host2 192.168.0.107
10 网桥: ovs1
11 容器:
12 con11 100.1.1.6
13
14 # 在host2上创建网桥ovs1和容器con11,添加容器IP并把容器网卡挂到ovs1上。
15 ovs-vsctl add-br ovs1
16 docker run -itd --name con11 --net=none busybox:latest sh
17 ovs-docker add-port ovs1 eth0 con11 --ipaddress=100.1.1.6/24
18
19 查看网桥ovs1
20 # ovs-vsctl show
21 50206360-82d5-49e8-97b7-0ea679206a35
22     Bridge "ovs1"
23         Port "ovs1"
24             Interface "ovs1"
25                 type: internal
26         Port "8d17f50c21804_l"
27             Interface "8d17f50c21804_l"
28 ovs_version: "2.11.1"
29
30 在host1上设置vxlan
31 # ovs-vsctl add-port ovs0 vxlan1 -- set interface vxlan1 type=vxlan options:remote_ip=192.168.0.107 options:key=flow
32 # ovs-vsctl show
33 7d0c41f2-8ed4-4303-b5a5-ae7f7436f712
34     Bridge "ovs0"
35         Port "bae7fe5cd8b54_l"
36             tag: 100
37             Interface "bae7fe5cd8b54_l"
38         Port "ed183fa308494_l"
39             tag: 100
40             Interface "ed183fa308494_l"
41         Port "vxlan1"
42             Interface "vxlan1"
43                 type: vxlan
44                 options: {key=flow, remote_ip="192.168.0.107"}
45         Port "b0289815131a4_l"
46             tag: 200
47             Interface "b0289815131a4_l"
48         Port "ovs0"
49             Interface "ovs0"
50                 type: internal
51 ovs_version: "2.11.1"
52
53 在host2上设置vxlan
54 # ovs-vsctl add-port ovs1 vxlan1 -- set interface vxlan1 type=vxlan options:remote_ip=192.168.0.103 options:key=flow
55 # ovs-vsctl show
56 50206360-82d5-49e8-97b7-0ea679206a35
57     Bridge "ovs1"
58         Port "vxlan1"
59             Interface "vxlan1"
60                 type: vxlan
61                 options: {key=flow, remote_ip="192.168.0.103"}
62         Port "ovs1"
63             Interface "ovs1"
64                 type: internal
65         Port "8d17f50c21804_l"
66             Interface "8d17f50c21804_l"
67 ovs_version: "2.11.1"
68
69 # 设置vlan tag
70 ovs-vsctl set port 8d17f50c21804_l tag=100
71
72 连通性测试
73 # docker exec -ti con11 sh
74 / # ping 100.1.1.2 -c 3
75 PING 100.1.1.2 (100.1.1.2): 56 data bytes
76 3 packets transmitted, 0 packets received, 100% packet loss
77 / # ping 100.1.1.3 -c 3
78 PING 100.1.1.3 (100.1.1.3): 56 data bytes
79 64 bytes from 100.1.1.3: seq=0 ttl=64 time=2.288 ms
80 64 bytes from 100.1.1.3: seq=1 ttl=64 time=1.129 ms
81 64 bytes from 100.1.1.3: seq=2 ttl=64 time=0.631 ms
82 3 packets transmitted, 3 packets received, 0% packet loss
83 / # ping 100.1.1.4 -c 3
84 PING 100.1.1.4 (100.1.1.4): 56 data bytes
85 64 bytes from 100.1.1.4: seq=0 ttl=64 time=1.722 ms
86 64 bytes from 100.1.1.4: seq=1 ttl=64 time=0.705 ms
87 64 bytes from 100.1.1.4: seq=2 ttl=64 time=0.853 ms
88 3 packets transmitted, 3 packets received, 0% packet loss
问题:vxlan只能连通两台机器的ovs上同一个网段的容器,无法连通ovs上不同网段的容器。
方法:如果需要连通不同网段的容器,那么通过ovs的流表来解决这个问题。
vxlan不同网段跨主机通信(网桥上刷流表)
流表
支持OpenFlow的交换机中可能包含多个flow table。每个flow table包含多条规则,每条规则包含匹配条件和执行动作。flow table中的每条规则有优先级,优先级高的优先匹配,匹配到规则以后,执行action,如果匹配失败,按优先级高低,继续匹配下一条。如果都不匹配,每张表会有默认的动作,一般为drop或者转给下一张流表。
环境
 1 host1 192.168.0.107
 2 网桥:  ovs0
 3 容器:
 4 con6  100.1.1.2   tag=100
 5 con7  100.1.1.3   tag=100
 6
 7 host2 192.168.0.106
 8 网桥: ovs1
 9 容器:
10 con9   100.1.2.2    tag=100
11 con10  100.1.2.3    tag=100
12 con11  100.1.1.5    tag=100
查看默认流表
 1 在host1上查看默认流表
 2 # ovs-ofctl dump-flows ovs0
 3  cookie=0x0, duration=554.882s, table=0, n_packets=0, n_bytes=0, priority=0 actions=NORMAL
 4
 5 在容器con6中ping con7,网络连通
 6 # docker exec -ti con6 sh
 7 / # ping 100.1.1.3
 8 PING 100.1.1.3 (100.1.1.3): 56 data bytes
 9 64 bytes from 100.1.1.3: seq=0 ttl=64 time=0.488 ms
10 64 bytes from 100.1.1.3: seq=1 ttl=64 time=0.160 ms
11 64 bytes from 100.1.1.3: seq=2 ttl=64 time=0.115 ms
12
13 删除默认流表
14 ovs-ofctl del-flows ovs0
15 ovs-ofctl dump-flows ovs0
16
17 测试网络连通性,发现网络已经不通
18 # docker exec -ti con6 sh
19 / # ping 100.1.1.3
20 PING 100.1.1.3 (100.1.1.3): 56 data bytes
21 5 packets transmitted, 0 packets received, 100% packet loss
同节点添加流表
 1 如果要con6和con7能够通信,那么需要建立规则,让ovs转发对应的数据。
 2 查看con6和con7在ovs上的网络端口
 3 # ovs-vsctl show
 4 50206360-82d5-49e8-97b7-0ea679206a35
 5     Bridge "ovs0"
 6         Port "a5cf4c83cad24_l"
 7             tag: 100
 8             Interface "a5cf4c83cad24_l"
 9         Port "ovs0"
10             Interface "ovs0"
11                 type: internal
12         Port "c63eea754f474_l"
13             tag: 100
14             Interface "c63eea754f474_l"
15     ovs_version: "2.11.1"
16
17 # ovs-vsctl list interface a5cf4c83cad24_l |grep ofport
18 ofport              : 1
19 ofport_request      : []
20
21 # ovs-vsctl list interface c63eea754f474_l |grep ofport
22 ofport              : 2
23 ofport_request      : []
24
25 添加规则
26 # ovs-ofctl add-flow ovs0 "priority=1,in_port=1,actions=output:2"
27 # ovs-ofctl add-flow ovs0 "priority=2,in_port=2,actions=output:1"
28 # ovs-ofctl dump-flows ovs0
29  cookie=0x0, duration=24.511s, table=0, n_packets=0, n_bytes=0, priority=1,in_port="a5cf4c83cad24_l" actions=output:"c63eea754f474_l"
30  cookie=0x0, duration=7.416s, table=0, n_packets=0, n_bytes=0, priority=2,in_port="c63eea754f474_l" actions=output:"a5cf4c83cad24_l"
31
32 测试连通性:con6和con7已通
33 # docker exec -ti con6 sh
34 / # ping 100.1.1.3
35 PING 100.1.1.3 (100.1.1.3): 56 data bytes
36 64 bytes from 100.1.1.3: seq=0 ttl=64 time=0.451 ms
37 64 bytes from 100.1.1.3: seq=1 ttl=64 time=0.135 ms
38 2 packets transmitted, 2 packets received, 0% packet loss
39
40 设置一条优先级高的规则
41 # ovs-ofctl add-flow ovs0 "priority=2,in_port=2,actions=drop"
42 # ovs-ofctl dump-flows ovs0
43  cookie=0x0, duration=309.595s, table=0, n_packets=4, n_bytes=280, priority=1,in_port="a5cf4c83cad24_l" actions=output:"c63eea754f474_l"
44  cookie=0x0, duration=21.760s, table=0, n_packets=0, n_bytes=0, priority=2,in_port="c63eea754f474_l" actions=drop
45
46 流表中的规则是有优先级的,priority数值越大,优先级越高。流表中,优先级高的优先匹配,并执行匹配规则的actions。如果不匹配,继续匹配优先级低的下一条。
47 #  docker exec -ti con6 sh
48 / # ping 100.1.1.3
49 PING 100.1.1.3 (100.1.1.3): 56 data bytes
50 3 packets transmitted, 0 packets received, 100% packet loss
51
52 在上一个vxlan的实践中,通过设置vxlan可以打通两个机器上的ovs,但是两个机器ovs上的容器得在同一个网段上才能通信。
53 host2上100.1.2.2的con9 ping host1上100.1.1.2的con6
54 # docker exec -ti con9 sh
55 / # ping 100.1.1.2
56 PING 100.1.1.2 (100.1.1.2): 56 data bytes
57 ping: sendto: Network is unreachable
跨节点添加流表
 1 在host1上
 2 # ovs-vsctl add-port ovs0 vxlan1 -- set interface vxlan1 type=vxlan options:remote_ip=192.168.0.106 options:key=flow
 3 # ovs-ofctl add-flow ovs0 "priority=4,in_port=3,actions=output:1"
 4 # ovs-ofctl add-flow ovs0 "priority=4,in_port=1,actions=output:3"
 5
 6 在host2上
 7 # ovs-vsctl add-port ovs1 vxlan1 -- set interface vxlan1 type=vxlan options:remote_ip=192.168.0.107 options:key=flow
 8 # ovs-ofctl add-flow ovs1 "priority=4,in_port=1,actions=output:4"
 9 # ovs-ofctl add-flow ovs1 "priority=4,in_port=4,actions=output:1"
10
11 测试连通性
12 在host2 con9上ping 100.1.1.2
13 # docker exec -ti con9 sh
14 / # ping 100.1.1.2
15 PING 100.1.1.2 (100.1.1.2): 56 data bytes
16 ping: sendto: Network is unreachable
17
18 发现网络不通,查看发现路由规则有问题,添加默认路由规则,注意这里需要已privileged权限进入容器
19 # docker exec --privileged -ti con9 sh
20 / # route -n
21 Kernel IP routing table
22 Destination     Gateway         Genmask         Flags Metric Ref    Use Iface
23 100.1.2.0       0.0.0.0         255.255.255.0   U     0      0        0 eth0
24 / # route add default dev eth0
25 / # route -n
26 Kernel IP routing table
27 Destination     Gateway         Genmask         Flags Metric Ref    Use Iface
28 0.0.0.0         0.0.0.0         0.0.0.0         U     0      0        0 eth0
29 100.1.2.0       0.0.0.0         255.255.255.0   U     0      0        0 eth0
30
31 # docker exec --privileged -ti con6 sh
32 / # route -n
33 Kernel IP routing table
34 Destination     Gateway         Genmask         Flags Metric Ref    Use Iface
35 100.1.1.0       0.0.0.0         255.255.255.0   U     0      0        0 eth0
36 / # route add default dev eth0
37 / # route -n
38 Kernel IP routing table
39 Destination     Gateway         Genmask         Flags Metric Ref    Use Iface
40 0.0.0.0         0.0.0.0         0.0.0.0         U     0      0        0 eth0
41 100.1.1.0       0.0.0.0         255.255.255.0   U     0      0        0 eth0
42
43 在host1和host2的容器中都添加好路由规则后,测试连通性
44 # docker exec -ti con9 sh
45 / # ping 100.1.1.2
46 PING 100.1.1.2 (100.1.1.2): 56 data bytes
47 64 bytes from 100.1.1.2: seq=0 ttl=64 time=3.166 ms
48 64 bytes from 100.1.1.2: seq=1 ttl=64 time=0.708 ms
49 64 bytes from 100.1.1.2: seq=2 ttl=64 time=0.660 ms
50 64 bytes from 100.1.1.2: seq=3 ttl=64 time=0.623 ms
51 4 packets transmitted, 4 packets received, 0% packet loss
已成功通过ovs,vxlan打通两台机器上不同网段容器。
参考资料
单节点容器网络参考:《自己动手写Docker》
ovs参考:ovs实践--openFlow跨网段组网