1.首先我们先建立一个java项目,导入spring相关的jar包
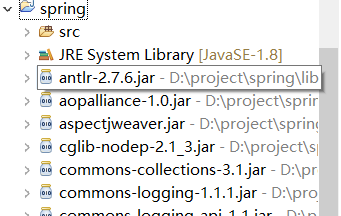
jar包自行下载,上面只是截一部分的。
2.1 准备pojo
package cn.yf.pojo;

public class Person {

    private int age;
    private String name;

    public int getAge() {
        return age;
    }
    public void setAge(int age) {
        this.age = age;
    }
    public String getName() {
        return name;
    }
    public void setName(String name) {
        this.name = name;
    }
    @Override
    public String toString() {
        return "Person [age=" + age + ", name=" + name + "]";
    }

}
2.2 按照常规方法创建对象
 1 package cn.yf.test;
 2
 3 import cn.yf.pojo.Person;
 4
 5 public class Test1 {
 6
 7     public static void main(String[] args) {
 8         // TODO Auto-generated method stub
 9         Person person = new Person();
10         person.setAge(20);
11         person.setName("tht");
12         System.out.println(person.getAge());
13         System.out.println(person.getName());
14     }
15
16 }
运行结果:
20
tht
2.3 用spring来创建对象
首先在src下创建applicationContext.xml,它是spring的核心配置文件

applicationContext.xml的内容如下:
<?xml version="1.0" encoding="UTF-8"?>
<beans xmlns="http://www.springframework.org/schema/beans"
    xmlns:xsi="http://www.w3.org/2001/XMLSchema-instance"
    xmlns:aop="http://www.springframework.org/schema/aop"
    xmlns:tx="http://www.springframework.org/schema/tx"
    xmlns:context="http://www.springframework.org/schema/context"
    xsi:schemaLocation="
   http://www.springframework.org/schema/beans
   http://www.springframework.org/schema/beans/spring-beans-3.0.xsd
   http://www.springframework.org/schema/aop
   http://www.springframework.org/schema/aop/spring-aop-3.0.xsd
   http://www.springframework.org/schema/tx
   http://www.springframework.org/schema/tx/spring-tx-3.0.xsd
   http://www.springframework.org/schema/context
   http://www.springframework.org/schema/context/spring-context-3.0.xsd">

    <bean name="p" class="cn.yf.pojo.Person">
        <property name="age" value="20"></property>
        <property name="name" value="tht"></property>
    </bean>

</beans>
里面的黑色字体是配置:<bean>配置需要创建的对象,name用于之后从spring容器获得实例时使用的,class需要创建实例的全限定类名,property用于配置属性,name是属性名,value是属性值
创建SpringTest1
package cn.yf.test;

import org.springframework.context.ApplicationContext;
import org.springframework.context.support.ClassPathXmlApplicationContext;

import cn.yf.pojo.Person;

public class TestSpring1 {

    public static void main(String[] args) {
        // TODO Auto-generated method stub
        ApplicationContext context = new ClassPathXmlApplicationContext(new String[]{"applicationContext.xml"});
        Person p = (Person)context.getBean("p");
        System.out.println(p.getAge());
        System.out.println(p.getName());
    }

}
运行结果如下:
20
tht
和上面一样。
3 spring注入对象
我们建立一个新的类,但是这个类要用到别的对象
package cn.yf.pojo;

public class Father {

    private int age;
    private String name;
    private Person person;
    public int getAge() {
        return age;
    }
    public void setAge(int age) {
        this.age = age;
    }
    public String getName() {
        return name;
    }
    public void setName(String name) {
        this.name = name;
    }
    public Person getPerson() {
        return person;
    }
    public void setPerson(Person person) {
        this.person = person;
    }
    @Override
    public String toString() {
        return "Father [age=" + age + ", name=" + name + ", person=" + person + "]";
    }


}
编写测试类如下:
package cn.yf.test;

import cn.yf.pojo.Father;
import cn.yf.pojo.Person;

public class Test2 {

    public static void main(String[] args) {
        // TODO Auto-generated method stub
        Person person = new Person();
        person.setAge(20);
        person.setName("tht");
        Father father = new Father();
        father.setAge(50);
        father.setName("yf");
        father.setPerson(person);
        System.out.println(father.getAge());
        System.out.println(father.getName());
        System.out.println(father.getPerson());
    }

}
结果:
50
yf
Person [age=20, name=tht]
这就是我们通常方法,现在看来好像没什么,但是一旦对象个数多了,耦合性就会过高,spring就是来解决这种问题的。
spring方法实现:
首先配置applicationContext.xml
<?xml version="1.0" encoding="UTF-8"?>
<beans xmlns="http://www.springframework.org/schema/beans"
    xmlns:xsi="http://www.w3.org/2001/XMLSchema-instance"
    xmlns:aop="http://www.springframework.org/schema/aop"
    xmlns:tx="http://www.springframework.org/schema/tx"
    xmlns:context="http://www.springframework.org/schema/context"
    xsi:schemaLocation="
   http://www.springframework.org/schema/beans
   http://www.springframework.org/schema/beans/spring-beans-3.0.xsd
   http://www.springframework.org/schema/aop
   http://www.springframework.org/schema/aop/spring-aop-3.0.xsd
   http://www.springframework.org/schema/tx
   http://www.springframework.org/schema/tx/spring-tx-3.0.xsd
   http://www.springframework.org/schema/context
   http://www.springframework.org/schema/context/spring-context-3.0.xsd">

    <bean name="p" class="cn.yf.pojo.Person">
        <property name="age" value="20"></property>
        <property name="name" value="tht"></property>
    </bean>

    <bean name="f" class="cn.yf.pojo.Father">
        <property name="age" value="50"></property>
        <property name="name" value="yf"></property>
        <property name="person" ref="p"></property>
    </bean>

</beans>
上面红色字体就是对Father类的配置,里面的对象注入要用ref
编写测试代码
package cn.yf.test;

import org.springframework.context.ApplicationContext;
import org.springframework.context.support.ClassPathXmlApplicationContext;

import cn.yf.pojo.Father;

public class TestSpring2 {

    public static void main(String[] args) {
        // TODO Auto-generated method stub
        ApplicationContext context = new ClassPathXmlApplicationContext(new String[]{"applicationContext.xml"});
        Father father = (Father)context.getBean("f");
        System.out.println(father.getAge());
        System.out.println(father.getName());
        System.out.println(father.getPerson());
    }

}
结果和上面一样
50
yf
Person [age=20, name=tht]
这样就借助spring实现具有依赖关系的对象之间的解耦
4 spring注解方式IOC/DI
4.1 @Autowired
首先一样的我们先配置applicationContext.xml文件
<?xml version="1.0" encoding="UTF-8"?>
<beans xmlns="http://www.springframework.org/schema/beans"
    xmlns:xsi="http://www.w3.org/2001/XMLSchema-instance"
    xmlns:aop="http://www.springframework.org/schema/aop"
    xmlns:tx="http://www.springframework.org/schema/tx"
    xmlns:context="http://www.springframework.org/schema/context"
    xsi:schemaLocation="
   http://www.springframework.org/schema/beans
   http://www.springframework.org/schema/beans/spring-beans-3.0.xsd
   http://www.springframework.org/schema/aop
   http://www.springframework.org/schema/aop/spring-aop-3.0.xsd
   http://www.springframework.org/schema/tx
   http://www.springframework.org/schema/tx/spring-tx-3.0.xsd
   http://www.springframework.org/schema/context
   http://www.springframework.org/schema/context/spring-context-3.0.xsd">

     <context:annotation-config/>
     <!-- 告诉Spring要用注解的方式进行配置 -->
    <bean name="p" class="cn.yf.pojo.Person">
        <property name="age" value="20"></property>
        <property name="name" value="tht"></property>
    </bean>

    <bean name="f" class="cn.yf.pojo.Father">
        <property name="age" value="50"></property>
        <property name="name" value="yf"></property>
        <!-- <property name="person" ref="p"></property> -->
    </bean>
黑色这一行的功能在后面由注解来完成
修改Father类
1 @Autowired
2 private Person person;
也可以这样修改
1 @Autowired
2 public void setPerson(Person person) {
3         this.person = person;
4 }
结果都是一样的
50
yf
Person [age=20, name=tht]
4.2 @Resource
效果和@Autowired一样,它们都是对注入对象行为的注解,效果一样都为
50
yf
Person [age=20, name=tht]
4.3 @Component
一样的先对applicationContext.xml进行配置
<?xml version="1.0" encoding="UTF-8"?>
<beans xmlns="http://www.springframework.org/schema/beans"
    xmlns:xsi="http://www.w3.org/2001/XMLSchema-instance"
    xmlns:aop="http://www.springframework.org/schema/aop"
    xmlns:tx="http://www.springframework.org/schema/tx"
    xmlns:context="http://www.springframework.org/schema/context"
    xsi:schemaLocation="
   http://www.springframework.org/schema/beans
   http://www.springframework.org/schema/beans/spring-beans-3.0.xsd
   http://www.springframework.org/schema/aop
   http://www.springframework.org/schema/aop/spring-aop-3.0.xsd
   http://www.springframework.org/schema/tx
   http://www.springframework.org/schema/tx/spring-tx-3.0.xsd
   http://www.springframework.org/schema/context
   http://www.springframework.org/schema/context/spring-context-3.0.xsd">

     <context:component-scan base-package="cn.yf.pojo"></context:component-scan>

</beans>
作用是告诉spring,bean都放在cn.yf.pojo这个包下面
然后对Person类进行修改
@Component("p")
public class Person
对Father类的配置
@Component("f")
public class Father
然后再次运行测试代码结果如下:
0
null
Person [age=0, name=null]
因为没有设置初值,所以默认为0或者null
5.1 Spring AOP
什么是AOP:面向切面编程,利用AOP可以对业务逻辑的各个部分进行隔离,从而使得业务逻辑各个部分之间的耦合度降低,提高程序的可重用性,同时提高了开发的效率。
先设计业务类代码如下
 1 package cn.yf.service;
 2
 3 import org.springframework.stereotype.Component;
 4
 5 @Component("s")
 6 public class ProductService {
 7
 8     public void doSomeService(){
 9         System.out.println("doSomeService");
10     }
11
12 }
再设计辅助功能类(切面)
 1 package cn.yf.aspect;
 2
 3 import org.aspectj.lang.ProceedingJoinPoint;
 4
 5 public class LoggerAspect {
 6
 7     public Object log(ProceedingJoinPoint joinPoint) throws Throwable{
 8         System.out.println("start log:" + joinPoint.getSignature().getName());
 9         //用于执行核心功能的代码
10         Object object = joinPoint.proceed();
11         System.out.println("end log:" + joinPoint.getSignature().getName());
12         return object;
13     }
14
15 }
配置applicationContext.xml
<?xml version="1.0" encoding="UTF-8"?>
<beans xmlns="http://www.springframework.org/schema/beans"
    xmlns:xsi="http://www.w3.org/2001/XMLSchema-instance"
    xmlns:aop="http://www.springframework.org/schema/aop"
    xmlns:tx="http://www.springframework.org/schema/tx"
    xmlns:context="http://www.springframework.org/schema/context"
    xsi:schemaLocation="
   http://www.springframework.org/schema/beans
   http://www.springframework.org/schema/beans/spring-beans-3.0.xsd
   http://www.springframework.org/schema/aop
   http://www.springframework.org/schema/aop/spring-aop-3.0.xsd
   http://www.springframework.org/schema/tx
   http://www.springframework.org/schema/tx/spring-tx-3.0.xsd
   http://www.springframework.org/schema/context
   http://www.springframework.org/schema/context/spring-context-3.0.xsd">

     <!-- 声明业务对象 -->
     <bean name="s" class="cn.yf.service.ProductService"></bean>
     <!-- 声明日志切面 -->
     <bean id="loggerAspect" class="cn.yf.aspect.LoggerAspect"></bean>

     <aop:config>
         <!-- 指定核心业务 -->
         <aop:pointcut expression="execution(* cn.yf.service.ProductService.*(..))" id="loggerCutpoint"/>
         <!-- 指定辅助业务 -->
         <aop:aspect id="logAspect" ref="loggerAspect">
             <aop:around pointcut-ref="loggerCutpoint" method="log"/>
         </aop:aspect>
     </aop:config>

</beans>
测试代码:
package cn.yf.test;

import org.springframework.context.ApplicationContext;
import org.springframework.context.support.ClassPathXmlApplicationContext;

import cn.yf.service.ProductService;

public class TestSpring3 {

    public static void main(String[] args) {
        // TODO Auto-generated method stub

        ApplicationContext context = new ClassPathXmlApplicationContext(new String[]{"applicationContext.xml"});
        ProductService s = (ProductService)context.getBean("s");
        s.doSomeService();
    }

}
测试结果:
start log:doSomeService
doSomeService
end log:doSomeService
5.2 Spring注解方式AOP
使用@Component("s") 注解ProductService 类
@Component("s")
public class ProductService
注解配置切面
@Aspect
@Component
public class LoggerAspect {

    @Around(value = "execution(* cn.yf.service.ProductService.*(..))")
    public Object log(ProceedingJoinPoint joinPoint) throws Throwable{
        System.out.println("start log:" + joinPoint.getSignature().getName());
        //用于执行核心功能的代码
        Object object = joinPoint.proceed();
        System.out.println("end log:" + joinPoint.getSignature().getName());
        return object;
    }

}
对applicationContext.xml进行配置
<context:component-scan base-package="cn.yf.aspect"></context:component-scan>
     <context:component-scan base-package="cn.yf.service"></context:component-scan>
     <aop:aspectj-autoproxy/>
运行结果一样:
start log:doSomeService
doSomeService
end log:doSomeService