本片内容使用到ids4+ids4.Entityframework持久化表单,以及core的identity相关表的一并持久化,然后就是登录认证,认证使用email发送邮件的方式。所以这里涉及到四块内容,1.ids4的集成,2.ids4+core identity的相关默认表的持久化,以及在迁移库、表的过程中初始化相关数据(用户数据);3.登录认证 4.mailkit邮件发送(见上篇),框架是按照ddd搭建的,该篇内容只是ddd中的一个支撑域的东西(一个子域),用于统一认证和授权的,内容比较简单也比较少,但是框架没完全写好,所以不放出来了。
core 2.x项目集成ids4
1.首先需要创建一个.net core项目,然后
2.选择使用登录认证(这也就涉及到了identity的东西了),然后创建好项目之后
3.右击解决方案,打开解决方案文件夹,
4.按住shift,然后右击鼠标,点击 powerShell,输入以下内容回车:iex ((New-Object System.Net.WebClient).DownloadString('https://raw.githubusercontent.com/IdentityServer/IdentityServer4.Quickstart.UI/master/getmaster.ps1'))
此时可以看到项目中生成了 quictstart.ui的相关内容,此内容是ids4的参考ui,相对于自己写省了不少事情了,详见:https://github.com/IdentityServer/IdentityServer4.Quickstart.UI 或者自己直接百度 identityserver4 ui就可以搜到。
持久化ids4 和 identity的相关表单
1.首先,我们在使用ids4的时候,需要添加两个迁移文件,详见这里:http://docs.identityserver.io/en/latest/quickstarts/7_entity_framework.html
dotnet ef migrations add InitialIdentityServerPersistedGrantDbMigration -c PersistedGrantDbContext -o Data/Migrations/IdentityServer/PersistedGrantDb
dotnet ef migrations add InitialIdentityServerConfigurationDbMigration -c ConfigurationDbContext -o Data/Migrations/IdentityServer/ConfigurationDb
以上两航依旧是在上面的步骤中的 powershell执行的。
2.然后是ids的相关配置(startup.cs中),configureServices方法
services.Configure<CookiePolicyOptions>(options =>
            {
                // This lambda determines whether user consent for non-essential cookies is needed for a given request.
                options.CheckConsentNeeded = context => true;
                options.MinimumSameSitePolicy = SameSiteMode.None;
            });

            //services.AddDbContext<ApplicationDbContext>(options =>
            //    options.UseSqlServer(
            //        Configuration.GetConnectionString("DefaultConnection")));
            //services.AddDefaultIdentity<IdentityUser>()
            //    .AddDefaultUI(UIFramework.Bootstrap4)
            //    .AddEntityFrameworkStores<ApplicationDbContext>();

            //services.AddMvc().SetCompatibilityVersion(CompatibilityVersion.Version_2_2);

            var connectionString = Configuration.GetConnectionString("DefaultConnection");
            var migrationsAssembly = typeof(Startup).GetTypeInfo().Assembly.GetName().Name;
            services.AddDbContext<ApplicationDbContext>(options => options.UseSqlServer(connectionString));
            services.AddIdentity<ApplicationUser/*IdentityUser*/, ApplicationRole>(options =>
            {
                // Password settings
                options.Password.RequireDigit = false;
                options.Password.RequiredLength = 6;
                options.Password.RequireNonAlphanumeric = false;
                options.Password.RequireUppercase = false;
                options.Password.RequireLowercase = false;
                options.Password.RequiredUniqueChars = 2;
                // Lockout settings
                options.Lockout.DefaultLockoutTimeSpan = TimeSpan.FromMinutes(5);
                options.Lockout.MaxFailedAccessAttempts = 5;
                options.Lockout.AllowedForNewUsers = true;
                // Signin settings
                options.SignIn.RequireConfirmedEmail = false;
                options.SignIn.RequireConfirmedPhoneNumber = false;
                // User settings
                options.User.RequireUniqueEmail = false;
            })
            .AddEntityFrameworkStores<ApplicationDbContext>()
            .AddDefaultTokenProviders();

            services.AddMvc().SetCompatibilityVersion(CompatibilityVersion.Version_2_2);

            //添加ids4配置
            services.AddIdentityServer()
                 .AddDeveloperSigningCredential()
                 //.AddSigningCredential(new X509Certificate2(@"D:WORKSPACECSHARP_COREesoftor-dddsrcESoftor.Authorization.ServerinDebug
etcoreapp2.2	empkey.rsa"))
                .AddConfigurationStore(options =>
                {
                    options.ConfigureDbContext = builder =>
                        builder.UseSqlServer(connectionString,
                            sql => sql.MigrationsAssembly(migrationsAssembly));
                })
                .AddOperationalStore(options =>
                {
                    options.ConfigureDbContext = builder =>
                        builder.UseSqlServer(connectionString,
                            sql => sql.MigrationsAssembly(migrationsAssembly));
                    options.EnableTokenCleanup = true;
                    options.TokenCleanupInterval = 30;
                })
                .AddAspNetIdentity<ApplicationUser/*IdentityUser*/>();
configure方法中
 app.UseCookiePolicy();

            //app.UseAuthentication();
            app.UseIdentityServer();//ids4的UseIdentityServer包含了UseAuthentication,所以不需要上面的UseAuthentication
3.最重要的一步,因为添加完上面的东西之后会报错,呵呵,nuget添加以下相关的 程序集:
IdentityServer4
IdentityServer4.AccessTokenValidation
IdentityServer4.AspNetIdentity
IdentityServer4.EntityFramework
因为需要迁移生成库,所以还需要添加ef core的相关包
Microsoft.EntityFrameworkCore.SqlServer (这里我是用的mssql)
Microsoft.EntityFrameworkCore.Tools
此时我们的基础工作基本完成了,其中涉及到ApplicationUser ApplicationRole,ApplicationUserRole,ApplicationIdentityUserLogin的内容,如下:
// ApplicationIdentityUserLogin.cs
public class ApplicationIdentityUserLogin : IdentityUserLogin<Guid>
    {
    }
// ApplicationRole.cs
 public class ApplicationRole : IdentityRole<Guid>
    {
        /// <summary>
        /// Gets or sets the UserRoles
        /// </summary>
        public ICollection<ApplicationUserRole> UserRoles { get; set; }
    }
// ApplicationUser.cs
public class ApplicationUser : IdentityUser<Guid>
    {
        /// <summary>
        /// Gets or sets the UserRoles
        /// </summary>
        public ICollection<ApplicationUserRole> UserRoles { get; set; }
    }
// ApplicationUserRole
public class ApplicationUserRole : IdentityUserRole<Guid>
    {
        /// <summary>
        /// Gets or sets the User
        /// </summary>
        public virtual ApplicationUser User { get; set; }

        /// <summary>
        /// Gets or sets the Role
        /// </summary>
        public virtual ApplicationRole Role { get; set; }
    }
然后我们需要针对core 的identity,注意,这里说的是identity,再单独生成一个迁移文件,这里就不说了,无非是 add-migration或者 dotnet ef add migrations
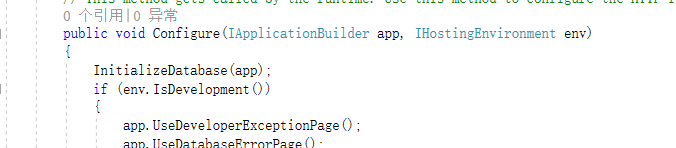
4.依旧在startup.cs中添加迁移用方法,说之前先说下ids4的官网, http://docs.identityserver.io/en/latest/quickstarts/7_entity_framework.html,其中提供的参考代码就是我们需要的,但是我们这里还需要添加对identity的相关表数据的初始化,也就是我们上面定义的几个表ApplicationUser,App....,所以我们的代码如下:
private void InitializeDatabase(IApplicationBuilder app)
        {
            using (var serviceScope = app.ApplicationServices.GetService<IServiceScopeFactory>().CreateScope())
            {
                //ids4
                serviceScope.ServiceProvider.GetRequiredService<PersistedGrantDbContext>().Database.Migrate();

                var context = serviceScope.ServiceProvider.GetRequiredService<ConfigurationDbContext>();
                context.Database.Migrate();
                if (!context.Clients.Any())
                {
                    foreach (var client in InMemoryConfiguration.Clients())
                    {
                        context.Clients.Add(client.ToEntity());
                    }
                    context.SaveChanges();
                }

                if (!context.IdentityResources.Any())
                {
                    foreach (var resource in InMemoryConfiguration.GetIdentityResources())
                    {
                        context.IdentityResources.Add(resource.ToEntity());
                    }
                    context.SaveChanges();
                }

                if (!context.ApiResources.Any())
                {
                    foreach (var resource in InMemoryConfiguration.ApiResources())
                    {
                        context.ApiResources.Add(resource.ToEntity());
                    }
                    context.SaveChanges();
                }

                //aspNet Identity
                serviceScope.ServiceProvider.GetRequiredService<ApplicationDbContext>().Database.Migrate();
                var appContext = serviceScope.ServiceProvider.GetRequiredService<ApplicationDbContext>();
                appContext.Database.Migrate();
                if (!appContext.Roles.Any())
                {
                    foreach (var item in ApplicationDbContextDataSeed.Roles)
                    {
                        appContext.Roles.Add(item);
                    }
                    appContext.SaveChanges();
                }

                if (!appContext.Users.Any())
                {
                    foreach (var item in ApplicationDbContextDataSeed.Users)
                    {
                        appContext.Users.Add(item);
                    }
                    appContext.SaveChanges();
                }

                if (!appContext.UserRoles.Any())
                {
                    foreach (var item in ApplicationDbContextDataSeed.UserRoles)
                    {
                        appContext.UserRoles.Add(item);
                    }
                    appContext.SaveChanges();
                }

            }
        }
这时候只需要在 configure方法中调用即可
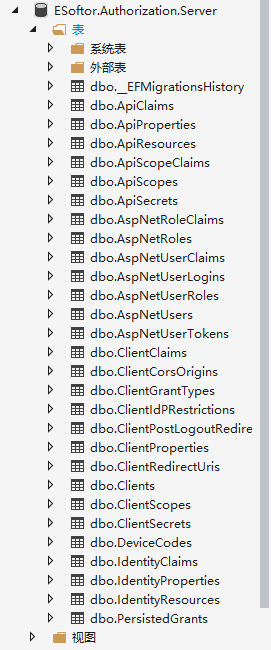
这时候我们只需要直接运行项目就额可以生成了 ids4的相关表,以及identity的几个表了,如下图:
登录认证
基于ids4的默认的登陆方法,我们修改如下(applicationController中):首先要注入
private readonly UserManager<ApplicationUser> _userManager;
private readonly SignInManager<ApplicationUser> _signInManager;
private readonly ILogger _logger;
修改登录方法如下:
/// <summary>
        /// Handle postback from username/password login
        /// </summary>
        [HttpPost]
        [ValidateAntiForgeryToken]
        public async Task<IActionResult> Login(LoginInputModel model, string button)
        {
            // check if we are in the context of an authorization request
            var context = await _interaction.GetAuthorizationContextAsync(model.ReturnUrl);

            if (ModelState.IsValid)
            {
                var user = await _userManager.FindByNameAsync(model.Username);
                if (user == null)
                {
                    await _events.RaiseAsync(new UserLoginFailureEvent(model.Username, "invalid credentials"));
                    ModelState.AddModelError(string.Empty, AccountOptions.InvalidUsername);
                }

                // validate username/password against in-memory store
                var result = await _signInManager.PasswordSignInAsync(model.Username, model.Password, model.RememberLogin, lockoutOnFailure: false);

                if (result.Succeeded)
                {
                    AuthenticationProperties props = null;
                    if (AccountOptions.AllowRememberLogin && model.RememberLogin)
                    {
                        props = new AuthenticationProperties
                        {
                            IsPersistent = true,
                            ExpiresUtc = DateTimeOffset.UtcNow.Add(AccountOptions.RememberMeLoginDuration)
                        };
                    };

                    if (context != null)
                    {
                        if (await _clientStore.IsPkceClientAsync(context.ClientId))
                        {
                            return View("Redirect", new RedirectViewModel { RedirectUrl = model.ReturnUrl });
                        }

                        return Redirect(model.ReturnUrl);
                    }

                    // request for a local page
                    if (Url.IsLocalUrl(model.ReturnUrl))
                    {
                        return Redirect(model.ReturnUrl);
                    }
                    else if (string.IsNullOrEmpty(model.ReturnUrl))
                    {
                        return Redirect("~/");
                    }
                    else
                    {
                        // user might have clicked on a malicious link - should be logged
                        throw new Exception("invalid return URL");
                    }
                }

                if (result.RequiresTwoFactor)
                {
                    //return RedirectToAction(nameof(LoginWith2fa), new { model.ReturnUrl, model.RememberLogin });
                    return RedirectToAction(nameof(SendCode), new { model.ReturnUrl, model.RememberLogin });
                }
                if (result.IsLockedOut)
                {
                    return RedirectToAction(nameof(Lockout));
                }
                else
                {
                    //ModelState.AddModelError(string.Empty, "Invalid login attempt.");
                    await _events.RaiseAsync(new UserLoginFailureEvent(model.Username, "invalid credentials"));
                    ModelState.AddModelError(string.Empty, AccountOptions.InvalidCredentialsErrorMessage);
                    //return View(model);
                }
            }

            // something went wrong, show form with error
            var vm = await BuildLoginViewModelAsync(model);
            return View(vm);
        }
其中涉及到一个 RequiresTwoFactor 的 二次认证的方法,SendCode,也就是我们铺垫了这么久要说的对象了,方法如下:
/// <summary>
        ///     发送验证码页面
        /// </summary>
        /// <param name="returnUrl"></param>
        /// <returns></returns>
        [HttpGet]
        [AllowAnonymous]
        public async Task<ActionResult> SendCode(string returnUrl, bool rememberMe)
        {
            var userId = await _signInManager.GetTwoFactorAuthenticationUserAsync();
            if (userId == null)
            {
                return View("Error");
            }

            //假设默认Email 获取方式进行验证//生成二次验证的 token
            var twoFactoryToken = await _userManager.GenerateTwoFactorTokenAsync(userId, "Email");
            //发送email
            EmailHelper.SendMail(new EmailInfo()
            {
                From = new System.Collections.Generic.List<EmailAddress>() { new EmailAddress("esoftor's framework(esoftor-from)", "1365101128@qq.com") },
                To = new System.Collections.Generic.List<EmailAddress>() { new EmailAddress("esoftor's framework(esoftor-to)", "1365101128@qq.com") },
                Subject = "esoftor's core 2.x framework 登录验证码",
                HtmlBody = $"<div style='font-size:18;font-weight:bold'>您正在进行esoftor's core 2.x framework 的二次认证授权登录,您的验证码为:{twoFactoryToken}</div>"
            });
            //二次验证方式 email,phone?...
            var userFactors = await _userManager.GetValidTwoFactorProvidersAsync(userId);
            var factorOptions = userFactors.Select(purpose => new SelectListItem { Text = purpose, Value = purpose }).ToList();
            SelectList selectLists = new SelectList(factorOptions);
            return View(new SendCodeViewModel
            {
                Providers = selectLists,
                ReturnUrl = returnUrl
            });
        }
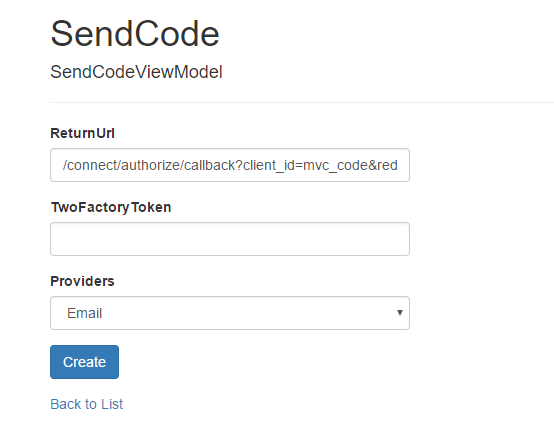
对应的 cshtml页面如下:
@model ESoftor.Authorization.Server.Models.SendCodeViewModel

@{
    ViewData["Title"] = "SendCode";
}

<h1>SendCode</h1>

<h4>SendCodeViewModel</h4>
<hr />
<div class="row">
    <div class="col-md-4">
        <form asp-action="SendCode">
            <div asp-validation-summary="ModelOnly" class="text-danger"></div>
            <div class="form-group">
                <label asp-for="ReturnUrl" class="control-label"></label>
                <input asp-for="ReturnUrl" class="form-control" />
                <span asp-validation-for="ReturnUrl" class="text-danger"></span>
            </div>
            <div class="form-group">
                <label asp-for="TwoFactoryToken" class="control-label"></label>
                <input asp-for="TwoFactoryToken" class="form-control" />
                <span asp-validation-for="TwoFactoryToken" class="text-danger"></span>
            </div>
            <div class="form-group">
                <label asp-for="Providers" class="control-label"></label>
                @*@Html.DropDownList("Providers", Model.Providers, new { @class = "form-control custom-select" })*@
                <select class="form-control custom-select">
                    @foreach (SelectListItem item in Model.Providers.Items)
                    {
                        <option value="@item.Value">@item.Text</option>
                    }
                </select>
            </div>
            <div class="form-group">
                <input type="submit" value="Create" class="btn btn-primary" />
            </div>
        </form>
    </div>
</div>

<div>
    <a asp-action="Index">Back to List</a>
</div>
当我们点击这里的 create的按钮的时候,就会提交到后台的验证码验证方法,如下:
[HttpPost]
        [AllowAnonymous]
        [ValidateAntiForgeryToken]
        public async Task<ActionResult> SendCode(SendCodeViewModel model)
        {
            if (!ModelState.IsValid)
            {
                return View();
            }
            var userId = await _signInManager.GetTwoFactorAuthenticationUserAsync();
            //// Generate the token and send it
            //if (!await _userManager.SendTwoFactorCodeAsync(model.SelectedProvider))
            //{
            //    return View("Error");
            //}
            var twoFactorProviders = await _userManager.GetValidTwoFactorProvidersAsync(userId);
            //return RedirectToAction("VerifyCode", new { Provider = model.SelectedProvider, ReturnUrl = model.ReturnUrl });
            //生成二次验证的 token
            //var twoFactoryToken = _userManager.GenerateTwoFactorTokenAsync(userId, model.Providers.Where(x => x.Selected).First().Value);
            //验证Email的token(code)
            var validTwoToken = await _userManager.VerifyTwoFactorTokenAsync(userId, "Email", model.TwoFactoryToken);
            if (validTwoToken)
            {
                var twoSignInResult = await _signInManager.TwoFactorSignInAsync("Email", model.TwoFactoryToken, isPersistent: true, rememberClient: false);
                if (twoSignInResult.Succeeded)
                    return Redirect(model.ReturnUrl);
            }

            ModelState.AddModelError(string.Empty, "Invalid Two Factory code.");
            return View();
        }
到这里就完成了,代码中哦都有注释,若干是不清楚,可以留言。这里稍微需要注意的就是 core的identity也就是上面注入的 UserManager和SignInManager的两个方法,和以前的owin不同,所以你搜到到的很多资料是驴唇不对马嘴的,也就是上面加红的部分,core的identity api中变成了以上的命名方法,如果搜到不一致,不要惊讶,因为我们这里是core。
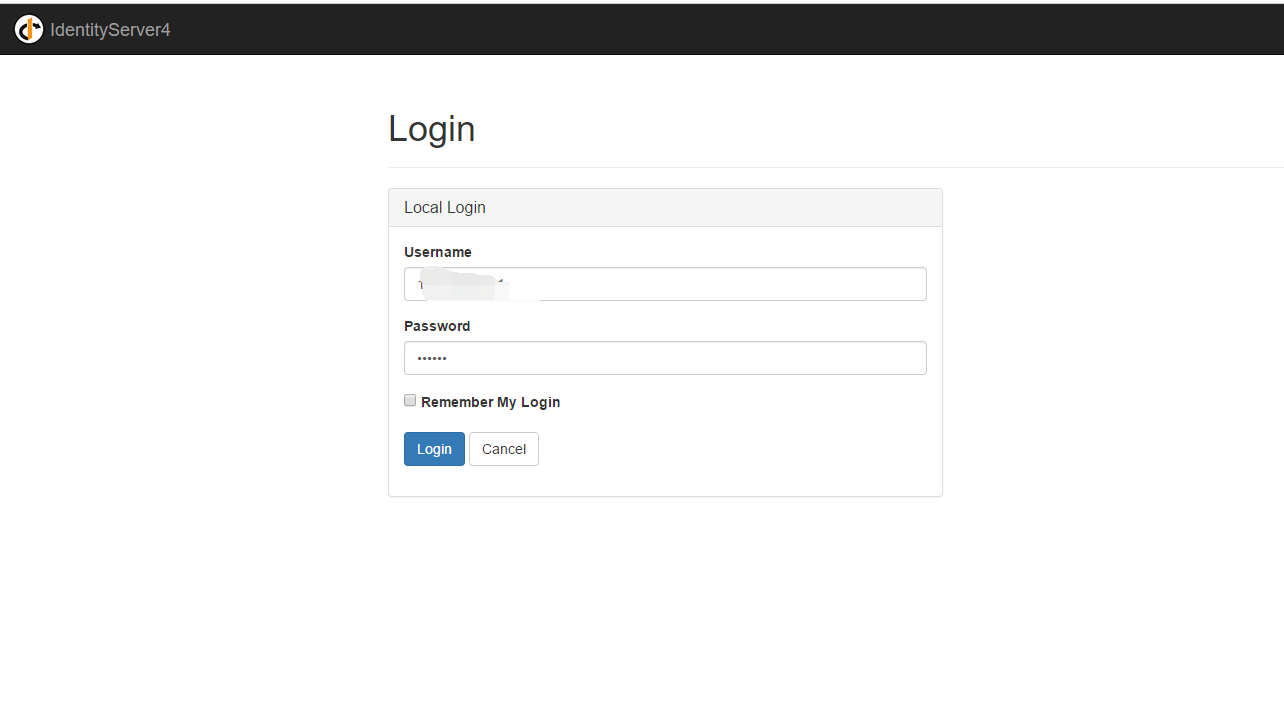
参考图如下:
项目跑起来之后,登录中之前,
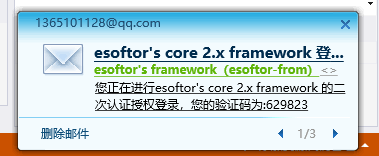
登录之后获取core二次认证,此时可以收到登录的短信或者邮件通知,内容包含了登陆所需的验证码,同时页面变为输入验证码的页面(右图)
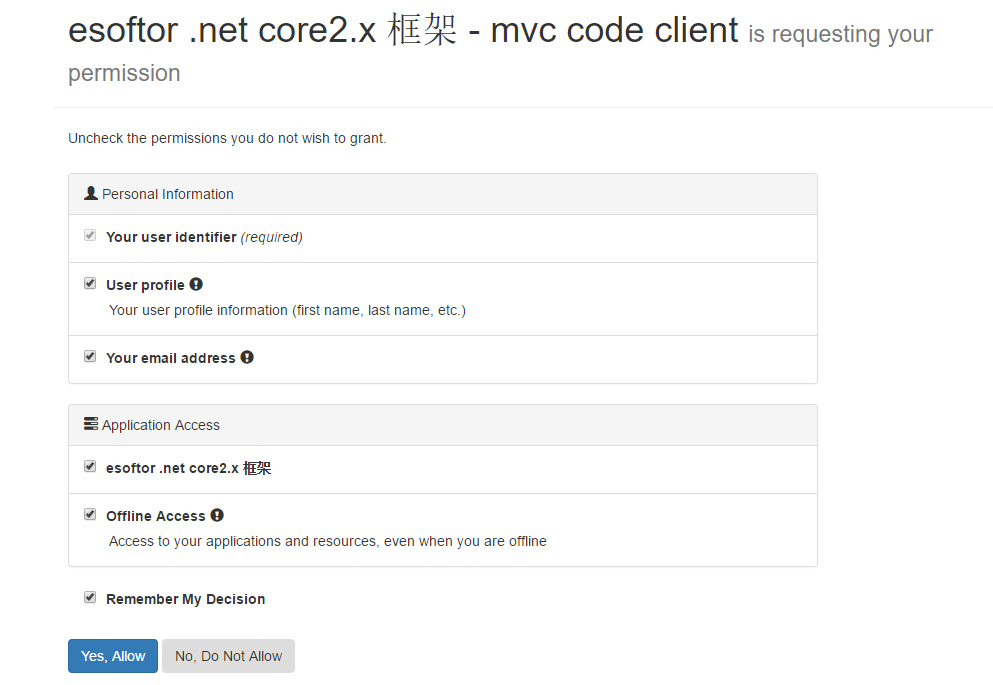
认证成功登录中之后,提示获取授权信息:
完。