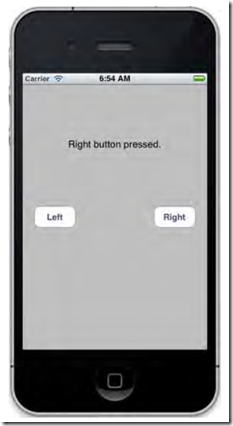
In this chapter, we’re going to write a slightly more complex application—one that will feature two buttons as well as a label
这个章节,我们要写个稍微有点点复杂的应用程序,用于控制两个按钮和标签的。
Creating Our Project
Launch Xcode and select File ➤ New ➤ New Project . Select the Single View Application template, and then click Next.
In the Product Name field, type the name of our new application, Button Fun. The Company Identifier field should still have the value you used in the previous chapter, so you can leave that alone. In the Class Prefix field, use the same value as you did in the previous chapter: BID.
select iPhone for Device Family. We’re not going to use storyboar ds or unit tests, so you can leave both of those options unchecked. Howeve r, we do want to use ARC, so check the Use Automatic Reference Counting box. We’ll explain ARC la ter in the chapter.
Looking at the View Controller
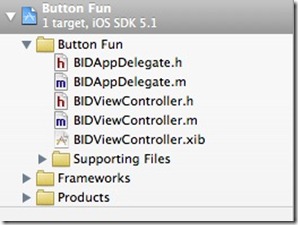
The Button Fun folder should contain four source code files (the ones that end in .h or .m) and a single nib file. These four source code files implement two classes that our application needs: our application delegate and the view controller for our application’s only view. Notice that Xcode automatically added the prefix we specified to all of our class names.
Button Fun文件夹应该包括四个源文件(两个h 和两个m文件),这四个文件实现我们应用需要的两个类:app delegate和视图控制器
Understanding Outlets and Actions
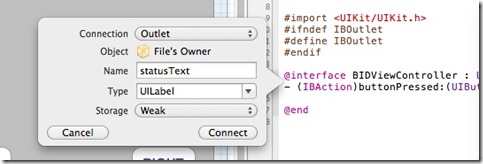
A controller class can refer to objects in a nib file by using a special kind of property called an outlet .
控制器类可以通过nib文件可以关联到对象,是因为使用了一种叫做outlet的属性。
interface objects in our nib file can be set up to trigger special methods in our controller class. These special methods are known as action methods (or just actions).
nib文件中的接口对象可以通过设置来出发指定的方法,这个指定的方法我们指的是action
Outlets
Outlets are special Objective-C class properties that are declared using the keyword IBOutlet. Declaring an outlet is done in your controller class header file, and might look something like this:
@property (nonatomic, retain) IBOutlet UIButton *myButton;
This example is an outlet called myButton, which can be set to point to any button in Interface Builder. The IBOutlet keyword is defined like this:
#ifndef IBOutlet
#define IBOutlet
#endif
OUTLET CHANGES
In the first version of this book, we declared both a property and its underlying instance variable for our outlets. At that time, properties were a new construct in the Objective-C language, and they required you to declare a corresponding instance variable, like this:
@interface MyViewController : UIViewController
{
    UIButton *myButton;
}
@property (nonatomic, retain) UIButton *myButton;
@end
在这个版本中,apple已经把IBOutlet这个关键字从实例变量前面移除了。如下
@property (nonatomic, retain) IBOutlet UIButton *myButton;
Actions
In a nutshell, actions are methods that ar e declared with a special return type, IBAction, which tells Interface Builder that this method can be triggered by a control in a nib file.
The declaration for an act ion method will usually look like this:
- (IBAction)doSomething:(id)sender;
or like this:
- (IBAction)doSomething;
Cleaning Up the View Controller
Delete all the methods except for viewDidUnload . When you’re finished, your implementation should look like this:
#import "BIDViewController.h"
@implementation BIDViewController

- (void)viewDidUnload
{
    [super viewDidUnload];
    // Release any retained subviews of the main view.
    // e.g. self.myOutlet = nil;
}

@end
Designing the User Interface

![DIACKE7}@89PL(G]]P{5$T6 DIACKE7}@89PL(G]]P{5$T6](https://images.cnblogs.com/cnblogs_com/TivonStone/201204/201204222223079223.jpg)

![5K]M_Z3WSPZ_3R$~7~B1(8R 5K]M_Z3WSPZ_3R$~7~B1(8R](https://images.cnblogs.com/cnblogs_com/TivonStone/201204/201204222223084273.jpg)
