简单整理下上周做的OS的lab1,前半部分主要介绍Linux内核编译和添加系统调用的流程,后半部分主要简要探索一下添加的系统调用中所用到的内核函数的源码。
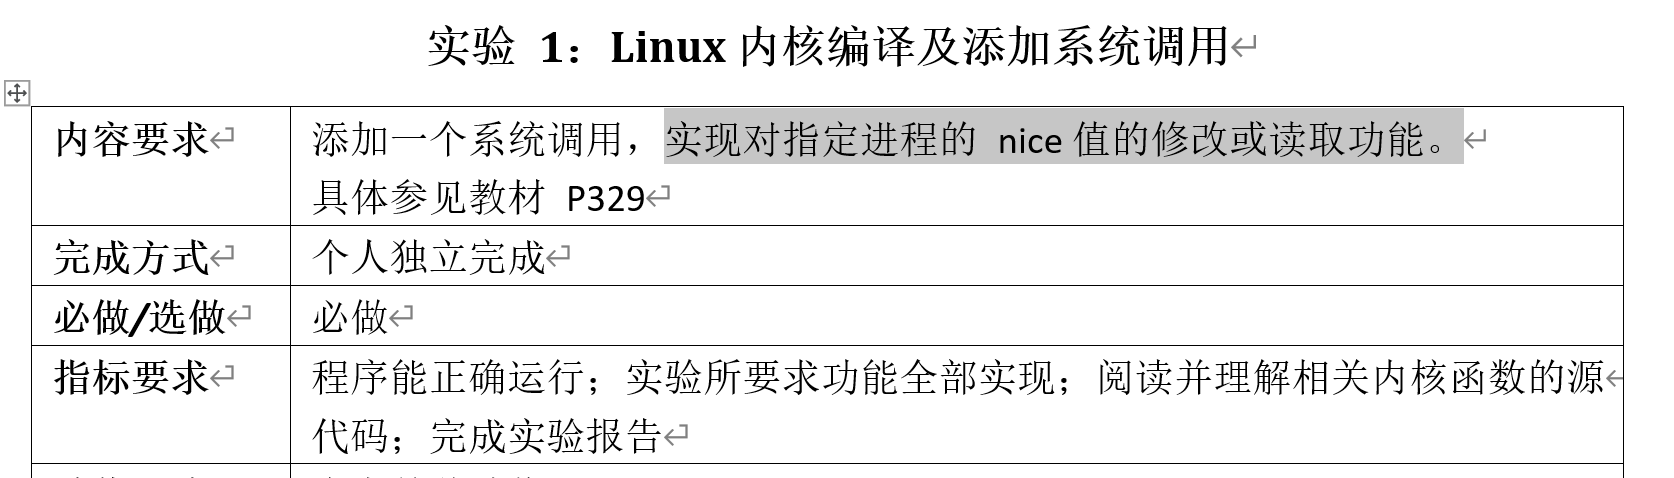
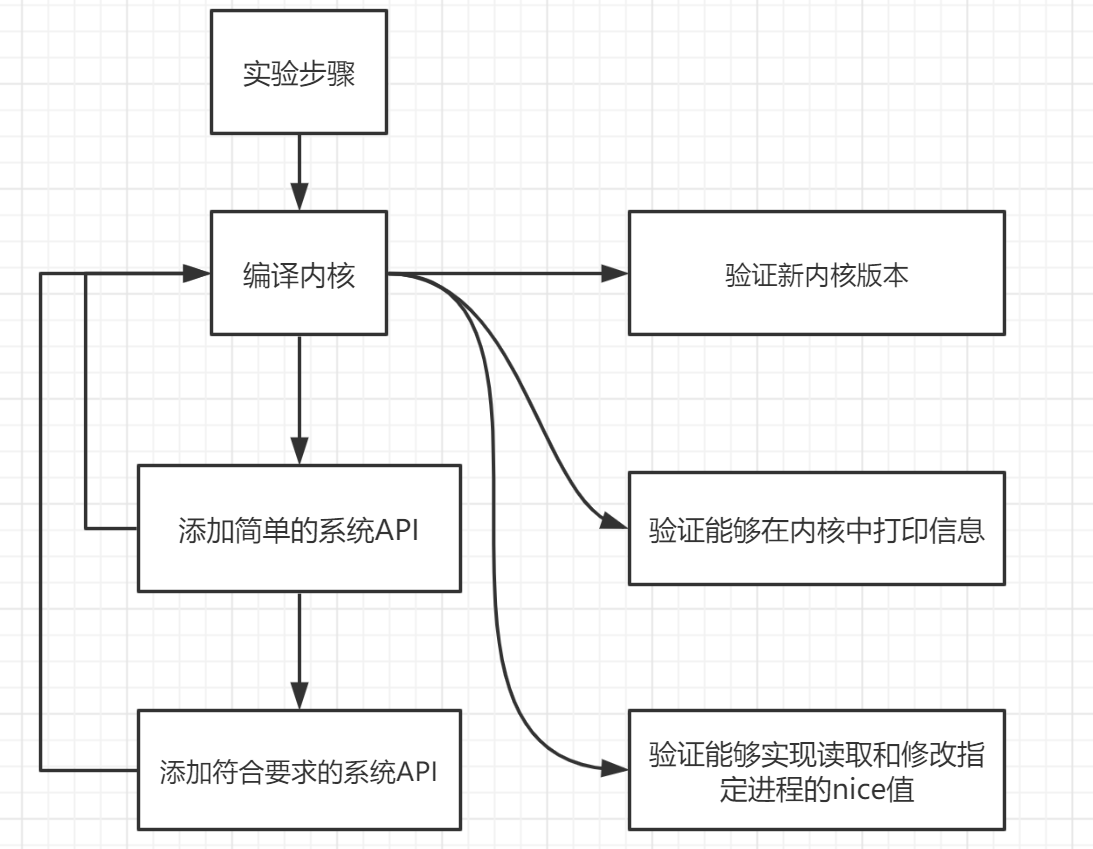
首先贴一下这次实验的要求和我的实验流程图:
Linux内核编译流程
实验环境
我的实验环境是VMware虚拟机下的Ubuntu 16.04,使用uname -a命令查看了自己的内核版本是4.15.0,于是确定待编译的新内核版本是:4.16.1(这个版本应略高于Linux系统的内核版本)。同时,由于在内核编译过程中会生成较多的临时文件,如果磁盘空间预留很小,会出现磁盘空间不足的错误而导致内核编译失败;内存太小则会影响编译速度。所以,这里建议虚拟机的配置参数:内存2GB以上,磁盘空间40GB以上。由于我在做内核编译之前的时候就已经安装了linux虚拟机,所以这里我需要先扩展磁盘内存,具体参考了以下博文: https://blog.csdn.net/ldzm_edu/article/details/78893721 。
下载内核源码并解压
在 https://www.kernel.org/ 中找到对应版本的内核源码并下载(如上文所说,这里我选择4.16.10,请视Linux系统的具体情况而定):

在Linux系统中切换至root用户(随后的所有步骤都应以root用户进行操作,无法切换的可以尝试passwd命令修改root用户密码),然后将压缩文件复制到/home或其他比较空闲的目录中,进入压缩文件所在子目录,使用以下命令解压:
xz -d linux-4.16.10.tar.xz
tar -xvf linux-4.16.10.tar
清楚残留的.config和.o文件
每次完全重新编译的时候都应从这一步开始,为了防止出现错误,我们先安装所需要的对应包:
apt-get install libncurses5-dev
随后执行命令:make mrproper
配置内核
执行命令:make menuconfig,随后出现诸如以下界面:
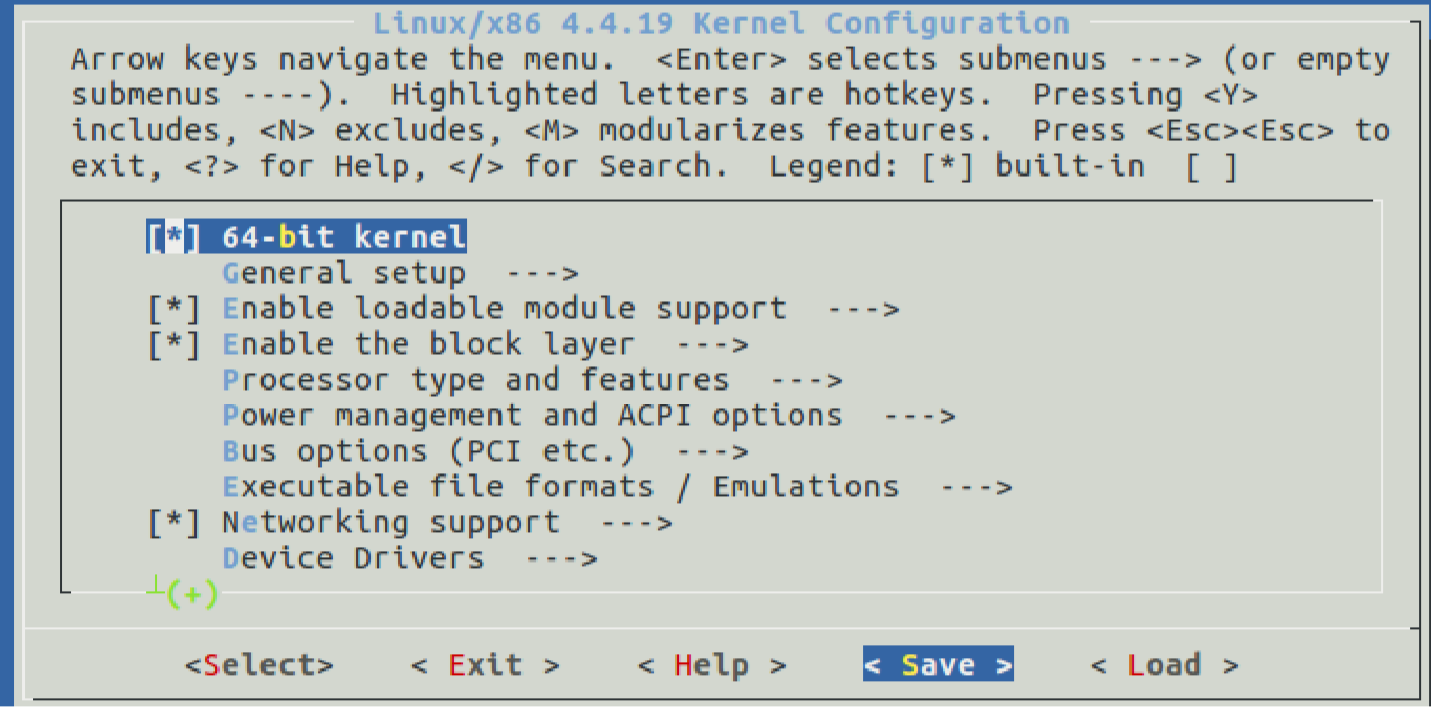
我们选择默认值:.config,最后
编译内核
先安装所需的包以防编译时报错:
=>安装openssl:apt-get install libssl-dev
=>安装bison:apt-get install bison
=>安装flex:apt-get install flex
随后执行命令:make,强烈建议使用命令make -j4或make -j8来加快编译速度,这里第一次进行内核编译的时候需要比较长的时间,我的电脑大概跑了一个多小时。
(在此过程中,我遇到了swap交换区内存不足的情况,具体通过查阅到博文:https://blog.csdn.net/babybabyup/article/details/79815118 解决)
后续操作
编译内核之后的操作用时就比较少了,先编译模块:make modules
随后安装模块:make modules_install
安装内核:make install
配置grub引导程序:update-grub2
最后重启系统:reboot
再次使用uname -a命令查看内核版本是否变成自己编译的版本,如果已经成功改变,那么就已经好啦:

添加系统调用的流程
接着,我们修改新编译的内核源码,添加自己的系统调用,我们先添加一个最简单的实现在内核中打印信息的系统调用mysyscall,以root身份进入Linux内核源码的目录/linux-4.16.1下:
修改系统调用表
修改目录下arch/x86/entry/syscalls/syscall_64.tbl文件,在文件的最后为mysyscall分配一个新的系统调用号(用来唯一标识每一个系统调用的编号,服务例程则是内核具体实现系统调用功能的函数,以sys_的格式命名),每个系统调用在该系统调用表中占一个表项,具体格式为:
<系统调用号><commmon/x32/64><系统调用名><服务例程入口地址>
具体修改如下:

声明系统调用服务例程原型
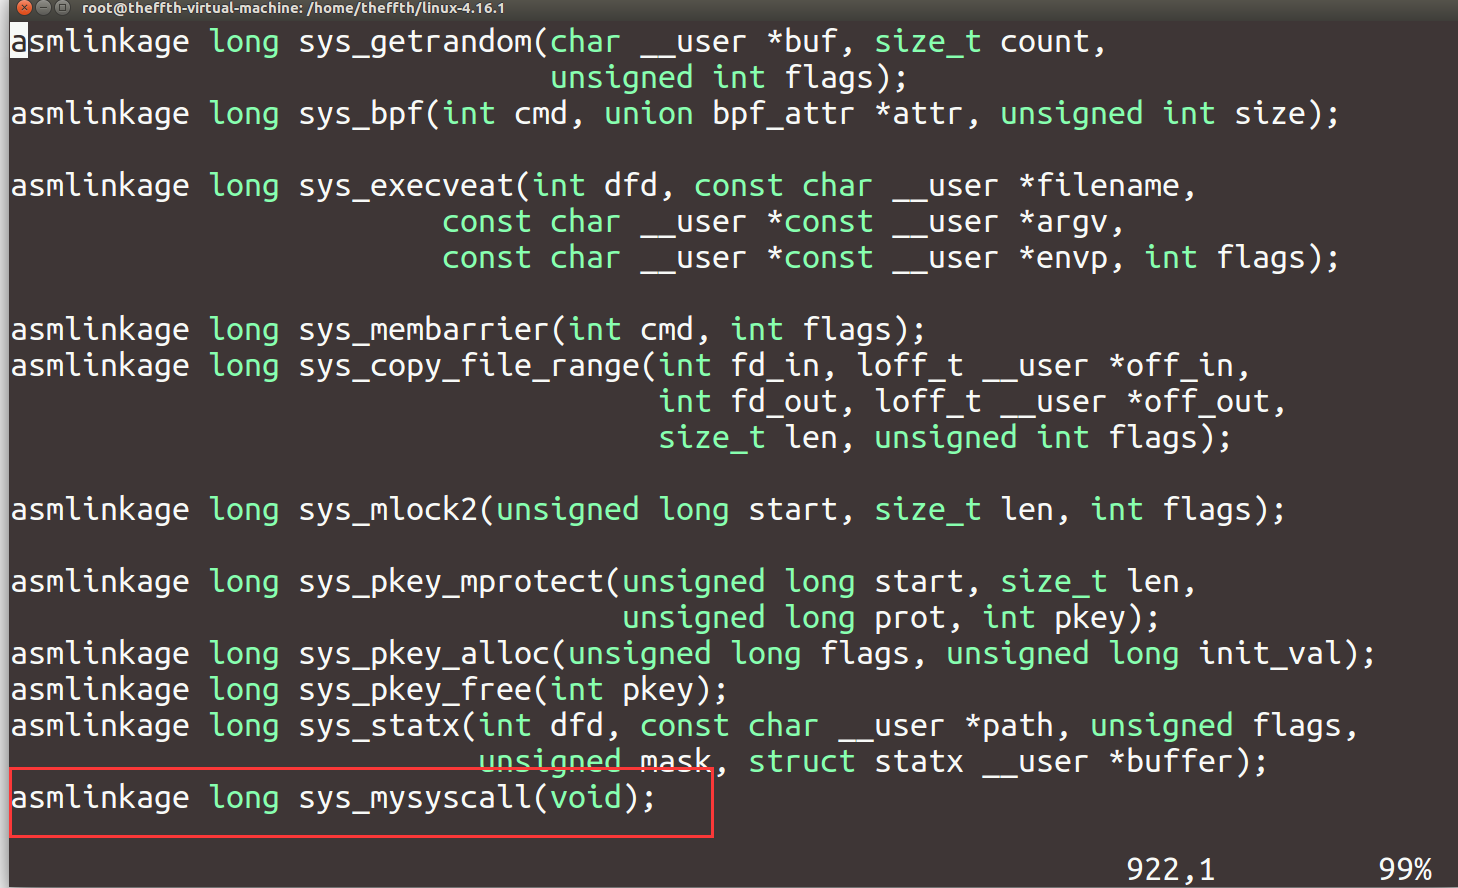
修改目录下include/linux/syscalls.h文件,服务例程的原型声明格式为:
asmlinkage long sys_系统调用名(参数)
这里我们只实现了最简单的打印功能,所以参数为空,在文件尾添加具体如下:
实现系统调用服务例程
修改目录下文件kernel/sys.c,实现系统调用的服务例程,新版本的内核中引入了宏SYSCALL_DEFINEN(sname)对服务例程的原型进行了封装(为了防止利用漏洞入侵),其中N是系统调用所需参数的个数,sname则是系统调用名+系统调用各参数,中间以,分割,具体修改如下:

重新编译内核
接着,我们按照上述步骤重新进行内核编译。
测试新系统调用
最后,我们编写用户态程序来测试系统调用mysyscall是否添加成功,这里使用宏定义将我们分配的系统调用号333定义为mysyscall:
#include <unistd.h>
#include <sys/syscall.h>
#include <stdio.h>
#define  mysyscall 333

long hello_syscall()
{
    return syscall(mysyscall);
}

int main()
{
    long result;
    result=hello_syscall();
    if (result<0)
    {
        printf("mysyscall failed");
    }
    else{}
    return 0;
}
编译,生成可执行文件:
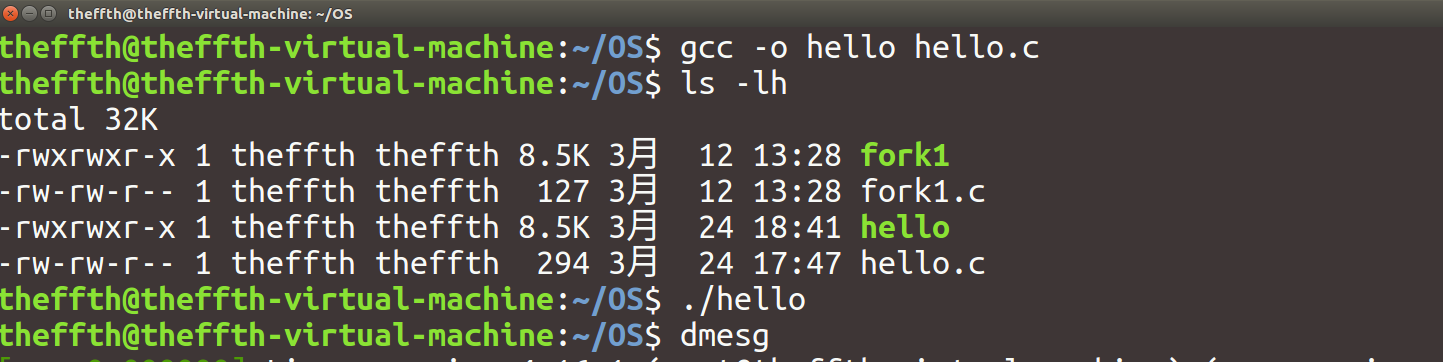
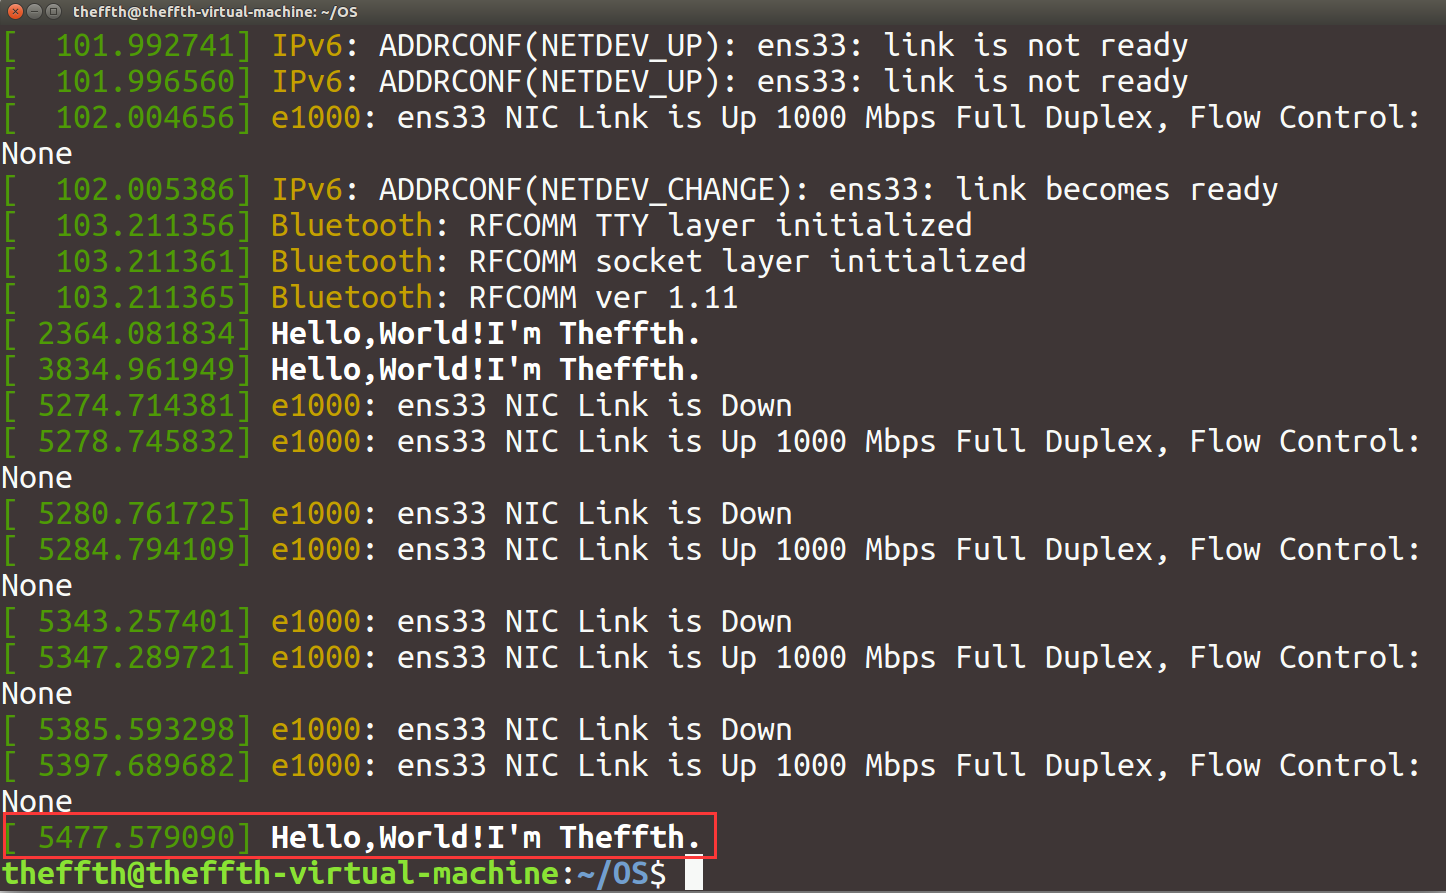
使用命令dmesg查看内核信息,发现成功在内核中打印了信息:
添加指定要求的系统调用API
该实验要求我们添加的系统调用需要实现:修改和读取指定进程的nice值,并返回进程最新的nice值及优先级prio。其中,函数调用的原型为:int mysetnice(pid_t pid, int flag, int nicevalue, void __user * prio, void __user * nice); ,各参数的含义为:pid:进程 ID;flag:若值为0,表示读取nice值,若值为1,表示修改nice值;nicevalue:为指定进程设置的新nice值;prio、nice:指向进程当前优先级prio及nice值。同时,系统调用成功时返回值是 0,失败时返回错误码 EFAULT。
经过上述添加系统调用的流程介绍,我们可以发现在整个流程中最为关键的是服务例程的实现,随后是编写用户态程序以测试新系统调用,这里直接给出我所使用的两部分代码(内核函数的源码浅析见下一部分):
补充:在实现服务例程的函数里我使用了find_get_pid()函数(注释的下一行),在下面的源码浅析中我们可以看到这个函数会调用get_pid(),从而使该pid的引用次数自增,因此,为了保持引用次数的平衡,我们在退出函数的时候需要同时调用put_pid()函数,使pid的引用次数自减并判断引用次数是否为0,若为0则回收该pid号。(在我的函数中没有考虑到这一点,存在bug)
实现系统调用服务例程:
SYSCALL_DEFINE5(mysetnice,pid_t, user_pid, int, flag, int, nicevalue, void __user*, prio, void __user*, nice)
{
int current_prio,current_nice;
struct pid* pid;
struct task_struct* pcb;
//---!>
pid=find_get_pid(user_pid);
if(pid==NULL)
{
return EFAULT;
}
else
{
pcb=pid_task(pid,PIDTYPE_PID);
if(flag==1)
{
set_user_nice(pcb,nicevalue);
}
else if(flag != 0)
{
return EFAULT;
}
current_prio = task_prio(pcb);
current_nice = task_nice(pcb);
copy_to_user(prio, ¤t_prio, sizeof(current_prio));
copy_to_user(nice, ¤t_nice, sizeof(current_nice));
}
return 0;
}
测试新系统调用的用户态程序:
#include <unistd.h>
#include <sys/syscall.h>
#include <stdio.h>
#include <stdlib.h>
#define  mysetnice 334
#define  EFAULT 14

int main()
{
    int flag;
    int pid,nicevalue=0;
    int prio,nice;
    int result;
    printf("Input 1 to set nice or 0 to print nice of your pid:");
    scanf("%d",&flag);
    printf("Give me your pid:");
    scanf("%d",&pid);
    if (flag == 1)
    {
        printf("Give me your nicevalue:");
        scanf("%d",&nicevalue);
    }
    result=syscall(mysetnice,pid,flag,nicevalue,&prio,&nice);
    if (result == EFAULT)
    {
        printf("Something Wrong!");
        exit(0);
    }
    printf("OK! Now, the prio of %d is %d, the nice is %d
",pid,prio,nice);
    return 0;
}
测试结果具体如下:

部分内核函数浅析
以下源码可以在 https://elixir.bootlin.com/linux/latest/source 中得到,由于版本越高内核源码越难懂复杂,这里我以2.6版本为例,由于我刚刚接触Linux内核,相应知识匮乏,理解较浅显且可能有误,望斧正。
首先我们分析一下实验要求我们实现的功能:能够设置用户指定进程的nice值、能够给出用户指定进程的nice值和进程优先级。我们知道,在用户态可以通过ps命令查看进程的PID号:

而在内核中,使用结构体struct pid标识进程,我们先看一下源码include/linux/pid.h中对struct pid的描述:
/*
 * What is struct pid?
 *
 * A struct pid is the kernel's internal notion of a process identifier.
 * It refers to individual tasks, process groups, and sessions.  While
 * there are processes attached to it the struct pid lives in a hash
 * table, so it and then the processes that it refers to can be found
 * quickly from the numeric pid value.  The attached processes may be
 * quickly accessed by following pointers from struct pid.
 *
 * Storing pid_t values in the kernel and referring to them later has a
 * problem.  The process originally with that pid may have exited and the
 * pid allocator wrapped, and another process could have come along
 * and been assigned that pid.
 *
 * Referring to user space processes by holding a reference to struct
 * task_struct has a problem.  When the user space process exits
 * the now useless task_struct is still kept.  A task_struct plus a
 * stack consumes around 10K of low kernel memory.  More precisely
 * this is THREAD_SIZE + sizeof(struct task_struct).  By comparison
 * a struct pid is about 64 bytes.
 *
 * Holding a reference to struct pid solves both of these problems.
 * It is small so holding a reference does not consume a lot of
 * resources, and since a new struct pid is allocated when the numeric pid
 * value is reused (when pids wrap around) we don't mistakenly refer to new
 * processes.
 */

...

struct pid
{
	atomic_t count;
	unsigned int level;
	/* lists of tasks that use this pid */
	struct hlist_head tasks[PIDTYPE_MAX];
	struct rcu_head rcu;
	struct upid numbers[1];
};
也就是说,struct pid是内核内部的进程标识符。它指单个任务,进程组和会话。进程号和进程标识符通过hash散列表构成一一对应的关系,通过该数据结构可以根据进程号快速找到进程标识符。使用进程标识符来描述进程可以解决两大问题:当进程号被重新使用时会分配新的进程标识符,不会错误得指向新进程;避免了用户态进程退出时无用的task_struct进程描述符占用太多空间,struct pid结构体只会占用64字节的空间。
简单了解进程标识符后,我们知道可以根据进程号PID快速找到对应进程的进程标识符,在内核函数中,可以通过find_get_pid实现,该函数的源码在/kernel/pid.c:
struct pid *find_get_pid(pid_t nr)
{
	struct pid *pid;

	rcu_read_lock();
	pid = get_pid(find_vpid(nr));
	rcu_read_unlock();

	return pid;
}
其中pid_t最终是int的宏定义,所以参数就是我们传入的进程号,rcu是read copy update,是一种锁机制, 读者在读取由RCU保护的共享数据时使用rcu_read_lock标记它进入读端临界区,接着查看find_vpid()函数:
struct pid *find_vpid(int nr)
{
	return find_pid_ns(nr, current->nsproxy->pid_ns);
}
//根据进程号,找到当前进程的pid_namespace
struct pid *find_pid_ns(int nr, struct pid_namespace *ns)
{
	struct hlist_node *elem;
	struct upid *pnr;

	hlist_for_each_entry_rcu(pnr, elem,
			&pid_hash[pid_hashfn(nr, ns)], pid_chain)
		if (pnr->nr == nr && pnr->ns == ns)
			return container_of(pnr, struct pid,
					numbers[ns->level]);

	return NULL;
}
//在pid hash表中,根据进程号nr和pid_namespace查找对应的进程描述符,需要两项内容同时相符,然后根据struct pid进程标识符中的level返回进程标识符
这样我们就得到了对应的进程标识符strcut pid了,接着,看看get_pid()函数,在include/linux/pid.h中:
static inline struct pid *get_pid(struct pid *pid)
{
	if (pid)
		atomic_inc(&pid->count);
	return pid;
}
该函数这里使找到的进程标识符的被引用次数自增1。至此,我们实现了利用内核函数通过进程号得到进程标识符。
同时,我们知道,操作系统管理进程最重要的数据结构就是进程控制块PCB,也即进程描述符,在Linux内核中是一个task struct类型的结构体,定义在linux/sched.h 中,用于存放进程所有的描述和控制信息,这里我们也是通过PCB来得到进程的nice值和优先级,修改进程的nice值也需要用到PCB。
那么该如何得到进程描述符?内核提供了pid_task()函数可以快速通过进程标识符struct pid得到进程描述符,在kernel/pid.c中:
struct task_struct *pid_task(struct pid *pid, enum pid_type type)
{
	struct task_struct *result = NULL;
	if (pid) {
		struct hlist_node *first;
		first = rcu_dereference_check(hlist_first_rcu(&pid->tasks[type]),
					      lockdep_tasklist_lock_is_held());
		if (first)
			result = hlist_entry(first, struct task_struct, pids[(type)].node);
	}
	return result;
}
其中,pid_type定义在include/linux/pid.h中:
enum pid_type
{
	PIDTYPE_PID,
	PIDTYPE_PGID,
	PIDTYPE_SID,
	PIDTYPE_MAX
};
于是我们通过下面这行代码,即可得到进程描述符pcb:
pcb=pid_task(pid,PIDTYPE_PID);
在2.6版本kernel/sched.c中可以找到通过pcb得到进程nice值和优先级的内核函数:
/**
 * task_prio - return the priority value of a given task.
 * @p: the task in question.
 *
 * This is the priority value as seen by users in /proc.
 * RT tasks are offset by -200. Normal tasks are centered
 * around 0, value goes from -16 to +15.
 */
int task_prio(const struct task_struct *p)
{
	return p->prio - MAX_RT_PRIO;
}

/**
 * task_nice - return the nice value of a given task.
 * @p: the task in question.
 */
int task_nice(const struct task_struct *p)
{
	return TASK_NICE(p);
}
在kernel/sched.c中也可以找到设置指定进程nice值的内核函数set_user_nice():
void set_user_nice(struct task_struct *p, long nice)
{
	int old_prio, delta, on_rq;
	unsigned long flags;
	struct rq *rq;

	if (TASK_NICE(p) == nice || nice < -20 || nice > 19)
		return;
	/*
	 * We have to be careful, if called from sys_setpriority(),
	 * the task might be in the middle of scheduling on another CPU.
	 */
	rq = task_rq_lock(p, &flags);
	/*
	 * The RT priorities are set via sched_setscheduler(), but we still
	 * allow the 'normal' nice value to be set - but as expected
	 * it wont have any effect on scheduling until the task is
	 * SCHED_FIFO/SCHED_RR:
	 */
	if (task_has_rt_policy(p)) {
		p->static_prio = NICE_TO_PRIO(nice);
		goto out_unlock;
	}
	on_rq = p->se.on_rq;
	if (on_rq)
		dequeue_task(rq, p, 0);

	p->static_prio = NICE_TO_PRIO(nice);
	set_load_weight(p);
	old_prio = p->prio;
	p->prio = effective_prio(p);
	delta = p->prio - old_prio;

	if (on_rq) {
		enqueue_task(rq, p, 0);
		/*
		 * If the task increased its priority or is running and
		 * lowered its priority, then reschedule its CPU:
		 */
		if (delta < 0 || (delta > 0 && task_running(rq, p)))
			resched_task(rq->curr);
	}
out_unlock:
	task_rq_unlock(rq, &flags);
}
最后,用户空间和内核空间之间不能直接传递数据,我们必须使用copy_from_user()和copy_to_user()两个函数实现,这里我们只简单看下函数原型:
static inline unsigned long copy_from_user(void *to, const void __user *from, unsigned long n)
static inline unsigned long copy_to_user(void __user *to, const void *from, unsigned long n);
至此,借助上述函数便能够完成符合要求的系统调用了。
推荐两个博客:
https://blog.csdn.net/tiantao2012 (这位大佬分析了很多Linux的内核函数)
http://www.wowotech.net/process_management/pid.html (关于Linux内核如何标识进程)