一、引入相关maven配置
mybatis; mysql驱动;jdbc
         <dependency>
            <groupId>org.mybatis.spring.boot</groupId>
            <artifactId>mybatis-spring-boot-starter</artifactId>
            <version>2.1.1</version>
        </dependency>
        <dependency>
            <groupId>mysql</groupId>
            <artifactId>mysql-connector-java</artifactId>
            <version>8.0.18</version>
        </dependency>
        <dependency>
            <groupId>org.springframework.boot</groupId>
            <artifactId>spring-boot-starter-jdbc</artifactId>
            <version>2.2.2.RELEASE</version>
        </dependency>
二、编写配置文件
配置两个数据源:我这里配置了一个腾讯云的数据库和一个本地的数据库
分别指定四个字段:数据库链接、用户名、密码、驱动

三、编写数据库类型枚举
public enum DataSourceEnum {

    TENCENT(0),LOCAL(1);

    private  int value;

    private DataSourceEnum(int _value)
    {
        this.value=_value;
    }
}
四、编写配置文件读取帮助类
注:我这里做这一步是为了更加透明的展示配置数据源的过程,如果想偷懒,这一一步可以不做,直接通过注解读取配置文件注入到容器中
DataSourceElement 数据库链接实体
/*数据库链接实体类
* 字段和配置文件保持一致*/
public class DataSourceElement {

    private  String url;

    private String userName;

    private String password;

   private String classDirver;
//忽略getter  setter
}
DataSourceItem 配置读取帮助类
@Component
@ConfigurationProperties(prefix = "spring.datasource")
public class DataSourceItem {
    //腾讯云链接 对应配置文件 tencent-db
    private  DataSourceElement tencentDb;
   //本地链接 对应配置文件 local-db
    private DataSourceElement localDb;
   //忽略getter  serrer
}
五、编写获取当前线程中执行的数据源的帮助类
这个类是为了指定我们当前线程中需要使用的数据源
public class DynamicDataSourceManger {

    /*
    * 初始化当前线程数据库类型*/
    private static final ThreadLocal<DataSourceEnum> threadLocalDbType = new ThreadLocal<DataSourceEnum>() {
        @Override
        protected DataSourceEnum initialValue() {
            return DataSourceEnum.TENCENT;
        }

        ;
    };

    /*获取当前线程数据库*/
    public static DataSourceEnum get() {
        return threadLocalDbType.get();
    }

    /*设置当前线程数据库*/
    public static void set(DataSourceEnum dataSourceEnum) {
        threadLocalDbType.set(dataSourceEnum);
    }

    /*清楚当前线程数据库缓存*/
    public static void reset() {
        threadLocalDbType.remove();
    }
}
六、继承AbstractRoutingDataSource
AbstractRoutingDataSource是spring提供的动态切换数据源工具类,他可以实现运行期间的数据源路由切换,具体内容请查看官方文档,我这里只写怎么用
简单的来说他会通过我们指定的key来获取我们设置的不同数据源,数据源的配置会在下面写到。

这里通过我们上面编写的DynamicDataSourceManger 拿到了当前线程需要执行的数据源的key
public class DynamicDataSource extends AbstractRoutingDataSource {
    @Override
    protected Object determineCurrentLookupKey() {
        /*读取当前线程的数据源key值配置*/
        return DynamicDataSourceManger.get();
    }
}
七、配置多数据源以及AbstractRoutingDataSource的实现
注:下面的代码中我使用了通过我们在第四部编写的配置文件帮助类来获取配置文件的内容实现了Bean的注入,这么做是为了方便读者明白DataSource的创建过程
也可以直接使用 @ConfigurationProperties(prefix = "spring.datasource.tencent-db")直接装配上去,这样的话只需要写一行
DataSource dataSource = DataSourceBuilder.create().build();即可

注意事项:1.我们需要为不通的数据源指定不通的Bean名称,防止冲突
        2.需要在获取AbstractRoutingDataSource实现的Bean上添加@Primary
        3.编写完后需要关闭spring的自动配置数据源,否则会引发循环依赖(下面会写)

Spring容器注入类
/*数据源注入*/
@Configuration
public class DynamicDataSourceConfiguration {

    /*拿到数据库链接*/
    @Autowired
    DataSourceItem dataSourceItem;

    /*注入腾讯云数据库*/
    @Bean(name = "TENCENTDB")
    public DataSource getTencentDataSource() {
        DataSourceElement tencentSoure = dataSourceItem.getTencentDb();
        DataSource dataSource = DataSourceBuilder.create()
                .url(tencentSoure.getUrl())
                .username(tencentSoure.getUserName())
                .password(tencentSoure.getPassword())
                .driverClassName(tencentSoure.getClassDirver())
                .build();
        return dataSource;
    }

    /*注入本地数据库*/
    @Bean(name = "LOCALDB")
    public DataSource getLocalDataSource() {
        DataSourceElement localSource = dataSourceItem.getLocalDb();
        DataSource dataSource = DataSourceBuilder.create()
                .url(localSource.getUrl())
                .username(localSource.getUserName())
                .password(localSource.getPassword())
                .driverClassName(localSource.getClassDirver())
                .build();
        return dataSource;
    }

    /*注入AbstractRoutingDataSource*/
    @Bean
    @Primary
    public DynamicDataSource getDyanmiceDataSource(@Qualifier("TENCENTDB") DataSource tencentDb,
                                                   @Qualifier("LOCALDB") DataSource localDb) {

        Map<Object,Object> hashMap=new HashMap<Object, Object>();
        hashMap.put(DataSourceEnum.TENCENT,tencentDb);
        hashMap.put(DataSourceEnum.LOCAL,localDb);

        DynamicDataSource dataSource=new DynamicDataSource();
        /*设置数据源*/
        dataSource.setTargetDataSources(hashMap);
        /*设置默认数据源*/
        dataSource.setDefaultTargetDataSource(tencentDb);
        /*调用方法实现数据源配置*/
        dataSource.afterPropertiesSet();
        return dataSource;
    }

}
更改Spring Boot启动设置,关闭数据源自动注入和手动把我们的配置类注入到IOC容器中
@Import(DynamicDataSourceConfiguration.class)
@SpringBootApplication(exclude = {DataSourceAutoConfiguration.class})
public class DynamicApplication {

    public static void main(String[] args) {
        SpringApplication.run(DynamicApplication.class, args);
    }

}
八、编写实体类、Mybatis的Mapper和XML、配置Mybatis
这里我在腾讯云建了一个叫t_user的表,在本地库建了一个叫person的表
我们分别编写他们的Mapper和实体以及XML。
以下代码皆免去get和set,并且把代码都写在了一起方便对比,实际的时候是拆开写的(这是基础吧。。。。应该不用我说)
public class Person {

    private Integer id;

    private  String name;

    private String address;

    private String province;

    private  String city;

    private  String area;
}
public class User {

    private Integer id;

    private String name;

    private String sex;

    private String address;

    private String city;

    private String area;
}
Mapper
@Mapper
public interface PersonMapper {

    List<Person> selectAllPerson();
}

@Mapper
public interface UserMapper {

    List<User> selectAllUser();
}
XML
<mapper namespace="com.example.dynamic.mapper.PersonMapper">
    <select id="selectAllPerson" resultType="com.example.dynamic.model.Person">
        select * from person
    </select>
</mapper>

<mapper namespace="com.example.dynamic.mapper.UserMapper">
    <select id="selectAllUser" resultType="com.example.dynamic.model.User">
        select * from t_user
    </select>
</mapper>
接口
我们在两个接口中,分别调用了腾讯云和本地两个数据源,在调用前通过在第五部编写的DynamicDataSourceManger来实现当前线程数据源key的切换
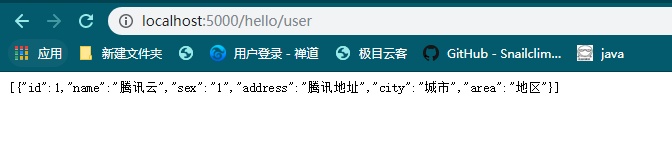
@RestController
@RequestMapping("/hello")
public class DynamicDataSourceController {

    @Autowired
    UserMapper userMapper;

    @Autowired
    PersonMapper personMapper;

    @RequestMapping("/user")
    public List<User> selectAllUser(){
        DynamicDataSourceManger.set(DataSourceEnum.TENCENT);
        return  userMapper.selectAllUser();
    }

    @RequestMapping("/person")
    public List<Person> selectAllPerson(){
        DynamicDataSourceManger.set(DataSourceEnum.LOCAL);
        return  personMapper.selectAllPerson();
    }
}
九、调用接口
调用腾讯云数据源
调用本地数据源

我们发现,这时候已经实现了多数据源的切换,这种写法其实有些生硬,需要手动设置数据源,可以通过AOP的方式把数据源设置编进去
十:编写Aspect实现动态切换
引入pom
        <dependency>
            <groupId>org.springframework.boot</groupId>
            <artifactId>spring-boot-starter-aop</artifactId>
            <version>2.2.2.RELEASE</version>
        </dependency>
自定义注解TargetDataSource,标明只能在函数上标注
@Target(ElementType.METHOD)
@Retention(RetentionPolicy.RUNTIME)
public @interface TargetDataSource {

    String value() default "";
}
自定义AOP切面类
@Component
@Aspect
public class DynamicSourceAspect {

    @Around("execution(* com.example.dynamic.mapper..*.*(..))")
    public Object around(ProceedingJoinPoint joinPoint) throws Throwable {
        System.out.println("执行AOP");
        //获取当前要执行的函数签名
        MethodSignature signature = (MethodSignature) joinPoint.getSignature();
        Method method = signature.getMethod();
        //获取当前函数上的指定注解
        TargetDataSource targetDataSource = method.getAnnotation(TargetDataSource.class);
        //如果有指定注解的话设置为注解的值,没有的话设置默认腾讯云
        if (targetDataSource == null) {
            DynamicDataSourceManger.set(DataSourceEnum.TENCENT);
        } else {
            String dyType = targetDataSource.value();
            switch (dyType) {
                case "TENCENT":
                    DynamicDataSourceManger.set(DataSourceEnum.TENCENT);
                    break;
                case "LOCAL":
                    DynamicDataSourceManger.set(DataSourceEnum.LOCAL);
                    break;
            }
        }
        //执行函数
        return joinPoint.proceed();
    }
}
再次执行函数发现效果和上面是一样的。