线程
线程和进程的区别:
①线程是程序中一个单一的顺序控制流程。进程内一个相对独立的、可调度的执行单元,是系统独立调度和分派CPU的基本单位指运行中的程序的调度单位。
在单个程序中同时运行多个线程完成不同的工作,称为多线程。
②进程(Process)是计算机中的程序关于某数据集合上的一次运行活动,是系统进行资源分配和调度的基本单位,是操作系统结构的基础
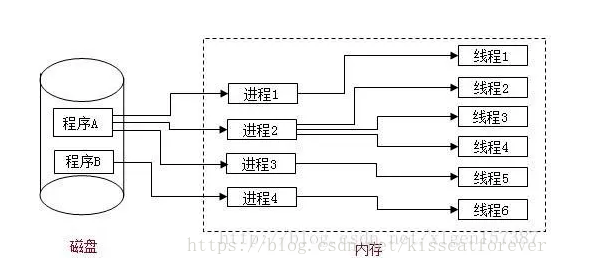
进程和线程的关系:
并发和并行:
并行:多个线程可以同时执行,每一个时间段,可以有多个线程同时执行。
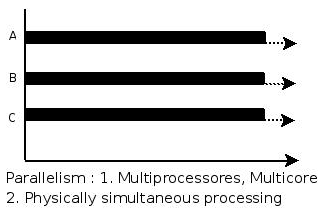
并发:多个线程同时竞争一个位置,竞争到的才可以执行,每一个时间段只有一个线程在执行。

线程的4种创建方式:
1.继承Thread类创建线程
2.实现Runnable接口创建线程
3.使用Callable和Future创建线程
4.使用线程池例如用Executor框架
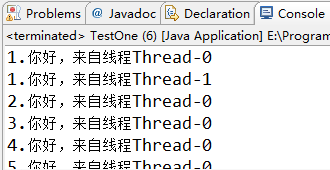
一,继承Thread类创建线程
public class ThreadTest extends Thread{

    public void run(){
        for(int i=1;i<=20;i++){
            System.out.println(i+".你好,来自线程"+Thread.currentThread().getName());
        }
    }
}
测试类及运行结果:
public class TestCase {
    public static void main(String[] args) {
        ThreadTest one=new ThreadTest();
        ThreadTest one1=new ThreadTest();
        one.start();
        one1.start();
    }
}
2.实现Runnable接口创建线程
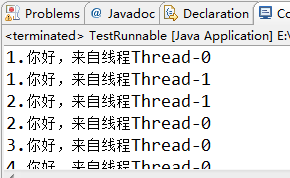
public class RunnableTest implements Runnable{
    @Override
    public void run() {
        for(int i=1;i<=20;i++){
            System.out.println(i+".你好,来自线程"+Thread.currentThread().getName());
        }
    }
}
测试类及运行结果:
public class TestRunnable {
    public static void main(String[] args) {
        RunnableTest rt=new RunnableTest();
        Thread t1=new Thread(rt);
        Thread t2=new Thread(rt);
        t1.start();
        t2.start();
    }
}
3.使用Callable和Future创建线程
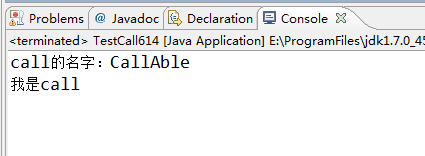
public class CallAbleTest implements Callable<String>{
    @Override
    //拥有返回值和可以抛异常的方法体
    public String call() throws Exception {
        System.out.println("call的名字:"+Thread.currentThread().getName());
        return "我是call";
    }
}
测试类和运行结果:
public class TestCall614 {
    public static void main(String[] args) {
        //创建FutureTask对象来包装CallAbleTest
        FutureTask<String> ft=new FutureTask<String>(new CallAbleTest());
        //创建线程对象
        Thread th=new Thread(ft,"CallAble");
        th.start();
        try {
            //打印返回值信息
            System.out.print(ft.get());
        } catch (Exception e) {

            e.printStackTrace();
        }
    }
}
4.使用线程池例如用Executor框架
public class ThreadPoolTest {
    public static void main(String[] args) {
        //创建一个具有10条线程的线程池
        ExecutorService exs=Executors.newFixedThreadPool(10);
        for(int i=0;i<10;i++){
            //匿名内部类来重写run函数,来创建十个线程
            exs.execute(new Runnable(){
                public void run(){
                    System.out.println("线程名为:"+Thread.currentThread().getName());
                }
            });
        }
        //关闭线程池
        exs.shutdown();
运行结果:

ThreadPoolExecutor的参数详解:
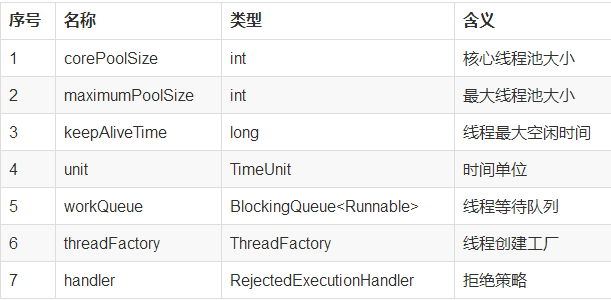
ThreadPoolExecutor的创建:
//尽量保证:任务数不要超过最大线程数+阻塞队列的长度
        ThreadPoolExecutor tp=new ThreadPoolExecutor(5, 10, 5, TimeUnit.SECONDS,  new LinkedBlockingQueue<Runnable>(10));
        for(int i=0;i<20;i++){
            tp.execute(new Runnable(){
                @Override
                public void run() {
                    System.out.println("线程名为:"+Thread.currentThread().getName());
                    try {
                        Thread.sleep(1500);
                    } catch (InterruptedException e) {
                        e.printStackTrace();
                    }
                }
            });
        }
        tp.shutdown();
    }
两个例子:
第一个例子,两个线程交替循环多次:
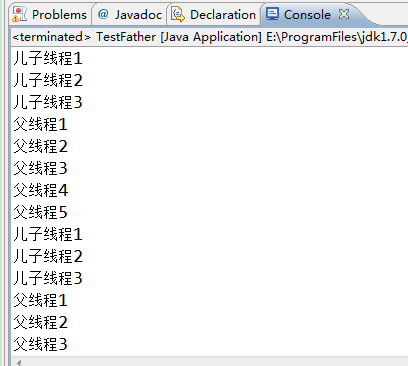
public class FatherAndSon {
    boolean flag=true;
    public void son(){
        synchronized (this) {
            if(!flag){
                try {
                    this.wait();
                } catch (Exception e) {
                    e.printStackTrace();
                }
            }
            for(int i=1;i<=3;i++){
                System.out.println("儿子线程"+i);
            }
            flag=false;
            this.notify();
        }
    }
    public void father(){
        synchronized (this) {
            if(flag){
                try {
                    this.wait();
                } catch (Exception e) {
                    e.printStackTrace();
                }
            }
            for(int i=1;i<=5;i++){
                System.out.println("父线程"+i);
            }
            flag=true;
            this.notify();
        }
    }
}
测试类及其结果:
public class TestFather {
    public static void main(String[] args) {
        final FatherAndSon fa=new FatherAndSon();
        Thread th=new Thread(new Runnable(){
            @Override
            public void run() {
                for(int i=0;i<10;i++){
                    fa.son();
                }
            }
        });
        th.start();
        for(int i=0;i<10;i++){
            fa.father();
        }
    }
}
第二个例子:循环打印三个汉字
public class PrintlnWorlds implements Runnable{
    private String worlds;//要打印的字符
    private Object previous;//上一个对象
    private Object current;//当前对象
    public PrintlnWorlds(String worlds,Object previous,Object current){
        super();
        this.worlds=worlds;
        this.previous=previous;
        this.current=current;
    }
    @Override
    public void run() {
        for(int i=0;i<10;i++){
        synchronized (previous) {
            synchronized (current) {
                current.notify();
                System.out.print(worlds);
            }
            try {
                previous.wait();
            } catch (Exception e) {
                e.printStackTrace();
            }
        }
        }
    }
}
测试类及运行结果:
public class TestPrintln {
    public static void main(String[] args) {
        Object a=new Object();
        Object b=new Object();
        Object c =new Object();
        PrintlnWorlds p1=new PrintlnWorlds("我",c,a);
        PrintlnWorlds p2=new PrintlnWorlds("爱",a,b);
        PrintlnWorlds p3=new PrintlnWorlds("你",b,c);
        Thread t1=new Thread(p1);
        Thread t2=new Thread(p2);
        Thread t3=new Thread(p3);
        t1.start();
        try {
            Thread.sleep(1000);
        } catch (InterruptedException e) {
            e.printStackTrace();
        }
        t2.start();
        try {
            Thread.sleep(1000);
        } catch (InterruptedException e) {
            e.printStackTrace();
        }
        t3.start();
    }
}

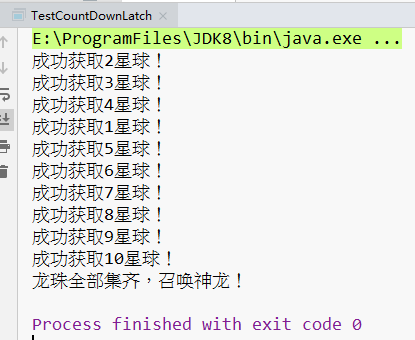
线程池和计数器的简单使用
public class TestCountDownLatch {
    public static void main(String[] args) {
        //创建一个数量为十的计数器
        final CountDownLatch cdl=new CountDownLatch(10);
        //创建一个固定数量为10的线程池
        ExecutorService es= Executors.newFixedThreadPool(10);
        for(int i=1;i<=10;i++){
            final int finalI = i;
            //执行线程
            es.execute(new Runnable(){
                @Override
                public void run() {
                   System.out.println("成功获取"+ finalI+"星球!");
                   //减少锁存器的计数,如果计数达到零,释放所有等待的线程
                   cdl.countDown();
                }
            });
        }
        try {
            //阻塞当前线程,直到锁存器计数到零
            cdl.await();

        } catch (Exception e) {
            e.printStackTrace();
        }
        System.out.println("龙珠全部集齐,召唤神龙!");
        es.shutdown();
    }
}
运行结果: